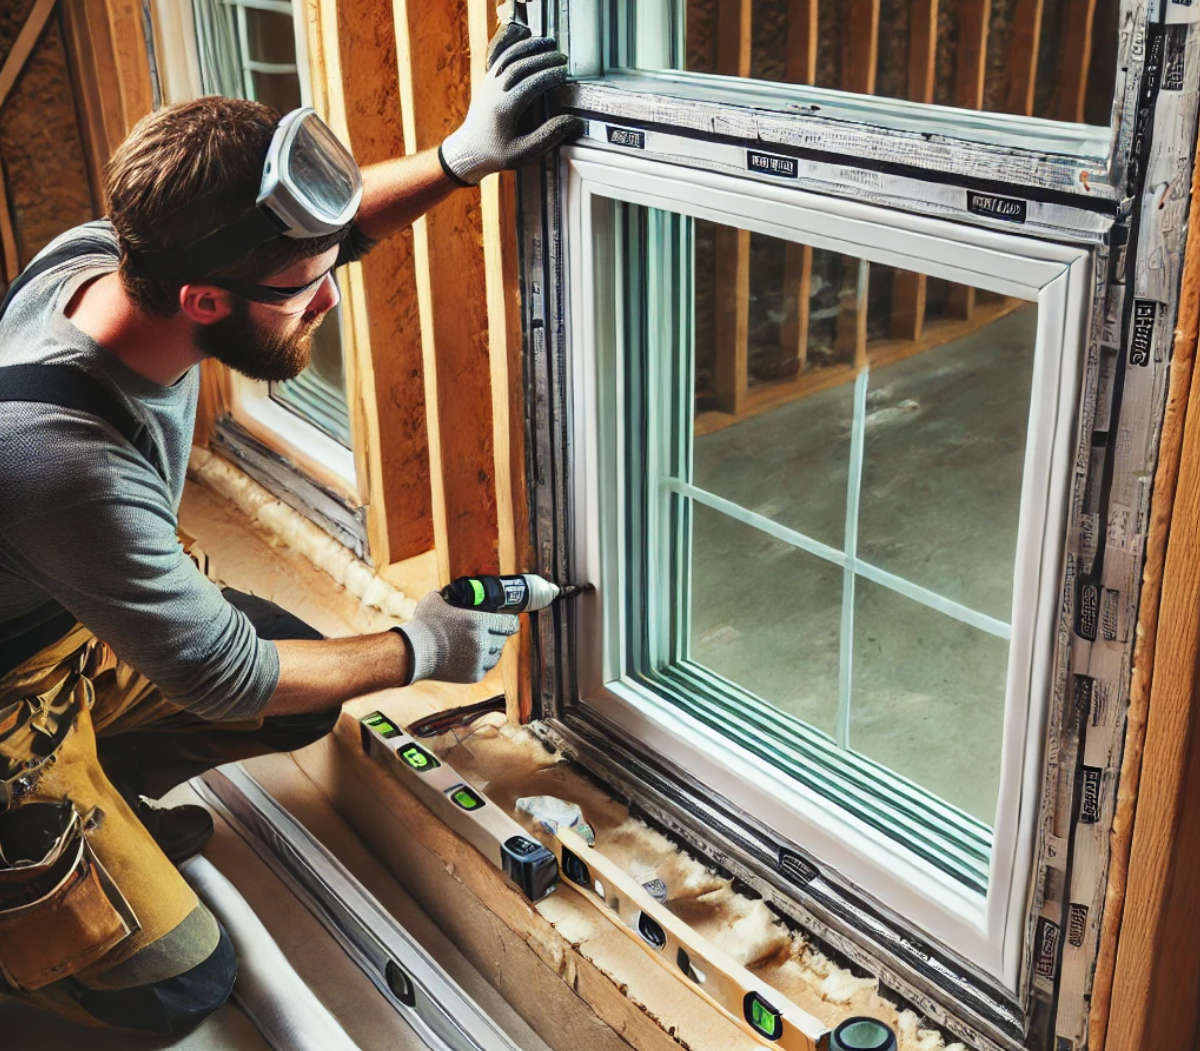
This article is about how to install vinyl windows in a new construction. Installing a vinyl window is not a complex project, but we can assure you it will change dramatically the look of your house and will decrease your heating costs. As you probably know, the vinyl windows are designed to insulate your house properly, so that during winter it keeps the warmth inside your house, while in the hot summer days it prevents the heat from getting in. Installing a vinyl window in a new construction is a smart choice, but you have to pay attention to our tips and tricks as to get the job done in a professional manner.
The main advantages of installing vinyl windows are that they have a long life span and great insulating properties. On the market there are a lot of option when coming to vinyl windows, starting with design consideration up to technical features. Therefore, before choosing the brand and model, you have to compare their characteristics, guarantee, accessories included and the price. When you have found the vinyl windows which fit both your needs and budget, you have to make sure they will transport the products to your house and that they give you everything you need for the installation (foam, caulk, screws, plastic covers for the hinges).
Another great thing about vinyl windows is that you can install them in virtually any window frame, as the producers will adjust their dimensions to your needs. Consequently, they are highly flexible and you can design your house without having the old constraints regarding the shapes and dimensions of the windows.
If you want to install the vinyl windows by yourself, it means that you are going to save a significant amount of money, so it would be wise to invest in highly efficient vinyl windows. In this manner, you will save money as your heating cost will decrease due to a better insulation.
Made from this plan
In order to learn how to install vinyl windows in a new construction, you need the following:
Materials
- PVC windows
- Door sealant
- Long screws (6-8” / 15-20 cm)
- Polyurethane foam
- Paper tape
Tools
- Safety gloves, glasses
- Measuring tape, carpentry pencil, l-square
- Stud finder (if your house has wooden walls)
- Drill machinery and drill bits
- Chisel, spirit level, vacuum cleaner
- Allen key bolts
Tips
- Use a vacuum to remove the residues after drilling the holes in the wall
- Don’t tight the screws too much, as you risk damaging the windows or bend the frame
Time
- Two hours
My best tips on installing vinyl windows in a new construction:
Vinyl windows are a popular choice for new construction due to their energy efficiency, low maintenance, and affordability. Proper installation is key to ensuring a good seal, long-term durability, and optimal performance. Here are my best tips for installing vinyl windows in new construction.
1. Gather the Right Tools and Materials
Before you start, make sure you have the following tools and materials:
- Vinyl windows (custom-ordered to fit your openings)
- Level
- Tape measure
- Shims
- Flashing tape
- Caulking gun and silicone caulk
- Nail gun or hammer
- Galvanized nails or screws
- Utility knife
- Insulation foam (low-expansion)
Having everything ready before you begin ensures a smooth and efficient installation process.
2. Check the Window Opening
Before installing the window, ensure that the rough opening is properly sized and prepared:
- The opening should be about 1/4 to 1/2 inch larger than the window frame on all sides to allow for shimming and insulation.
- Use a tape measure to confirm the width, height, and depth of the opening. Make sure the window fits snugly but allows enough room for adjustments.
- Verify that the opening is level, square, and plumb by using a level and measuring diagonally from corner to corner. The measurements should be equal, indicating the opening is square.
If the opening is not square, you may need to make adjustments before installing the window.
3. Apply Flashing Tape to the Sill
Waterproofing the window opening is crucial to prevent leaks and water damage:
- Apply flashing tape along the bottom sill of the window opening. Start by cutting a piece of flashing tape about 6 inches longer than the sill, then press it firmly into place.
- Extend the tape slightly up the sides of the opening to create a watertight seal.
- For extra protection, you can use a sill pan or pre-formed flashing for additional waterproofing.
Proper flashing ensures that water drains away from the window and prevents future leaks.
4. Dry Fit the Window
Before applying any adhesive or fasteners, perform a dry fit to make sure the window fits properly:
- Place the window into the opening and check that it fits snugly and sits level.
- Insert shims along the sides and top to hold the window in place without putting stress on the frame. Make sure the shims are evenly spaced.
If the window doesn’t fit properly, adjust the opening or reposition the shims to ensure the window sits correctly.
5. Apply Caulk Around the Opening
To create a watertight seal, apply silicone caulk around the exterior of the window frame:
- Run a continuous bead of caulk along the flanges of the window or around the perimeter of the opening. This will help seal the window against air and water leaks.
- Avoid using too much caulk, as this can cause issues with the window’s alignment during installation.
This step helps keep the window frame secure and watertight once installed.

6. Install the Window
Once the caulk is applied and the window is properly aligned, it’s time to install the window:
- Insert the window into the opening, pressing it firmly against the caulk. Use a level to make sure the window is straight and plumb.
- Secure the window in place by nailing or screwing the nailing flange (the outer edge of the window frame) to the exterior wall. Use galvanized nails or screws to prevent rust.
- Start by securing the top corners of the flange, then work your way around, adding fasteners every 6-8 inches along the flange. Be careful not to overtighten, as this can warp the frame.
The window should now be firmly in place, with no gaps or misalignments.
7. Check for Proper Operation
Before moving on to insulation, check that the window operates properly:
- Open and close the window to ensure it glides smoothly and locks correctly.
- If there’s any binding or difficulty operating the window, adjust the shims or fasteners as needed.
Making sure the window operates smoothly at this stage will save you from having to make adjustments later on.
8. Seal the Gaps
After the window is securely installed, fill the gaps between the window frame and the rough opening with low-expansion spray foam:
- Avoid using high-expansion foam, as it can exert pressure on the window frame and cause it to warp.
- Apply the foam in small amounts, letting it expand to fill the gaps. Don’t overfill, as excess foam can be trimmed later with a utility knife.
Insulating around the frame helps improve energy efficiency by reducing drafts and heat loss.
9. Install Exterior Flashing and Trim
After the window is sealed and insulated, install exterior flashing tape and trim to protect the window from the elements:
- Apply flashing tape along the sides and top of the window frame, overlapping the top piece onto the sides to create a water-shedding effect.
- Install exterior trim around the window to cover the nailing flange and create a finished look.
Exterior flashing and trim help protect your window from moisture and provide a polished, completed appearance.
10. Apply Interior Trim
Once the window is installed, you can finish the interior side of the window with trim:
- Use wooden or vinyl trim to cover the edges where the window frame meets the drywall. Cut the trim to size and attach it with finishing nails or screws.
- Caulk any gaps between the trim and the wall for a seamless look.
Bonus Tip: Double-Check the Weather Stripping Most vinyl windows come with weather stripping pre-installed, but it’s always a good idea to check that it’s intact and properly aligned. The weather stripping helps improve energy efficiency by creating a tight seal between the sash and the frame.
How to install vinyl windows in a new construction

Window frame measurements
First of all, you have to measure the windows openings, as to know the dimensions of your new window. In addition, this step is even more important when speaking about a new construction. Consequently, use a tape measure and take several measurements (for both width and height) in more places in each direction.
For example, for the height you might get two different results: in the left 3′ 5” and in the right 3′ 5 1/2”. You have two options: either modify the window frame as to get the same dimensions (remove concrete or shave the wood frame), or order the window using the smaller dimension, and fill the gap with sealer or foam.

New construction window frame
In our case, we have to install vinyl windows in a new construction made of bricks. In addition, the vinyl window was connected to the door, so consequently we also measured the door opening.
In the case of new constructions, where the wall aren’t finished yet, when ordering the windows and doors, we have to subtract 1/2” on all directions, as we will have to apply later a thick layer of mortar plaster. In most of the cases, we recommend you to install the windows after you have applied the plaster, as you will be able to fit them perfectly.

Connecting vinyl window to vinyl door
Next, we have joined the vinyl door frame to the window frame, by using 2-3” screws.
When making the connection, make sure the door and the window frames are aligned perfectly and then drive in the screws, while holding them locked into place. Work with patience as any mistake will cost you a great deal of money. In addition, read carefully the manufacturer’s instructions before installing the vinyl windows.

Fitting vinyl windows
Next, after you have connected the two frames together, you have to fit them inside the opening. The vinyl frame might be quite heavy, especially if it is large, so it would be a great idea to call a friend to help you. Next, you have to make use the vinyl frame is perfectly aligned with the walls, otherwise your room won’t have a nice appearance.
If the wall are thick, you could install the vinyl window either in the middle, either pushed towards outside if you want to install a sill in your room. Irrespective of your decision, you also have to use a spirit level to make sure the frame is plumb. Use cider shims under the vinyl frame to raise and level it.

Making sure the vinyl window is plumb
Next, you have to drill several holes on every side of the vinyl window frame by using a drill machinery and sharp drill bits. Taking into account that we have to insert auto tapping screws, you don’t have to drill the holes too deep.
Smart Tip: While you drill the holes, make sure you use the spirit level as to check if the frame remains plumb. This aspect is essential if you want to install the vinyl windows in a professional manner, so don’t hesitate to use a spirit level.

Fastening vinyl with screws
Next, you have to insert the screws in the pre-drilled holes, by using an electric screwdriver. It is important to secure the vinyl frame properly, that is why we recommend you to use 2 screws on each side for small windows (3′ x 3′) and 3 screws for larger windows (5′ x 3′). This aspect is very important as you want to install the vinyl window in a new construction as to be durable for many years in a row.
Please work with patience and insert the screws carefully, as not to damage the vinyl frame. In addition, use the spirit level every time you insert a screws, as it might twist or bend the frame from the ideal position.
Smart Tip: If the heads of the auto-tapping screws are too large, you have to countersink them, otherwise the door or windows might not open and close as they are supposed to.

Insulating vinyl window with polyurethane foam
After you have secured the vinyl windows in the new construction, you have to seal the gaps by using either polyurethane foam (for gaps larger than 1/2”) or a good sealant. Consequently, start with one corner and apply the polyurethane foam from bottom to top. You don’t have to use too much foam in one place, as it will expand.
If the gaps are smaller than 1/2”, then you could use a good waterproof sealant, as to fill them. Work with patience, as you are on the way of finishing installing your vinyl windows.

Installing vinyl windows new construction
Afterwards, you have to install the window openings and the actual door inside the frames. Consequently, you have to connect them to the hinges and then drive in a couple of screws. Due to the fact that the locking systems vary according to the manufacturer, we recommend you to read carefully the instructions we will get in the package.
We can assure you that it is not a difficult task, just insert all the screws and them attach the plastic covers over the hinges.

How to install vinyl window new construction
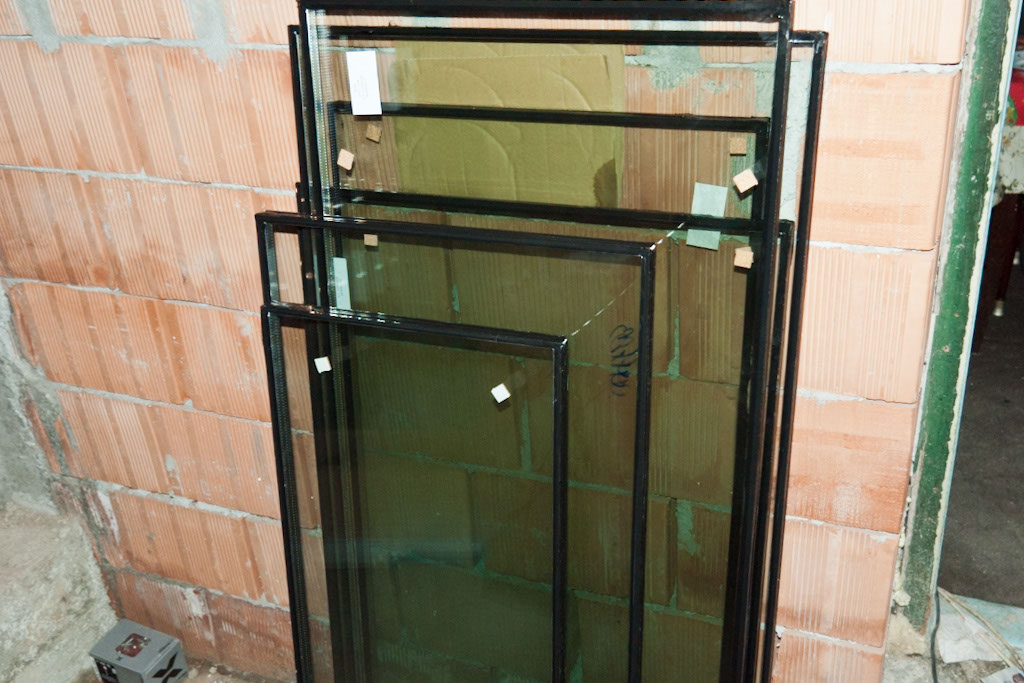
In certain cases you won’t receive the vinyl windows with the glasses attached, but separately. Nevertheless, you don’t have to worry about this aspect, as the installation of the glasses is straightforward.
Smart Tip: In order to avoid scratching the glasses lay them on a block of wood or on several layers of cardboard. In addition, don’t lean the glasses directly on the wall, but put a sheet of cardboard between the wall and the glasses.

Installing glasses in vinyl windows
Next, after you have installed the vinyl frame and the window openings, you have to attach the glasses. Consequently, move them gently, as you could scratch them easily and install them inside the frame. Make sure the glasses are set properly, being level and well aligned.
In order to lock them into position, you have to attach a plastic trim around the glasses. In order to set it into position, just push it with your hands until it locks into position.

Installing glass to PVC window
In order to install the interior trim which secures the glass, you should press it with your fingers, to the vinyl frame. This procedure is quite simple, you just have to make sure they attach to the channels properly, otherwise they won’t lock the glass into position.
After the polyurethane foam has dried out, you have to use a cutter to remove the excess. If you used a waterproof sealant, then you have to make sure it doesn’t go over the PVC frame, as it can obstruct the drain channels inside the window.
Last but not least, you should caulk the space between the window and the sill (both inside and outside your home), by using silicone. Wipe out the excess by using a wet towel.
Smart Tip: For a nice appearance, you should remove the protective tape from the frame and clean it with a special solution and a soft material.

Installing vinyl windows new construction
Last but not least, you should tune the vinyl window as to make sure it opens and closes properly. Consequently, you have to use allen key bolts on the hinges to adjust the windows for lateral movement. In order to adjust the compression you should use the allen key bolts on the window keep.
We hope that our tutorial has been helpful and we recommend you to read the rest of our projects regarding installing doors and windows.
By following these tips, you’ll be able to install vinyl windows in new construction efficiently and securely, ensuring they perform well for years to come. Proper installation not only prevents air and water leaks but also enhances the energy efficiency and aesthetics of your home.
Thank you for reading our article about how to install vinyl windows new construction and we recommend you to check out the rest of our projects. Please share our projects with your friends, by using the social media widgets.
