This article is about how to build a hip roof for a 2 storey brick house. This is Episode 3 of the concrete and brick house series, where I show you how we built the hip roof and then installed metal shingle sheets. I took my time to share lots of pics of the process and hopefully you can learn something from my experience. The roof is complex and therefore the costs were substantial, but I aimed for a distinctive look and I knew from the very beginning it’s going to be pricey.
This brick house is built to withstand 8.5 earthquakes on Richter scale and thus, it has strong structure made with re-bars and concrete. We used brick blocks for the interior and exterior walls. We used 8 tons of rebars for this house and close to 100 cubic meters of concrete for the whole constructions. In Episode 1, I will show you the story of the land, the plans for the house and how we poured the foundation. See all my Premium Plans HERE.
Made from this plan
Materials
- Lumber
- Nails and screws
- Metal shingles
- Anti-condensation foil
Tools
- Safety gloves, glasses
- Measuring tape, carpentry pencil, l-square, spirit level
- Hammer and circular saw
- Angle grinder
- Chainsaw
Time
- 1 week
Related
- Episode 1: Building the foundation
- Episode 2: Building the walls
- Episode 3: Building the roof
- Episode 4: Doing the installation and Windows
- Episode 5: Screeding the floors
- Episode 6: Installing the rock wool insulation
- Episode 7: Painting the house on the exterior
- Episode 8: Cementer render and wall plaster
- Episode 9: Installing natural stone
- Episode 10: Installing the septic Tank
- Episode 11: Building the walkarounds with pavers
- Episode 12: The kitchen
- Episode 13: The bathrooms
- Episode 14: The living Room
- Episode 15: The bedrooms
Brick House Construction – Video!
How to Build a Hip Roof
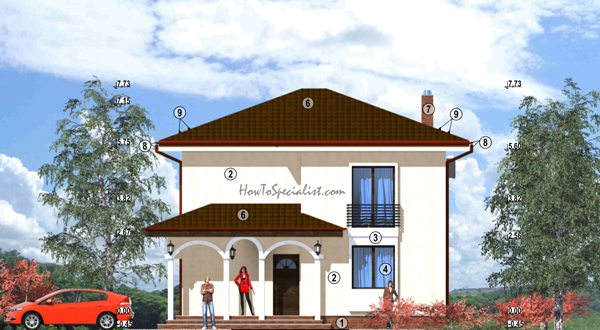
Plan-drawing-for-brick-house
Every house starts with a plan, so our countryside house didn’t make an exception. As you can see we went after a Mediterranean design with a few local influences so it blends in easily. This isn’t a large house because I wanted to go for minimalism and pack everything I needed in a medium sized area. The house features two floors and an attic that will be used for storage purposes. This is a concrete and brick house with 3 bedrooms, 2 bathrooms, a large kitchen, a living room and two small rooms for storage. In addition, the house features a porch to the front with beautiful columns and arches.
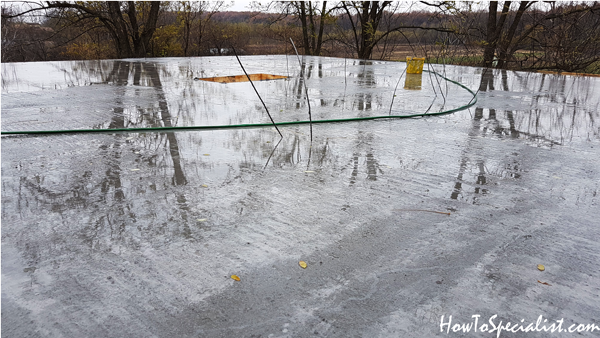
Concrete-ceiling
As you can see, we set 6 mm wire into the concrete ceiling, so we can lock down the supports for the ridge beam. It is important to read the plans so you can set the wire in the right place. We let the concrete ceiling set for one week before building the roof structure for the brick house.
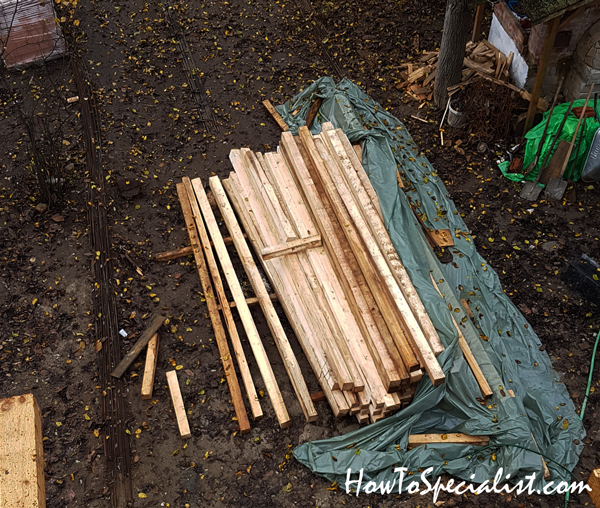
Lumber-for-house-hip-roof
This roof required a lot of lumber. In this picture you can see a fraction of the beams we used to frame the hip roof.
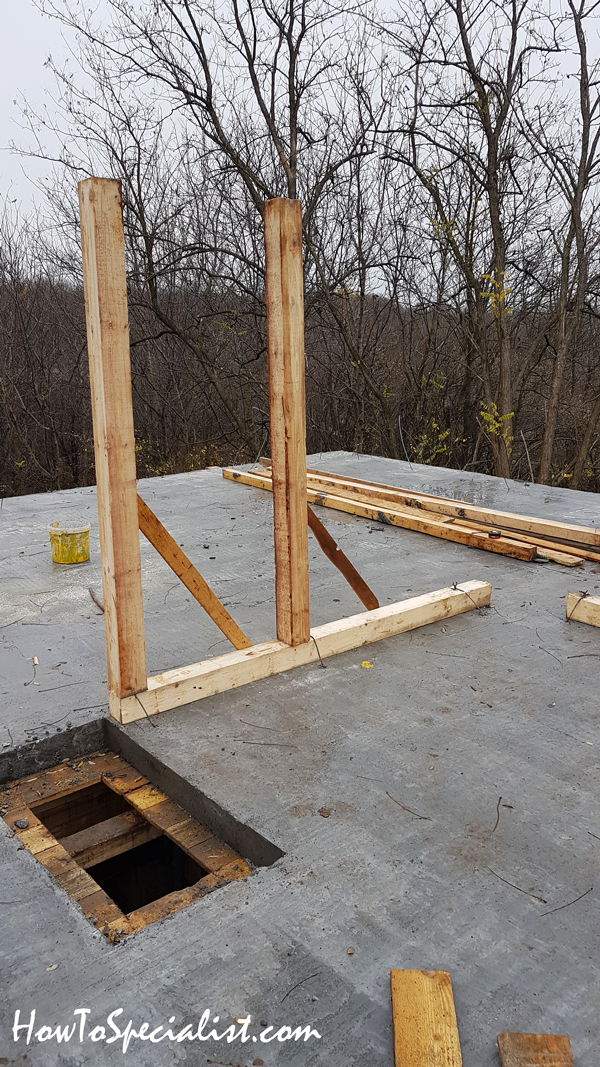
Supports-for-ridge-beam
We started with the 6×6 ridge beam supports. We locked the horizontal component to the ceiling with the 6 mm wire I showed you earlier. Then we set the vertical supports with nails We used a spirit level to plumb the posts and then lock them into place with temporarily braces.
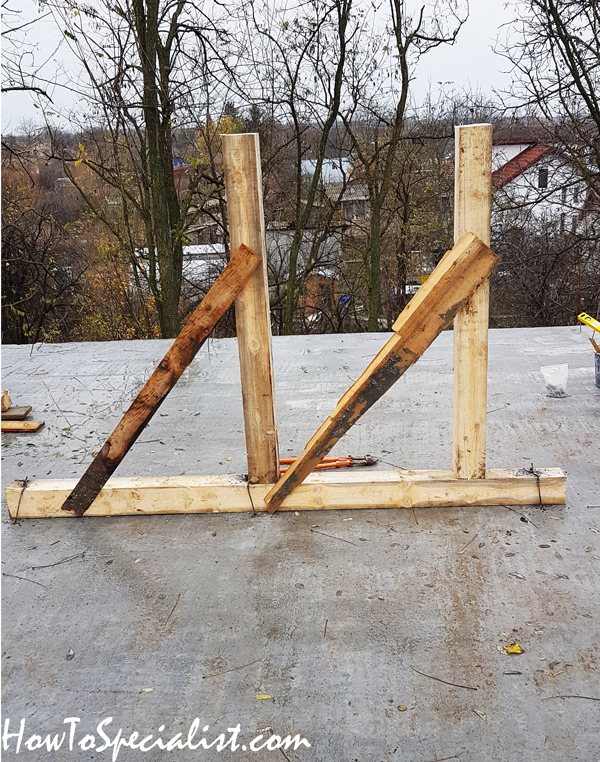
Ridge-beam-supports
We also added L brackets to the joints, later on.
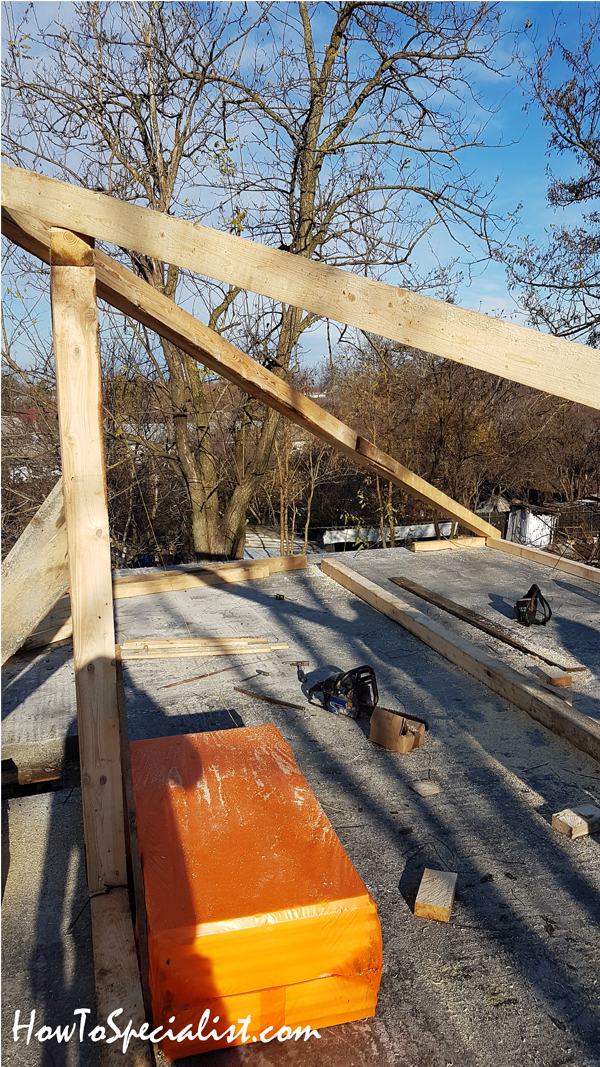
Fitting-the-hip-rafters
Next, we installed the 6×6 hip rafters. However, you should notice we also installed 4×4 plates along the outside edges of the concrete ceiling. The plates are needed so we can lock the rafters into place.
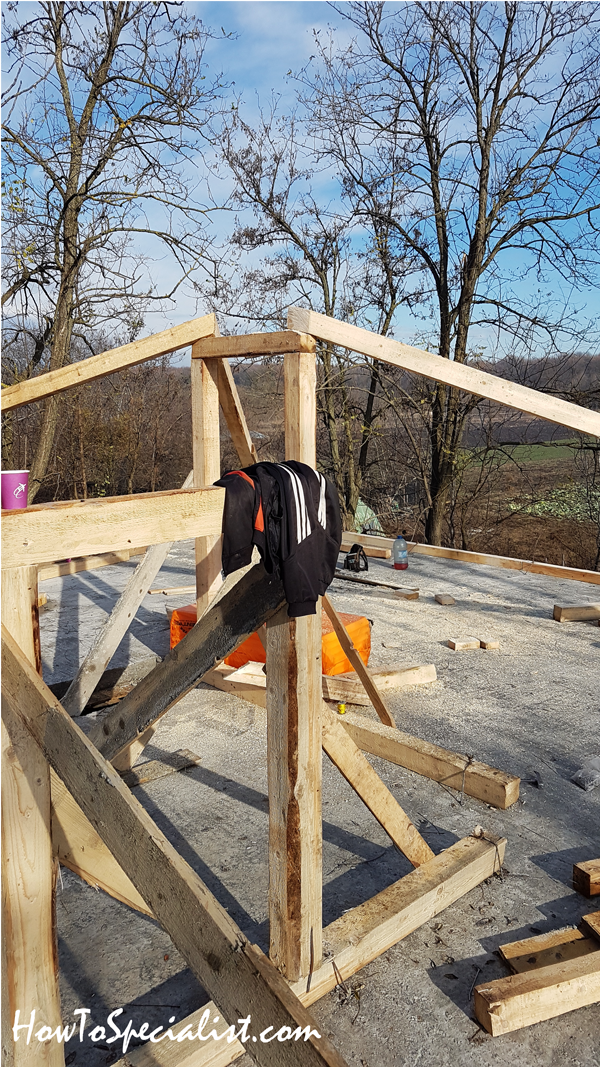
Hip-rafters—brick-house
We used a chainsaw to make the angle cuts, so we can join all the rafters together on the ridge beams. We used 8″ and 10″ nails to lock the rafters into place.
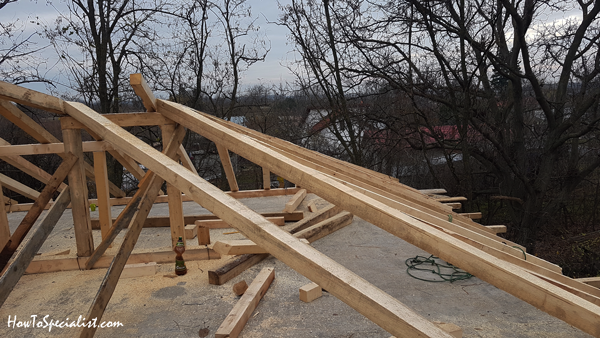
Hip-roof-structure
Next, we added the jack rafters to the back and to one side of the roof.
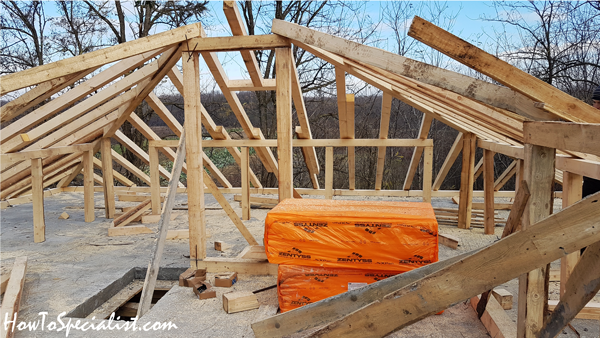
Fitting-the-jack-and-common-rafters
Notice the supports that go just under the middle of the rafters. We need these supports because of the wide span of the rafters.
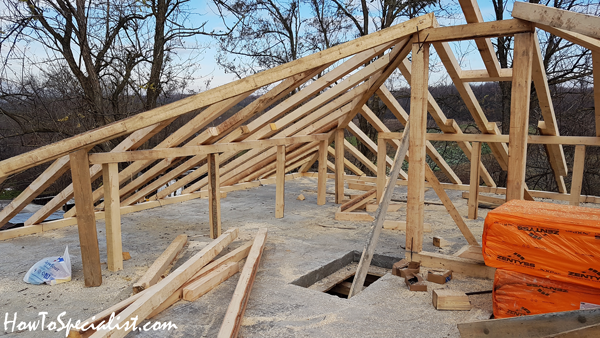
Fitting-the-jack-rafters
We also used two pieces of lumber for some rafters and joined them one piece along the other, just over the supports. This saves some money, because the longer the lumber beams the more pricey they are.
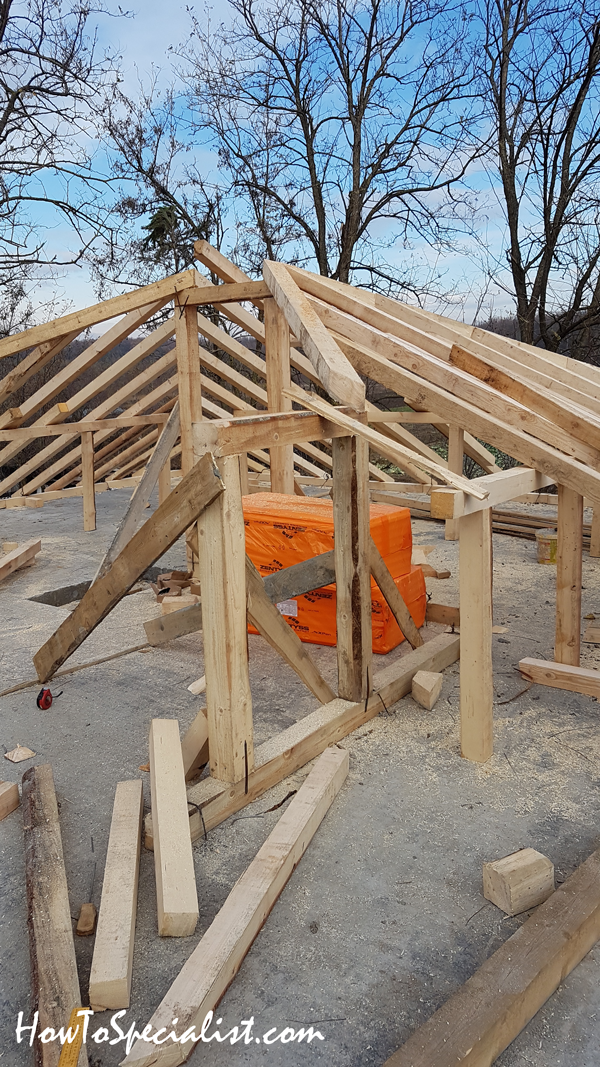
Framing-the-hip-roof-extension
The roof is starting to take shape. Lots of angles going on there, but that the reason I chose this roof style. It will add value to the house and make it stand out.
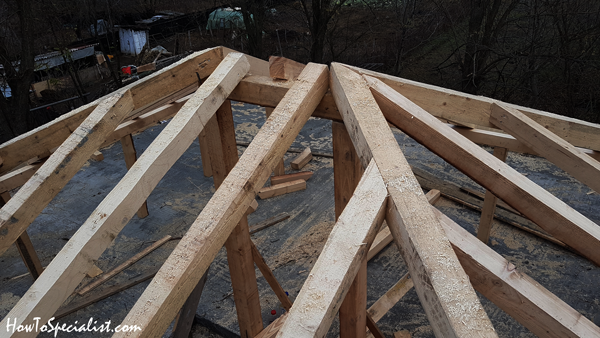
Top-view-of-hip-roof-frame
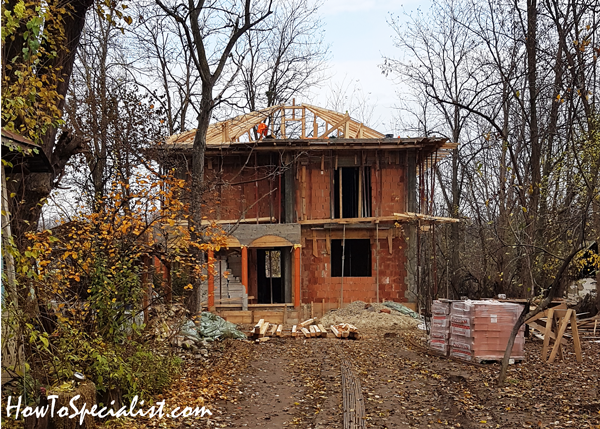
Framing-a-hip-roof-for-a-brick-house
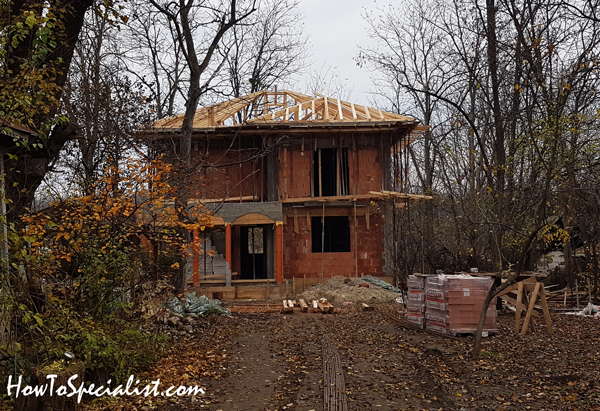
Hip-roof
I also took some pictures of the roof seen from the ground. You can notice the rafters that go every 24″ on center.
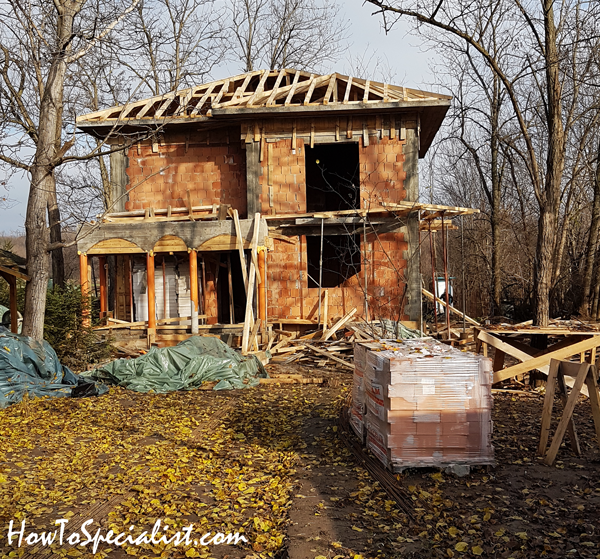
Hip-roof-structure-for-brick-house
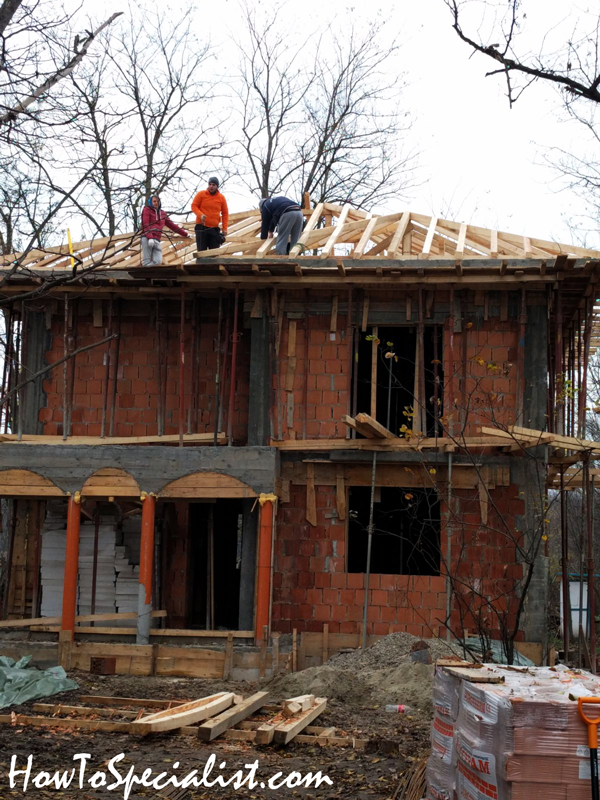
Building-the-roof-for-the-brick-house
The guys assembling the last rafters. It was very cold on the top of the world, since we built it in December.
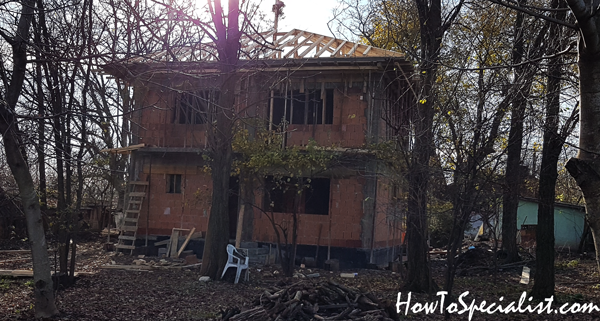
Building-hip-roof-for-brick-house
Roof structure officially completed!
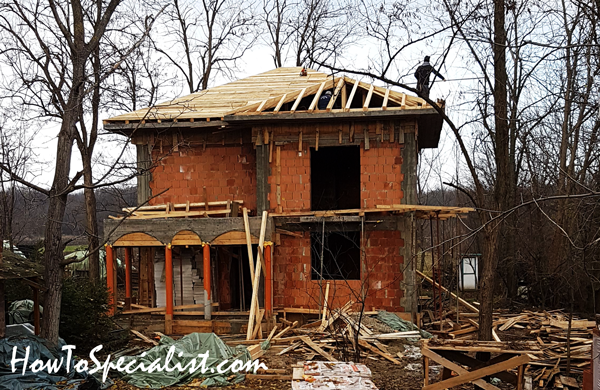
Roofing-sheets—hip-roof
The next step was to attach the slats to the roof structure. We mainly used slats from the formwork panels. The slats are 6/8″ or 22 mm thick so they were more than enough for the job. The roof has many angles so the guys used a chainsaw to make the cuts.
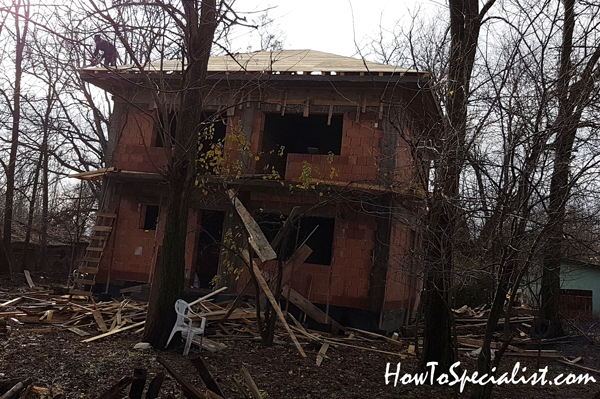
Roof-sheets
Now, laying the slats to the back of the roof structure.
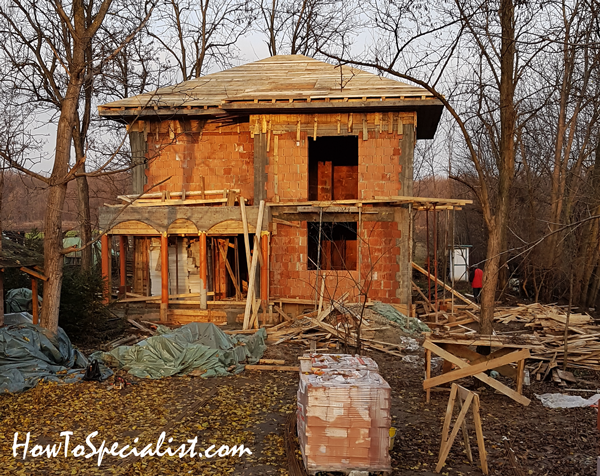
Roofing-for-brick-house
Installing the slats to the roof is a straight forward job and the guys got the job done in one day.
Hip roof for Front Porch
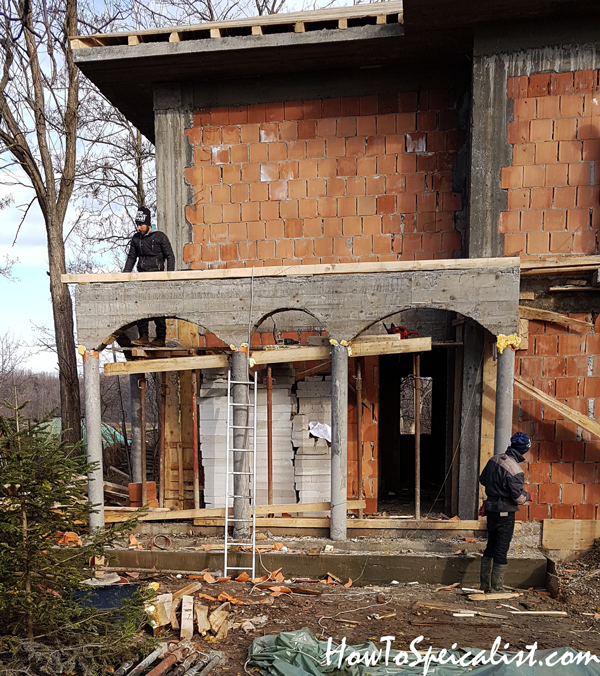
Easy Framing-the-roof-for-the-front-porch
Next, we framed the hip roof for the front porch. First, we attached the plate on top of the concrete beam. We made sure it’s perfectly level and we added some shims if needed.
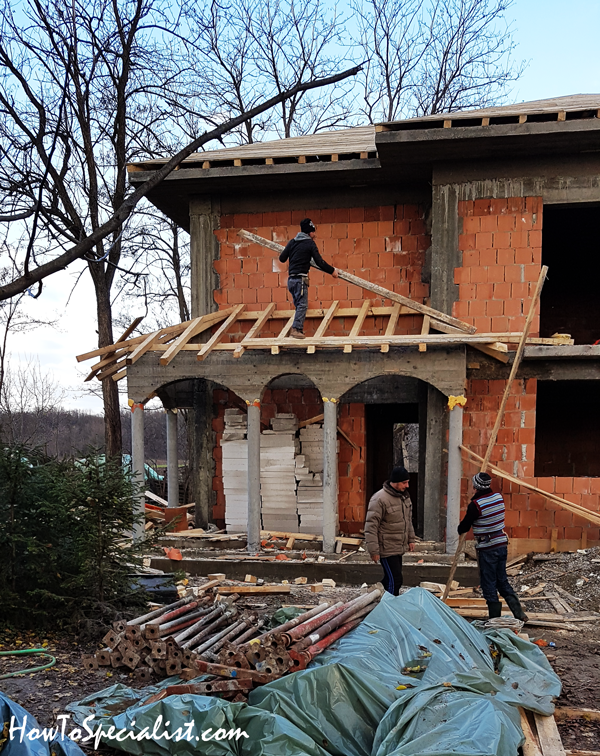
Framing-the-roof-for-the-front-porch
Next, we added the ledger beam to the wall of the house and installed the rafters.
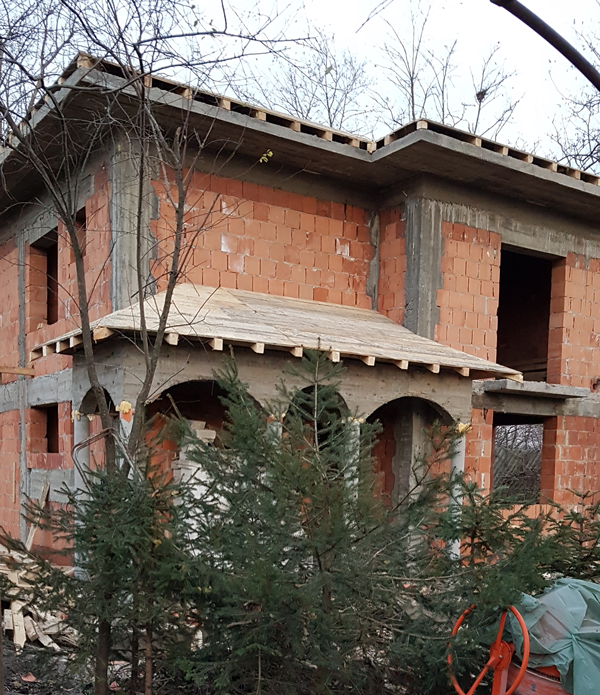
Roofing-the-front-porch
Last but not least, we set the slats to the front porch roof. We nailed down the slats into place with 4″ nails. We also used the chainsaw to make cuts to the end of the rafters.
Installing the metal roof shingles
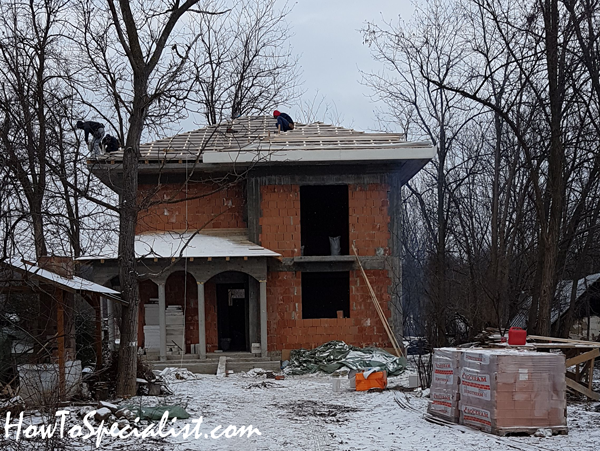
Fitting-the-purlins-for-the-metal-shingles
The roof was covered with anti-condensation foil and then the roofing guys installed the purlins. In addition, they also installed the trims to all sides of the roof.
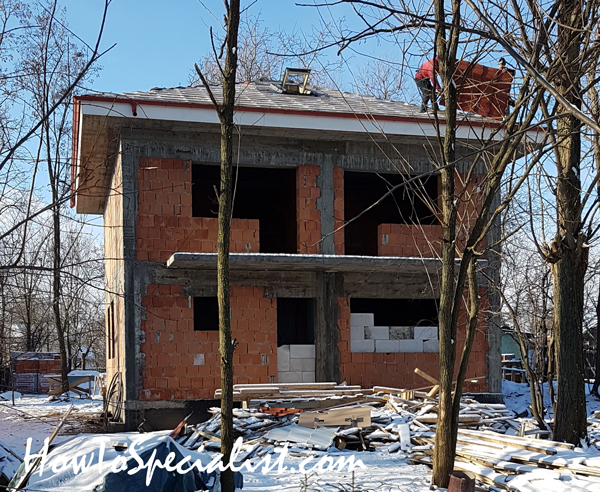
Roofing-a-house-with-metal-shingles
As you can see in the image, we installed a window to the attic. We needed the window to have some light inside the attic and to ventilate it during the summer days. You should also notice the guys installed the rain gutters before attaching the metal shingle sheets.
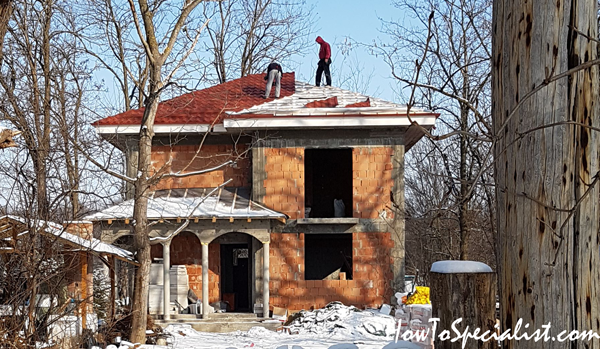
Roofing-with-shingles
Installing the metal shingles is a quick process. They only needed to make cuts to the sheets so they can fit to the roof and then screws were used to lock them to the purlins.
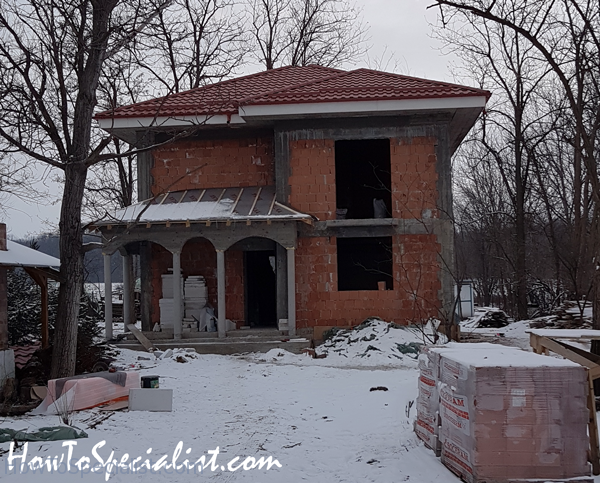
Metal-shingles-for-the-roof-of-the-house
Next, they sealed the hip edges and installed other connectors and elements to prevent the snow from falling down the roof and thus damaging the rain gutters.
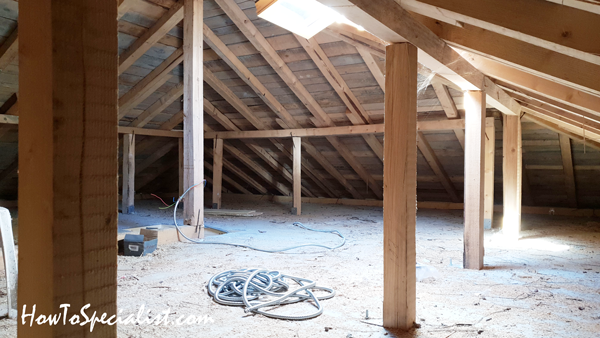
Hip-roof-seen-from-attic
I also thought you’d like to see an image from the attic. You can notice the window that gives a lot of light inside the attic. I will use the attic for storage so it doesn’t have to look pretty.
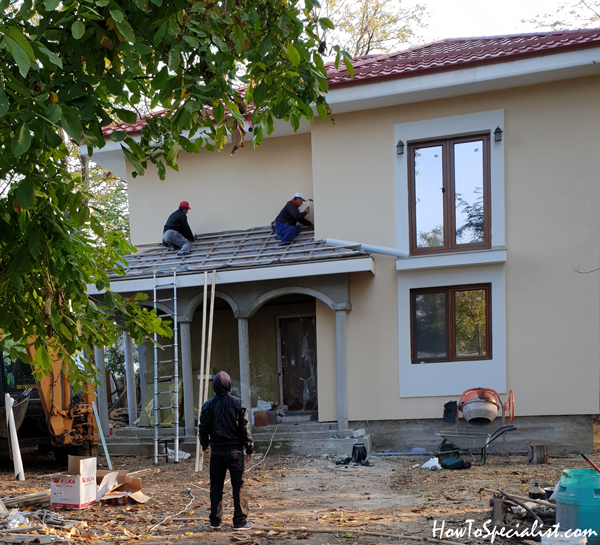
Roof-purlins-metal-shingles
The roofing for the porch has a story of its own. We installed rock wool insulation on the exterior walls of the house (step by step tutorial on Episode 6), so we had to postpone the metal sheet installation after finishing that step. Installing the rock wook boards and painting the exterior of the house is messy, so with the roof on, it would have got ugly.
The roofing guys installed the anti-condensation foil and then the purlins.
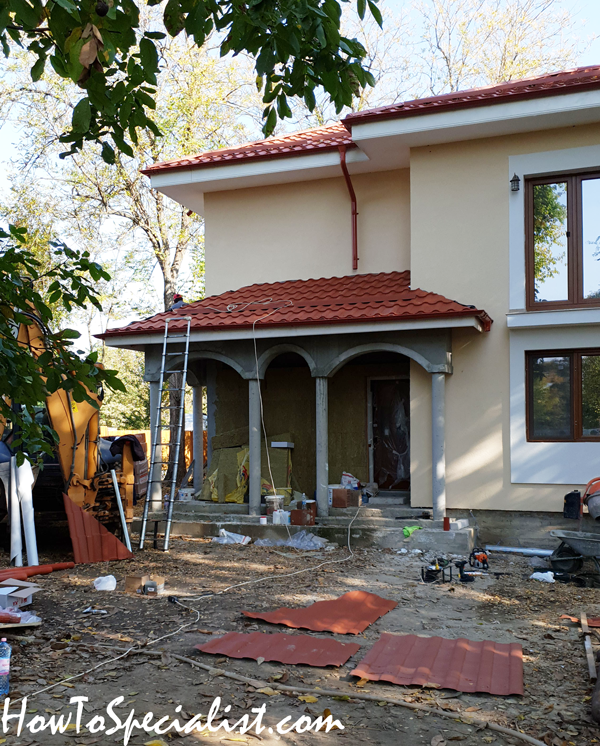
Roof-sheets-for-front-porch
Next, they cut and installed the rain gutters and the metal shingle sheets. It’s hard to see from the pics, but the roof has matte finish and resembles quite well the aspect of natural ceramic tiles. Very pleased with the result and with the costs ($4000).
Make sure you take a look over the rest of the Concrete and Brick House Series to see our building adventure from bare ground to moving in. I promise you will have a lot of fun seeing the house coming together and maybe learn from out mistakes and problem solving.
Thank you for reading our article on how to build a hip roof for a brick house and we recommend you to check out the other episodes of the series. Don’t forget to share our articles with your friends, by using the social media widgets.
