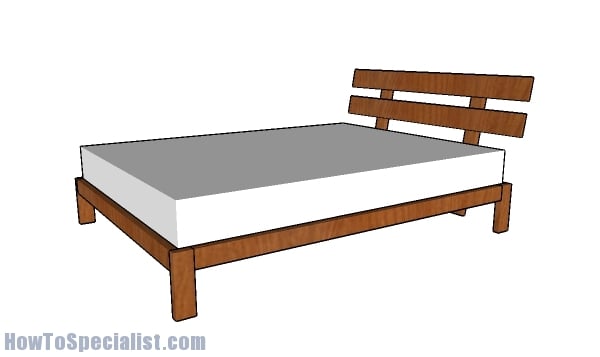
This step by step diy article is about basic headboard plans. I have designed this basic headboard to go perfectly with the super simple platform bed. This headboard has a sleek, modern look and it is in the same time durable. You can make a few adjustments to my design and the possibilities are endless. I would also recommend you to take a look over the rest of my bed frame plans HERE.
Always aligned the components before locking them together with screws. In addition, we recommend you to pre-drill the lumber, otherwise the wood might easily split. Add glue to the joints, if you want to enhance their bond. Smooth the cut edges with fine grit sandpaper and remove the residues using a vacuum cleaner. Make sure you take a look over the related plans to get an idea about what you can build for your home. See all my Premium Plans HERE.
Made from this plan
Basic Headboard Plans
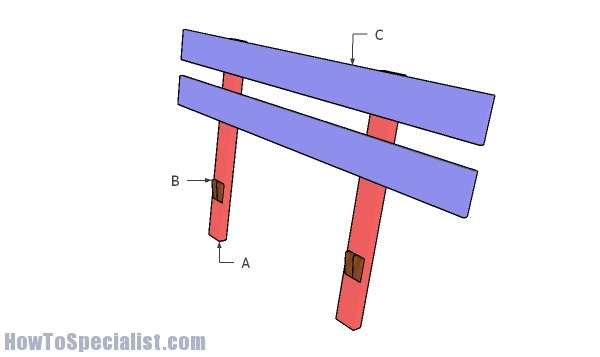
Building a basic headboard
Materials
- A – 2 pieces of 2×4 lumber – 36″ long SUPPORTS
- B – 4 pieces of 2×4 lumber – 1″ long BRACKETS
- C – 2 piece of 1×6 lumber – 64″ long SLATS
- 2 pieces of 1×6 lumber – 6′
- 1 piece of 2×4 lumber – 8′
- 2 1/2″ screws, 2 1/2″ pocket screws
- 1 5/8″ screws
- putty, glue, stain
- queen mattress
Tools
- Safety gloves, glasses
- Miter saw, jigsaw
- Chalk line, tape measure, spirit level, carpentry pencil
- Drill machinery and drill bits
Time
- One day
Related
Building a modern headboard
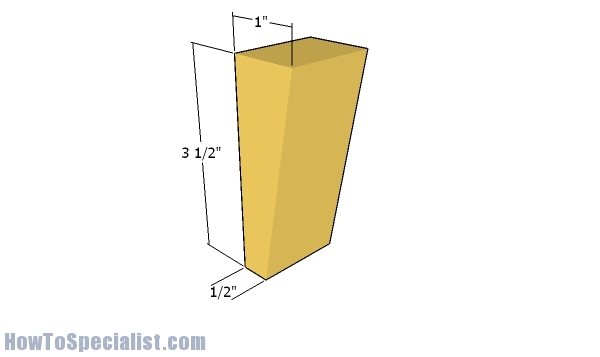
Building the brackets
The first step of the project is to build the brackets for the headboard. Use a saw to cut 4 pieces as shown in the diagram. You can adjust the lean angle of the headboard by cutting these brackets differently.
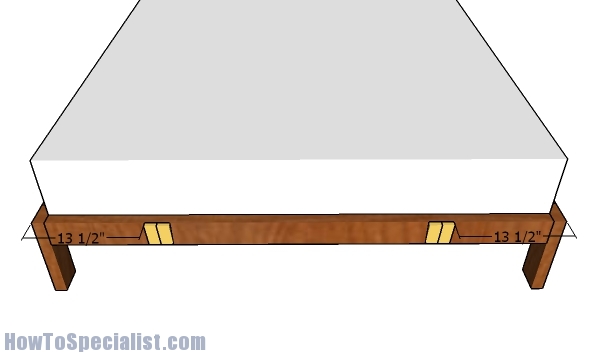
Fitting the headboard brackets
Fit the brackets to the platform bed frame, as shown in the plans. Drill pilot holes and insert 1 5/8″ screws to secure the brackets into place tightly.
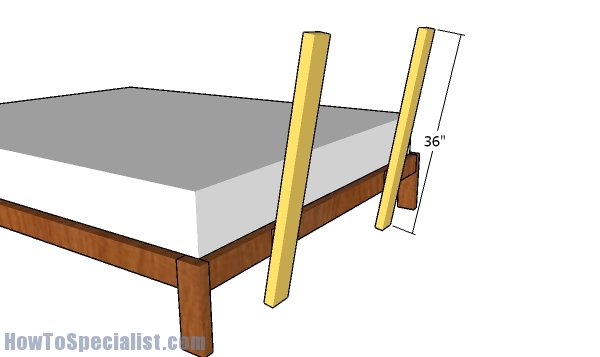
Fitting the supports for the headboard
Fit the headboard supports to the bed frame. Align the edges with attention, drill pilot holes and insert 2 1/2″ screws to lock them to the brackets.
Fitting the slats to the headboard
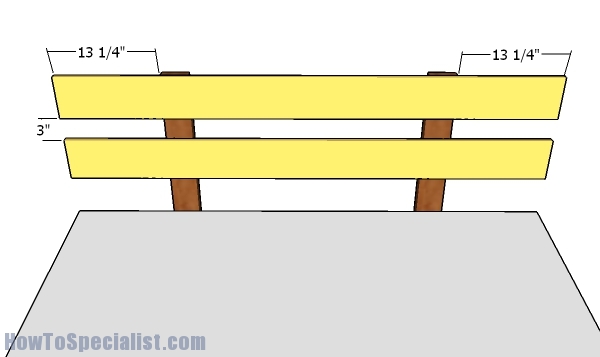
Fit the 1×6 slats to the supports. Center the slats to the supports and adjust the gaps between them to suit your needs. Drill pilot holes and insert 1 5/8″ screws to lock the slats to the supports tightly.
Building a basic platform bed
Fill the holes with wood putty and then smooth the surface with 120-220 grit sandpaper. Apply a few coats of paint/stain over the components to protect them from decay and to enhance the look of the bed frame. Check out PART 1 of the project, so you learn how to build the basic bed frame.
Thank you for reading our article about basic queen size platform bed plans and we recommend you to check out the rest of our home improvement projects. Don’t forget to share this projects to your friends, using the social media widgets, if you’ve found it useful. Like us on Facebook to be the first that gets the latest updates and to help us create more free plans for you.

2 comments
Always Love Your RSS Feed Plans. I’m Old With Disabilities, but when I get one built I’ll be sure to send pics. Thanks, so much.
Good luck. Looking forward to seeing your projects.