This step by step woodworking project is about 10×12 gable shelter roof plans plans. This is the PART 2 of the outdoor shelter project, where I show you how to build the gable roof. This shelter is ideal for animals and for storing equipment. My plans come with step by step instructions and you can easily adjust all the dimensions to suit your needs. See my other DIY projects HERE.
We recommend you to invest in the best materials you could afford. Therefore, you should buy weather-resistant lumber, such as pine or cedar. Always take accurate measurements before adjusting the size of the components at the proper size. Drill pilot holes trough the components before inserting the wood screws, to prevent the wood from splitting. See all my Premium Plans HERE.
Made from this plan
10×12 Field Shelter Plans
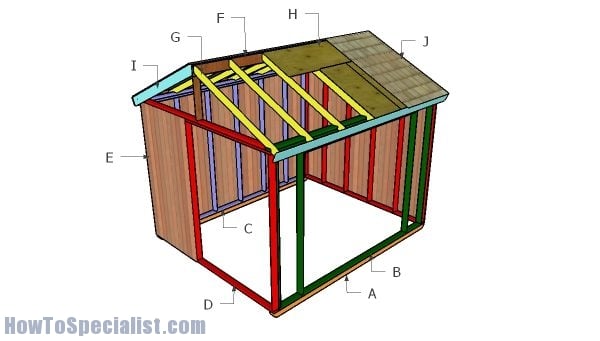
Building an outdoor field shelter
Materials
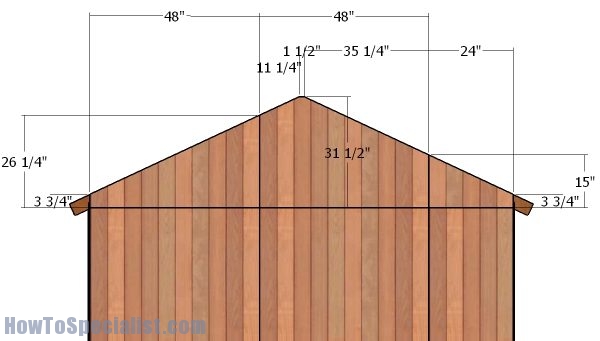
- E – 2 pieces of T1-11 siding – 26 1/4″x48″ long, 2 pieces – 31 1/2″x48″ long, 2 pieces – 15″x24″ long GABLE ENDS
- F – 2 pieces of 2×4 lumber – 24 1/2″ long, 1 piece – 144″ long RIDGE BEAN
- G – 14 pieces of 2×4 lumber – 72″ long RAFTERS
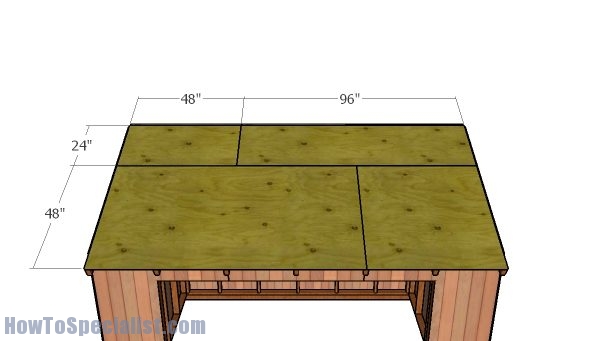
- H – 2 pieces of3/4″ plywood – 48″x96″ long, 2 pieces – 48″x48″ long, 2 pieces – 24″x96″ long, 2 pieces – 24″x48″ long ROOF
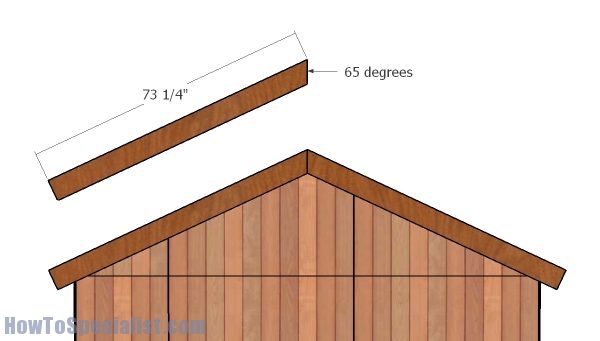
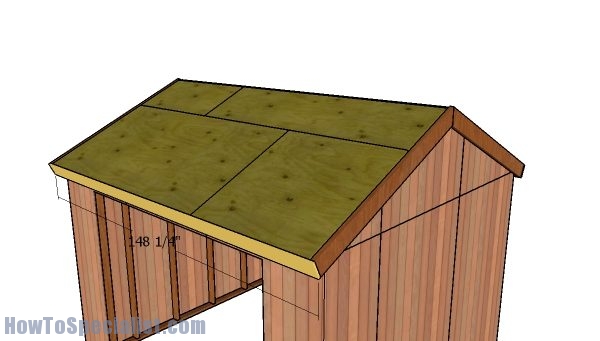
- I – 2 pieces of 2×6 lumber – 73 1/4″ long, 2 pieces of 1×6 lumber – 148 1/4″ long TRIMS
- J – 150 sq ft of tar paper, 150 sq ft of asphalt shingles ROOFING
- 1 pieces of 2×4 lumber – 12′
- 15 pieces of 2×4 lumber – 6′
- 4 pieces of 2×6 lumber – 8′
- 2 pieces of 1×6 lumber – 14′
- 4 pieces of 3/4″ plywood – 48″x96″
- 2 pieces of T1-11 5/8″ siding – 4’x8′
- 150 sq ft of tar paper, 150 sq ft of asphalt shingles
- 2 1/2″ screws, 3 1/2″ screws, 1 5/8″ screws
- 4d nails, 6d nails
- rafter ties
- wood filler , wood glue, stain/paint
Tools
- Safety gloves, glasses
- Miter saw, jigsaw
- Chalk line, tape measure, spirit level, carpentry pencil
- Drill machinery and drill bits
Time
- One week
Building a gable shelter roof
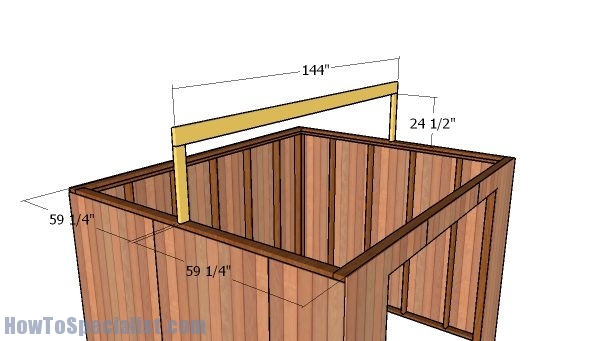
Fitting the ridge beam
Use 2×4 lumber for the ridge beam supports. Drill pocket holes at both ends of the supports and then secure them into place with 2 1/2″ screws. Make sure the corners are square and plumb the supports with a spirit level. Fit the top ridge and make sure the corners are square.
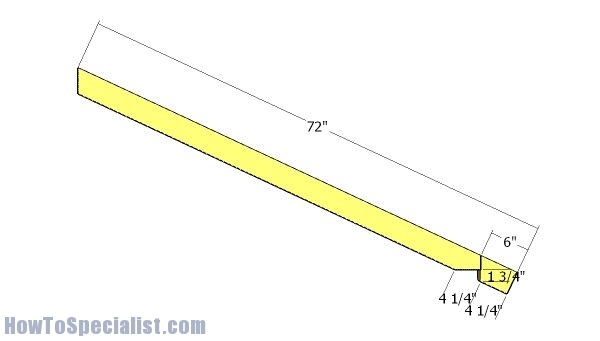
Rafters
Use 2×4 lumber for the rafters. Make the cuts to the rafters, so you can fit them into place tightly.
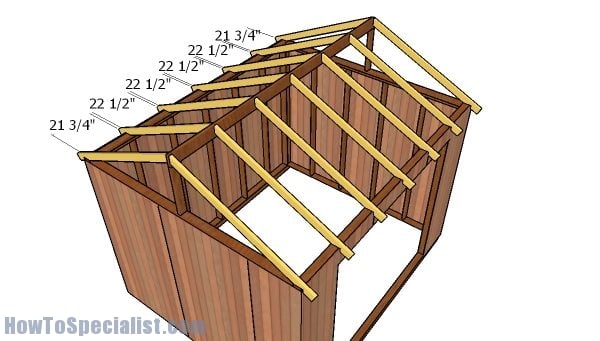
Fitting the rafters
Fit the rafters every 24″ on center, for a neat result. Lock the rafters to the plates with rafter ties. Lock the rafters to the ridge beam with screws, after drilling pilot holes.
Gable end panels
Attach the T1-11 siding sheets to the gable ends. Mark the cut lines on the sheets and get the job done with a circular saw. Align the edges flush and insert 6-8d nails, every 8″ along the framing. Leave no gaps between the sheets for a neat result.
Fitting the roofing sheets
Fit 3/4″ plywood sheets to the roof of the field shelter. Align the edges flush and insert 1 5/8″ screws, every 8″ along the framing. Leave no gaps between the sheets for a professional result.
Side overhangs
Fit the 2×6 overhangs on the sides of the shelter. Align the edges flush and insert 2 1/2″ screws, after drilling the pilot holes.
Front and back trims
Fit 1×6 slats to the front and to the back of the shelter. Align the edges and insert 2″ nails.
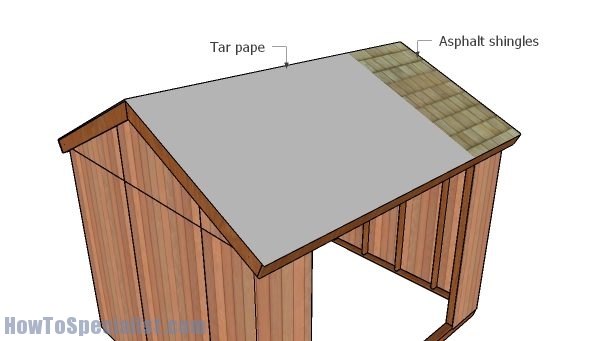
Fitting the roofing
The next step of the woodworking project is to cover the roof with felt. As you can see in the image, you need to make sure the strips of roofing felt overlap at least 2”. In addition, you have to lock the tar paper to the plywood sheets with staples. Attach the asphalt shingles to the roof, making sure you follow the manufacturer’s instructions.
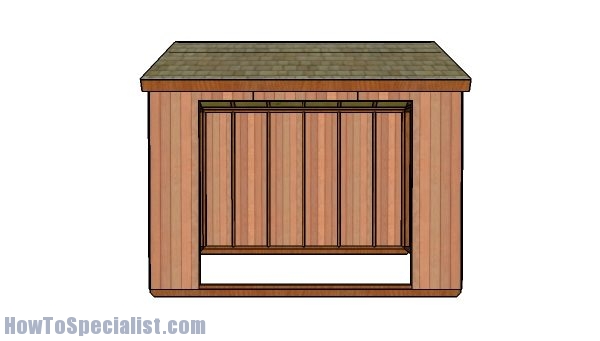
Outdoor Field Shelter Plans – Front view
Fill the holes with wood putty and smooth the surface with 120-220 grit sandpaper. Apply a few coats of paint or stain to enhance the look of the shelter.
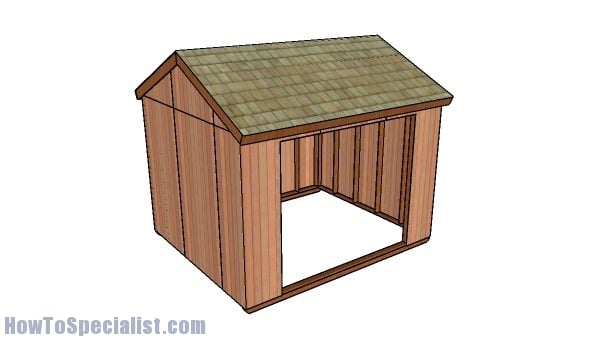
Outdoor Field Shelter Plans
This shelter project is super easy to complete from the ground up to the roof, using my free plans. Check out PART 1 to learn how to build the frame of the shelter.
Thank you for reading our project about free 12×10 gable shed roof plans and I recommend you to check out the rest of the projects. Don’t forget to LIKE and SHARE our projects with your friends, by using the social media widgets. SUBSCRIBE to be the first that gets our latest projects.
<< Previous | Next >>
