This step by step woodworking project is about how to build an outdoor wine caddy. I designed this project, after building this wine cadddy, as my friends suggested I should make something that incorporates two glasses. I personally love going to picnics in nature and so do my friends. I have come up with this design, so you can disassemble the glass support and add more character to the project. Needless to say that you can adjust the design so it suits your tastes.
I recommend you to invest in the best materials you could afford. Therefore, you should buy weather-resistant lumber, such as pine or cedar. Always take accurate measurements before adjusting the size of the components at the proper size. Drill pilot holes trough the components before inserting the wood screws, to prevent the wood from splitting. See all my Premium Plans in the Shop.
Made from this plan
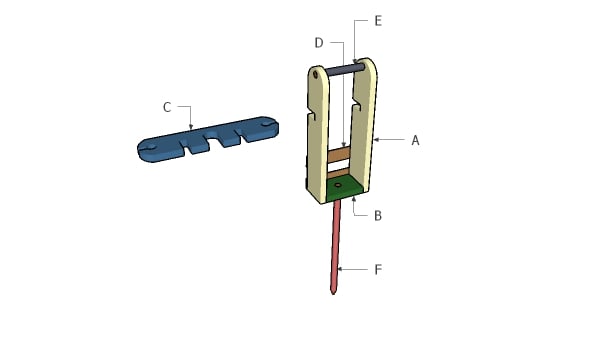
Materials
- A – 2 pieces of 1×4 lumber – 16″ long SIDES
- B – 1 piece of 1×4 lumber – 5″ long BOTTOM
- C – 1 piece of 1×4 lumber – 14 1/2″ long SUPPORT
- D – 4 pieces of 1×2 lumber – 6 1/2″ long STRIPS
- E – 1 piece of 3/4″ dowel – 6 1/2″ long HANDLE
- F – 1 piece of 3/4″ dowel – 16″ long STAKE
- 1 piece of 1×4 lumber – 8′
- 1 piece of 1×2 lumber – 4′ (1/4″ thick)
- 1 pieces of 3/4″ dowel
- 1 1/2″ brad nails
- stain, glue
Tools
- Safety gloves, glasses
- Miter saw, jigsaw
- Chalk line, tape measure, spirit level, carpentry pencil
- Drill machinery and drill bits
Tips
- Adjust the size of the project to suit your needs
Time
- One Day
Outdoor Wine Caddy Plans
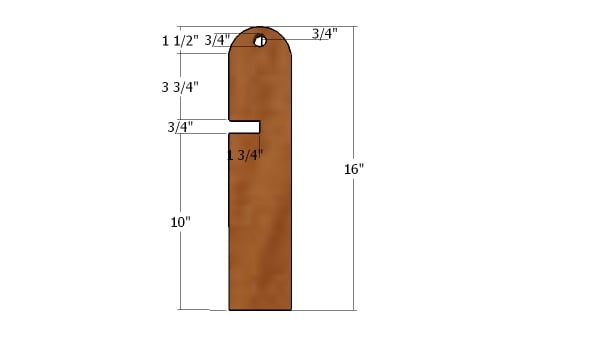
The first step of the project is to build the sides for the picnic wine caddy. Mark the cut lines on the 1×4 slats and get the hob done with a jigsaw. Smooth the edges with sandpaper for a professional result. In addition, cut out the 3/4″ holes for the top handles.
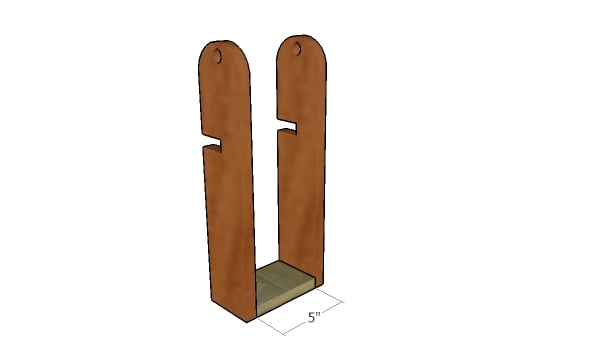
Next, attach the bottom to the side components. Make sure the edges are flush and if the corners are square. Add glue to the joints and use 1 1/2″ brad nails to lock everything together tightly. Drill a pilot holes through the middle of the bottom slat.
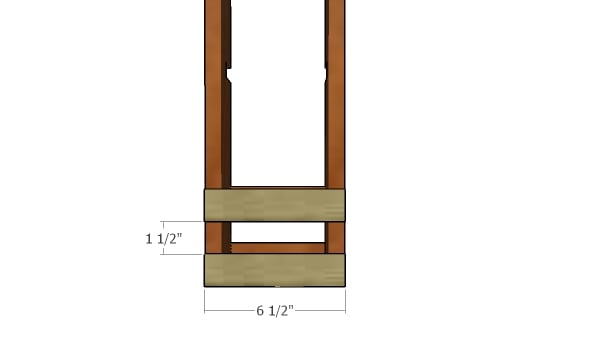
Attach the 1×2 strips to the front and back of the wine caddy (1/4″ thick). Use glue and 3/4″ brad nails to secure the strips to the sides.
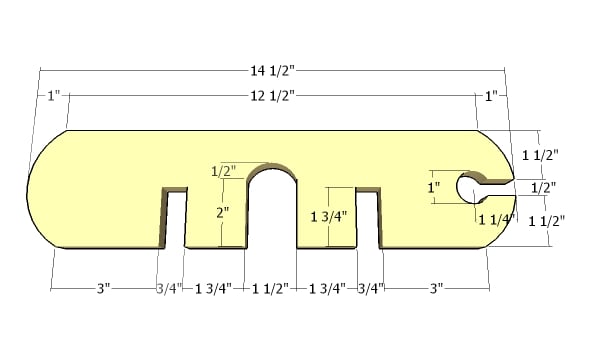
Build the glass support from a piece of 1×4 lumber. Mark the cut lines to the slat and get the job done with hole saw drill bit and with a jigsaw. Smooth the edges thoroughly.
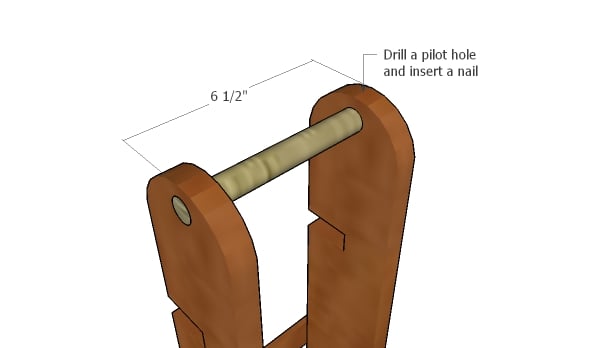
Cut a piece of 3/4″ dowel and fit it to the top of the wine caddy. Drill pilot holes through the sides and insert 1 1/2″ nails to secure the handle into place tightly. Add glue to the joints for a durable bond.
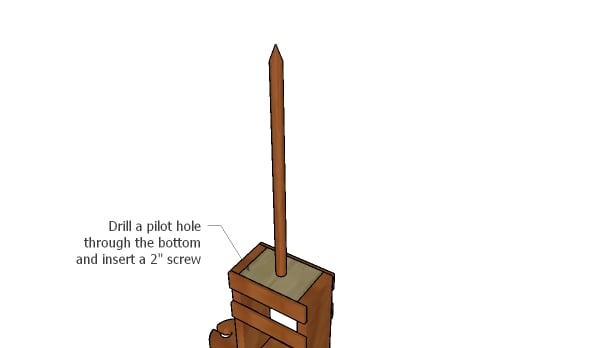
Use a 3/4″ dowel to build the stake for the wine caddy. Center the dowel to the bottom of the caddy and insert a 2″ screw to lock it into place tighly. In addition, add glue to the joints.
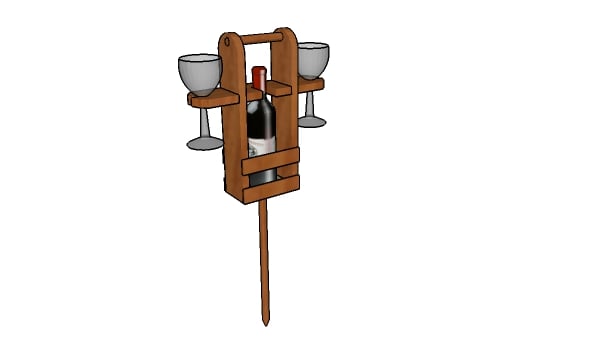
Smooth the edges and apply a few coats of stain or paint to enhance the look of the project. Sharpen the stake tip of the stake with a sander so you can driven it into the ground.
How to build an outdoor wine caddy with glass supports
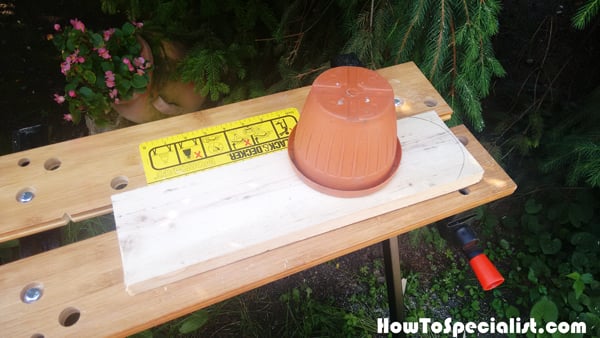
First, I marked the curved cut lines on the 1×4 slats. You can use 1×6 boards, as well, if you want to carry larger bottles.
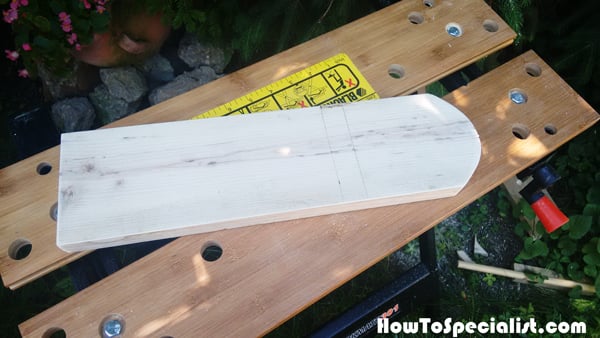
I used my jigsaw to make the curved cuts and the smoothed the edges with 120 grit sandpaper. I then marked the outline of the slots so I can cut out them easily. The slots should be cut out 1 3/4″ (if you use 1×4 lumber).
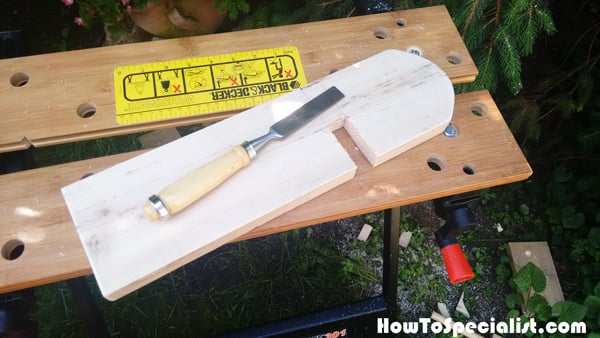
I used a saw to make the cuts to the slots and then removed the excess with a chisel. Make sure you don;t apply too much force when using the chisel, otherwise you can tear the material.
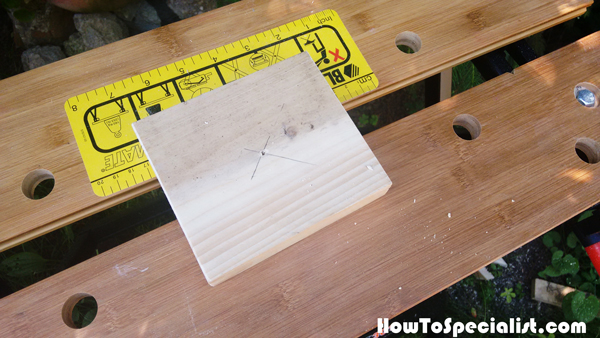
Drill a pilot hole through the middle of the bottom slat, as after assembling the wine caddy the space will be tight.
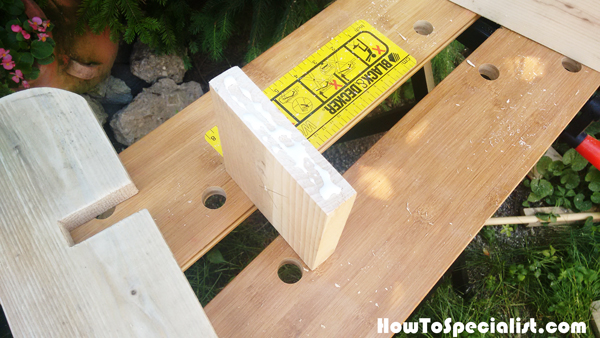
Add glue to the sides of the bottom slat before attaching it to the frame of the caddy.
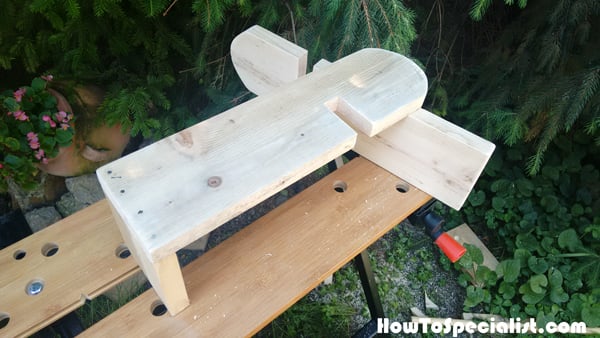
I used 1 1/2″ brad nails to lock the sides to the bottom. 4-5 brad nails on each side are enough to create a strong bond between the components, I used a carpentry square to make sure the corners are right-angled. Moreover, I made sure the edges were flush.
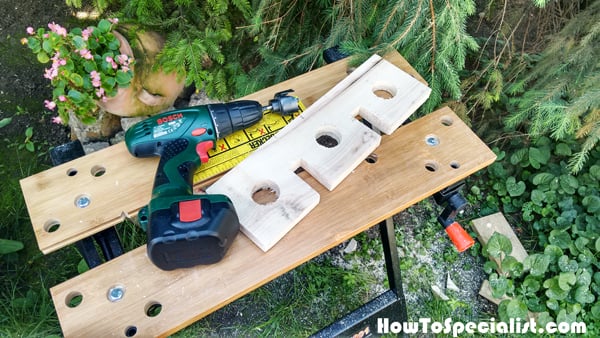
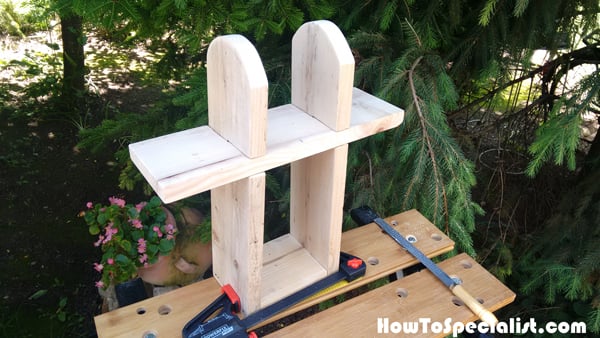
I fit the glass support to the frame of the wine caddy, so I can make a preliminary test. Fortunately, the components fitted together easily and the glass support slid easily. For this design, it is essential to make sure the support slides easily. If necessary, sand the slots to remove more material.
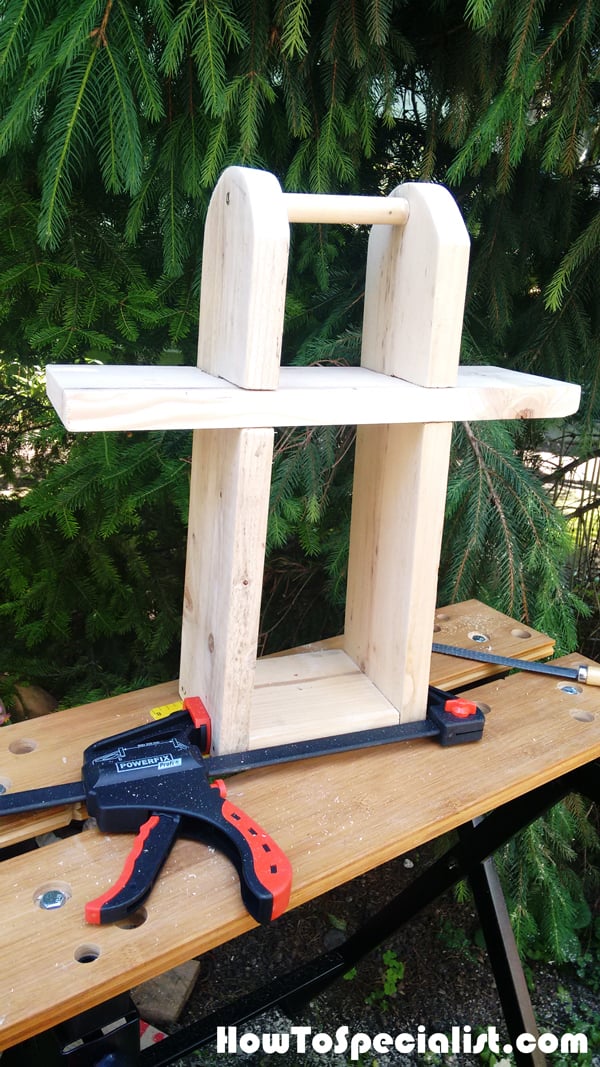
With the glass support fitted into place you should install the handle to the wine caddy.
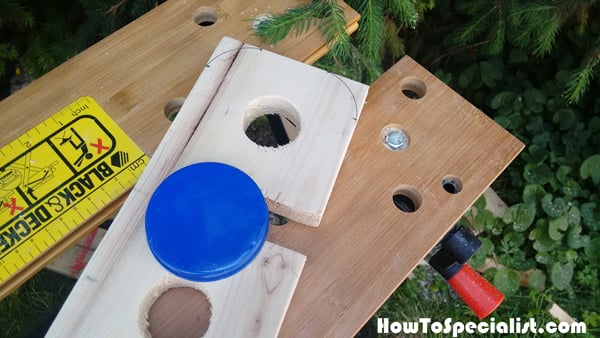
Next, I marked the cut lines to the corners of the glass support using a pencil and a round object.
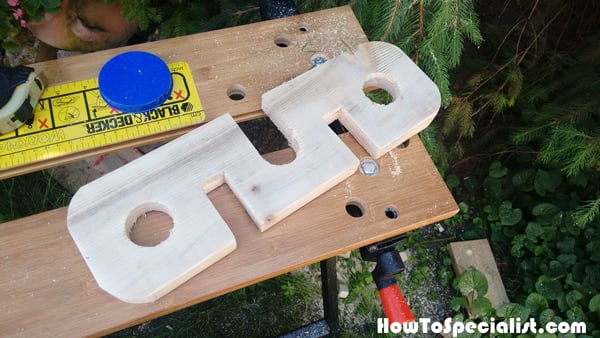
I made the curved cuts with jigsaw and sanded the edges with 120-grit sandpaper. You can use a router as well, if you have access to one.
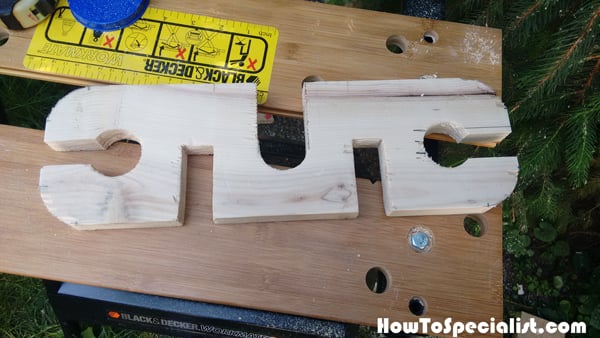
Next, I cut the slots for the glasses on both sides of the support.
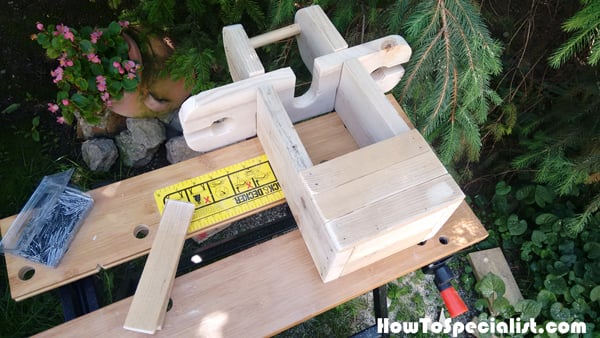
Next, I attached the 1×2 strips to the front and back of the wine caddy. I added glue to the joints and used 3/4″ brad nails. In addition, I fitted some extra strips as spacers, so I can create even gaps on both sides of the caddy.
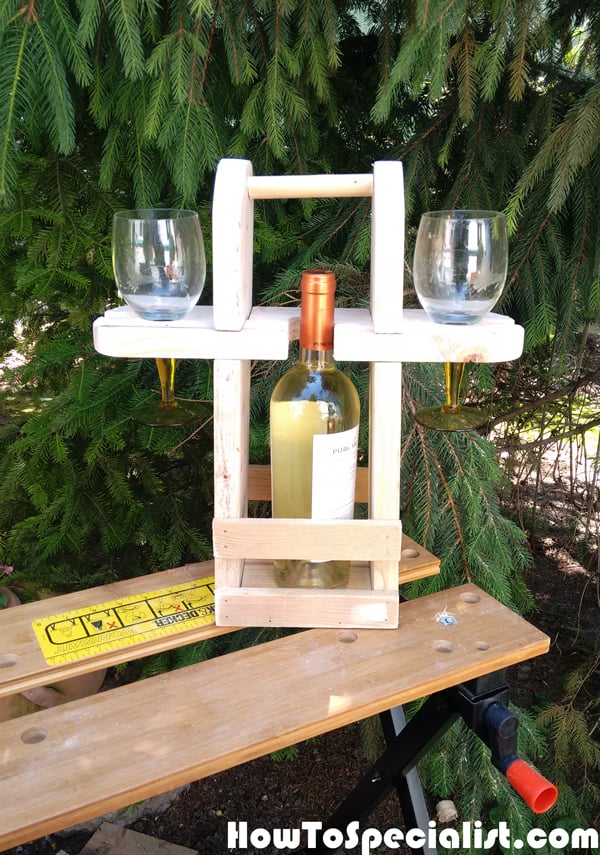
The outdoor wine caddy is starting to take share and it already looks awesome. I don’t see any reason why you can’t use it as it is, without fitting the stake to the bottom.
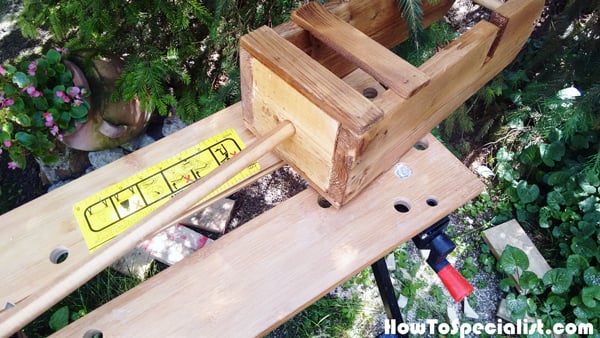
I attached the 3/4″ stake to the bottom of the wine caddy. I added glue to the joints and insered a 2″ screws from top into the dowel. I also stained the wine caddy with teak stain. I seal the finish with a few coats of spar varnish, considering the caddy will be used outdoors. Sharpen the tip of the stake so you can drive it into the ground.
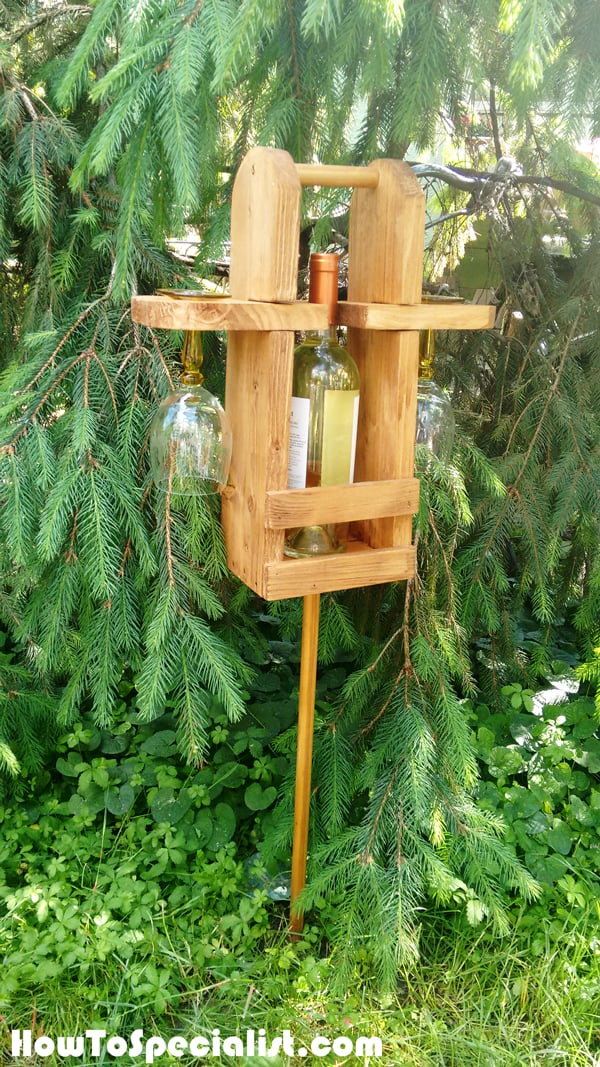

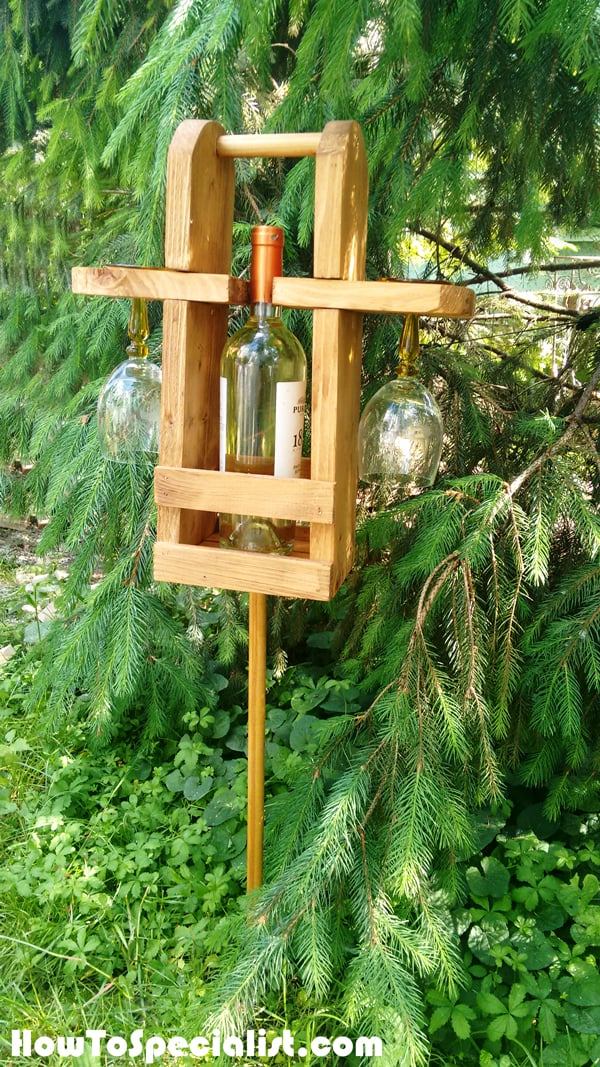
This is one of my favorite diy projects to date and I really love how this design came out. The sliding support is a personal touch that adds character to the project and makes it unique. If you are looking for an interesting gift idea for the loved one, you should give this outdoor wine caddy a chance. This project cost me under 15 $ to make so it is also budget friendly.
Thank you for reading our project about how to build an outdoor wine caddy and I recommend you to check out the rest of the projects. Don’t forget to LIKE and SHARE our projects with your friends, by using the social media widgets. SUBSCRIBE to be the first that gets our latest projects.
