This step by step woodworking project is about how to build a picnic shelter. If you want to create a leisure area in your backyard, you should consider building a simple pavilion. This project features instructions for building a wide shelter made from common materials. Follow the building codes and hire a professional contractor if you don’t have the right skills to undertake the project on your own.
A 14×12 wooden shelter for your backyard is a construction that can be built by any woodworking amateur in a few weeks, but there are many techniques you have to master before undertaking the project. However, building a gazebo, a pergola or even a backyard kitchen with an attached roof could be projects that are more suitable for your needs. It’s you job to decide what design does best for you.
We recommend you to invest in the best materials you could afford. Therefore, you should buy weather-resistant lumber, such as pressure-treated lumber, pine or cedar. Always take accurate measurements before adjusting the size of the components at the proper size. Drill pilot holes trough the components before inserting the wood screws, to prevent the wood from splitting. See all my Premium Plans in the Shop.
Made from this plan
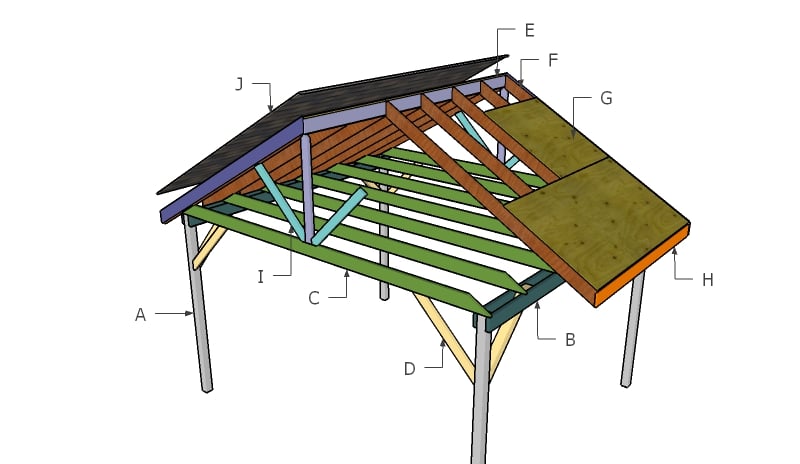
Building a picnic shelter
Materials
- A – 4 pieces of 4×4 lumber – 132″ long (36″ in the ground) POSTS
- B – 4 pieces of 2×6 – 144″ long SUPPORT BEAMS
- C – 8 pieces of 2×6 – 171″ long BOTTOM RAFTERS
- E – 2 pieces of 2×4 lumber – 44 1/4″ long, 2 pieces – 24″ long, 1 piece of 2×6 lumber – 144″ long TOP RIDGE
- F – 16 pieces of 2×6 lumber – 119 1/4″ long RAFTERS
- post anchor
- 2 1/2″ screws, 1 5/8″ screws
- stain, glue, putty
Tools
- Safety gloves, glasses
- Miter saw, jigsaw
- Chalk line, tape measure, spirit level, carpentry pencil
- Drill machinery and drill bits
Tips
- Add trims to the pavilion
- Secure the roofing slats to the structure with galvanized screws
Time
- One Week
Related
- PART 1: How to build a picnic shelter
- PART 2: Picnic shelter roof plans
How to build a picnic shelter
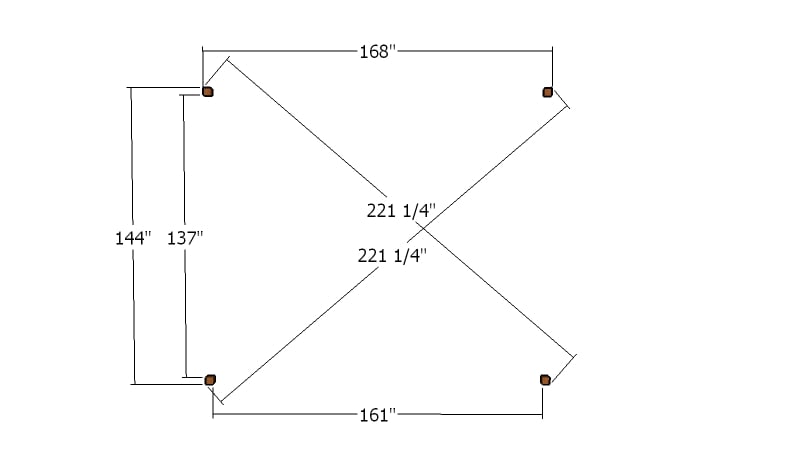
Laying out the pavilion
First of all, you need to layout the posts for the picnic shelter in a professional manner. Use batter boards and string to layout everything with attention. Make sure the diagonal are equal and apply the 3-4-5 rule to each corner, to check if they are square.
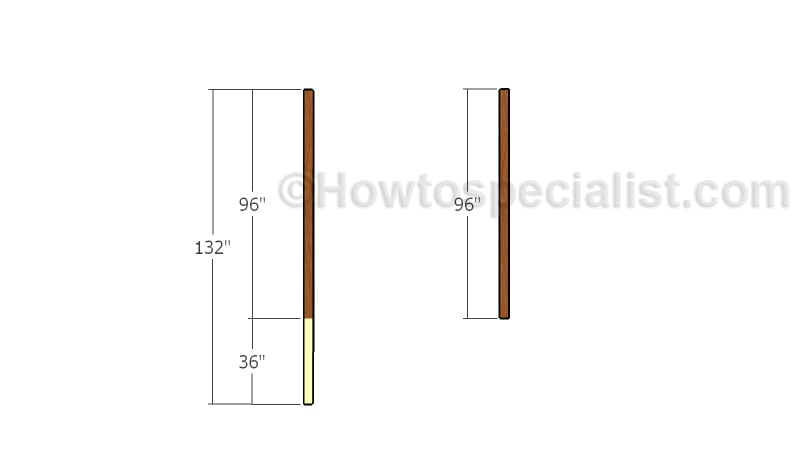
Building the posts
Use 4×4 lumber for the posts. You need to set the posts for about 2-3′ in the ground, so make sure you add this to the length of the posts, before making the cuts. You can adjust the height of the picnic shelter to suit your needs.
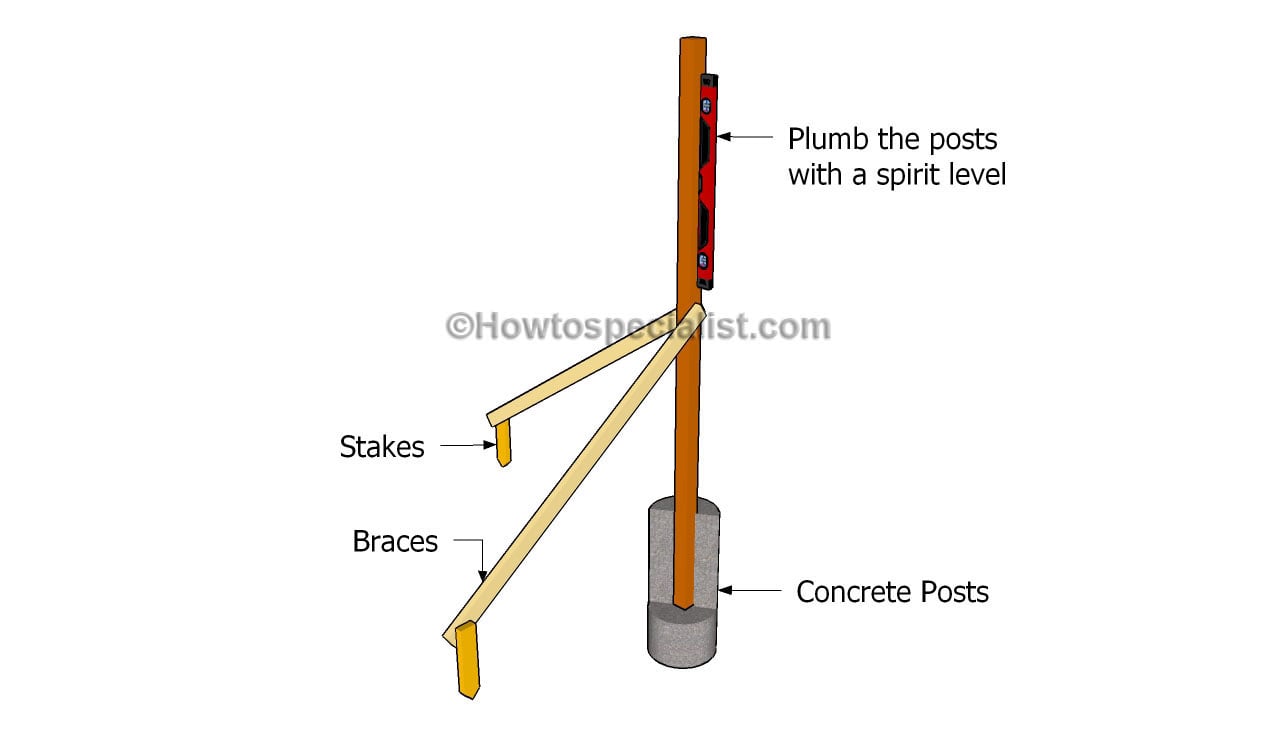
Fitting the posts
After marking the location of the posts, you need to dig 2-3′ deep holes in the ground, using a post hole digger. Install tube forms and fit the posts into place, making sure they are perfectly plumb. Secure the 4×4 posts with braces before filling the forms with concrete.
Fitting the support beams
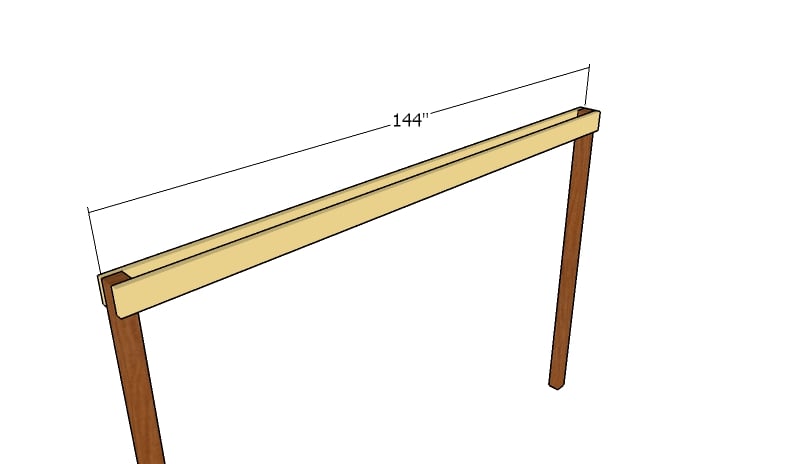
Afterwards, you need to install the 2×6 support beams to the top of the posts, on both sides of the picnic shelter. Clamp the beams to the posts and use a spirit level to check if the beams are horizontal. Use a carpentry square to check if all the corners are right-angled. Drill pilot holes through the beams and through the posts. Insert 7″ carriage bolts and lock the components together tightly.
Bottom rafters
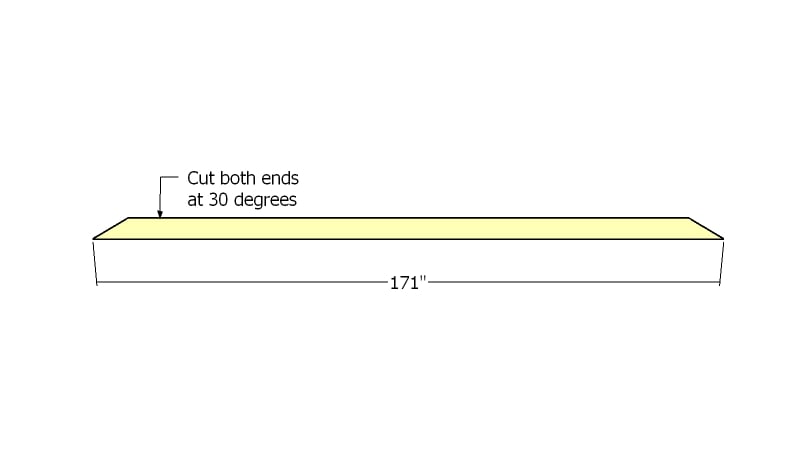
Build the bottom rafters from 2×6 lumber. Cut both ends of the rafters at 30 degrees. Smooth the cut edges with sandpaper.
Fitting the bottom rafters
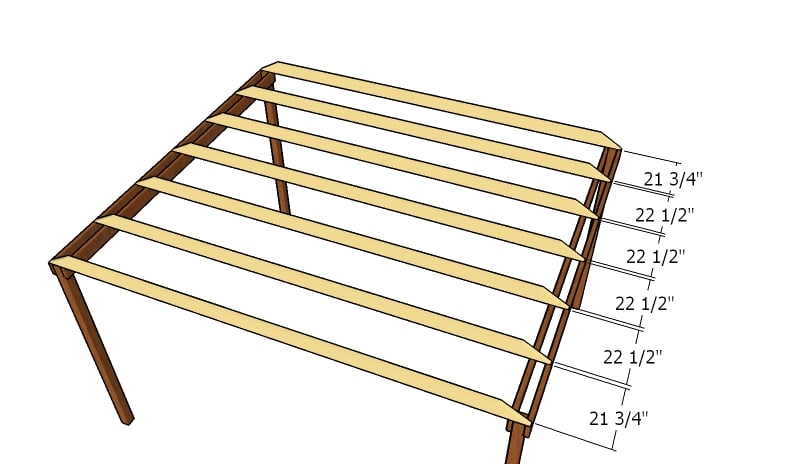
Place the support rafters equally-spaced (24″ on center) and leave no gaps between the components. Use metal connectors to lock the rafters to the support beams. In addition, drill pilot holes through the rafters and insert 3 1/2″ screws into the support beams.

Ridge support
In order to enhance the rigidity of the picnic shelter, we recommend you to fit 2×4 supports to both the front and the back of the shelter.
Ridge support
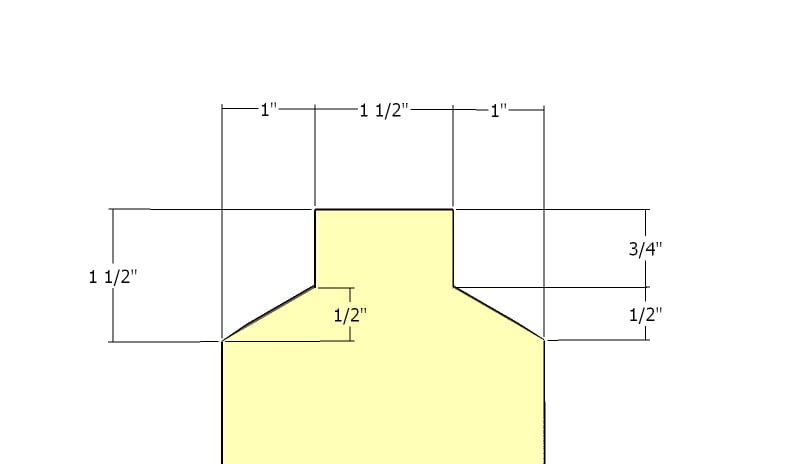
Mark the cut lines to the slats and get the job done with a saw. Smooth the edges with fine-grit sandpaper and remove the residues with a damp cloth.
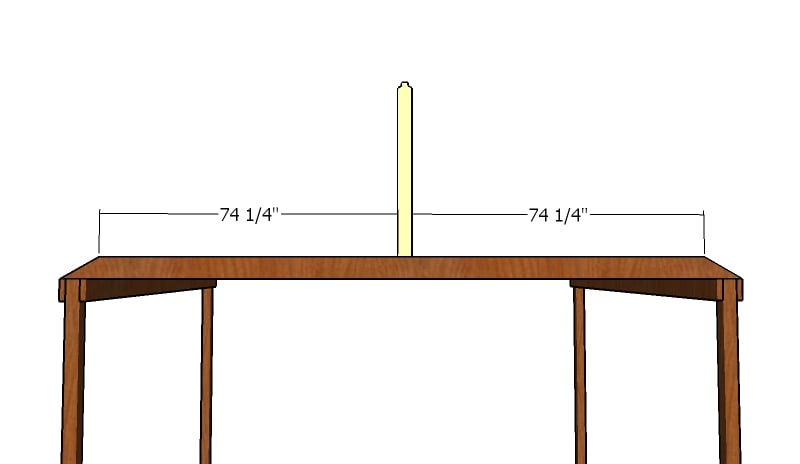
Fitting the top ridge supports
Center the supports to the end bottom rafters and plumb them with a spirit level. Make sure the corners are square before locking the supports into place with metal plates. In addition, drill pilot holes and insert 3 1/2″ screws to lock the supports into place.
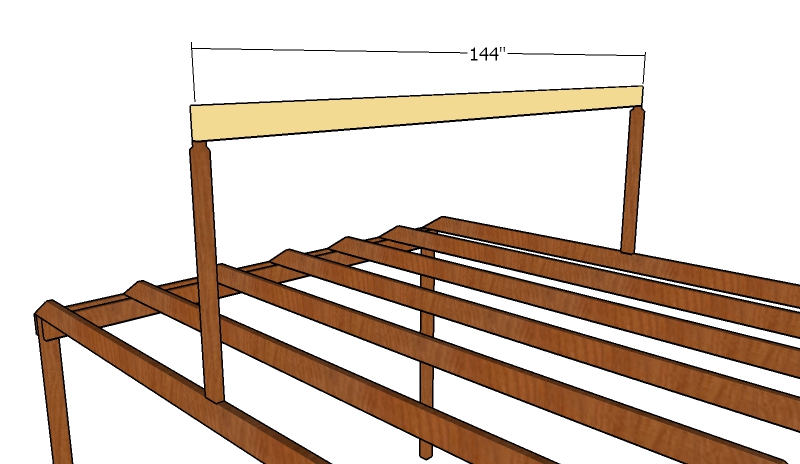
Fitting the top ridge
Fit the supports to the end bottom rafters. Make sure the corners are square and plumb the support with a spirit level. Align the edges with attention and use metal connectors to lock the supports into place. Attach the 2×6 top ridge to the supports. Make sure the corners are square.
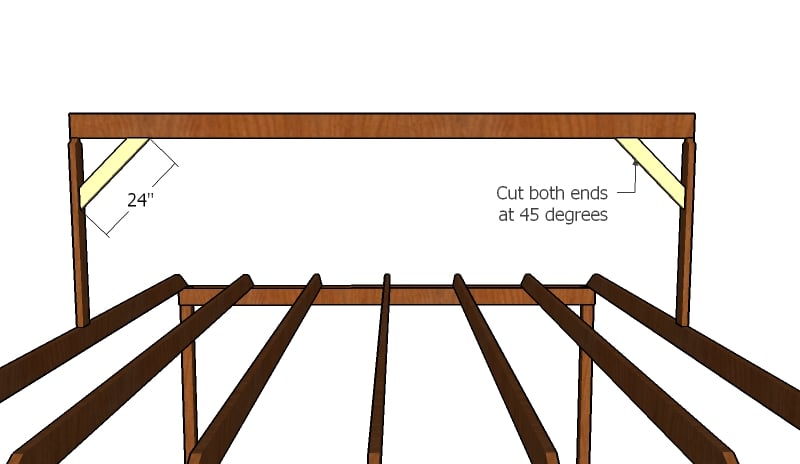
Fitting the top ridge braces
Build some braces for the top ridge from 2×4 lumber. Cut both ends of the braces at 45 degrees. Fit the braces to the top ridge and lock them into place using 3 1/2″ screws, after drilling pilot holes.
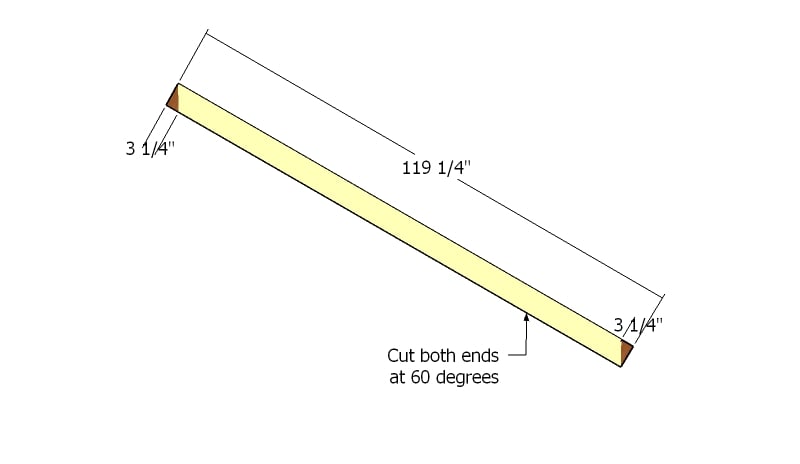
Building the rafters
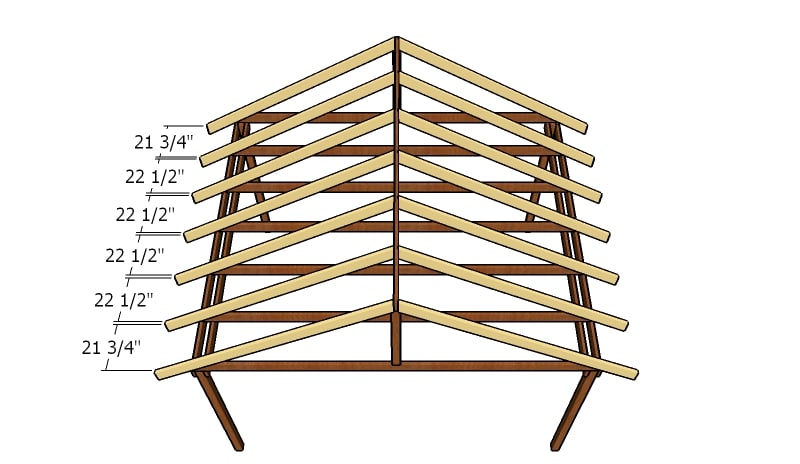
Next, you need to build the rafters for the shelter from 2×6 lumber. Cut both ends of the slats at 60 degrees.
Fitting the rafters
Place the rafters to the support beams, making sure they are equally-spaced. Use metal connectors to secure the rafters to the support beams and 3 1/2″ screws to lock the opposite ends to the top ridge. Drill pilot holes before inserting the screws, to prevent the wood from splitting.

Wooden picnic shelter plans
Make sure you check out PART 2 of the project, to learn everything you need to know about taking care of the finishing touches (roofing, braces, trims).
Building a 14×12 outdoor pavilion
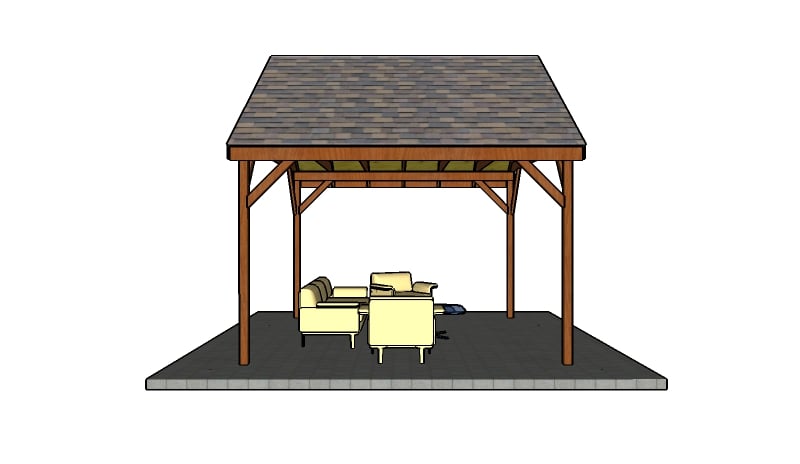
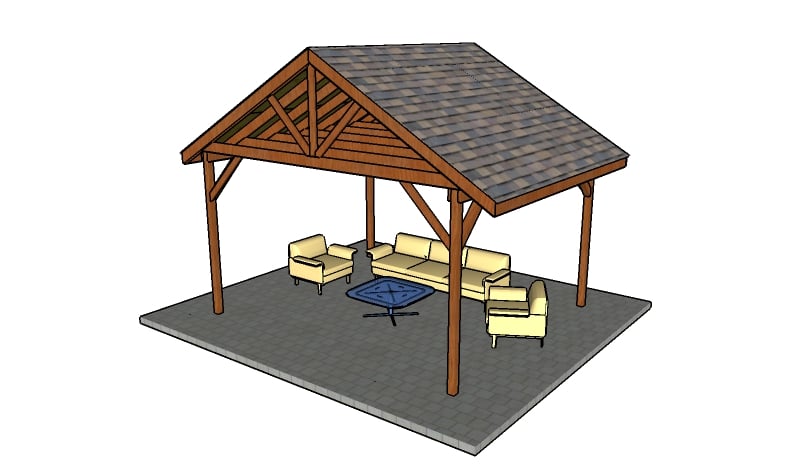
The picnic shelter has a nice design and can match the style of any backyard. Moreover, you can adjust the size of the pavilion, if you want more space for leisure.
How to build a picnic shelter
Thank you for reading our project about picnic shelter building plans and we recommend you to check out the rest of the projects. Don’t forget to LIKE and SHARE our projects with your friends, by using the social media widgets. SUBSCRIBE to be the first that gets our latest projects.
<< Previous | Next >>

11 comments
Thanks so much!!!
Welcome! Part 2 coming tomorrow.
A couple of typos in your Materials list: C should say 2×6, maybe? And F should say 119 1/4 “. Thank you for the excellent instructions and diagrams!
Thank you for letting me know. I updated the list with the right measurements and materials.
30 degrees for bottom rafters? That doesnt seem right. Roof would be pretty tall
Any help?
This is my design, but you can make adjustments to suit your needs.
Hi Jack,
Are the bottom rafters necessary for support? I want to build this over our hot tub and would prefer not to have the cross rafters for aesthetic reasons. I’ve seen structures without them but don’t want to compromise the stability if this design requires them.
Yes. Check out these plans: http://myoutdoorplans.com/pergola/16×16-outdoor-pavilion-plans/
Great Plans, thank you. How long would the Rafters be for a 10’x8′ instead of this 14×12?
Can you provide a more accurate description of the metal plates to connect the top rafters to the bottom rafters
This: https://amzn.to/2RLocs4