This step by step diy project is about pergola with swing plans. This backyard project features detailed instructions regarding the construction of a basic pergola with swing. Don’t forget to take a look over this article and this article, in order to see how to build the swing bench. Check out the rest of the outdoor projects that are featured on our site.
You should always plan everything from the very beginning, in order to prevent costly mistakes and to save time. In most of the cases, you need a friend to give you a hand when assembling the pergola with swing. Invest in high quality lumber and plywood, as the components will be exposed to bad weather. Protect the components with appropriate paint or stain.
There are a few tips that you should take into account, if you want to get a professional result. Therefore, take accurate measurements and use professional tools when making the cuts or when drilling pilot holes. Align the components at both ends and add waterproof glue to the joints, if you want to create a rigid structure. See all my Premium Plans in the Shop.
Made from this plan
Pergola with swing plans
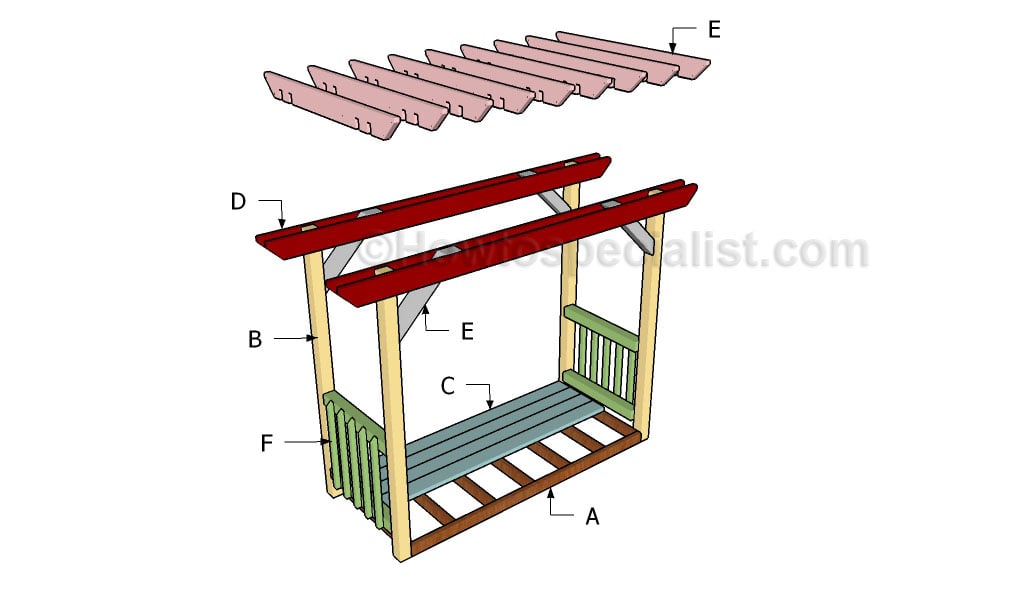
Building a pergola with swing
Materials
- A – 7 pieces of 2×4 lumber – 37″ long, 2 pieces – 89″ long FRAME
- B – 4 pieces of 4×4 lumber – 84 1/2″ long POSTS
- C – 7 pieces of 2×6 lumber – 89″ long FLOORING
- D – 4 pieces of 2×6 lumber – 120″ long SUPPORT BEAMS
- E – 4 pieces of 4×4 lumber – 27 1/2″ long BRACES
- E – 9 pieces of 2×6 lumber – 60″ long RAFTERS
- F – 4 pieces of 4×4 lumber – 33″ long, 10 pieces of 2×2 lumber – 28 1/2″ long RAILINGS
- 6 pieces of 2×4 lumber – 8 ft
- 7 pieces of 4×4 lumber – 8 ft
- 7 pieces of 2×6 lumber – 8 ft
- 9 pieces of 2×6 lumber – 10 ft
- 3 pieces of 2×2 lumber – 10 ft
- rafter ties, 1 1/2″ structural screws
- 8″ screws
- 2 1/2″ screws, 3 1/2″ screws
- 9 pieces of 7″ carriage bolts
- paint, glue
- post to beam connectors
Tools
- Safety gloves, glasses
- Miter saw, jigsaw
- Chalk line, tape measure, spirit level, carpentry pencil
- Drill machinery and drill bits
Tips
- Use a good miter saw to make the angle cuts
- Drill pilot holes before inserting the screws
Time
- One Weekend
Related
How to build a pergola with a swing
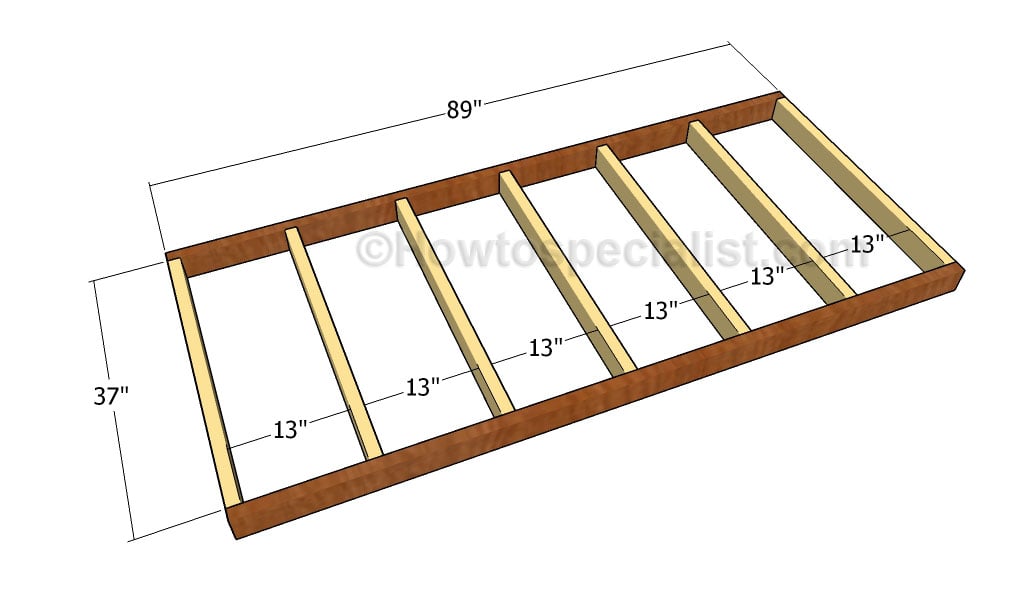
Building the floor frame
The first step of the project is to build the floor frame for the pergola. Cut the components out of 2×4 lumber and drill pocket holes at both ends of the 37″ long joists. Align everything with attention and insert 2 1/2″ screws to create rigid joints. Add glue to the joints and remove the excess with a damp cloth.
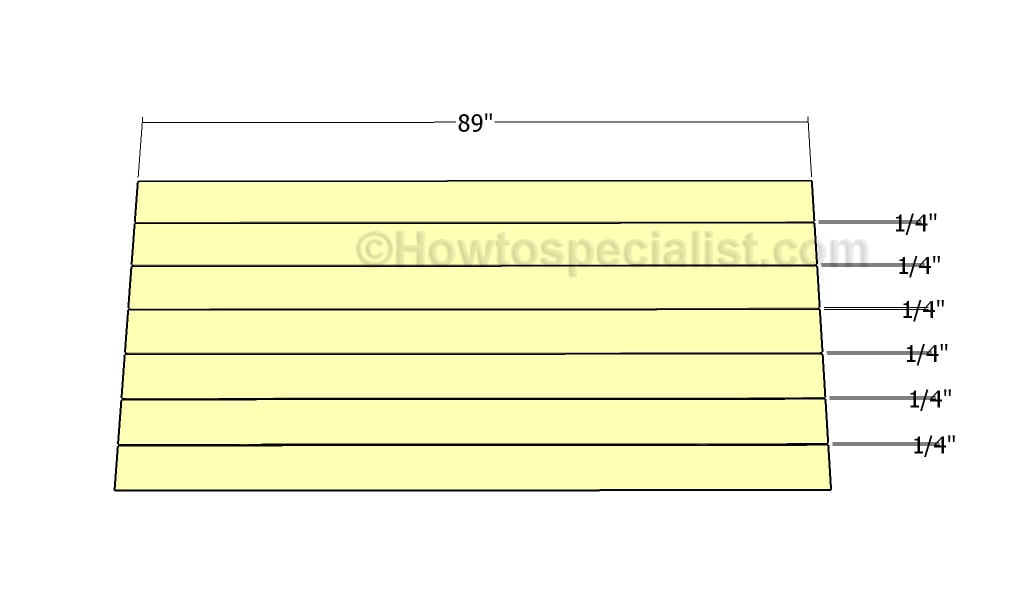
Attaching the decking boards
Next, fit the 1×6 or 2×6 decking boards to the floor frame. Place a piece of 1/4″ plywood between the boards to make sure the gaps are consistent. Drill pilot holes and secure the boards to the joists using appropriate screws.
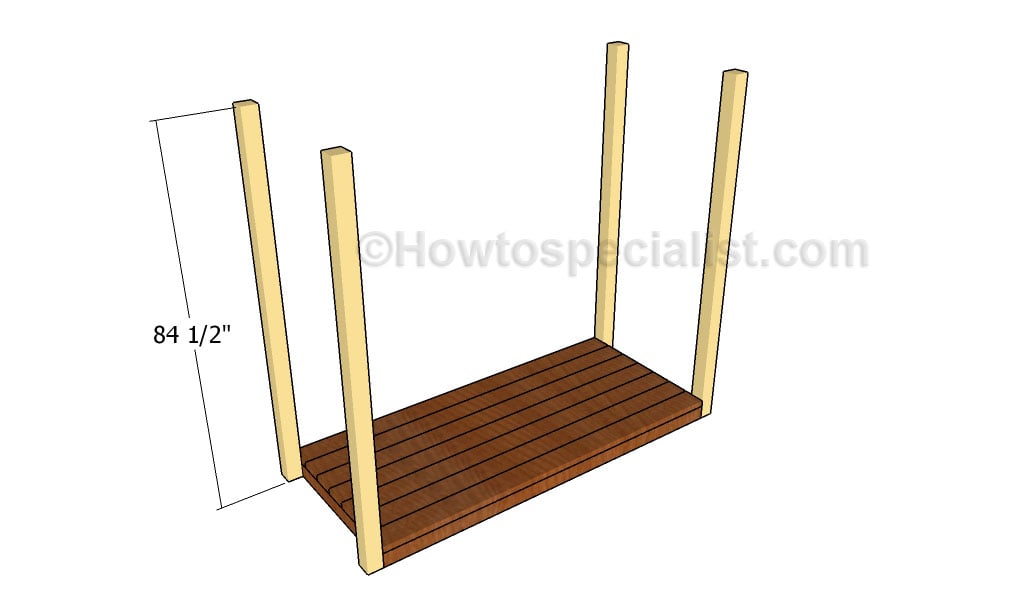
Attaching the posts
Next, attach the 4×4 posts to the floor of the frame. Drill pilot holes through the posts and through the joists. Insert 5 1/2″ carriage bolts to lock the posts to the joists in a professional manner. Plumb the posts with a spirit level, before drilling the pilot holes.
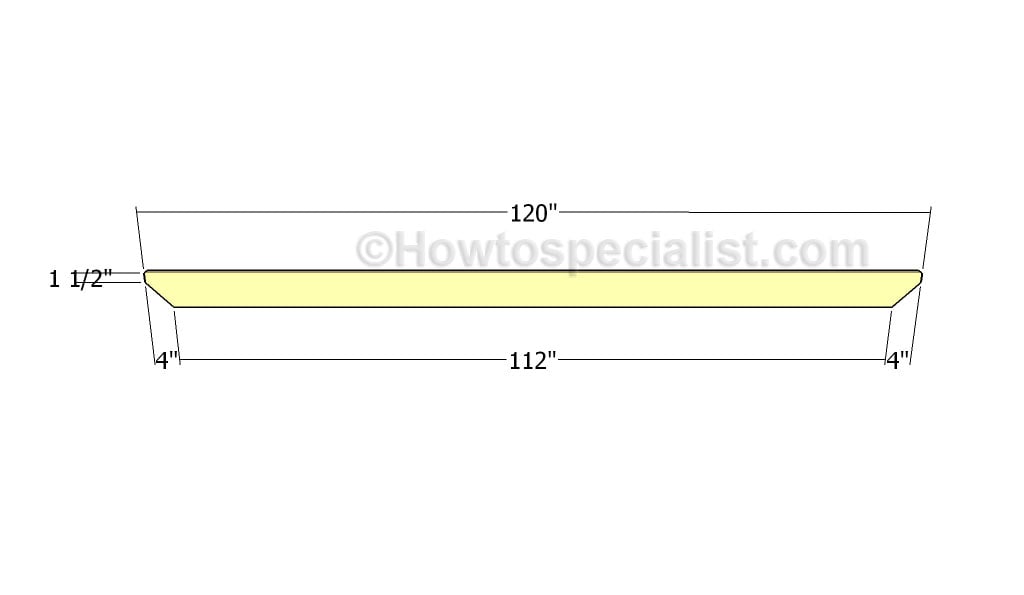
Building the support beams
The next step of the project is to build the supports beams for the pergola with arbor. Cut both ends of the 2×6 beams in a decorative manner and smooth the cut edges with fine-grit sandpaper.
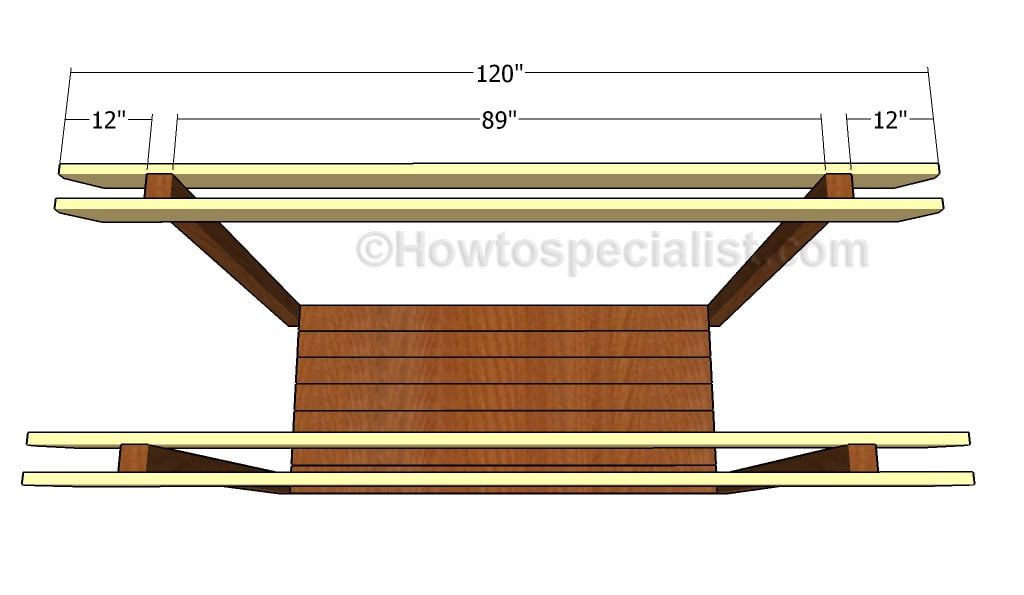
Fitting the support beams
Attach the support beams to the top of the posts and secure them tightly into place, by clamps. Make sure the corners are square and check if the support beams are horizontal. Drill pilot holes through the beams and through the posts. Insert 7″ carriage bolts to lock everything together tightly.
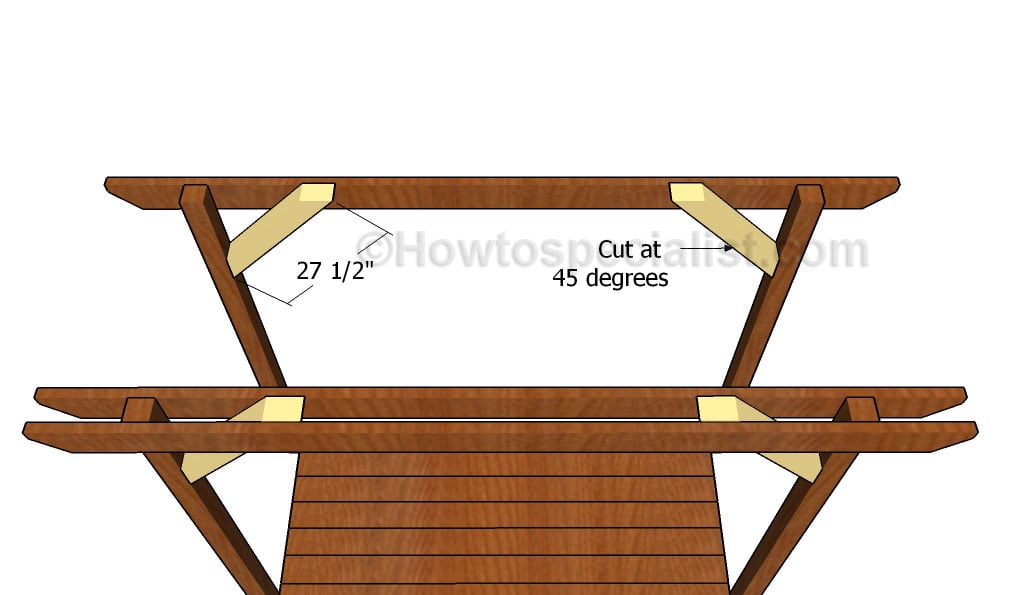
Fitting the braces
In order to enhance the rigidity of the structure, we recommend you to install 4×4 braces. Cut both ends of the braces at 45 degrees and fit them to the pergola, as described in the diagram. Drill pilot holes through the braces and secure them to the structure using 3 1/2″ screws. Make sure the corners are right-angled before fitting the braces.
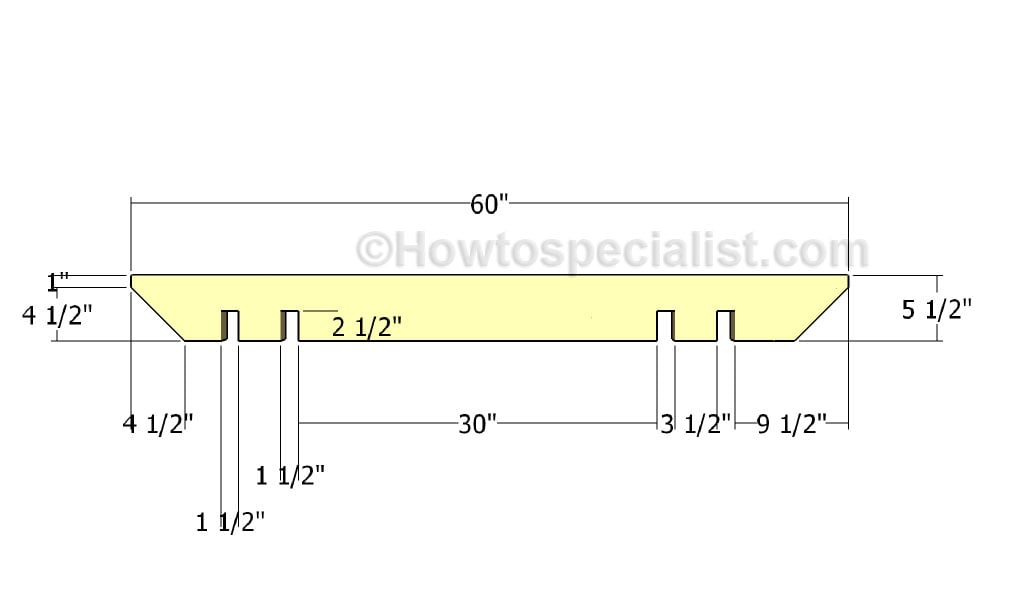
Building the rafters
Continue the project by building the rafters for the simple pergola. Use 2×6 lumber to build the components. Mark the cut lines and get the job done with a circular saw. Remove the excess material with a chisel and smooth the recess with sandpaper.
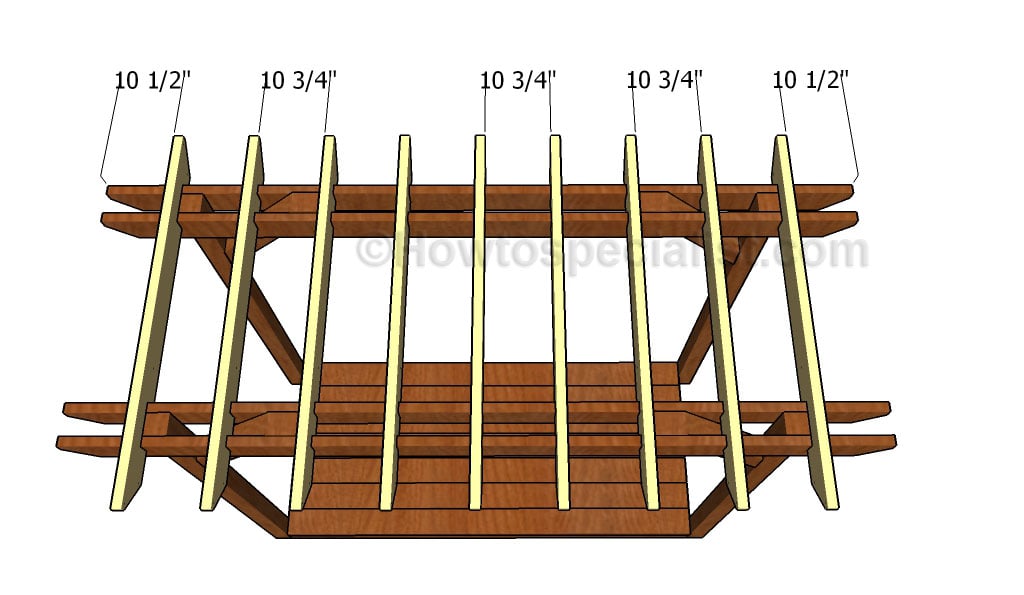
Fitting the rafters
Fit the rafters to the support beams, making sure you place them equally-spaced. Drill pilot holes through the top rafters and secure them to the support beams by using 8″ screws. Alternatively, you can use rafter ties and 1 1/2″ screws.
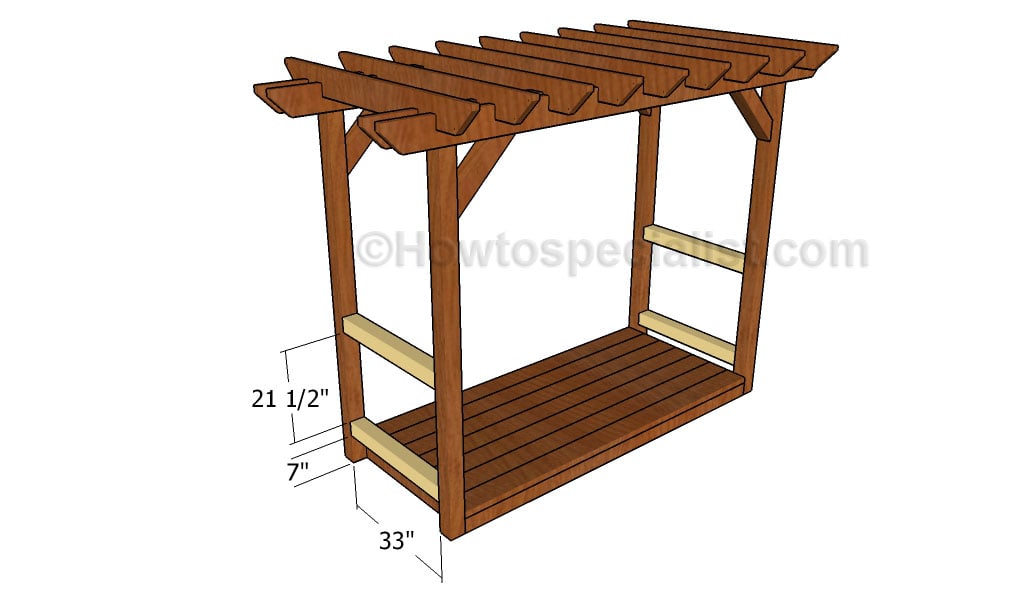
Fitting the railings
One of the last steps of the project is to build the railings for the pergola with swing. Build the supports out of 4×4 lumber. Drill pocket holes at both ends and secure them to the posts using 2 1/2″ screws. Make sure the corners are square and leave no gaps between the components.
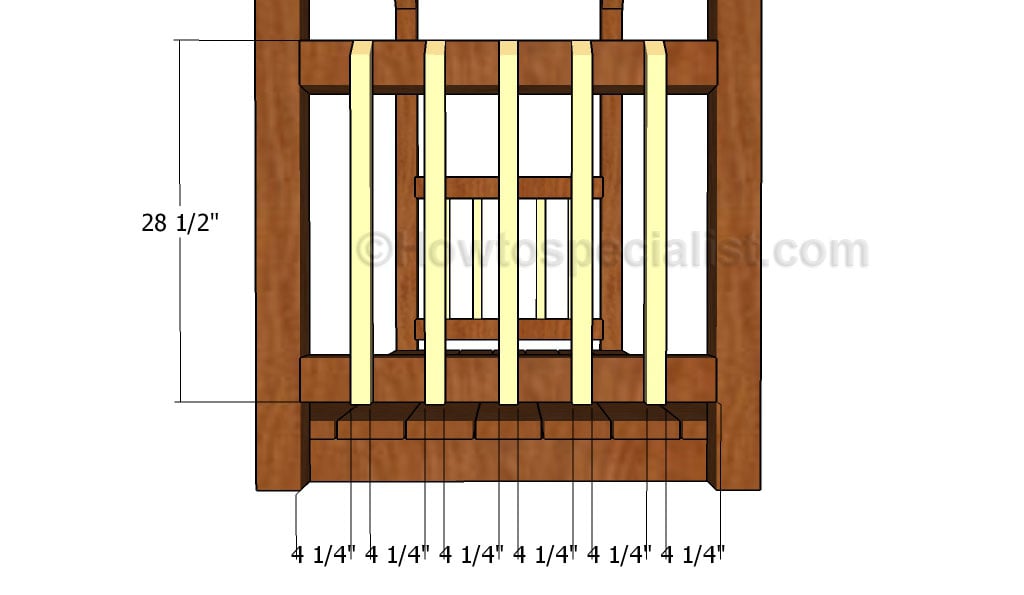
Attaching the balusters
Build the balusters out of 2×2 lumber. Cut the top at 45 degrees and secure them into place using 2 1/2″ screws, after drilling pilot holes. Drilling the pilot holes is needed, to prevent the wood from splitting.
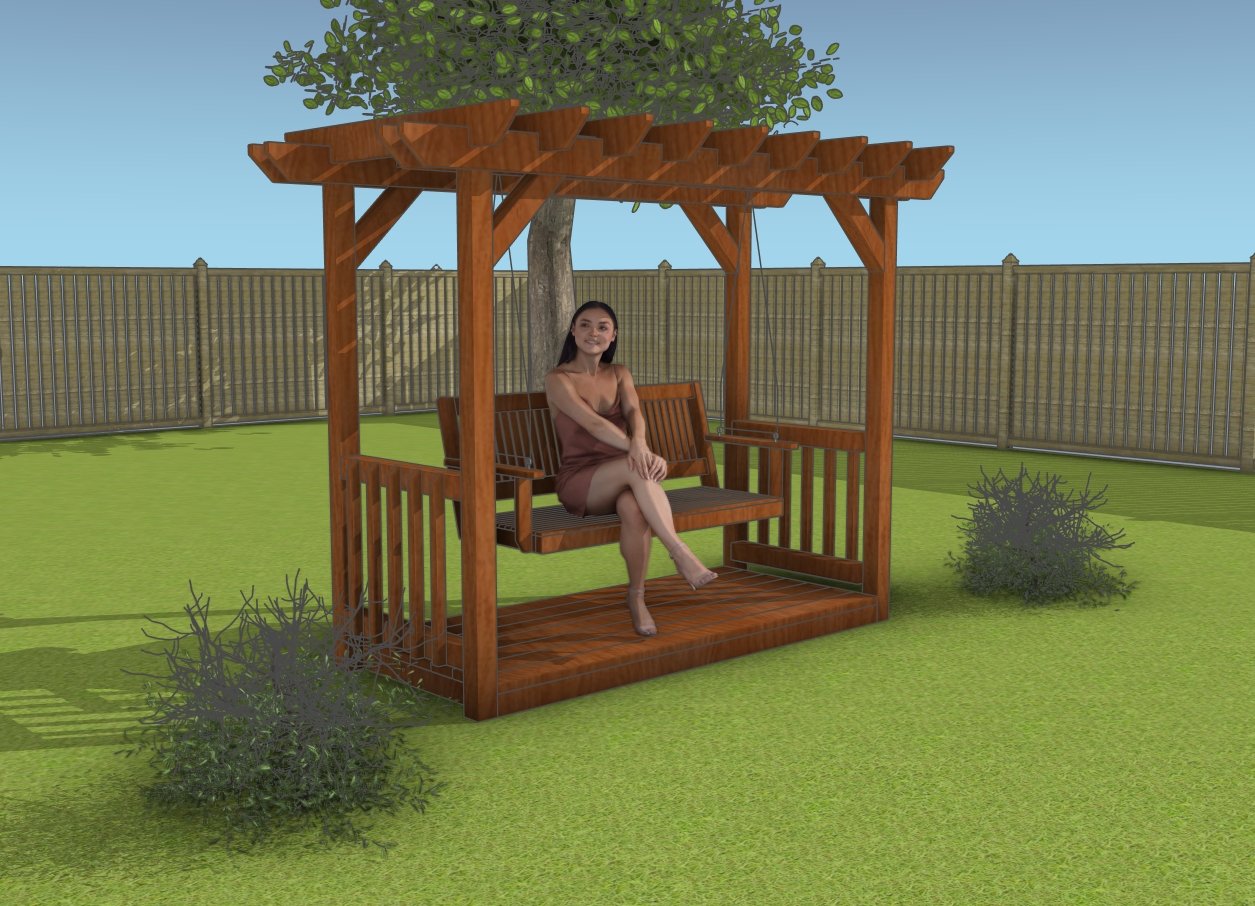
Pergola with swing plans
Imagine building an arbor pergola with a deck base that holds a swing—a dreamy, inviting escape right in your own backyard! This unique structure combines the elegance of an arbor with the charm of a pergola, creating an open, airy space that draws you in with the promise of endless relaxation. The sturdy deck base gives you a clean, elevated foundation, perfect for hosting your favorite swing, where you can sway gently in the breeze or cozy up with a book.
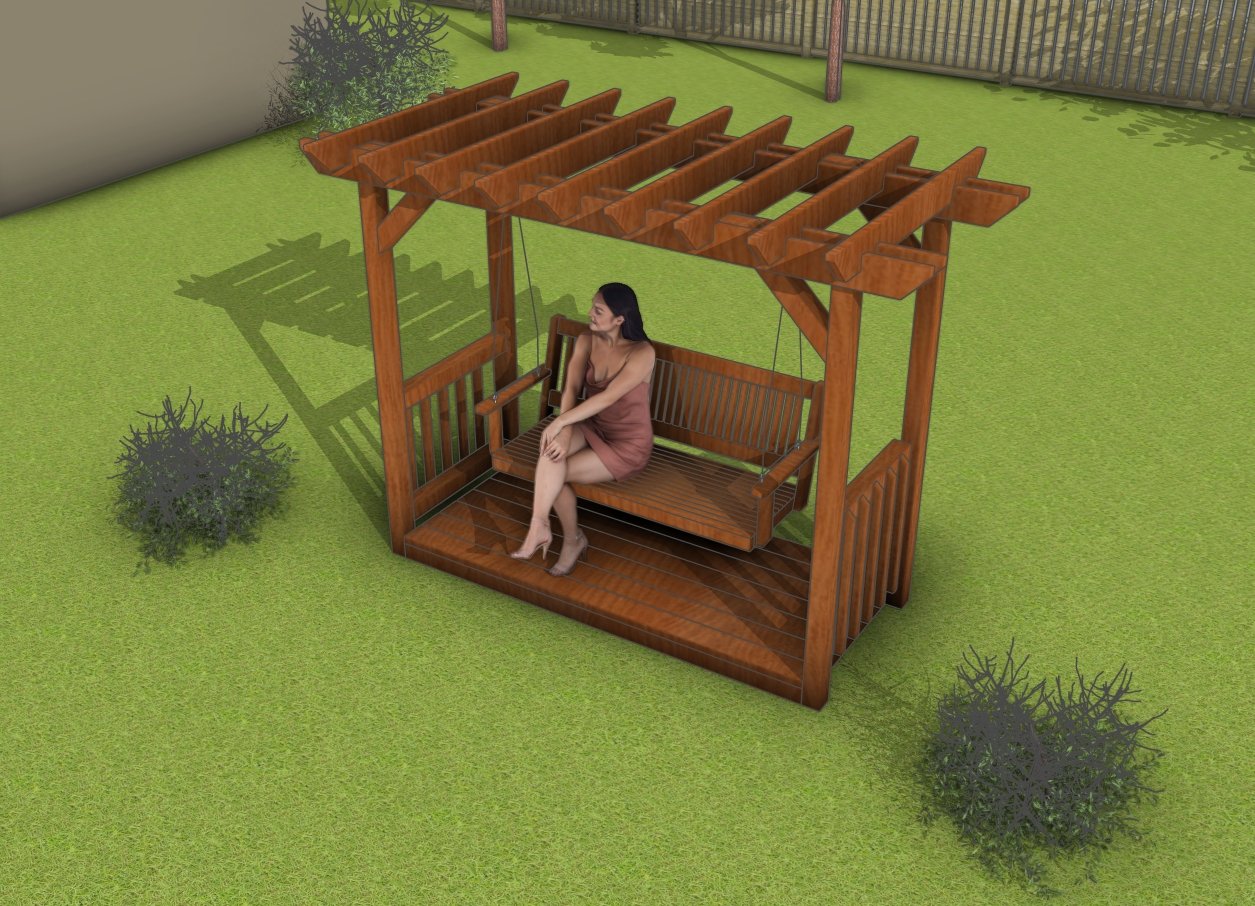
How to build an arbor swing
With the overhead arbor, you have a canvas for trailing vines or fairy lights that add a whimsical touch as they weave above, creating a dappled light show that dances around you. It’s more than just a build; it’s a little slice of paradise, a corner that’s all yours to unwind, dream, and make memories in the most delightful way!
Last but not least, we recommend you to take care of the finishing touches. In order to get a professional result, fill the holes and the gaps with wood filler and let it dry out for a few hours. Check if there are protruding screws and fix this issue, if necessary.
Thank you for reading our project about pergola with swing plans and we recommend you to check out the rest of the projects. Don’t forget to SHARE and LIKE our projects with your friends, by using the social media widgets, if you want to help us keep adding free woodworking plans.

16 comments
Regarding instruction # 3…..how are you able to attach and tighten carriage bolts in the posts without having access to the threaded end of the bolt?
You need to lay the posts on the ground and place the frame perpendicular to the ground. In this manner, you will have access under the frame so you can tighten the nuts.
How does the swing attach?
You secure it to he rafters with appropriate hardware.
Are there stability issues when the swing rocks? I’m trying to understand if the unit requires additional anchoring or can just sit on a concrete patio. Thanks for the plan – am anxious to try it.
It works good like this, but if you could secure it to the concrete slab, it will be even better.
Whats the recommended surfaces to put this on and not having to worry about the wood. Planning on putting this ontop of some packed 1/4″ limestone and having a holland paver patio infront of it. But not on it. Thanks
That sounds good. If you use pressure treated lumber for the base, it should last for many many years.
Hello Jack, a little confused on how the rafters attach to the support beams. Are you drilling down through the rafters and screwing them to the support beams. It seems like only a 1/2″ of the screw would bite through the beam. Is that correct? I like the plan and would like to try it without the floor and just put the posts in the ground with concrete. Thanks
You could do that with longer screws or you could drill the pilot holes at angle through the sides. Alternatively, you could also use rafter ties: http://amzn.to/2sV4kUz
Thank you for taking the time to provide the details on this project.
But I have a correction:
Under Materials: A – shouldn’t that be 2 pieces of 2×4 at 89″ and 7 pieces at 37″? Or should they be 38″ as it is in the diagrams?
I’ve updated the cut list. Thank you.
Is it one carriage bolt per 4×4 post when attaching to the floor?
I would go for 2 bolts for each joint.
Where do the chains attach for swing??
Your pergola with swing plans are fantastic—combining relaxation and style seamlessly! The detailed instructions make this DIY project approachable and inspiring.