This step by step diy project is about how to build a shed door and about installing the trims. Building a shed door is easy, if the right techniques are used, but you also need to plan everything form the very beginning. Use at least three hinges and a door latch to fit the shed door to the jams properly. Work with great care and attention, in order to prevent costly mistakes.
There are several aspects you should take into when building a shed door or when installing the corner trims. First of all, you need to use quality materials, otherwise the shed door won’t have a nice appearance and won’t be durable. Build the door using the piece of plywood cut out in the previous steps of the project. Attach 1×4 trims to the door, in order to enhance the rigidity of the frame.
Align the components into place before locking them with screws. Always align the trims, as well as the door, before attaching them to the shed. Use a spirit level to check if the door is plumb and the top trims are horizontal. Fill the holes with wood filler and smooth the surface with medium-grit sandpaper, if you want to get a professional result. See all my Premium Plans in the Shop.
Made from this plan
In order to build a shed door, you need to use the following:
Materials
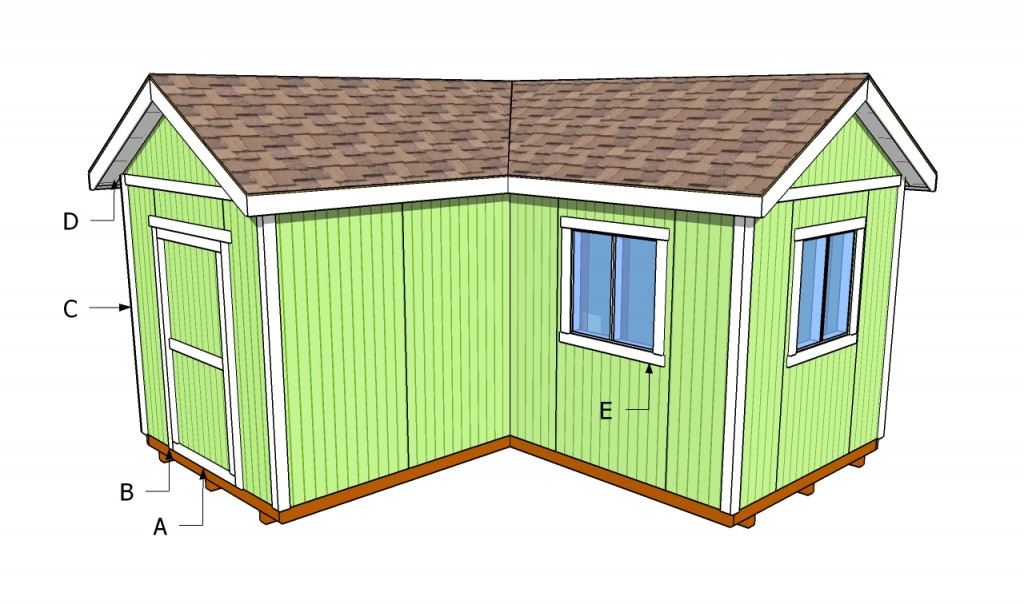
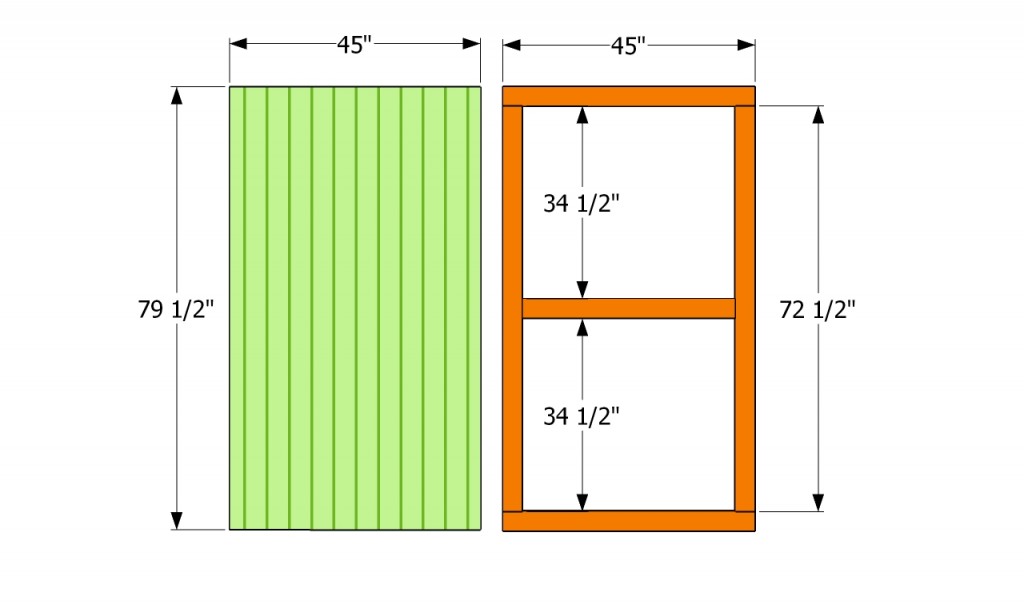
- A – 2 pieces of 1×4 lumber – 72 1/2″, 2 pieces – 45″, 1 piece – 38″ SHED DOOR
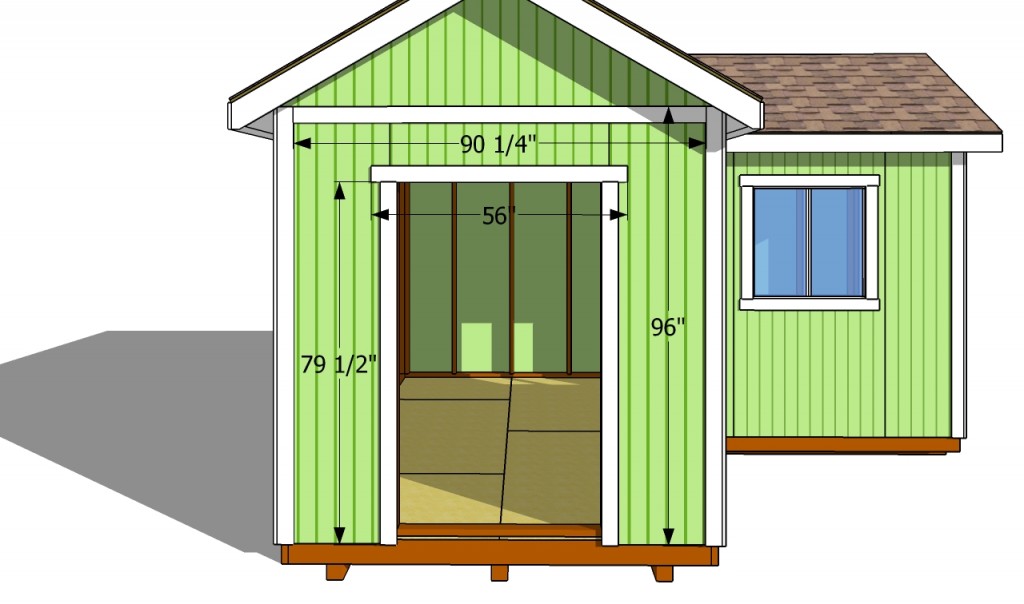
- B – 2 pieces of 1×4 lumber – 79 1/2″, 1 pieces of 1×4 lumber – 56″ DOOR JAMS
- C – 10 pieces of 1×4 lumber – 96″, 2 pieces of 1×4 lumber – 90 1/4″ TRIMS
- D – 1/4″ plywood SOFFIT
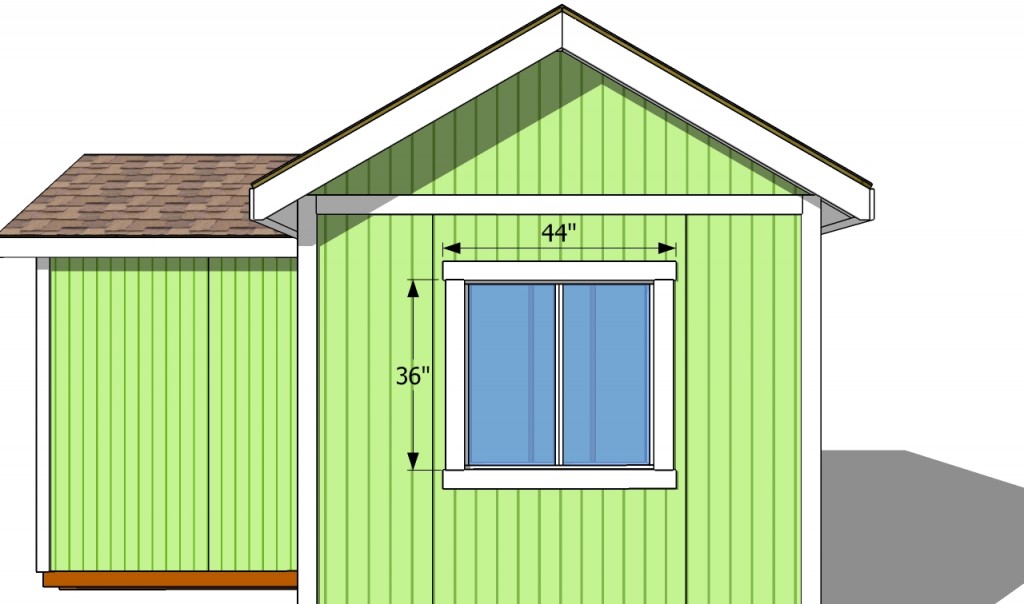
- E – 4 pieces of 1×4 lumber- 36″, 4 pieces of 1×4 lumber – 44″ WINDOW TRIMS
Tools
- Safety gloves, glasses
- Miter saw, jigsaw
- Chalk line, tape measure, spirit level, carpentry pencil
- Drill machinery and drill bits
Tips
- Apply several coats of wood stain to the wooden components
- Fit 1×6 trims to add character to your shed
Time
- One Day
Related
- Part 1: How to build a workshop
- Part 2: How to install siding on a shed
- Part 3: How to build an L-shaped roof
- Part 4: How to install roof decking
- Part 5: How to build a shed door
Building a shed door
Buidling a shed door
How to build a shed door
The first step of the woodworking project is to install the corner trims, as well as the door supports. As you can see in the image, you need to cut the components from 1×4 lumber and to attach them to the exterior siding with 1 1/2″ finishing nails. Make sure the trims are flush with the components, before locking them into place with nails.
Building a shed door is not as difficult as it might seem at first glance. First of all, you need to use the piec of wood that was cut out from the exterior siding in the previous steps of the project. Attach 1×4 trims to the exterior edges of the siding, in order to reinforce the door. Use 1 1/4″ finishing nails to secure the trims to the plywood sheet.
Fit the door inside the opening and secure it to the jambs, on one side, using metal hinges. Check if the door opens properly and make the necessary adjustments, if necessary. Ina ddition, don’t forget to install a door latch.
Continue the project by fitting the shed windows inside the opening. Afterwards, install 1×4 trims around the windows, if you want to enhance the look of your shed. Make sure the corners are right-angled and work with great care, as to prevent costly mistakes.
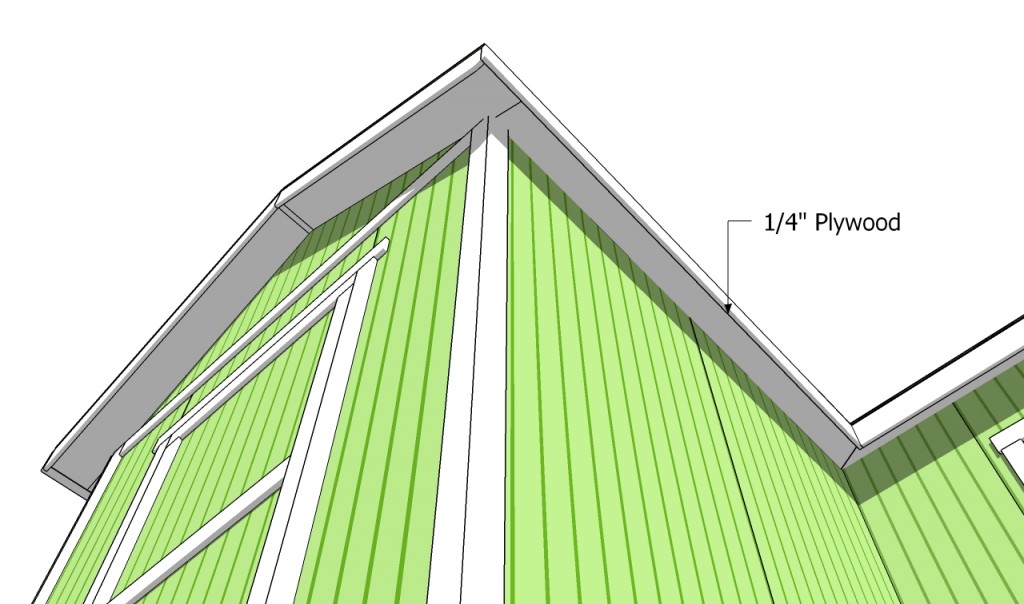
One of the last steps of the project is to install the soffit. In order to get a professional result, we recommend you to measure the overhang of the shed and to cut several pieces of 1/4″ plywood. Secure the plywood to the rafters with 1 1/4″ finishing nails, after aligning them at both ends.
Last but not least, we recommend you to take care of the finishing touches. Fill the holes with wood filler and let it to dry out for several hours. Afterwards, smooth the wooden surface with fine-grit sandpaper.
Thank you for reading our project about how to build a shed door and we recommend you to check out the rest of the projects. Don’t forget to share our projects with your friends, by using the social media widgets.
<< Previous | Next >>



1 comment
You are amazing. Those are the best articulated plans I’ve ever seen! For anything. I needed just this for the corner of my townhome yard to store gardening, camping, kayaking and cycling supplies. I wanted something to match the house, with siding and use the window side for an actual gardening, seeding, potting area. I’ll have expert help, but with these plans and guidance, I can work on it, too. Thank you so much for offering all these plans!