

This step by step woodworking project is about free hope chest plans. If you want to store toys or other small items in a beautiful wooden chest, you should pay attention to my plans. I have designed this hope chest so you can learn how to build one amazing piece of furniture and to have another storage alternative. Make sure you check out my top projects, for a healthy dose of building inspiration.
We recommend you to invest in the best materials you could afford. Therefore, you should buy quality lumber, such as pine, cedar or redwood. Always take accurate measurements before adjusting the size of the components at the proper size. Drill pilot holes trough the components before inserting the wood screws, to prevent the wood from splitting. See all my Premium Plans in the Shop.
Made from this plan
Building a hope chest
Materials
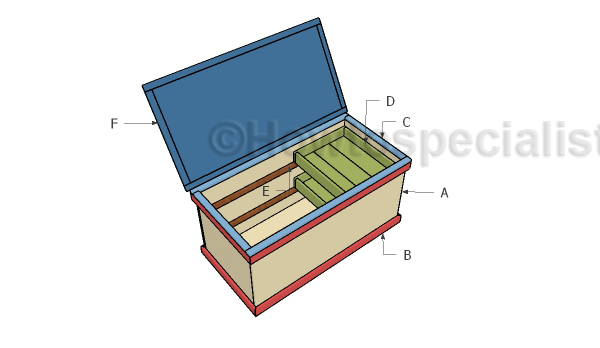
- A – 2 pieces of 3/4″ plywood – 22″x48″ long, 2 pieces – 22″x22″ long, 1 piece – 23 /1/2″x48″ long FRAME
- B – 4 pieces of 1×3 lumber – 49 1/2″ long, 4 pieces – 25″ long TRIMS
- C – 2 piece of 1×2 lumber – 22″ long, 2 pieces – 49 1/2″ long TRIMS
- D – 6 pieces of 1×6 lumber – 20 1/4″ long, 4 pieces of 1×4 lumber – 18″ long, 4 pieces – 20 1/4″ long TRAYS
- E – 4 pieces of 1×2 lumber – 46 1/2″ long CLEATS
- F – 1 piece of 3/4″ plywood – 23 1/2″x48″ long, 2 pieces of 1×2 lumber – 23 1/2″ long, 2 pieces – 51″ long LID
- 4 pieces of 1×3 lumber – 8′
- 6 pieces of 1×2 lumber – 8′
- 2 pieces of 1×6 lumber – 6′
- 2 pieces of 3/4″ plywood- 4’x8′
- piano hinge, safety hinge
- 100 pieces of 1 1/4″ pocket screws
- 200 pieces 2″ brad nails, 1 1/4″ brad nails
- wood glue, wood filler
- stain, spar varnish
Tools
- Safety gloves, glasses
- Miter saw, jigsaw
- Chalk line, tape measure, spirit level, carpentry pencil
- Drill machinery and drill bits
Time
- One Day
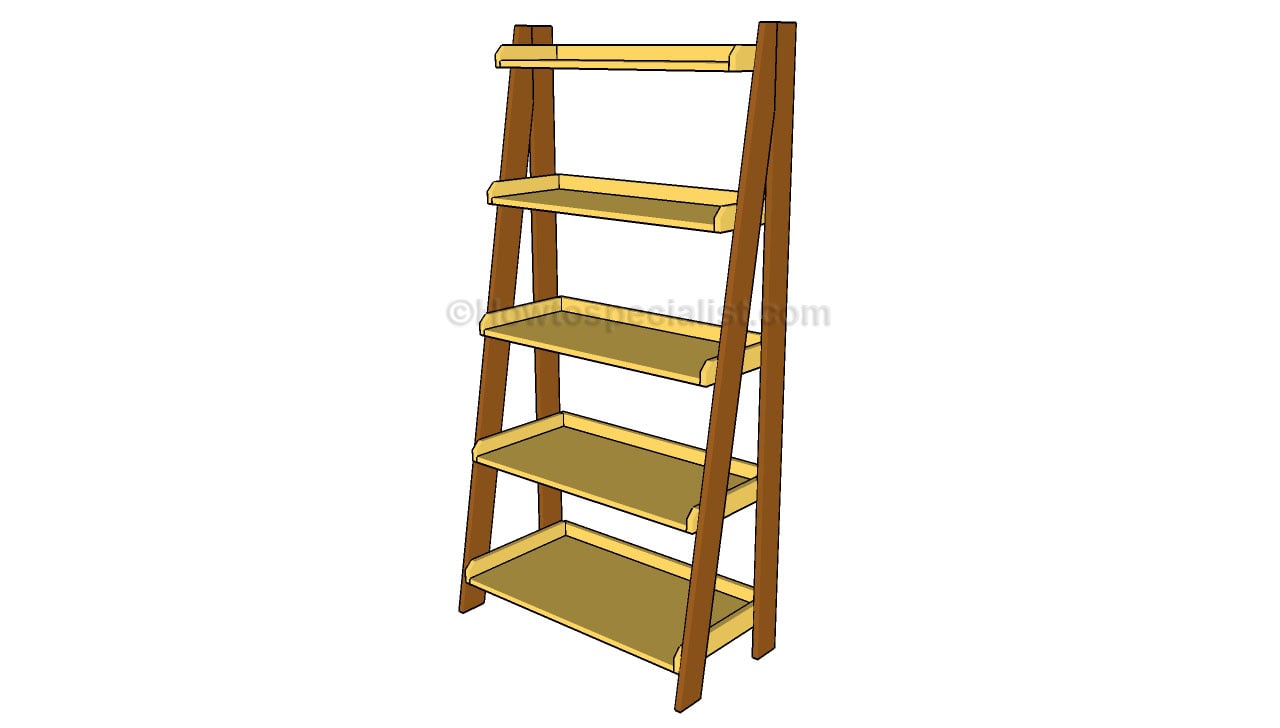
Free Hope Chest Plans
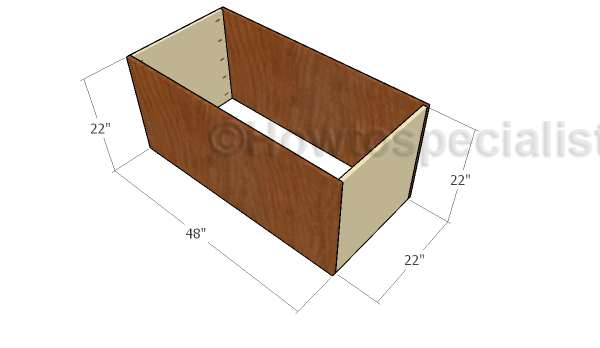
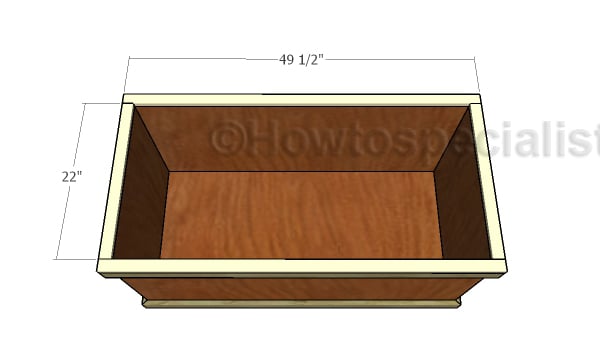
Building the frame of the hope chest
The first step of the project is to build the frame for the chest. Cut the panels from 3/4″ panels making sure you smooth the edges with sandpaper. Drill pocket holes along the sides of the small panels, align the edges flush and insert 1 1/4″ screws to lock everything together tightly. Add glue to the joints.
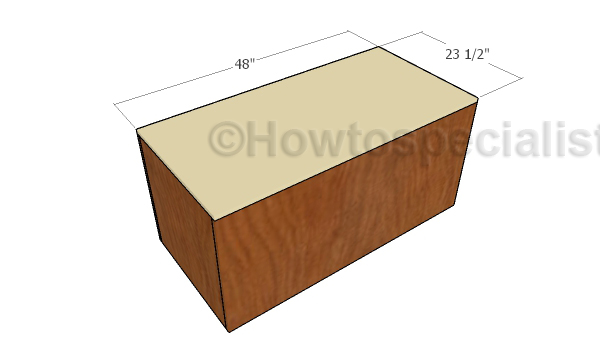
Attaching the bottom
Attach the bottom to the hope chest and add glue to the joints. Align the edges flush and insert 2″ brad nails to secure the bottom to the frame tightly. Smooth the edges with sandpaper before attaching the trims.
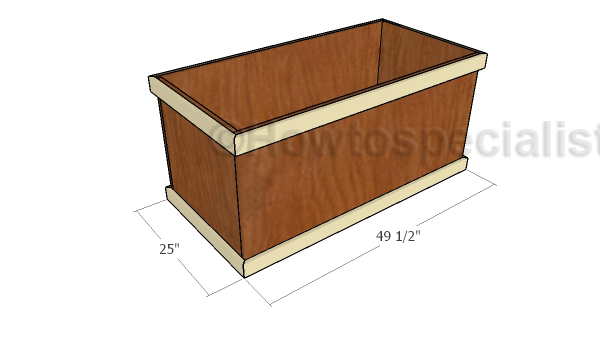
Fitting the trims to the chest
Build the trims for the wood toy chest from 1×3 lumber. Cut both ends of the trims at 45 degrees, if you want neat joints between them. Add glue to the trims and them secure them into place with 1 1/4″ brad nails. Leave no gaps between the components for a professional result.
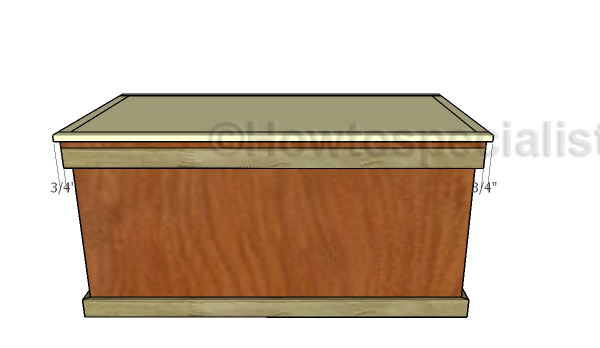
Fitting the top trims
Fit 1×2 slats to the top of the chest, as shown in the diagram. Use glue and 1 1/4″ brad nails to secure the trims into place. Align the edges and smooth everything with sandpaper for a professional result.
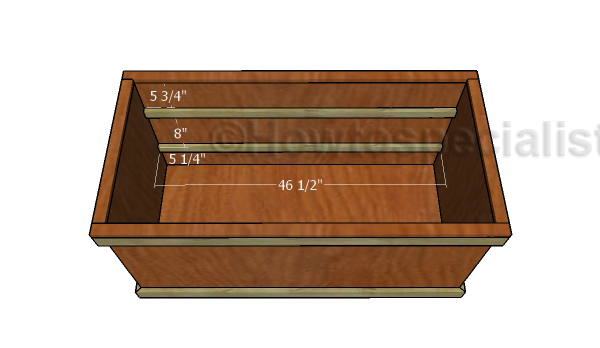
Fitting the cleats
Fit 1×2 cleats to the interior of the chest. You can adjust the distance between the cleats, as well as their locations according to your needs. Use 1 1/4″ brad nails and glue to secure the cleats into place.
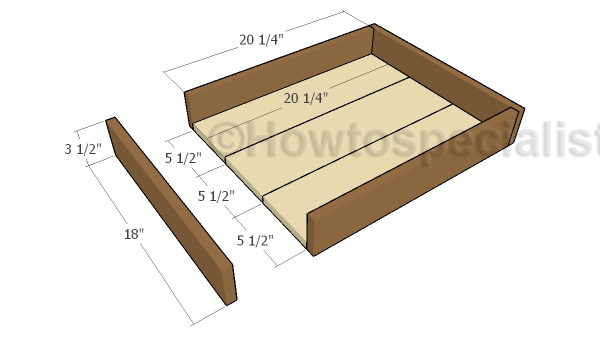
Building the trays
Building the storage trays is a straight forward process. First of all, you need to glue together the 1×6 slats for the bottom. Align the edges flush, add glue to the joints and clamp them together tightly, making sure you leave no gaps between them.
Next, build the frame of the drawers from 1×4 lumber. Align the edges making sure the corners are square and use 2″ brad nails to secure them together tightly.
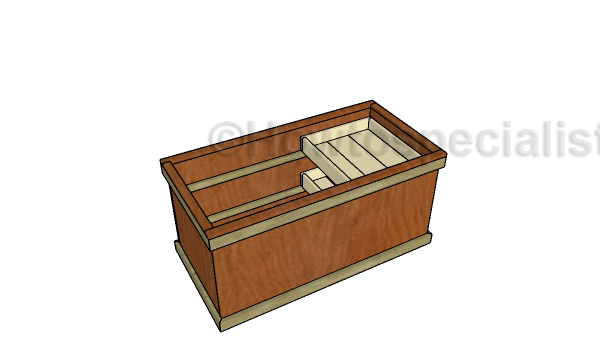
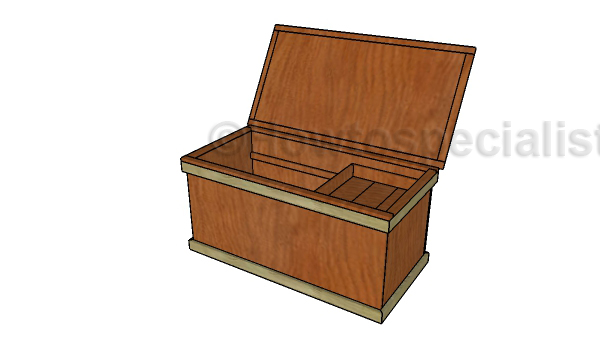
Fitting the trays
Fit the trays to the cleats, as shown in the diagram. These trays are great for storing small items, as you know where to take them from when you need them.
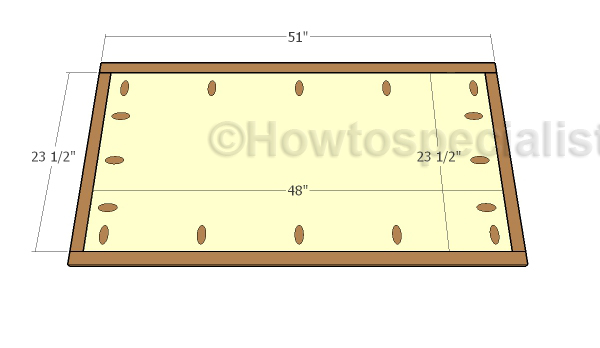
Building the lid
Build the lid for the chest from 3/4″ plywood. As you can see in the image you need to drill pocket holes along the edges and insert 1 1/4″ screws into the 1×2 trims. Add glue to the joints and align everything with attention. Make sure the edges are flush before inserting the screws.
Fitting the lid
Fit the lid to the chest and align it to the back. Fit a piano hinge so you can open and close the lid easily. In addition, install a safety hinge to one side of the lid, so you can protect the little fingers from getting smashed under the weight of the lid.
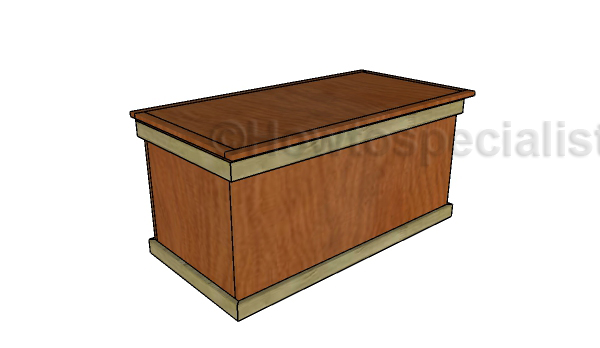
Toy chest plans
After assembling the hope chest, you need to take care of the finishing touches. Therefore, apply a few coats of stain and then seal everything with clear lacquer. Make sure you sand between the coats of lacquer with 150 grit sandpaper, for a professional finish.
Hope chest plans
Thank you for reading our project about free hope chest plans and we recommend you to check out the rest of the projects. Don’t forget to LIKE and SHARE our projects with your friends, by using the social media widgets. SUBSCRIBE to be the first that gets our latest projects.

