This article is about storage shed plans. Building a wood shed is a complex project, but if you manage to get the job done in a professional manner, you will have a large construction ready to store garden tools, firewood or other objects you don’t use on a regular basis. Before beginning the actual project, we recommend you to study several projects as to find free shed plans that fit your needs and tastes. As you probably know, storage sheds come in a large variety of dimensions, designs and materials, but you should take into account your needs and budget when taking the final decision. See HERE our newest shed plans that come with more detailed diagrams and instructions.
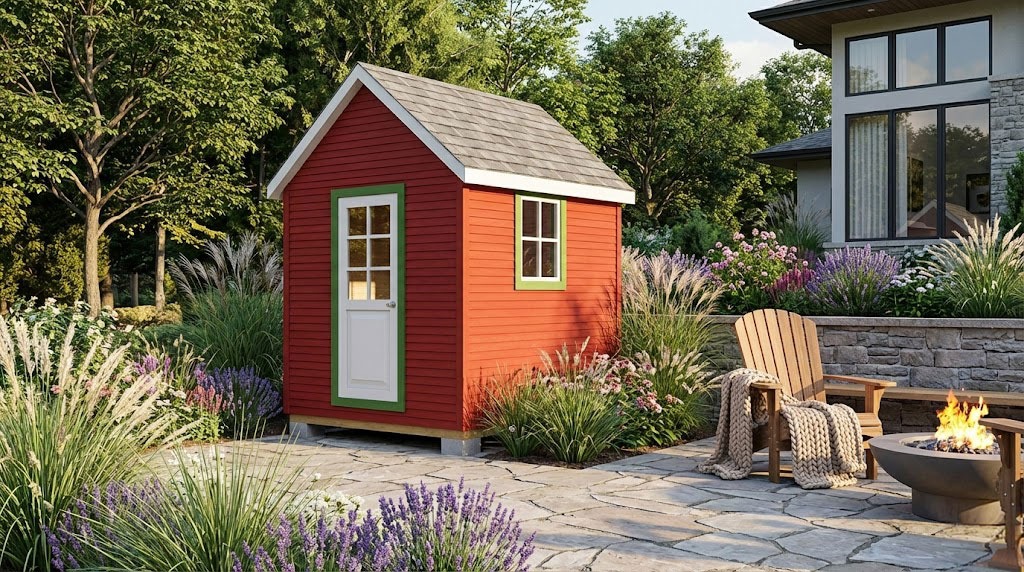
It is essential to place the shed in a proper location, as to have an easy access to it and to match the neat look of your garden. Strange as it might seem, building the right storage shed for your needs, can add value to your property, as it should complement the design of your garden. Work with great care and make sure you position the shed far away from your barbeque or fire pit, as it might easily ignite.
Lay out the 12×16′ wood shed in a professional manner, by using batter boards and string. In order to build a durable foundation, able to support the weight of the wooden construction, you have two broad alternatives. On one hand you could pour a concrete slab or you can choose to build several concrete footings. Irrespective of your choice, we recommend you to make sure the foundation or the footings are perfectly aligned and level, otherwise the storage shed won’t be symmetrical.
Made from this plan
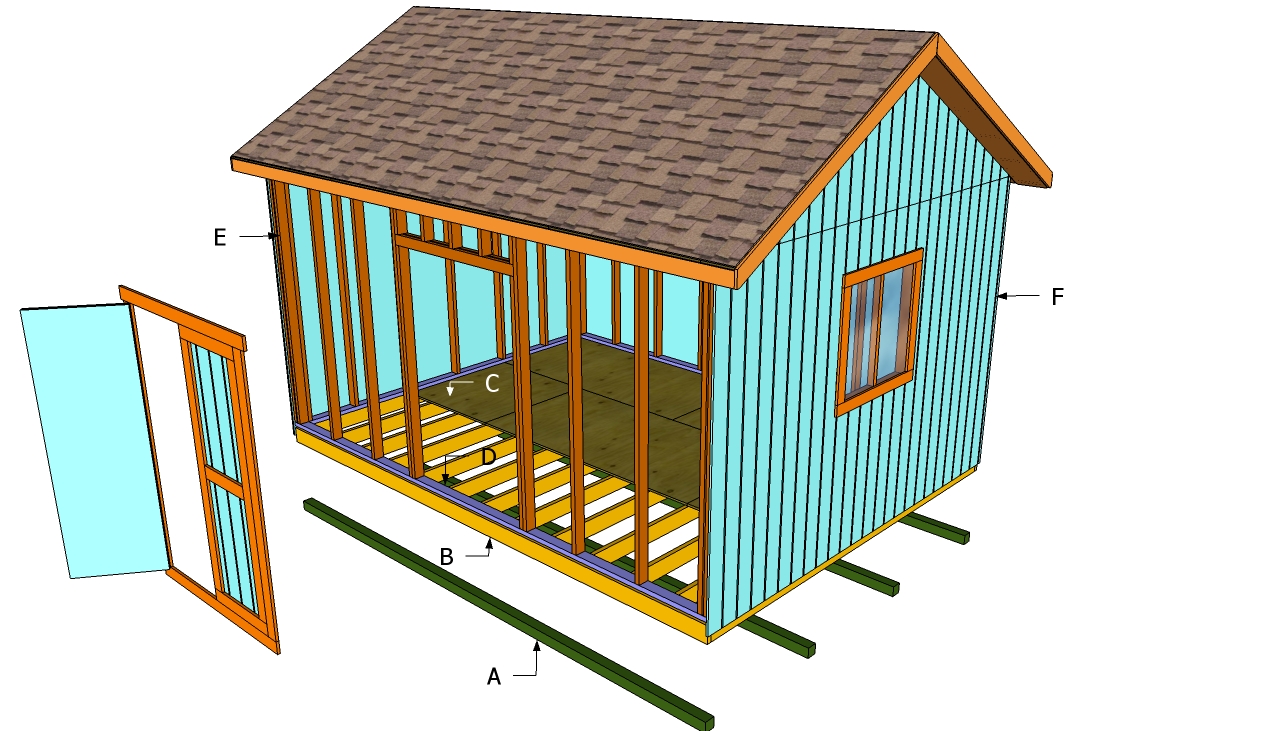
In order to build a 12×16 storage shed, you need the following:
Materials
- A – gravel, 10 tube forms, concrete CONCRETE FOOTINGS
- B – 2 pieces of 2×6 lumber 144” long, 2 pieces of 2×6 lumber 192” long, 45º cuts at both ends SILLS
- 2 pieces of 2×6 lumber 192” long RIM JOISTS
- C – 13 pieces of 2×6 lumber 143” long JOISTS
- D – 200 sq ft 3/4” plywood sheets FLOOR DECKING
- E – 4 pieces of 2×4 lumber 192” long, 4 pieces of 2×4 lumber 137” long BOTTOM AND TOP PLATES
- F – 2×4 lumber, 84-96” long, placed every 16” on center WALL STUDS
- G – 2 pieces of 2×4 lumber, 3′ long DOUBLE HEADER FOR DOOR
- H – 600 sq ft of 5/8” grooved plywood EXTERIOR SIDING
- I – 18 pieces of 2×4 lumber, 96” long, cut at 30º at both hands RAFTERS
- J – 9 pieces of 2×4 lumber, 144” long, cut at 60º at both ends BOTTOM RAFTER
- K– 290 sq ft of 1/2 tongue and groove ROOFING SHEETS
- L – 290sq fit of tar paper ROOFING FELT
- M – 290sq ft of asphalt shingles ASPHALT SHINGLES
- N– 1 piece of 3×3′ window (recommended) WINDOW
- O – 1 piece of 3×6 1/2-7′ door DOOR
- P – 1×4 lumber and 1×6 lumber TRIMS
- 8 pieces of 2×4 lumber 96”, cut at 30º at both ends OVERHANG RAFTERS
- 16 pieces of 2×4 lumber, 7” long BLOCKING
- 4” screws and corner brackets – to secure the joists to the rim beams
- 3 1/2” screws – to install the wall studs to the top and bottom plates
- 4” screws – to secure the walls to the floor
- 1 1/4 finishing nails – to install the siding and the trims
- 1/2” plywood – to build the gussets
- Drip caps and silicone – to waterproof the roof
- Hinges, latch
Tools
- Safety gloves, glasses, Miter saw, jigsaw
- Chalk line, tape measure, spirit level, carpentry pencil
- Drill machinery and drill bits
- Router, 1/4” round bit – optional
- Power mixer, Wheelbarrow, shovel, post digger, Ladder
Tips
- Lay the carport properly, using batter boards and string
- Pre-drill holes in the wooden components, before driving in the screws
- Align the components before locking them into place with screws
- Don’t use lumber that is likely to crack or shrink
Time
- Two weekends
Related
Storage shed plans free

Storage shed plans free
Building a 12×16′ storage shed is one of those project that will add value to your property and enhance the look of your backyard. Therefore, you should choose the right plans for your needs and comply with the local building codes. Before starting the building process, thoroughly consult the legal requirements and design the shed as to satisfy these specifications.
Smart Tip: After you plan every aspect of the project, you should ask estimates form several lumber stores and choose the best offer in terms of quality and price. Make sure you buy everything from the very beginning, otherwise you would waste time and money, every time you go to the lumber store.
How to build a 12×16′ storage shed

Storage shed layout
First of all, you have to lay out the storage shed in a professional manner. Therefore, you have to build batter boards from 2×4 wooden slats, lock them into position and use string to mark the shed’s perimeter, as in the image.
In order to check if the corners are right angled, you should measure the diagonals and adjust the batter boards until they match. In addition, you could apply the 3-4-5 rule on each corner.

Shed footings form
Next, you have to dig several 2-3′ (6” under the frost line) holes and fit tube forms, or build square wooden forms from 2x8s. Compact a 4” layer of gravel on the bottom of the holes, before fitting the tube forms. Use a level to make sure the forms are horizontal and aligned one with another.

Storage shed footings
The holes should be 2-3′ deep and at least 6” below the frost line. From our experience, we recommend you to pay attention to these aspects, otherwise the footings won’t be able to support the weight of the storage shed.
Pour a 4” thick layer of gravel on the bottom of the holes, compact it thoroughly and fill them with concrete (2 parts cement, 3 parts sand, 4 parts gravel and water).

Storage shed floor joists
Let the concrete dry out for several days before building the floor frame of the shed. In addition, we recommend you to use a long straight edge and a spirit level, to make sure all the footings are perfectly aligned and horizontal.
The fist step of building the floor structure is to lay 2×6 sills over the footing, as you can notice in the image. Work with great care, otherwise the corners of the shed might not be right angled.

Shed floor plans
Next, install the 2×6 perimeter joists and secure them into place by toenailing them with 6” screws or by using appropriate metal hardware. Irrespective of your choice make sure you plumb them with a spirit level, before driving in the nails.

Storage shed flooring
After you have built the floor frame of the storage shed, you have to install 3/4” plywood and secure it with decking screws. Work with great care and with good judgement to get the job done in a professional manner.
12×16′ storage shed plans

Storage shed walls
After you have built the floor of the storage shed, you have to assemble the walls and lock them into position by driving in 4” galvanized screws. As you can see in the image, you have to use 2×4 wooden studs to build the timber frames and afterwards fasten them into place.
From our experience, we recommend you to assemble the frame on the ground and afterwards move them on the floor with the help of a friend.

Storage shed door frame
On one side of the shed, you have to leave enough space for a door and build a double wooden lintel, as in the image. Work with great care and with good judgement, making sure you place the 2×4 wooden studs every 16” on center.
Building a rigid structure is essential for this project, otherwise the storage shed won’t be durable on the long run. In order to lock the studs into place, drive in screws through the top and bottom plates, using a nail gun.

Storage shed window
Continue building the rest of the walls, in the same manner described above. As you can see in the image, you could build a 3×3′ window on one side of the storage shed, but you have to frame it with 2×4 wooden studs. Use a tape measurement to make sure the dimensions are accurate.

Storage shed wall plans
After you have build the side walls of the storage shed and set them into place, you have to check attentively the frame, making sure the construction is level and properly aligned.

Storage shed siding
Next, install the exterior siding, making sure you also cover the perimeter joists. Drive in 1 1/4” finishing nails trough the siding in the wooden studs, until you have covered the whole surface of the walls.
If you want to obtain a neat look, you can install siding on the interior faces. Nevertheless, if you have a tight budget, you should remember that the shed is functional even without interior siding.
Roof shed building plans

Storage shed roof plans
Continue the shed project by building the roof trusses and install them into position every 24” on center. As you can see in the image, you need to use 2×4 slats and gussets to build the frame of the roof.
After you have cut the 2×4 components, you have to assemble them by using 1/2” plywood gussets over every joint. Work with great care, making sure all trusses are exactly the same. If their size varies, you won’t be able to apply the roofing sheets properly.

Wood shed roof plans
As you can see in the image, the rafters should overhang at least 8” , otherwise the roof won’t be able to drain the water properly. Next, fasten the end trusses by toe-nailing them with 4” screws, after they are plumb and locked into position with 2×4 braces.
Next, you should install the rest of the trusses every 24” on center, in the same manner described above.

12×16 storage shed
Before installing the roof sheeting, you have to install the rest of the siding, on the gabled ends. Work with great patience and fasten the siding by driving in nails.

Installing the front overhang
The roof of the shed should overhang about 10” in the front and back faces, to drain the water properly and to enhance the look of the construction. After building the four sets of double rafters, you should align them properly and lock them into place with 3” screws.
Work with judgement, as everything has to be neat and look symmetrical. Buy galvanized screws, as they are highly resistant to water.

Storage shed roof plans
Install 1/2” plywood sheets over the rafters and secure them with 2” screws. Work with great care, making sure you connect the tongue and groove sheets properly, otherwise they could move because of the changes in humidity.

Storage shed window
Use asphalt shingles or metal sheets to cover the roof of the storage shed. Install the side drip caps over the tar paper and the bottom drip caps under the roofing paper.
Fit the asphalt shingles with 1/2” nails, starting with bottom of the roof, paying attention to the manufacturer’s instructions. The shingles should overhang 1/3” over the drip caps. Fit the windows into place and secure them with nails.

Stoorage shed door plans
Building the door of the 12×16 shed is a straight forward process, as you just have to attache 1×4 trims to a piece of 5/8” grooved plywood. After you measure thoroughly the door opening, you should cut a piece of plywood and attach 1×4 lumber, by inserting 1 1/4” finishing nails.
Afterwards, install 1×4 or 1×6 lumber to the wall, around the door, and lock them into position with finishing nails and several 3” screws. Next, install the hinges, the door handle and a proper latch.

Free storage shed plans
Install the corner trims and an ornamental square, in order to hide the edges and add character to the 12×16′ storage shed. Work with great care, making sure you insert the 1 1/4” finishing nails at least 1/2” from the edges, to prevent the wood from splitting.
Build a 16×12 shed
Make sure you take a look over our newest shed project. The plans are much more detailed and come with step by step diagrams and a complete cut list. See the free plans HERE.
My best tips for building a 12×16 storage shed:
A 12×16 storage shed with a gable roof is perfect for storing tools, equipment, and other essentials. Its large size and classic roof design offer both practicality and style. Here are my best tips for building a sturdy and functional shed:
1. Plan Your Design and Layout
Before you start, plan the size, style, and features:
- Dimensions: A 12×16 foot shed offers plenty of space for storage and workspace. Ensure you have enough room in your yard and check local building codes for size restrictions.
- Roof pitch: A gable roof has two sloped sides that meet at a peak. Choose a roof pitch between 4:12 and 6:12 for proper drainage and headroom.
- Doors and windows: Plan for double doors for easy access to large items and add windows for natural light and ventilation.
Careful planning ensures that your shed meets your storage needs and complements your yard.
2. Build a Solid Foundation
A solid foundation is key to a stable shed:
- Concrete slab: Pour a 4-6 inch concrete slab for the best stability. This foundation is ideal for a large, permanent shed.
- Pavers or gravel: For a simpler foundation, use gravel or pavers. This provides a stable, level surface while allowing for proper drainage.
- Wooden frame: Build a pressure-treated wooden frame if you want to elevate the shed slightly off the ground. Ensure the frame is level and securely fastened.
A strong foundation prevents shifting and keeps the shed level over time.
3. Construct the Floor and Frame
The frame is the backbone of your shed, so it needs to be strong and well-built:
- Floor frame: Use 2×6 pressure-treated lumber to create a sturdy floor frame. Space the joists 16 inches apart and attach them to the rim joists. Cover with 3/4-inch plywood for the floor.
- Wall frame: Build the wall frames with 2×4 lumber, spacing the studs 16 inches apart. Make sure to leave openings for doors and windows. Construct one wall taller to support the gable roof’s peak.
- Roof frame: Build gable roof trusses with 2×4 lumber, connecting them with metal plates. Space the trusses 24 inches apart to provide strong support for the roof.
Constructing a solid frame ensures the shed can support the roof and withstand the elements.
4. Install the Roof
The gable roof is the signature feature of this shed:
- Roof sheathing: Attach plywood or OSB sheathing to the roof trusses, extending it slightly beyond the walls for rain protection.
- Roofing material: Use asphalt shingles, metal roofing, or corrugated panels for a durable, weather-resistant roof. Start at the bottom and work your way up to ensure proper overlap.
- Ridge vent: Add a ridge vent at the peak of the roof for proper ventilation, preventing moisture buildup inside the shed.
A well-installed roof ensures your shed is protected from rain, snow, and wind.
5. Install Siding and Windows
Add siding and windows for protection and aesthetics:
- Siding: Use T1-11 plywood siding, vinyl, or wood lap siding to cover the exterior walls. Attach the siding to the frame using galvanized nails or screws, and make sure to overlap the panels for water runoff.
- Windows: Install weatherproof windows to let in natural light and provide ventilation. Use caulk around the edges to seal them against moisture.
- Doors: Install double doors for easy access to larger items. Use heavy-duty hinges and weather stripping to keep out moisture.
Siding and windows complete the shed’s exterior, making it weatherproof and functional.
6. Paint or Stain for Protection
To protect your shed from the elements and enhance its appearance:
- Paint: Use exterior-grade paint to protect the wood from moisture and UV damage. Choose a light color to reflect sunlight and keep the interior cooler.
- Stain: If you prefer a natural wood look, apply a wood stain to enhance the grain and protect the shed from weather exposure.
Finishing the shed with paint or stain adds a protective layer and improves curb appeal.
Bonus Tip: Add Interior Shelving and Hooks To maximize the storage space inside your shed, install shelves, hooks, or even a pegboard for organizing tools and equipment.
By following these tips, you’ll be able to build a durable and spacious 12×16 storage shed with a gable roof that meets all your storage needs. With proper planning, materials, and construction, your shed will stand the test of time and enhance your outdoor space.
Thank you for reading our article about storage shed plans free and we recommend you to check out the rest of our projects. Don’t forget to share our articles with your friends, by using the social media widgets.