
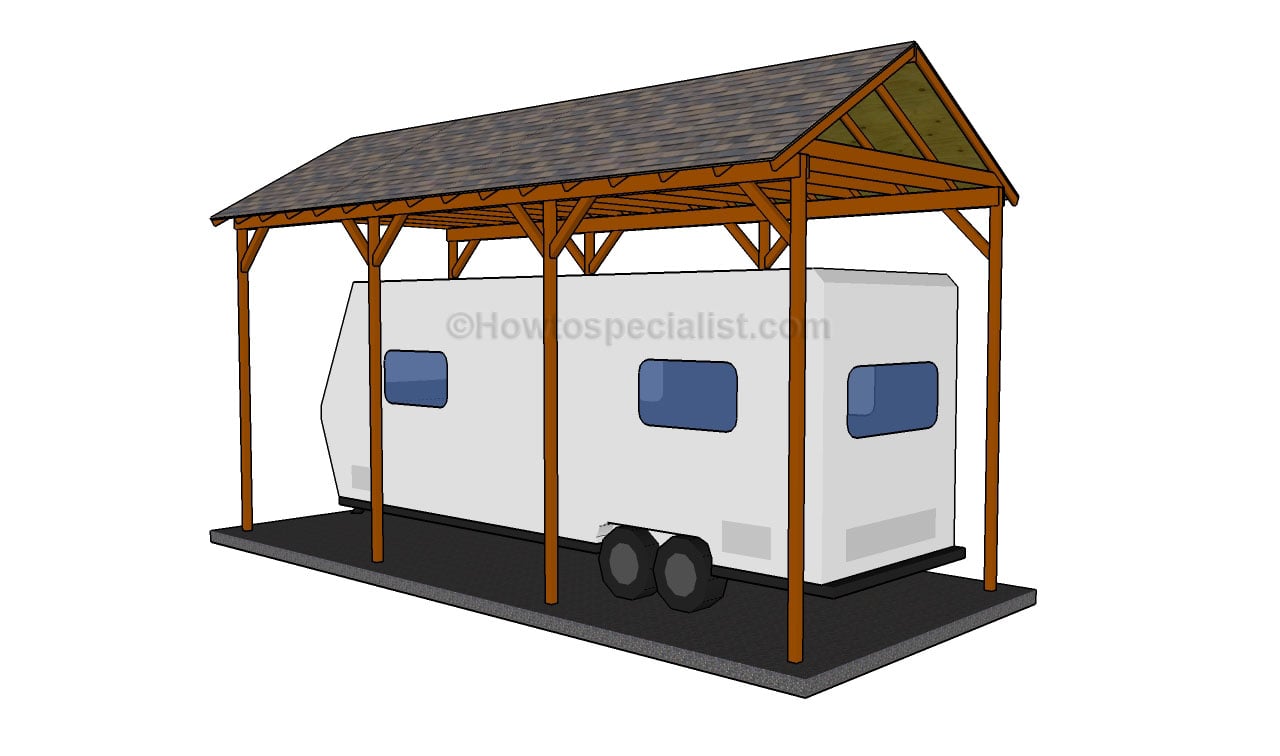
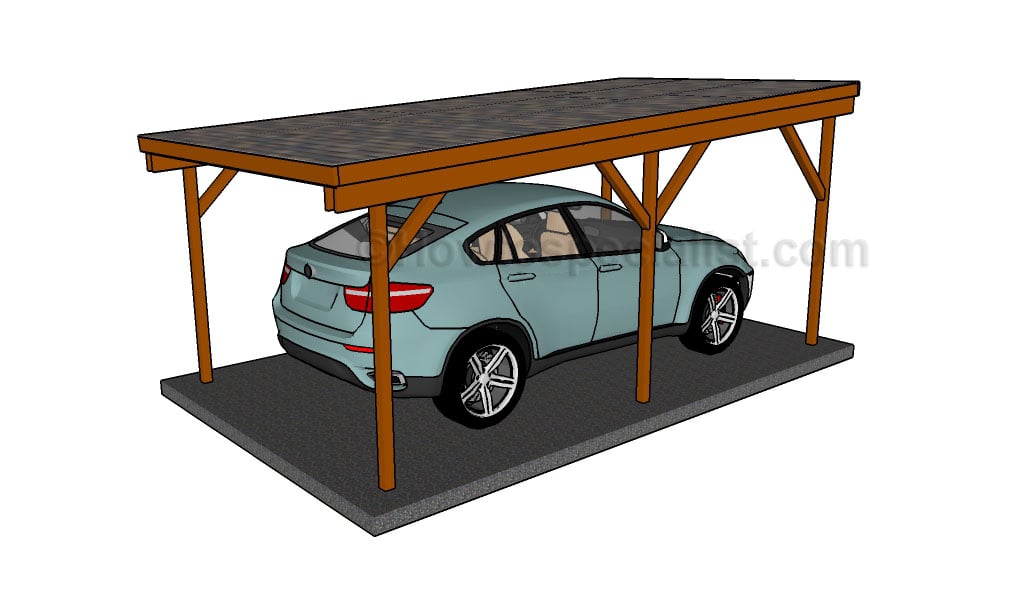
This step by step diy woodworking project is about how to build a wooden carport. Building a carport for your RV is a basic project, but it will protect your vehicle from bad weather. A wooden carport will be durable and easy to build, even by persons with average woodworking skills. Nevertheless, a proper planning is essential for the success of the woodworking project.
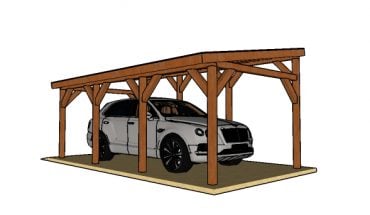
If you want to build the carport by yourself, there are a few things that you should take into account. Therefore, we recommend you to study the local building codes and to choose the appropriate plans for your needs. These plans are designed for a RV (recreational vehicle), so if you want to build a carport for a regular car you should either adjust the dimensions of the structure to your needs or to check out the related projects.
There are a few tips that you have to take into account, before starting the actual construction. Therefore, we recommend you to invest in durable and weather resistant lumber. Moreover, check if the components are in a good condition before buying them from the local lumberyard. In most of the cases a building permit is required, so make sure you do the due diligence. See all my Premium Plans in the Shop.
Made from this plan
Building a wooden carport

Building a wooden carport
Materials
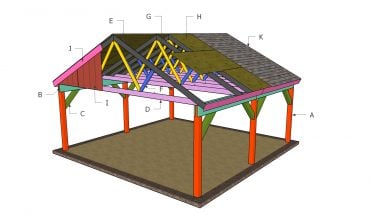
- A – 8 pieces of 4×4 lumber – 204” long POSTS
- B – 4 pieces of 2×6 lumber – 360” long BEAMS
- C – 12 pieces of 4×4 lumber – 42 1/2″ long BRACES
- D – 16 pieces of 2×6 lumber – 147″ long RAFTERS
- E – 32 pieces of 2×6 lumber – 96″ long BOTTOM RAFTERS
- F – 1 piece of 2×6 lumber – 360″ long TOP RIDGE
- G – 15 pieces of 3/4″ plywood – 4’x8′ ROOFING
- H – 200 sq ft of tar paper UNDERLAYMENT
- I – 200 sq ft of asphalt shingles SHINGLES
- 8 pieces of 4×4 lumber – 18 ft
- 4 pieces of 4×4 lumber – 30 ft
- 6 pieces of 4×4 lumber – 8 ft
- 16 pieces of 2×6 lumber – 14 ft
- 32 pieces of 2×6 lumber – 8 ft
- 1 piece of 2×6 lumber – 30 ft
- 15 pieces of 3/4″ plywood – 4’x8′
- 200 sq ft of tar paper, 200 sq ft of asphalt shingles
- tube form, post anchor
- 2 1/2″ screws, roofing felt, asphalt shingles
- rafter ties
Tools
- Safety gloves, glasses
- Miter saw, jigsaw
- Chalk line, tape measure, spirit level, carpentry pencil
- Drill machinery and drill bits
Tips
- Apply several coats of wood stain to the wooden components
- Fill the holes with wood filler and smooth the surface
- Plumb the sides of the bench with a spirit level
Time
- One Day
Related
How to build a wooden carport

Fitting the posts
The first step of the outdoor project is to lay out the carport and to dig the post holes. Therefore, we recommend you to use batter board and string when marking the perimeter of the carport. Make sure the diagonals are equal and the corners are right-angled. You should adjust the size of the carport according to your car, while using the same steps described in this project.

Anchoring the posts
There are many ways in which you can set the wooden posts into place. Therefore, you could set the posts into concrete or pour footings and use post hangers. Taking into account the size of the carport, setting the posts into concrete would give your structure the best support. Dig 3′ deep holes in the ground, set the posts and plumb them with a spirit level, before filling the tube forms with concrete.

Installing the support beams
Let the concrete to dry out for several days before installing the support beams. Attach the 2×8 beams to the top of the posts and check if they are perfectly horizontal, before drilling pilot holes and inserting the carriage bolts.

Fitting the braces
In order to reinforce the structure of the carport, we recommend you to attach 4×4 beams to the posts, as in the free plans. Cut both ends of the braces at 45 degrees and check if the posts are plumb before attaching them into place. Work with attention and align everything at both ends, if you want to get the job done in a professional manner.

Installing the rafters
The next step of the project is to build the rafters and to fit them into place. As you can see in the image, you have to attach the rafters to the top ridge at one ends, and to the support beams at the opposite end. Place the rafters equally spaced, if you want to get a professional result.
In order to secure the top ridge into place, we recommend you to fit the rafters placed at both ends of the roof. Use a spirit level to make sure the top ridge is perfectly horizontal. Afterwards, install the rest of the rafters to the structure.

Building the rafters
Building the rafters is not a difficult step, but you need to pay attention to the plans and use a quality miter saw for the angle cuts. Build the bottom rafters from 2×6 lumber, while the regular rafters should be built from 2×4 lumber. Align everything before locking the components together with 5 1/2″ galvanized screws.
Drill pilot holes through the bottom rafters and insert 5 1/2″ screws into the supports beams, on both sides of the rv carport. Leave no gaps between the components for a professional result.

Installing the roofing sheets
One of the last steps of the woodworking project is to build the roof of the carport. First, you need to attach 3/4″ plywood sheets over the rafters, using the pattern describe din the plans. Mark the line before adjusting their width with a circular saw. Attach the plywood sheets to the rafters and lock them into place with 1 1/4″ screws, making sure there are no gaps between them.

How to build a wooden carport
Last but not least, you should take care of the finishing touches. Fill the holes with putty and let it dry out for several hours, before smoothing the surface with sandpaper. Make sure all the screws are inserted properly and the components aligned at both ends.
If you want to download the plans. just click on the GET PDF PLANS button bellow.

Thank you for reading our project about how to build a wooden carport and we recommend you to check out the rest of the projects. Don’t forget to share our projects with your friends, by using the social media widgets.