This step by step article is about how to build a bird feeder. If you want to freshen up the look of your garden or you just want to attract the singing birds to your property, building a basic wooden feeder is a must-have diy project. There are many shapes and designs to choose from, so we recommend you to study the alternatives before taking a decision. A basic wooden bird feeder can be built in just a few hours, if you have all the materials and tools.
It is essential to smooth all the cut edges, if you want to obtain a professional result. Therefore, use a sand block and 120-grit sandpaper, to smooth the cut edges, along the wood grain. Alternatively, you could round the edges with a router and a 1/4” drill bit. Work with great care and attention, otherwise the birds may injure in the sharp edges. Moreover, cut out the round entrances with a hole saw drill bit, or using a jig saw.
Align all the components, drill pilot holes and insert the nails to lock them together tightly. Apply wood glue to the edges of the components, as to enhance the bond of the joints. Fill the holes with a good wood filer and sand the wood surfaces, after the compound has dried out. You could also paint the exterior faces of the birdhouse in a mild color, as a loud color would keep away the birds. See all my Premium Plans in the Shop.
Made from this plan
Building a simple bird feeder

How to build a bird feeder
Materials
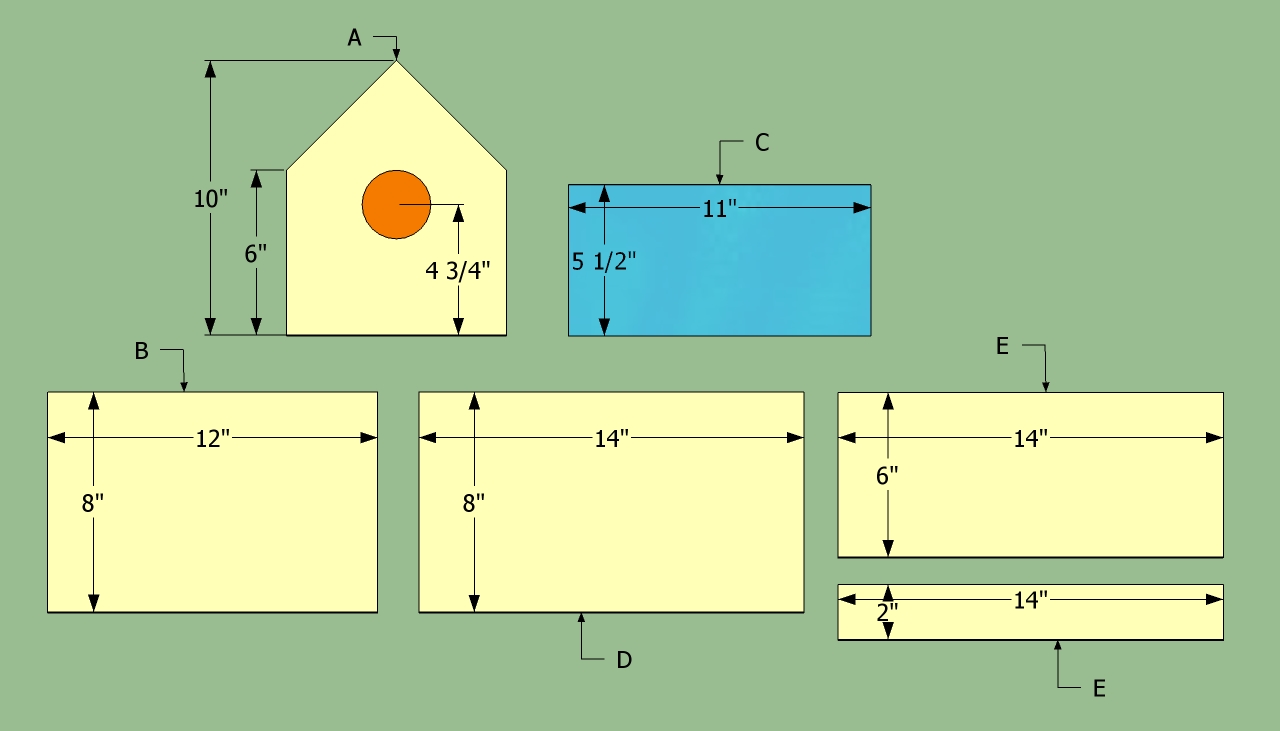
- A – 2 pieces of 1×8 lumber – 10” long FRONT AND BACK FACES
- B – 1 piece of 1×8 lumber – 12” long FLOORING
- C – 2 pieces of 1/8” plexiglas – 5 1/2” x 11” SIDE WALLS
- D – 1 pieces of 1×8 lumber- 14” long LONG ROOF PIECE
- E – 1 pieces of 1×8 lumber – 14” x 2”, 1 piece of 1×8 lumber – 14” x 6” SHORT ROOF PIECES
- 2 hinges, 2 eye screws, 1 1/4” nails
- 1 piece of 1×8 lumber – 8 ft
- 1 piece of 1/8” plexiglas – 11” x 11”
- 2 hinges, 2 eye screws, 1 1/4” nails
- 2 1/2″ screws
- 1 1/4″ screws
- glue, stain
- wood filler
Tools
- Safety gloves, glasses
- Miter saw, jigsaw
- Chalk line, tape measure, spirit level, carpentry pencil
- Drill machinery and drill bits
Tips
- Pre-drill holes in the wooden components, before driving in the screws
- Smooth the exposed edges, by using a router with a 1/4” bit
Time
- 2 hours
Related
How to build a bird feeder

Bird feeder components
First of all, you need to use the right plans for your needs. After deciding the shape and the size of the bird feeder, you can continue the project and buy all the materials.

Materials for birdhouse feeder
In order to obtain a professional result, we recommend you to check the wooden boards before buying them. Therefore, the boards should be in a good condition and perfectly straight. Choose quality lumber, as you will place the feeder outdoor. Pine, cedar or redwood are excellent choices as you can work easily with the boards and they are highly durable.
You will also need a small piece of plexiglas, to build the side walls, two small hinges, two eye screws and 1 1/4” galvanized screws. If you buy all the materials, they shouldn’t cost you more than 5 dollars.

Marking the cut lines
After buying all the materials and getting the tools ready, you can start the actual construction of the bird feeders. Begin with marking the cut lines on the wooden boards, as in the image. Use a pencil to draw the cut lines.

Cutting the boards
After marking all the cut lines on the boards, you should perform the actual cuts, using a circular saw. In order to get perfectly straight nice cuts, we strongly recommend you to place the boards on a horse saw and to lock it into place with several C-clamps.
Afterwards, clamp a straight fence into place, to guide you when making the cuts. Make sure the blade of the circular saw will go exactly over the lines, at both ends. You can read more about cutting straight lines here.

Drilling the entry
After making the cuts, you have to continue the projects by making the round entrance. Use a hole saw drill bit to obtain accurate results and to get the job done quickly. In most of the cases, the hole should have about 1 1/4” – 1 1/2” in diameter. Alternatively, you could also cut the round holes using a jigsaw. Drill a large starting hole inside the circle, just along the cut lines, and make the cuts with a jig saw.

Carving the channels
Next, cut small channels (1/4” deep) along the sides of the front and back faces, about 1/2” from the edges. In order to get the job done accurately, you should use a table saw. Nevertheless, you can also cut the grooves in the wood, using a sharp hand saw.

Attaching the bottom plate
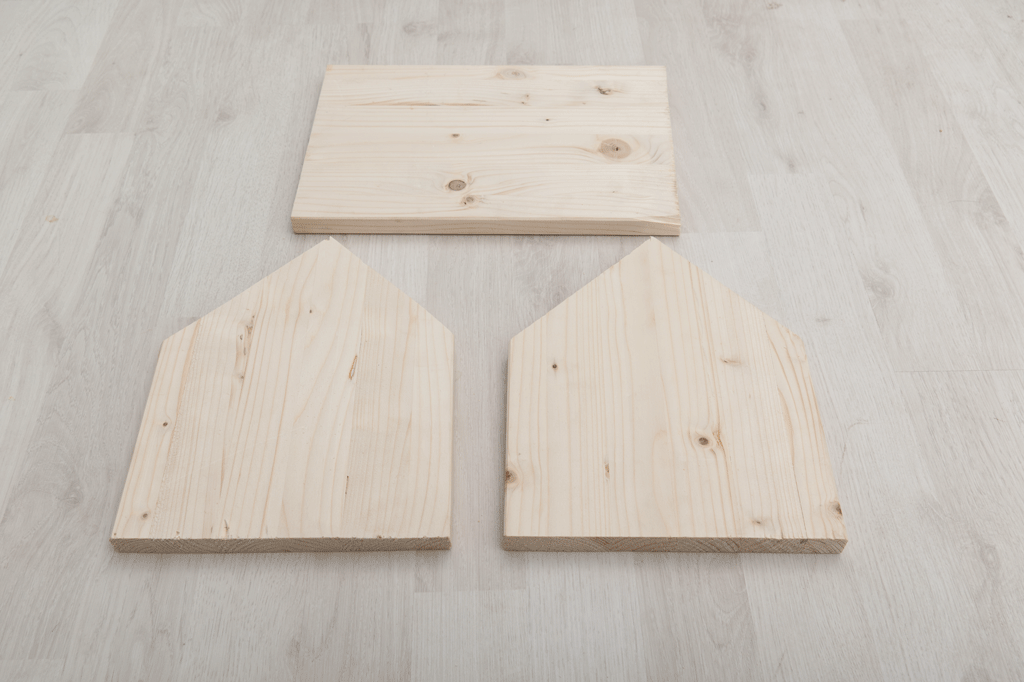
Next, attach the front and back faces to the flooring and secure them into place with 1 1/4” finish nails. As you can see in the image, you need to align the components properly, before drilling the pilot holes in the base of the feeder.
Mark a line to the base of the bird feeder, about 1/4” from the edges. Afterwards, drill pilot holes using a drill machinery and a small drill bit. Drive in about 4 screws at each end of the box, making sure you place the components on a wood block, otherwise you might damage the support surface.

Building a bird feeder
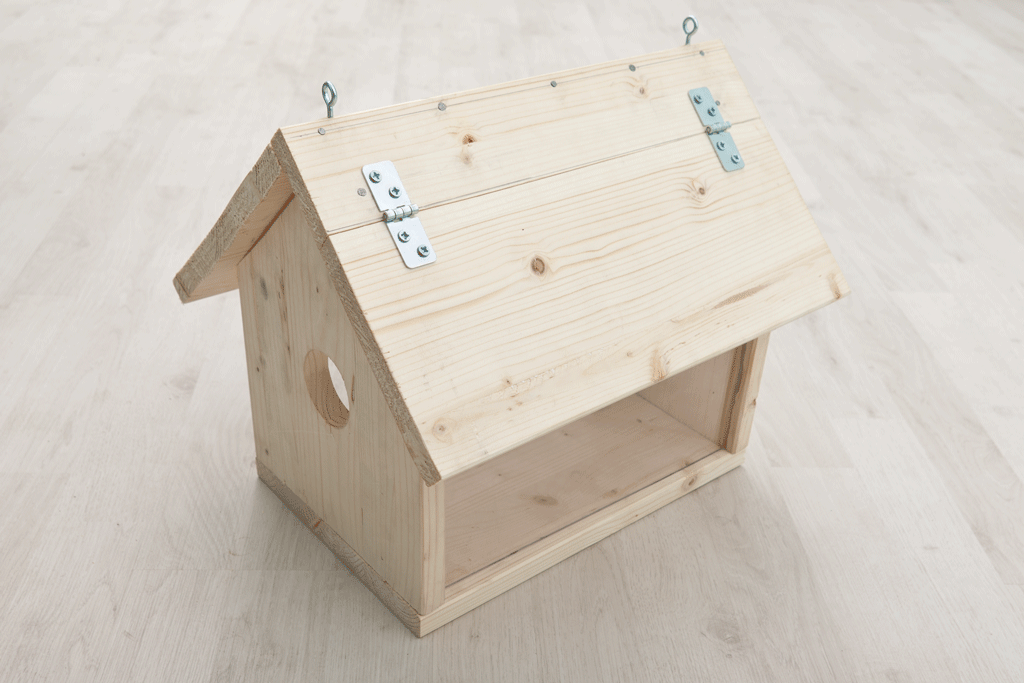
The frame of the birdhouse, after attaching the front and back faces. You could also add wood glue to the enhance the bond of the joints.

Cutting the glass
Continue the project by building the sides of the bird feeder. In order to add character to the construction, we recommend you to make the walls from 1/8” plexiglass.
In order to get accurate results, we recommend you to mark the cut lines on the plexiglass sheet, before performing the cut. Use a good hack saw to make the side walls, along the cut lines. Don’t forget to sand the cut edges of the plexiglass pieces, as to make them smooth.

Installing the side walls
Afterwards, slide the side walls into place, making sure you don’t apply too much force. If the plexiglass panels don’t fit easily into place, smooth the edges with sandpaper.

Building the roof
Next, assembling the roof of the birdhouse. As you can see in the image, you should first attach the small piece to the other side of the roof. If you follow our plans, these components should be perpendicular. In this manner, you can secure the roof to the bird feeder easily.
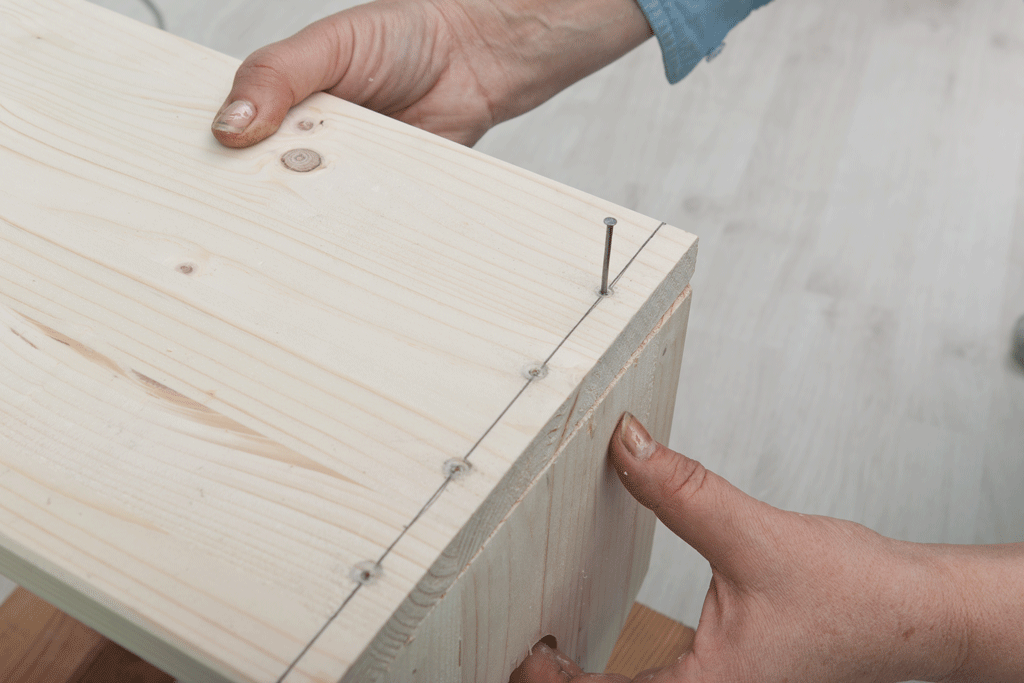
Align the components at both ends, before inserting the 1 1/4” finish nails into place. Drill pilot holes before inserting the nails, otherwise the wood might split. Don’t apply too much force when installing the nails, as you might damage the wood.

Installing the roof of the feeder
Secure the roof to the gable ends, every 2”, using 1 1/4” nails. Drill pilot holes and insert the screws, to lock the roof into place. Make sure you center the roof, leaving about 1” on both sides.

Installing the lid
Attach the hinges to the lid with small screws, before attaching it to the rest of the roof. Make sure the lid opens properly, before driving in the screws. Work with great care and attention, if you want to get a professional result.

Installing the hanging supports
In order to hang the wooden birdhouse to a tree, you should install two eye screws to the roof, one at the front and one at the back of the construction.

Building a simple bird feeder
Last but not least, take care of the finishing touches. Therefore, you should make sure the head of the screws are inserted properly, otherwise they might injure the birds. Fill the holes with wood filler and let it dry out for several hours.
Thank you for reading our article about how to build a bird feeder and we recommend you to check out the rest of our projects. Don’t forget to share our project with your friends, using the social media widgets, if you’ve found it useful.

3 comments
Very helpful, though i altered the design so the roof does’nt extend further on on side. Thanks
I would like to feature you project on the site, if you want to send a few pics.
I altered the design and painted it black. It seems the birds don’t like the color. They like the seed fine when it falls out of the feeder. Is black a ‘loud’ color? Will they get used to it?