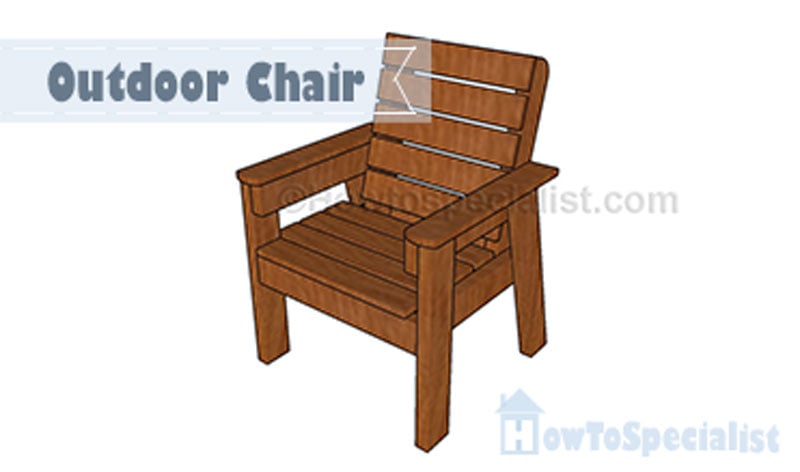
This step by step diy project is about how to build an outdoor chair. If you want to learn more about building a wooden chair for your backyard, pay attention to this project. This garden chair is ideal for a patio or deck and it is easy to build, so that any diy-er can get the job done in a few hours. Make sure you smooth all the edges and apply a few coats of paint or stain to protect the components.
You should always plan everything from the very beginning, in order to prevent costly mistakes and to save time. In most of the cases, you need a friend to give you a hand when assembling the wood outdoor chair. Invest in high quality lumber and plywood, as the components will be exposed to bad weather. Protect the components with appropriate paint or stain.
There are a few tips that you should take into account, if you want to get a professional result. Therefore, take accurate measurements and use professional tools when making the cuts or when drilling pilot holes. Align the components at both ends and add waterproof glue to the joints, if you want to create a rigid structure.
Made from this plan
How to Build an Outdoor Chair
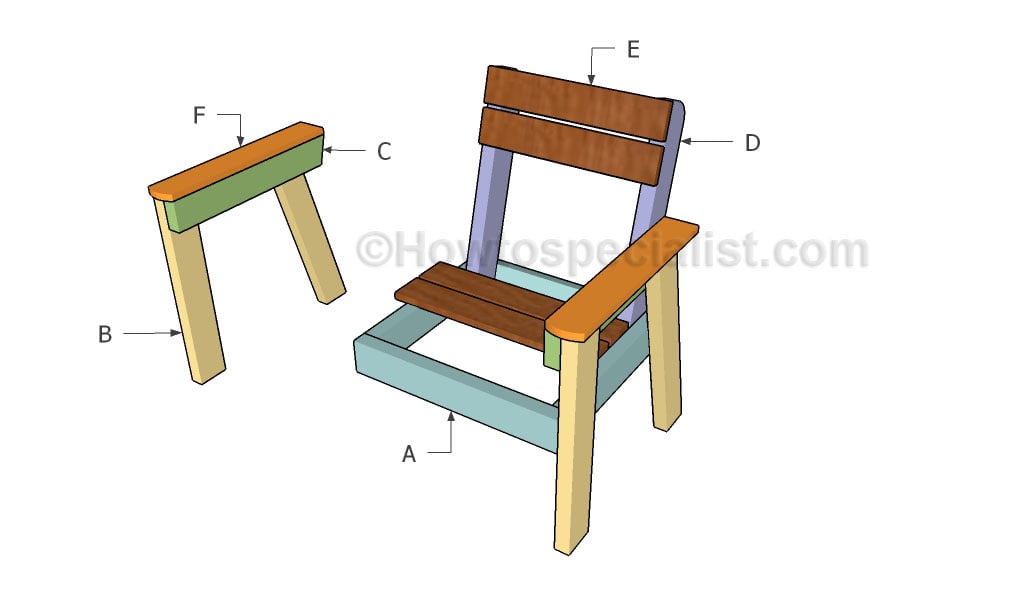
Building an outdoor chair
Materials
- A – 2 pieces of 2×4 lumber – 18″ long, 2 pieces – 22″ long SEAT FRAME
- B – 2 pieces of 2×4 lumber – 23″ long, 2 pieces – 24″ long LEGS
- C – 2 pieces of 2×4 lumber – 21 3/4″ long SUPPORTS
- D – 2 pieces of 2×4 lumber – 24″ long BACKREST SUPPORT
- E – 3 pieces of 1×4 lumber – 23 1/2″ long, 1 piece – 22″ long, 5 pieces – 19″ long SLATS
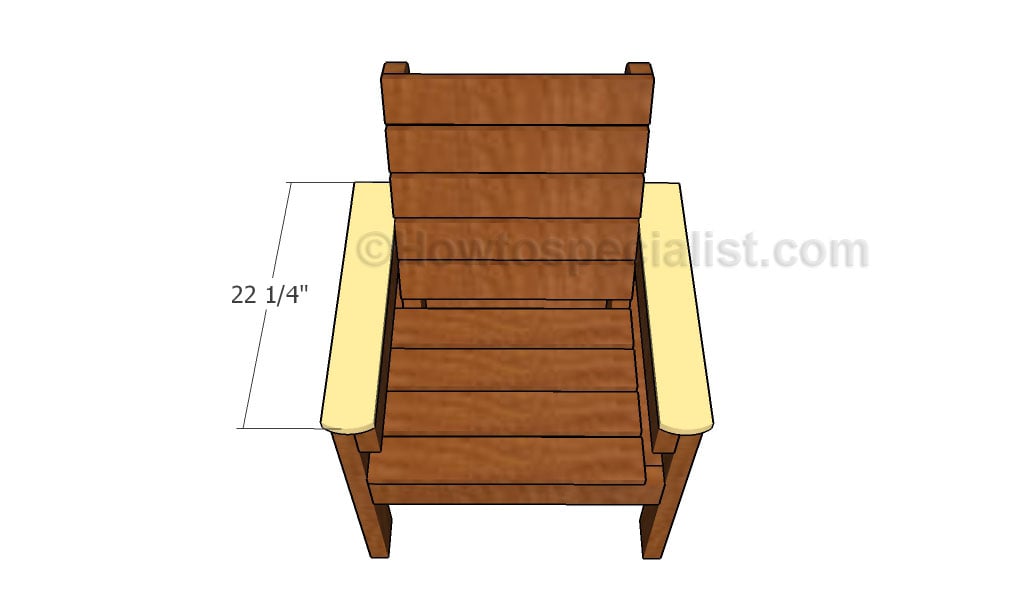
- F – 2 pieces of 1×4 lumber – 22 1/4″ long ARMREST
- 3 pieces of 2×4 lumber – 8 ft
- 3 pieces of 1×4 lumber – 8 ft
- 2 1/2″ screws
Tools
- Safety gloves, glasses
- Miter saw, jigsaw
- Chalk line, tape measure, spirit level, carpentry pencil
- Drill machinery and drill bits
Tips
- Use a good miter saw to make the angle cuts
- Drill pilot holes before inserting the screws
Time
- One Day
Related
Building an outdoor chair – Free Plans
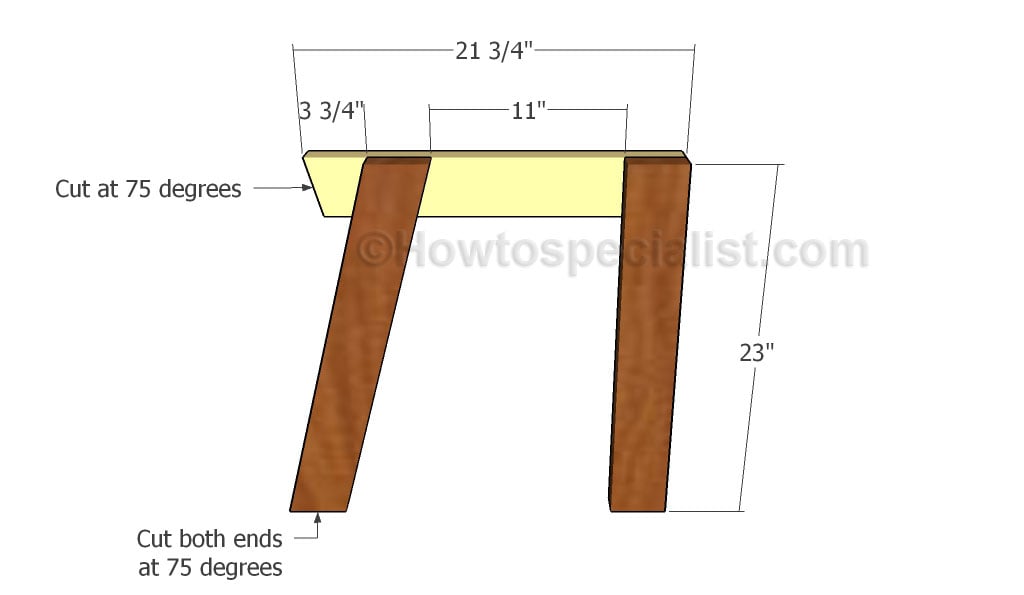
Building the side legs
The first step of the project is to build the legs for the outdoor chair. Cut both ends of the back legs at 75 degrees (set the miter at 15 degrees). Smooth the edges with fine-grit sandpaper and remove the residues. Attach the top support to the legs, as shown in the diagram. Drill pilot holes through the supports and insert 2 1/2′ screws. Add glue to the joints.
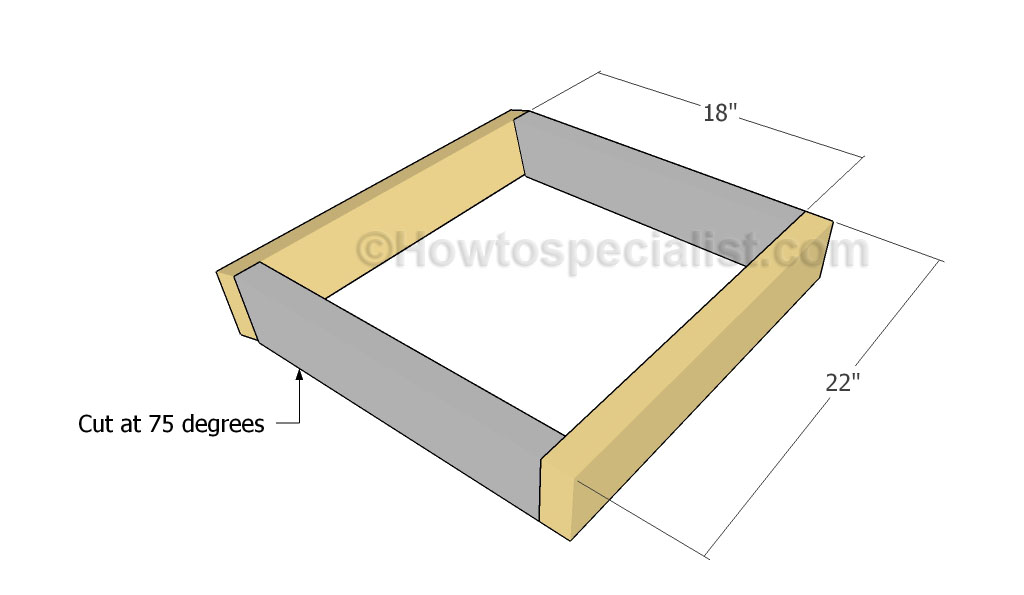
Building the seat frame
Build the frame of the seat out of 2×4 lumber. Cut one end of the side supports at 75 degrees (set the miter at 15 degrees). Drill pilot holes through the front and back components and insert 2 1/2″ screws into the side supports. Add glue to the joints to create rigid joints. Make sure the edges are flush before inserting the screws.
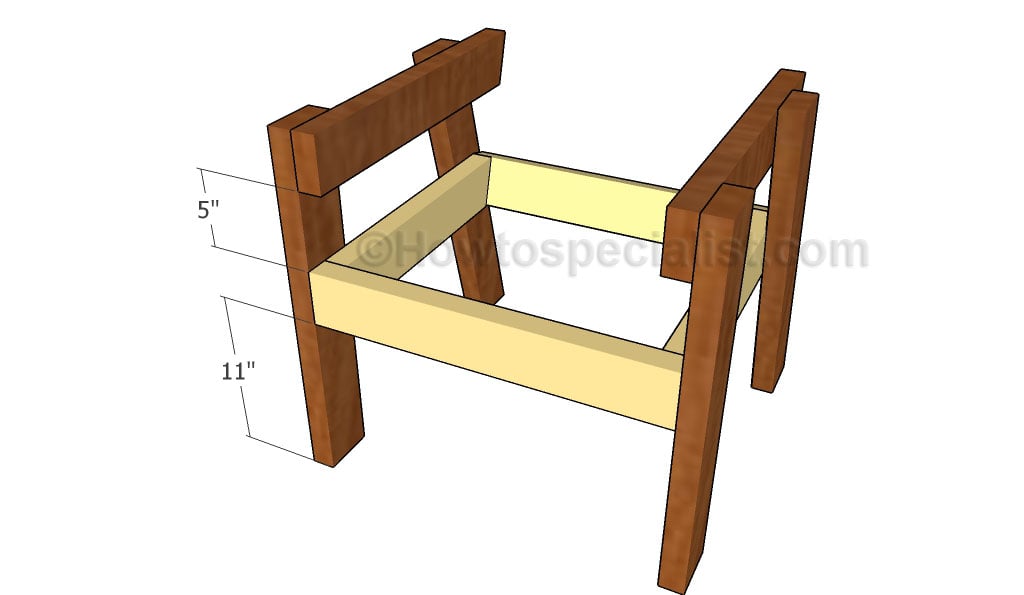
Assembling the outdoor chair
Attach the seat frame to the sides, as shown in the diagram. Drill pilot holes through the frame and insert 2 1/2″ screws into the legs. Make sure the corners are square and check if the legs are perfectly plumb.
Building the backrest support
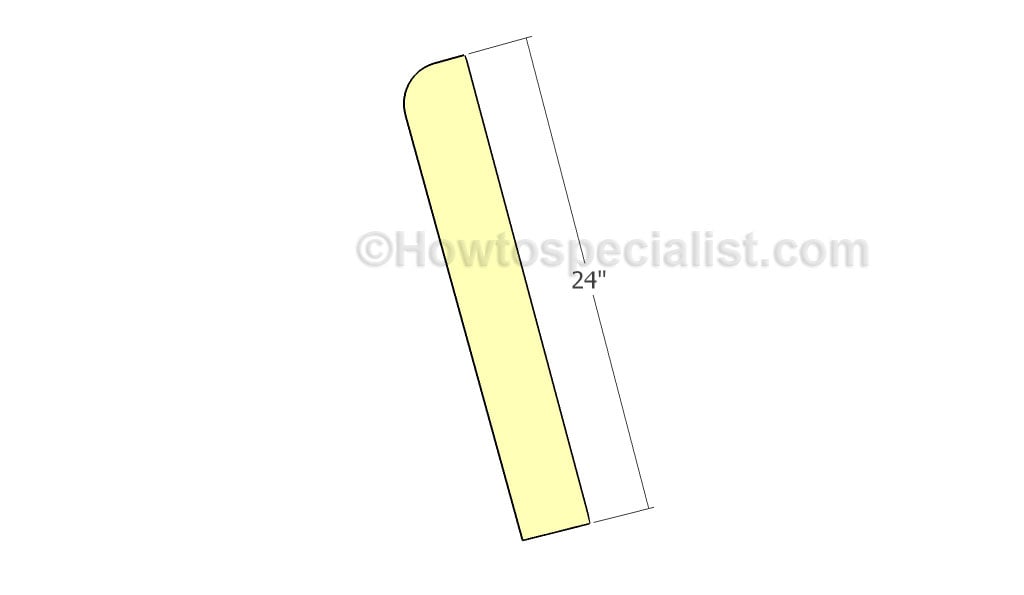
Build the supports for the backrest out of 2×4 lumber. Round one corner of the supports using a jigsaw. Smooth the cut edges with sandpaper.
Fitting the backrest supports
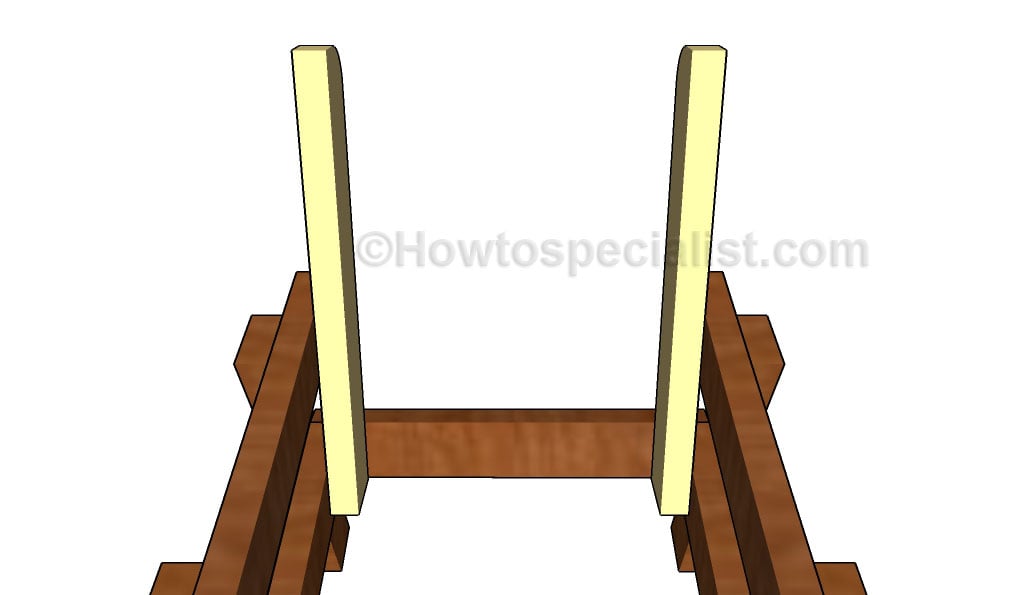
Attach the backrest supports to the garden chair. Align everything with attention and secure the backrest supports to the seat frame and to the armrests supports using 2 1/2″ screws.
Building the backrest
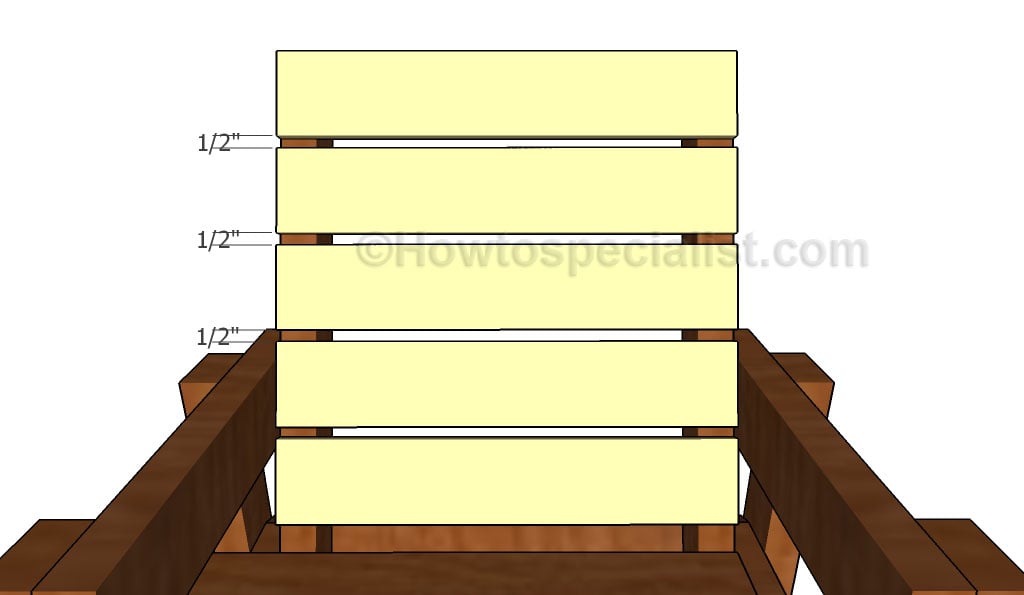
Attach the 1×4 slats to the backrest supports. Place a piece of 1/2″ wood block between the slats, to create even gaps. Use 1 1/4″ screws to lock the slats into place.
Attaching the seat slats
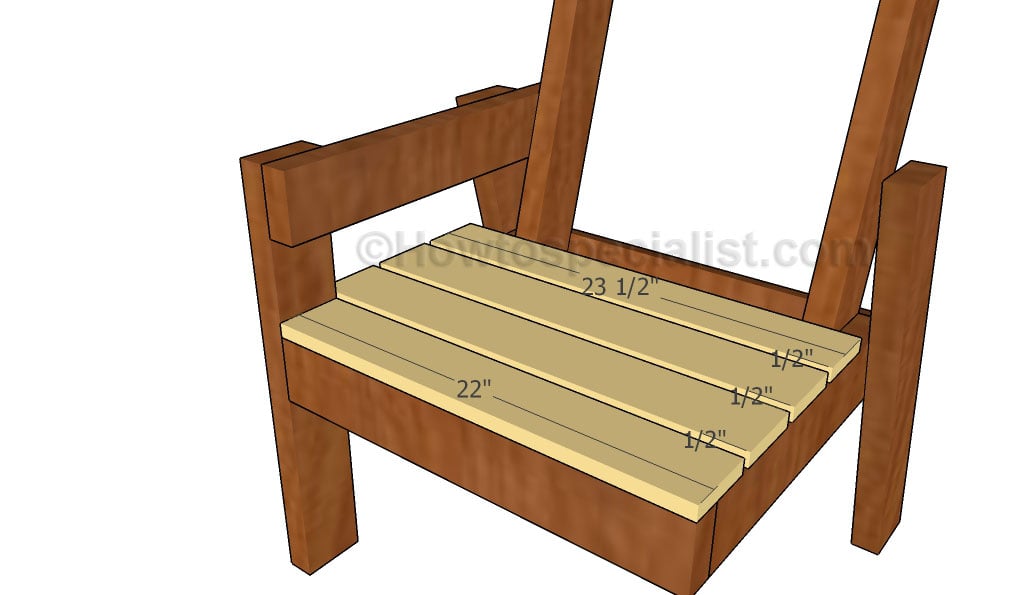
Fit the 1×4 slats to the seat frame, as described in the diagram. Drill pilot holes though the slats and insert 1 1/4″ screws to lock the slats into place. Leave 1/2″ between the slats for a professional result.
Fitting the armrest
One of the last step of the project is to attach the 1×4 armrest to the wooden chair. Round one end of the armrests using a jigsaw. Smooth the cut edges with 120-grit sandpaper. Use 1 1/4″ screws to lock the components to the supports.
Outdoor-chair-plans
Last but not least, we recommend you to take care of the finishing touches. In order to get a professional result, fill the holes and the gaps with wood filler and let it dry out for a few hours. Check if there are protruding screws and fix this issue, if necessary.
Thank you for reading our project about how to build an outdoor chair plans and we recommend you to check out the rest of the projects. Don’t forget to SHARE and LIKE our projects with your friends, by using the social media widgets, if you want to help us keep adding free woodworking plans.

11 comments
This is the first plans I can follow step by step. I am not handy with wood works but can follow directions.
Thank You!!
You’re very welcome. I’m looking forward to seeing the end result.
75 degrees??? Not only does my miter saw only go to 50 degrees but I have never seen a miter saw with the 75° setting. Are you sure you don’t mean 15 degrees?
Set the muiter at 15 degrees. Once you make the cut, you will be left with 75 degrees.
I did this in a 3D model before I started and the length of the back legs is off a bit. It is written that the back legs should be 24″ and cut at 75 degrees (really 15 degrees as pointed out). This will leave it with a wobble because the front longer once the back leg is cut, rotated 15 degrees, and attached.
If you cut the back leg to 24.75″ instead then it will be level with the front.
They definitely ment 15 deg…do cut your legs at 75 degrees. It is the wrong degree and will just irritate you when you figure it out.Same with all cuts that are marked as 75 degrees
75 degrees is what is left after you make the angle cut
Están magníficos estos planos, no tuve ninguna dificultad en fijar la sierra en 15 grados y figurar que quedaría en 75 grados al final.
Gracias
I would recommend putting the 1×4 onto the seat frame before attaching the legs. This was the only frustrating part if the build, I had to screw the slats on at an angle because the tops of the leg frames were in the way. Perhaps clamp the legs on to ensure everything fits and then add the seat slats. I also turned the backrest supports so the 4″ were across the back, giving an extra 2″ depth to the chair (built for a plus-sized man) and added an extra 4″ across the width of the seat pan. This made the 8′ pieces of wood a bit tricky, but used recycled stud wall frames and hardwood decking (in Australia I also could not find 4×1 planks). One last step was to add a couple of 4×2 braces under the seat frame with some industrial strength screws for a bit of extra support, does not affect the look of the chair at all.
excelente como esta explicado,muy buen tutorial,es para recomendar
Hôw do you get 15 degree on chop saw