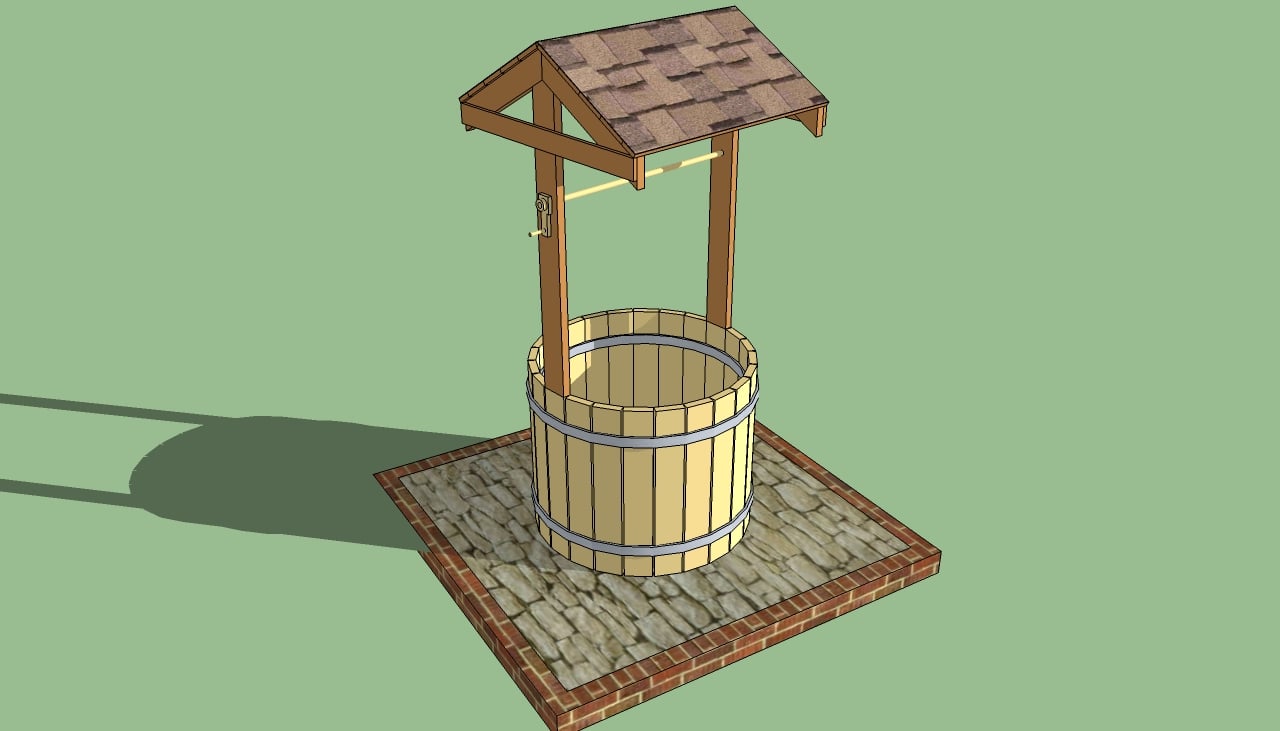
This step by step article is about how to build a wishing well. A wishing well has a decorative purpose in most of the cases, as it is a great piece that could enhance the look of any garden. In addition, if you build a mini-well, you could use it as a planter for your flowers. Irrespective of your choice you have to follow our instructions and to buy proper materials, if you want to obtain a neat result. Work with great care and attention, making sure you cut the components at the right size, before assembling them together.
In order to build a durable structure, but in the same time to keep the expenditures under control, we recommend you to use pine or cedar. Select the lumber with great care, as the quality of the wooden components will influence directly the aspect of the wishing well. Usually, these kind of projects require the use of 2×4 boards, but you can still get the job done in a professional manner, by using 2×6 lumber.
Measure all the components twice before making the cuts, as any wasted materials would increase the costs of the projects. In addition, drill pilot holes in the components before inserting the screws, in order to avoid wood from splitting. Sand the cut edges of the wooden elements, using a sand block and average-grit sandpaper, in order to give them a nice appearance and to avoid possible injuries. See all my Premium Plans in the Shop.
Made from this plan
How to build a wishing well

Building a wishing well
Materials
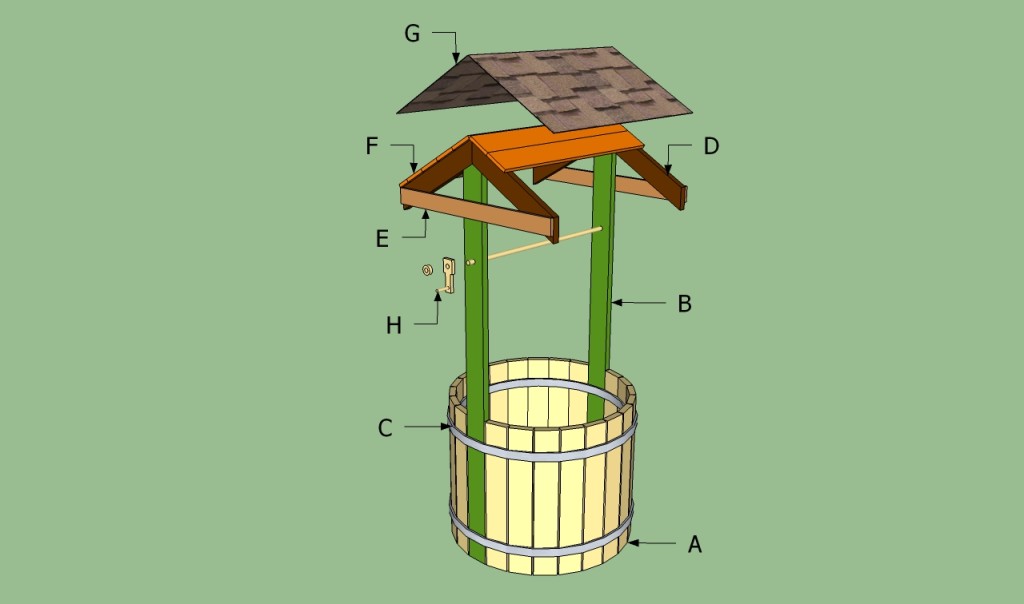
- A – 22 pieces of 2×6 lumber – 35″ long BASE
- B – 2 pieces of 2×6 lumber – 90″ long EXTENDED PALINGS
- C – 2 pieces of 2″ wide metal straps – 140″ long METAL STRAP
- D – 4 pieces of 2×4 lumber – 25″ long RAFTERS
- E – 2 pieces of 2×4 lumber – 43″ long BRACES
- F – 10 pieces of 1×4 lumber – 44″ long SLATS
- G – 20 sq ft of asphalt shingles ROOFING
- H – 1×6 lumber and 1 piece of 1×1 round lumber – 45″ long SPINDLE
- 6 pieces of 2×6 lumber – 12 ft
- 2 pieces of 2×6 lumber – 8 ft
- 2 pieces of metal straps – 12 ft
- 2 pieces of 2×4 lumber – 10 ft
- 5 pieces of 1×4 lumber – 8 ft
- 20 sq ft of asphalt shingles
- 2 1/2″ screws
- 1 1/4″ screws
- glue, stain
- wood filler
Tools
- Safety gloves, glasses
- Miter saw, jigsaw
- Chalk line, tape measure, spirit level, carpentry pencil
- Drill machinery and drill bits
Tips
- Use a good miter saw to make the angle cuts
- Drill pilot holes before inserting the screws
Time
- One Week
Related
Building a wishing well for a wedding

Building a wishing well
The first step of the project is to build the base of the wishing well. Therefore, you have to lay the 2×6 palings on a sturdy and level surface, as you can see in teh image. Align the boards properly at both ends, before locking them together with the metal strap. Place the straps about 5” from the edges and drive in 1 1/4” nails in every board.
Don’t leave any gaps between the wooden boards, as this will be the interior face of the wishing well.

Building the base of the wishing well
The next step is to lift the palings and to build the circular shape. In order to get the job done as a professional, we recommend you to cut out a round template with a radius of 20”. Place the template at the top of the base and secure a metal strap on the exterior face, using 1 1/4” nails.
Place the 1/2” plywood template at the bottom of the well and install another metal strap, as in the image. If you have worked with attention, the diy wishing well should have a circular shape.

Building the roof rafters
If you want to add support to your own wishing well, attach the plywood template at the bottom of the palings and lock it into position with nails. Afterwards, build the roof structure, as in the plans.
Cut the top of the extended palings at 30º, while the ends of the rafters have to be cut at 60º. Lock the roof structure using 1×4 cross braces and 2” wood screws. Countersink the head of the screws, to get a neat appearance.

Installing the roofing boards
Next, you have to attach the roofing boards, in order to get the job done. Cut the 1×6 slats at about 44” and attach them to the rafters, using 2” screws. Pre-drill holes in the rafters before inserting the screws, to prevent the wood from splitting.

Installing the asphalt shingles
After you have covered the roof of the wishing well with slats, you have to attach roofing felt on the whole surface. Use staples to secure the felts into place, before attaching the asphalt shingles.

Building the spindle
One of the last steps of this woodworking project is to build the spindle and the handle. Therefore, we recommend you to drill holes in the extended palings, before installing the spindle. Make sure holes are level, using a spirit level.

How to build a wishing well
Last but not least, after building your own wishing well, you have to take care of the finishing touches. Therefore, fill the head of the screws and the gaps with a good wood putty. Let the compound to dry out properly, before sanding the wooden surfaces with 120-grit sandpaper.
Thank you for reading our article about how to build a wishing well for a wedding and we recommend you to check out the rest of our projects. Don’t forget to LIKE and SHARE our articles with your friends, by using the social media widgets. SUBSCRIBE to be the first that gets our latest projects.

1 comment
Great plans. Looking forward for more.