This article is about how to mix ceramic tile adhesive. When you want to tile your kitchen or bathroom you have to prepare first adhesive for gluing the tiles on the floor or on the walls. Generally speaking, mixing ceramic tile adhesive is not a hard task, providing you use the right materials and tools. Consequently, you can mix the adhesive by hand (you can use a margin trowel) or mechanically (you should use a drill machinery with torque control and a mixing palette). In addition, when deciding to install tile in your house, one of the critical decision is to choose the right adhesive, to match the surface type and the tiles.
On one hand, there are mastic adhesives, which are already mixed by the manufacturers. Although mastic adhesives are the oldest ones on the market, they require experience in order to tile in a professional manner. In addition, mastic adhesives are not resistant to water, which makes them a poor option for bathrooms or kitchens. If you don’t have a drill machinery with a mixing paddle, buying a mastic adhesive could be the best solution for your needs.
Nowadays, the most used adhesives are thinset mortars. These adhesives are based on a mixture of cement, sand and additives. They are resistant to moisture and heat and secure properly the floor tiles and the wall tiles into position. If the flooring is made of wood, then you have to choose a special type of thinset, which contains latex adhesives. The best way to mix thinset is to use a drill mixer, if you want to get a professional result. We don’t recommend you to mix the tile adhesive by hand, as the compound will have lumps in the composition. Check out the rest of the tile projects, to learn how to install ceramic tile as a professional.
Made from this plan
In order to mix tile adhesive, you need the following:
Materials
- Water
- Thinset mortar / premixed mastic
Tools
- Safety gloves, glasses
- Drill machinery with mixing palette
- Bucket
Tips
- Read carefully the product label
Time
- 15-20 minutes
How to mix tile adhesive
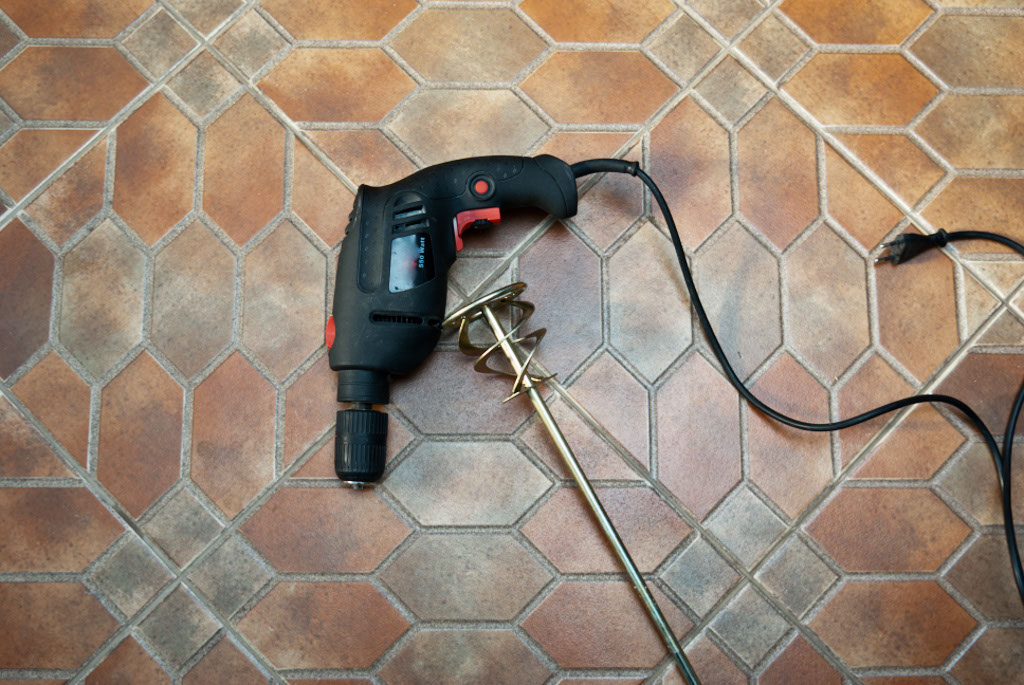
In order to mix tile adhesive mechanically you need a good drill machinery with torque control and a mixing paddle attachment. On the other hand, for small projects you can mix tile adhesive by using a margin trowel, but you should remember it will take a longer time.
That is why, for surfaces larger than 30 sq feet / 10 m2 it is better to buy or rent a drill machinery. It will get the job done quicker and much better. Especially if you install wall tile on old surfaces, the quality of the thinset adhesive is essential.
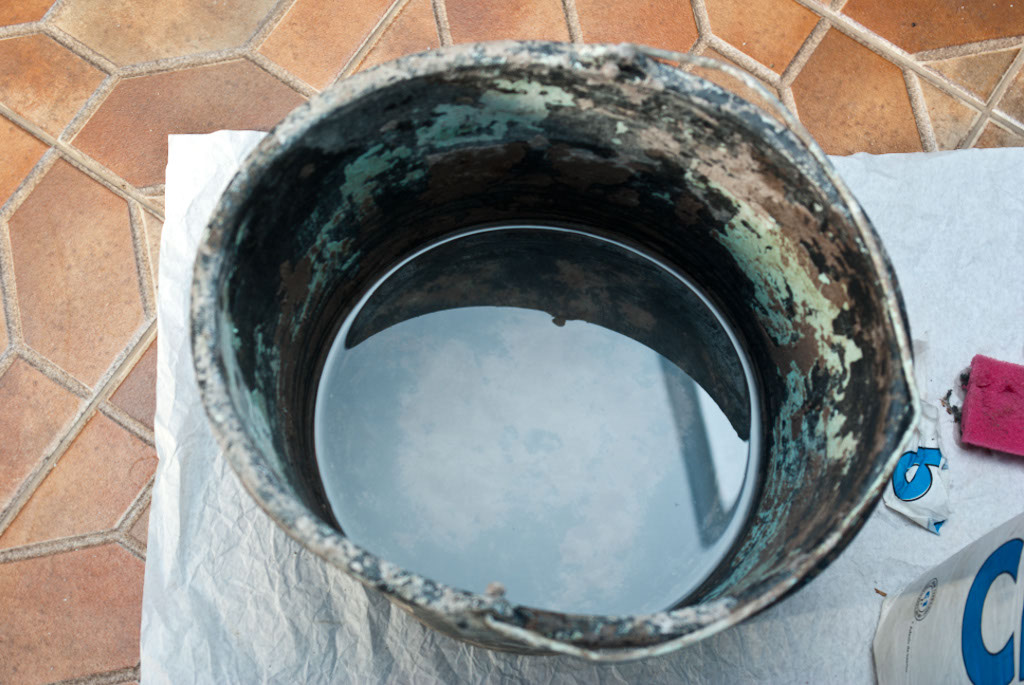
Next, after you have the right tools for mixing tile adhesive, you also need a rubber bucket. If the construction bucket is not new, you have to clean it thoroughly before pouring in the water and cement-based adhesive.
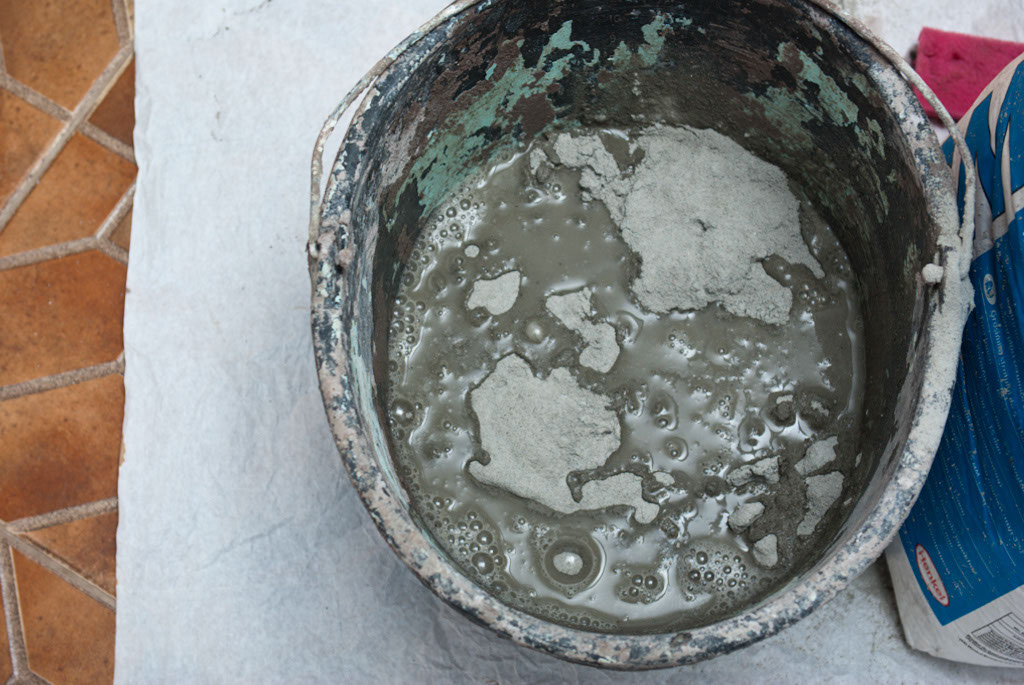
Then, you have to pour adhesive in the bucket until it gets over the top of the water. There is no magic formula to tell you how much tile adhesive to pour in the bucket, you will get it right after you gain some experience. Nevertheless, you have to let the adhesive soak some water for a couple of minutes, before you can start mixing it.
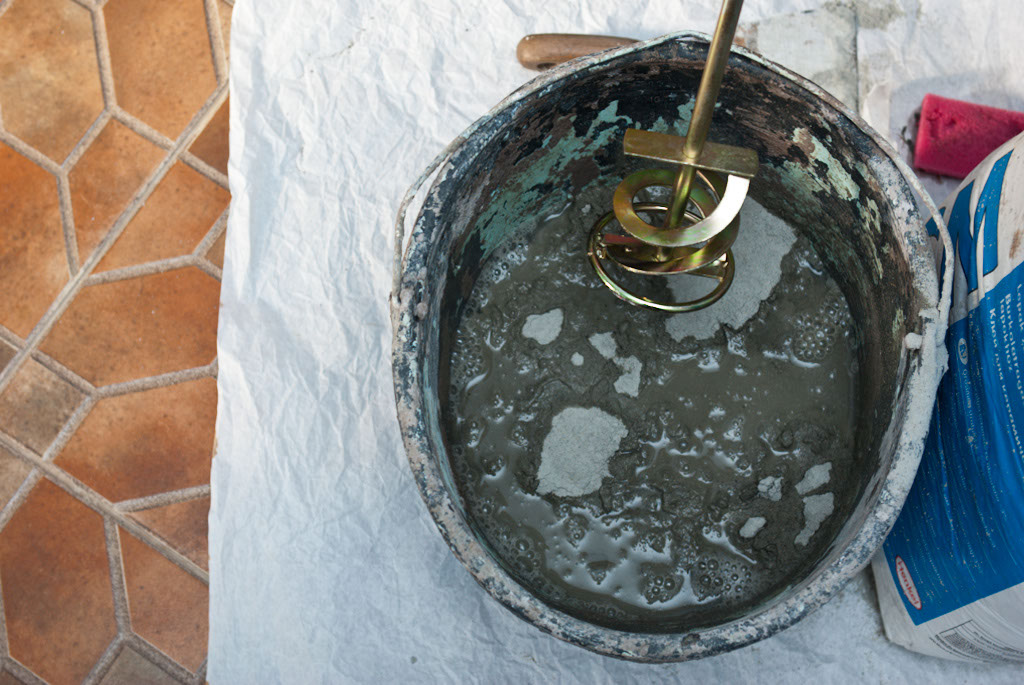
After you have let the adhesive soak water for a couple of minutes, you should start mixing it, by using the paddle attachment. If you use a drill machinery with torque control, it is better to start by using average speeds.
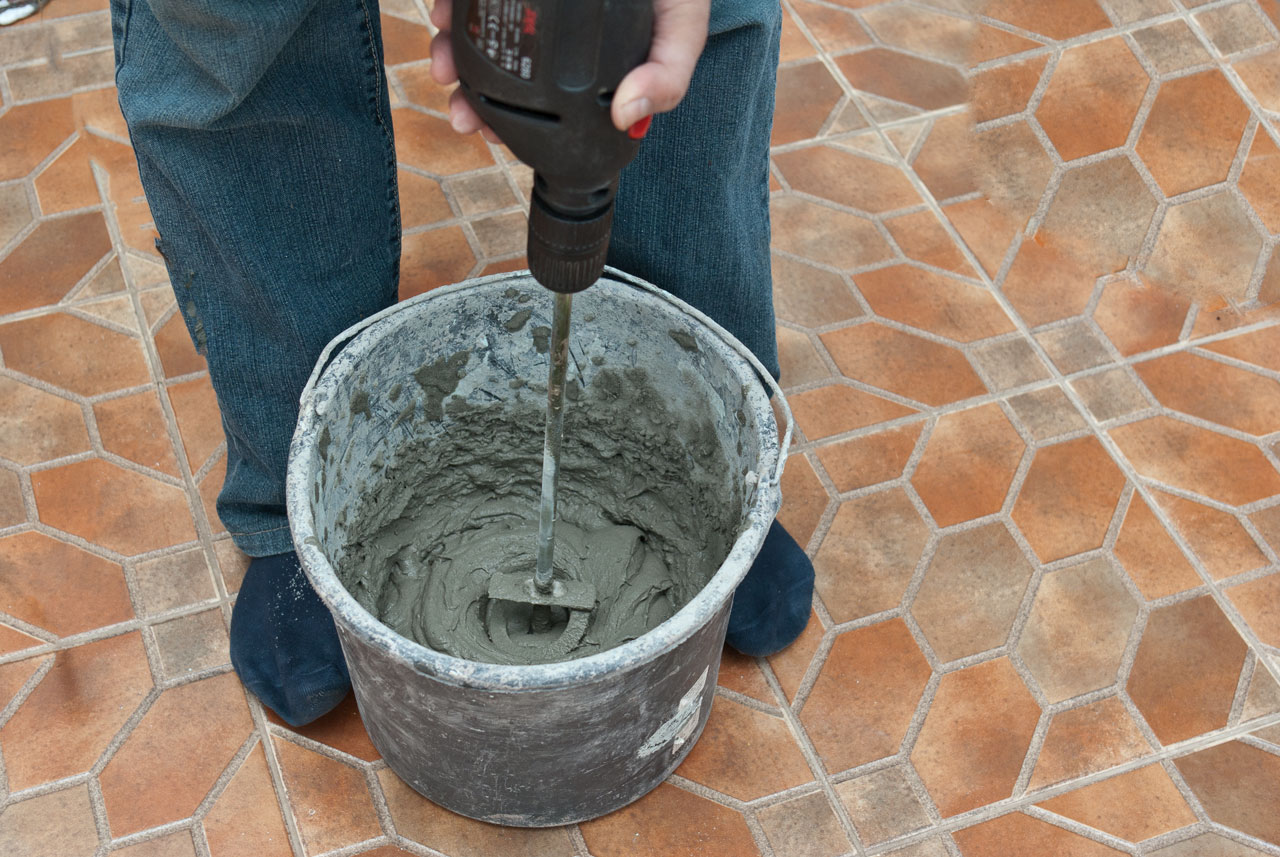
If you have to mix the tile adhesive by yourself, we recommend you to use your feet to lock the bucket into position while using the drill machinery. As you can see in the image, you have to hold the bucket in place, by using your feet, otherwise the bucket would move continuously and you wouldn’t be able to mix the thin-set.
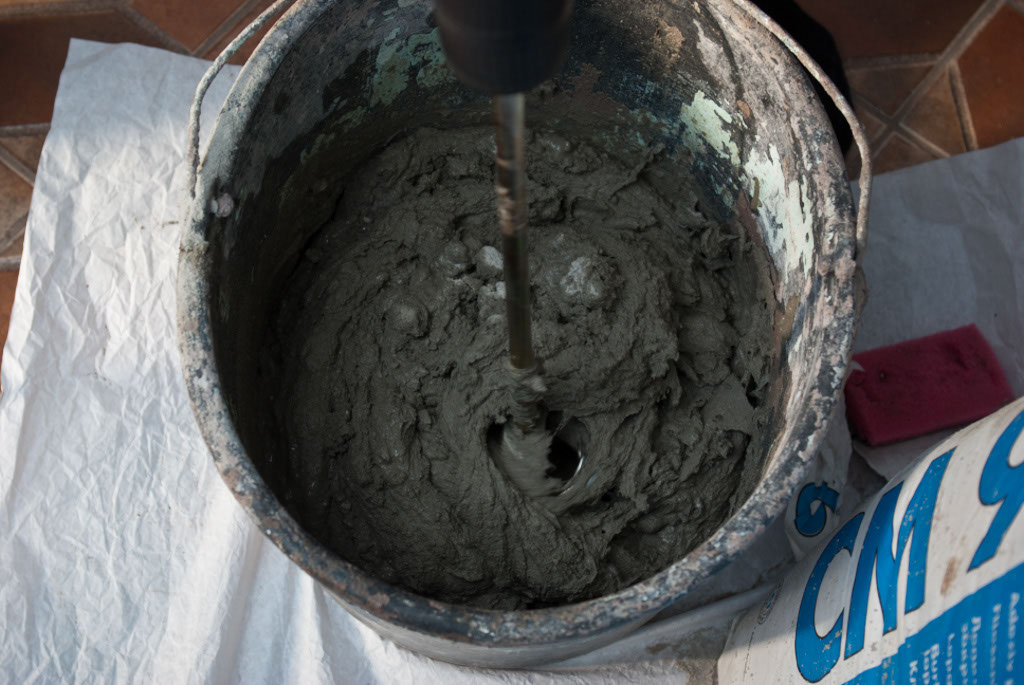
In order to obtain a proper tile adhesive, you should mix it for a couple of minutes, otherwise it won’t glue the ceramic tiles. Therefore, make sure you mix the tile adhesive thoroughly, by using circular moves, until you get an uniformly compound.
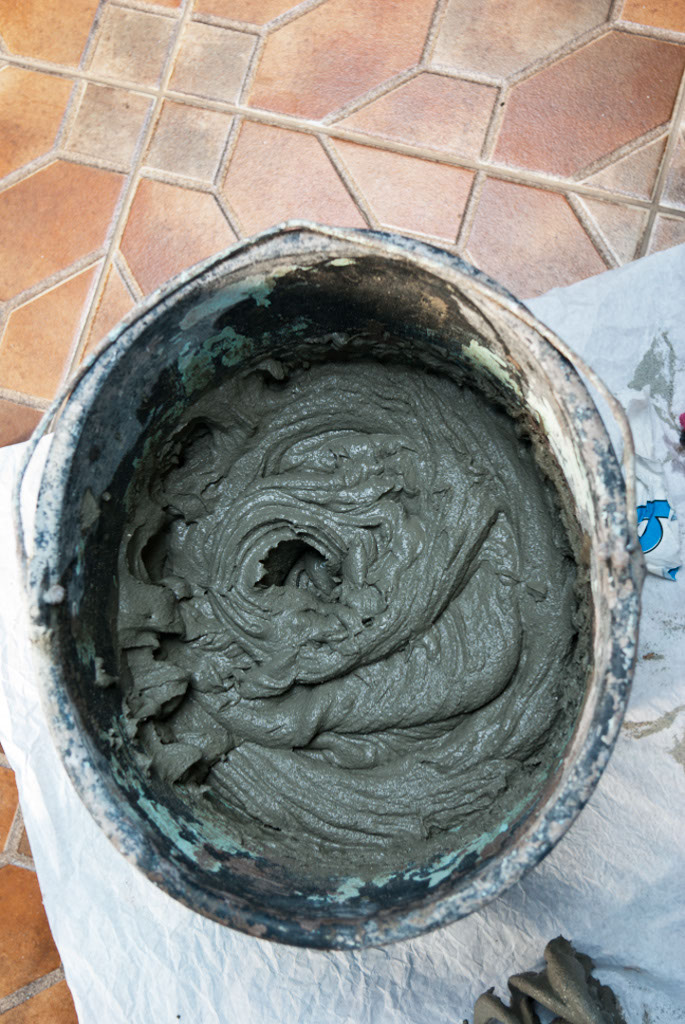
After you have mixed thoroughly the thinset adhesive, you have to leave it for 5 minutes, as to allow the water to penetrate the powder and activate the adhesives. Although, at first glance, it might seem unimportant to you, this aspect is essential for obtaining a good adhesive. Another aspect that you should be aware of is that the thinset will dry out quickly, so you have to be prepared to spread it on the wall/floor and install the ceramic tiles. After you have mixed the tile adhesive, in most of the cases, you can use it within 3 hours.
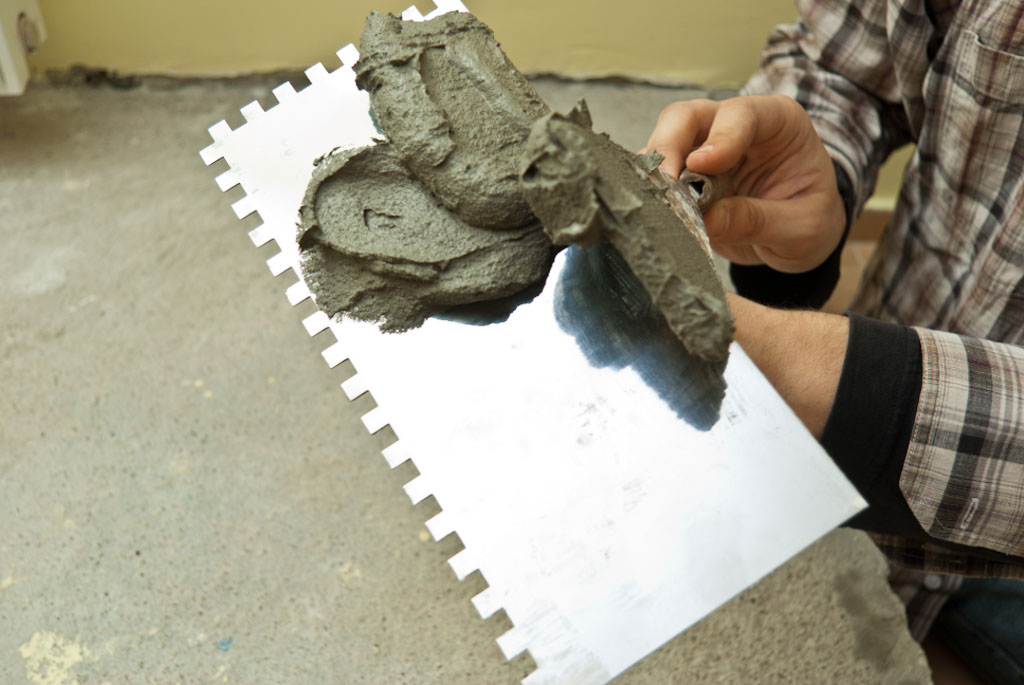
If you want to test the consistency of the tile adhesive, you should load material on a trowel. If the thinset sticks to the trowel and doesn’t fall off, while being able to spread it on the floor, it means it has the right consistency.
Best tips to mix tile adhesive:
Mixing tile adhesive is a critical step in ensuring your tiles bond properly to the surface, so it’s important to get it right. Here are my best-ever tips for mixing tile adhesive:
1. Start with a Clean Bucket: Always use a clean bucket for mixing adhesive. Any debris, dust, or dried adhesive left in the bucket can affect the consistency of your new mix and reduce its bonding strength.
2. Follow the Manufacturer’s Instruction: Read the instructions on the adhesive package carefully. The water-to-powder ratio is important, and it can vary between different brands and types of adhesive. Follow the recommended measurements for the best results.
3. Add Powder to Water, Not the Other Way Around: Always add the adhesive powder to water, rather than pouring water onto the powder. This ensures the mix blends smoothly and prevents lumps from forming, giving you a more even consistency.
4. Use a Mixing Paddle: For the best consistency, use a mixing paddle attached to a drill. This will save you a lot of time and effort compared to hand-mixing and ensures a smooth, lump-free adhesive. Start mixing at a slow speed to prevent splashing, then gradually increase the speed until the mix is even.
5. Aim for Peanut Butter Consistency: The ideal consistency for tile adhesive should be like peanut butter – thick but spreadable. If the mix is too watery, the tiles won’t adhere properly and may slip; if it’s too thick, it will be hard to spread and might not bond well. Adjust by adding small amounts of water or powder as needed.
6. Let the Adhesive Slake: After mixing, let the adhesive slake (rest) for about 5-10 minutes. This gives the chemical compounds time to activate, which improves its bonding strength and workability. After slaking, give it a quick stir before using it.
7. Only Mix What You Can Use: Tile adhesive starts to dry out after a certain amount of time, so only mix as much as you can use in 30-45 minutes. This prevents waste and ensures you’re always working with fresh adhesive.
8. Check the Temperature: The room temperature can affect how quickly the adhesive sets. If it’s hot, it will set faster, so consider mixing smaller batches. If it’s cold, the adhesive will take longer to dry, giving you more working time.
9. Keep the Tools Clean: Clean your mixing paddle, trowel, and bucket frequently during the job to prevent dried adhesive from contaminating your fresh mix. Dried lumps of adhesive can make your application rough and uneven.
10. Test the Adhesive: Before applying a large amount, test the adhesive on a small section to make sure it spreads easily and holds the tile in place. If it’s too thick or too thin, adjust the consistency before proceeding.
By following these tips, you’ll achieve a smooth, workable tile adhesive that bonds properly, ensuring a durable and long-lasting tile installation!
Thank you for reading our article on how to mix tile adhesive and we recommend you to check out the rest of our projects. Please share our projects with your friends, by using the social media widgets.
