This step by step woodworking project is about 4×8 deer stand plans. If you have a passion for hunting and you want to have more chances when shooting the deer, you should consider framing a box stand. This project is ideal if you like to hunt with a friend, as it’s a 2 person deer blind. With 2x4s, 3/4″ plywood and a few screws you can build this project is less than a week. So what’s stopping you from taking hunting to the next level?
We recommend you to invest in the best materials you could afford. Therefore, you should buy quality lumber, such as pine. Always take accurate measurements before adjusting the size of the components at the proper size. Drill pilot holes trough the components before inserting the wood screws, to prevent the wood from splitting. You can see here plans for a 4×4 deer stand that is perfect for one person. PDF downloadable plans with premium features in the Store.
Made from this plan
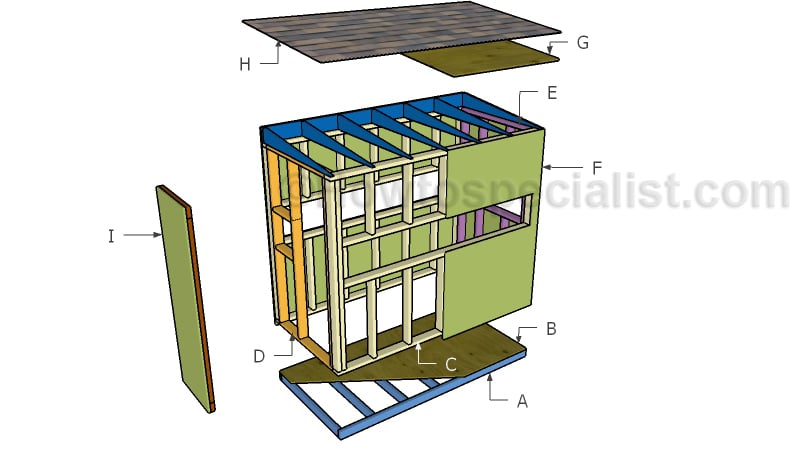
Building a 4×8 deer blind
Materials
- A – 2 pieces of 2×4 lumber – 96″ long, 7 pieces – 45″ long FLOOR FRAME
- B – 1 piece of 3/4″ plywood – 48″x96″ long FLOOR
- C – 2 pieces of 2×4 lumber – 96″ long, 4 pieces – 72″ long, 2 pieces – 89″ long, 5 pieces – 22 1/2″ long, 5 pieces – 32 1/2″ long 2xFRONT WALL
- D – 2 pieces of 2×4 lumber – 41″ long, 3 pieces – 72″ long, 2 pieces – 14″ long DOOR WALL
- E – 2 pieces of 2×4 lumber – 41″ long, 2 pieces – 72″ long, 2 pieces – 22 1/2″ long, 2 pieces – 32 1/2″ long FRONT WALL
- 38 pieces of 2×4 lumber – 12′
- 1 piece of 3/4″ plywood – 4’x8′
- 500 pieces of 2 1/2″ screws
- 100 pieces of 1 1/4″ screws
- wood glue, stain
- stand brackets
Tools
- Safety gloves, glasses
- Miter saw, jigsaw
- Chalk line, tape measure, spirit level, carpentry pencil
- Drill machinery and drill bits
Time
- One Weekend
4×8 Deer Stand Plans
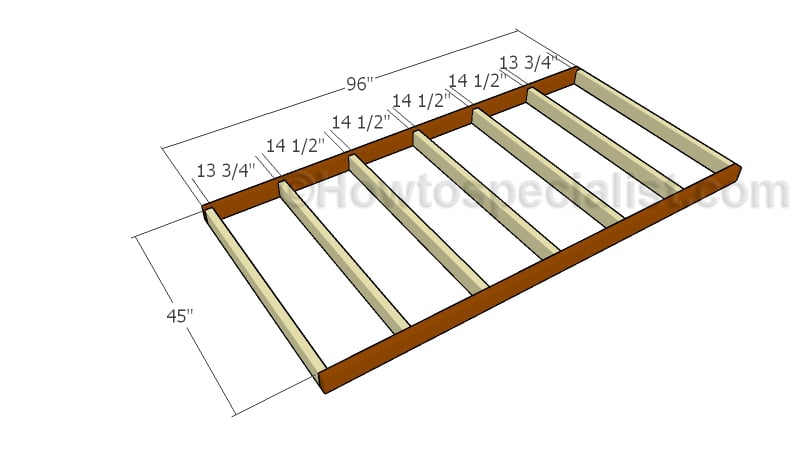
Building the floor frame
The first step of the project is to build the floor frame for the 2 person deer blind. As you can see in the plans, you need to use 2×4 or 2×6 beams for the components. Drill pilot holes through the rim joists and insert 2 1/2″ screws into the perpendicular components. Make sure the edges are flush and check the corners for squareness.
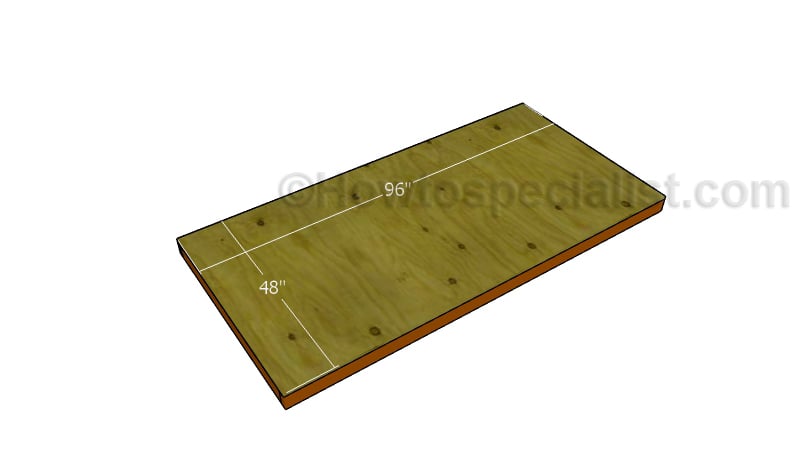
Fitting the floor
Attach a piece of 3/4″ plywood to the joists. Use 1 1/4″ screws to secure the plywood piece to the joists, every 8″. Leave no gaps between the plywood piece and the floor frame for a professional result. Invest in pressure treated plywood, as the sheets will be exposed to the elements.
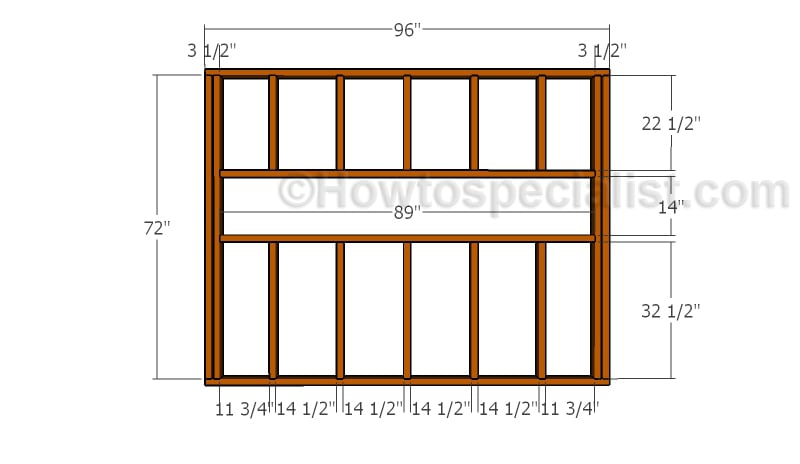
Building the front and back walls
The next step of the deer box project is to assemble the front and the back wall. Cut the plates and the studs from 2×4 lumber. Drill pilot holes through the plates and insert 2 1/2″ screws into the studs. Place the studs equally spaced, every 16″ on center.
As you can notice in the plans, you have to frame the window opening. Moreover, double the studs placed at both ends of the wall. Fit 1/2″ pieces of plywood between the double studs.
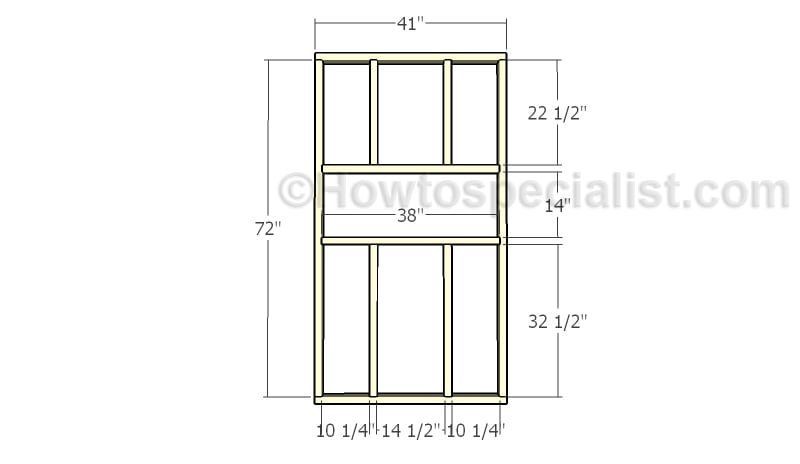
Building the side wall
Next, build the side wall. Cut the components from 2×4 lumber. Drill pilot holes through the plates and insert 2 1/2″ screws into the studs. Make sure the corners are right angled and insert the screws.
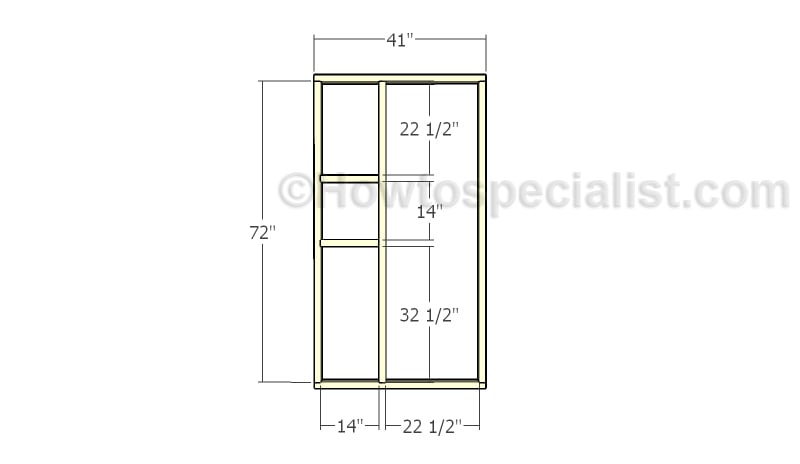
Building the door wall
Build the door wall frame using the information from the diagram. Cut the components from 2×4 lumber/ Drill pilot holes through the plates and insert 2 1/2″ screws into the studs. As you notice in diagram, you need to frame the door and the window opening.
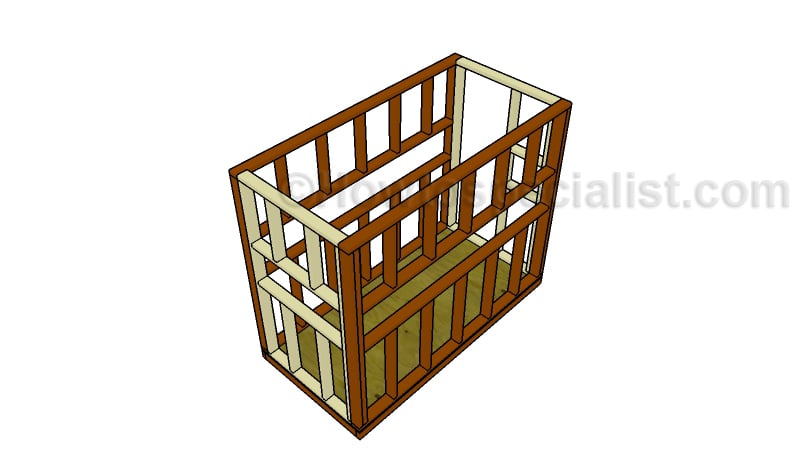
Assembling the frame of the deer stand
After building the four walls of the 2 person deer stand, you need to assemble them together tightly. Drill pilot holes through the bottom plates and insert 2 1/2″ screws into the floor. Make sure the edges are flush before inserting the screws.
In addition, you need to secure the adjacent walls together by using 2 1/2″ screws. Drill pilot holes and insert the galvanized screws. Check the corners for squareness before inserting the screws.
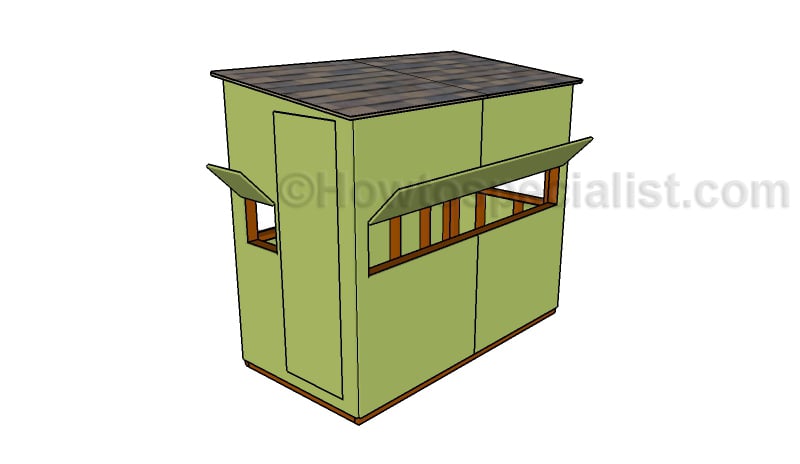
4×8 Deer Stand Plans
If you want to download the plans. just click on the GET PDF PLANS button bellow.
Thank you for reading our project about free 4×8 deer stand plans and we recommend you to check out the rest of the projects. Don’t forget to LIKE and SHARE our projects with your friends, by using the social media widgets. SUBSCRIBE to be the first that gets our latest projects.
<< PREVIOUS | NEXT >>



10 comments
About how much did it cost to build this 4×8 hunting shed.
I have no cost estimates for my projects, but you have a materials list right there.
I want to build this blind but i want to raise it off the ground would you recommend using 4×4 posts or cinder blocks.
I recommend wooden posts so you can lift it up a few feet.
Thank you for taking the time to create this step by step tutorial. My son and I used it to build the blind it was very easy to follow.
Congrats for the project
1 piece of plywood for whole thing huh?? Guess the walls are see through.
I guess you haven’t looked over PART 2 of the project. This 1 piece of plywood is for the floor. The wall panels are detailed in PART 2.
Is there a total materials list anywhere? Hard to read since it’s all split up.
The Premium version has 1 full cut list 1 full shopping list. See the GET PDF PLANS button at the ends of the article