
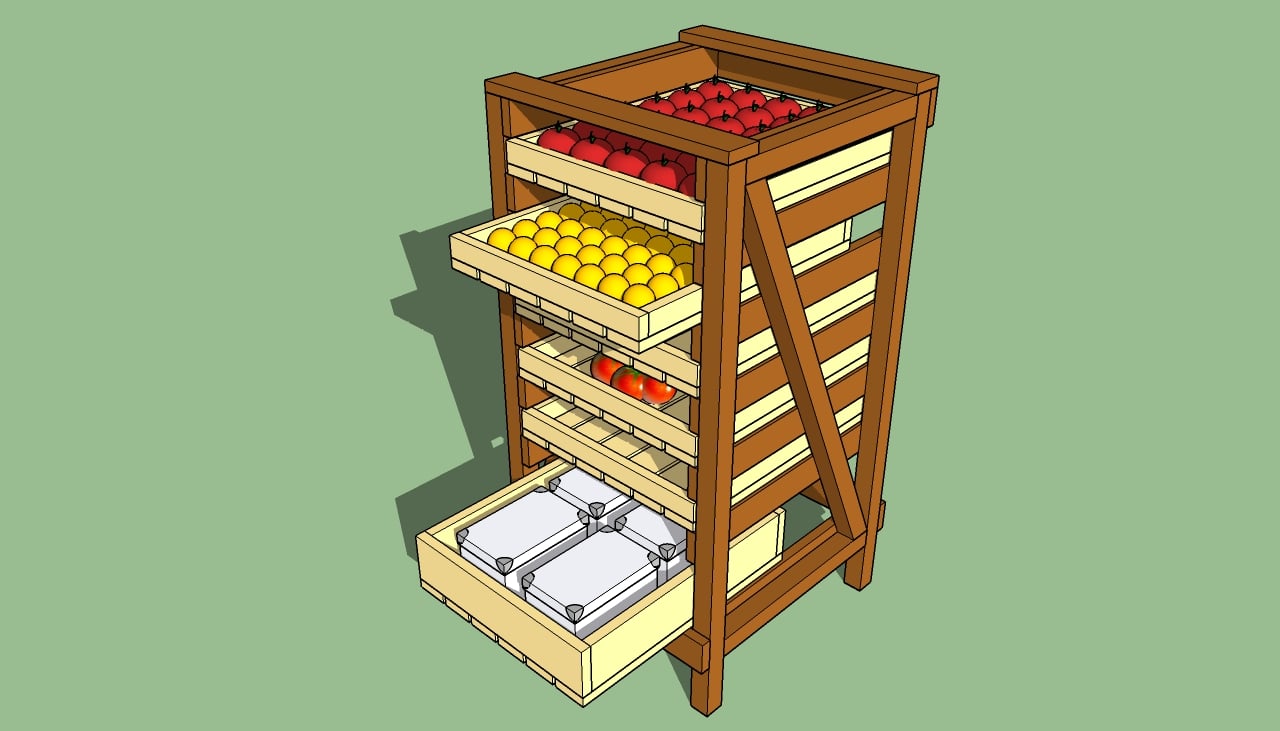
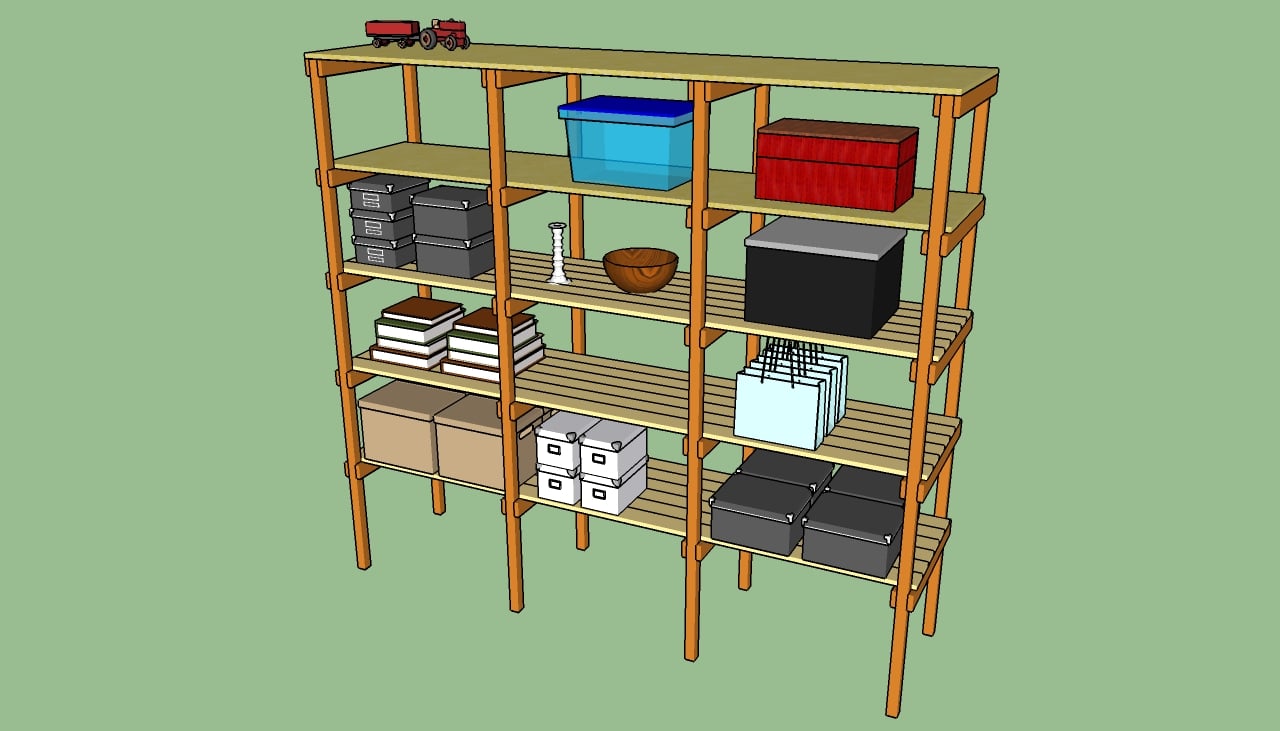
This step by step diy article is about how to build food storage shelves. If you need more storage space for vegetables, fruits or other small items, but you have a limited available space, then a wooden rack should be the right solution to your needs. Adjust the size of the shelves, as well as their number, according to your needs and tastes. The storage shelves are ideal to dry the vegetables or to store them during the winter.
In order to get the job done by yourself in just a day, you need to pay attention to several aspects. Therefore, buy quality lumber or sand the slats thoroughly, using 120-grit sandpaper. In addition, choose the lumber with attention, making sure the components are straight and in a good condition. Choose cedar, redwood or pine, as they have an exquisite look and are easy to work with.
Moreover, don’t forget to align the boards at both ends and drill pilot holes in the wooden components before inserting the screws, to prevent the wood from splitting. Check if the corners are right-angled after each step, by using a carpentry square. In addition, it would be a good idea to measure the diagonals of the panels and adjust the components, until they are perfectly equal. See all my Premium Plans in the Shop.
Made from this plan
In order to build food storage shelves, you needs the following:
Materials
- 4 pieces of 2×2 lumber – 40″ long LEGS
- 19 pieces of 1×3 lumber – 20″ SUPPORTS
- 36 pieces of 1×3 lumber – 20″ SHELF BOTTOM
- 25 pieces of 1×2 lumber – 18 1/2″ long, 25 pieces – 16 1/2″ long, 2 pieces of 1×4 lumber – 16 1/2″ long, 2 pieces – 18 1/2″ long SHELF SIDES
- 1 1/4” and 2 1/2” wood screws – SCREWS
- Wood glue
- 2 pieces of 2×2 lumber – 8 ft
- 13 pieces of 1×3 lumber – 8 ft
- 1 piece of 1×4 lumber – 8 ft
- 10 pieces of 1×3 lumber – 8 ft
- 2 1/2″ screws
- 1 1/4″ screws
- glue, stain
- wood filler
Tools
- Safety gloves, glasses
- Miter saw saw, jigsaw
- Chalk line, tape measure, spirit level, carpentry pencil
- Drill machinery and drill bits
Tips
- Pre-drill holes in the wooden components, before driving in the screws
- Smooth the exposed edges, by using a router with a 1/4” bit
Time
- One weekend
Food Storage Rack Plans

Diy Food Storage Shelves
Building a small wooden rack with storage shelves is one of those projects that will improve significantly your life, while spending the least amount of money. In most of the cases, you can even get the job done using scrap lumber.
How to build food storage shelves

Building the sides of the rack
The first step of the project is to build the sides of the rack, using 2×2 lumber and 1×3 supports. In order to obtain a professional result, we recommend you to work on a level surface. In addition, after fitting each support and locking it to the legs with wood screws, you should make sure the corners are right angles.
Drill pilot holes before inserting the screws, to prevent the wood from splitting.

Attaching the aprons
After building the two sides of the wooden rack, we recommend you to lock them together with 1×3 aprons. Use a large spirit level to plumb the sides of the rack, before driving in the nails trough the braces in the legs.
If you want to add extra-support to the components, you should fit 2×2 lumber between the outside frame. Cut the ends of the diagonals at angle and insert 2” screws, from the inside.

Small Shelf Plans
Building the storage shelves can be done in several ways, bu we recommend you to use the right techniques for your needs. Leave about 1/4” between the 1×3 and attach the 1×2 frame, to lock them tightly.

Large shelf plans
As you can easily see in the plans, we have decided to make the bottom shelf a little larger, as to store boxes or other items. In order to get the job done as a professional, us the same carpentry techniques described above.
Don’t forget to add glue to the edges of the components, in order to enhance the bond of the joints. Use a router and a 1/4” bit to round the exposed edges of the components.

How to build food storage shelves
Last but not least you have to take care of the finishing touches. Therefore, will the holes with a good wood filler and let it dry out for several hours. Sand the surface with 120-grit sandpaper, along the wood grain.
Thank you for reading this article about how to build food storage shelves and we recommend you to check out the rest of the diy projects. Don’t forget to share our articles with your friends, by using the social media widgets.
