This step by step diy project is about how to build corner shelves. Building simple shelves for a corner of your room is a quick and cheap project. If you follow the right plans, you can get the job done in just one day, without spending a significant amount of money. You should always adjust the size and the design of the shelves to your needs before starting the actual construction project.
Even if this is a basic woodworking project that is ideal for beginners, there are several important aspects that one should take into account. Therefore, you should use quality lumber when building the components. Choose boards that are perfectly straight and in a very good visual condition. Double-check all the measurements when building the components and use professional tools with a sharp blade.
When locking the components together, we recommend you to drill pilot holes before inserting the screws, in order to prevent the wood from splitting. Add a good wood glue to the joints and check if the corners are right-angled, by using a carpentry square. Fill the holes with wood putty and sand the surface along the wood grain, before applying several coats of stain or paint. See all my Premium Plans in the Shop.
Made from this plan
Building corner shelves
Building corner shelves
Materials
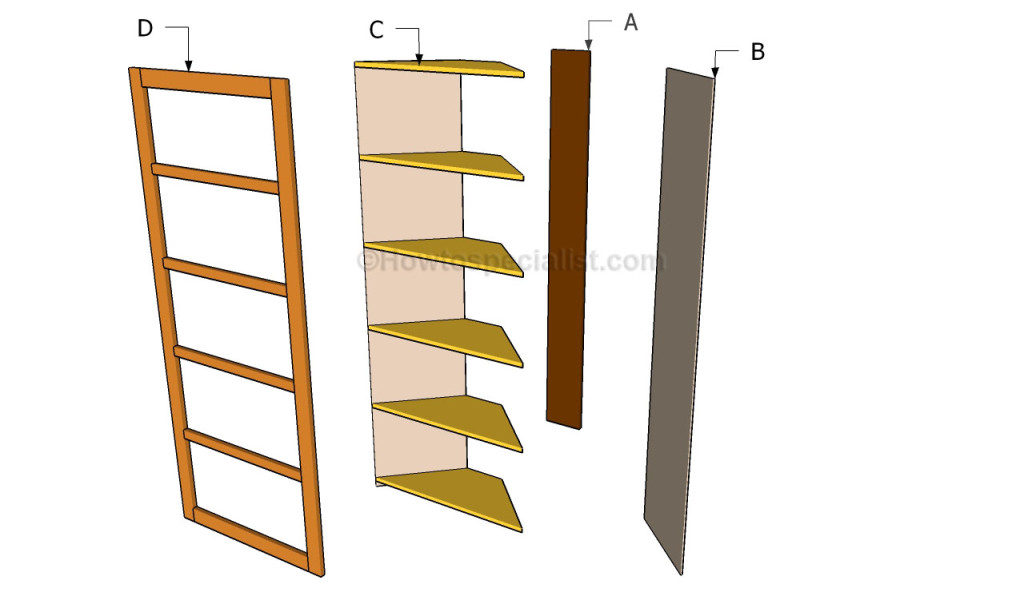
- A – 1 pieces of 1×8 lumber – 73″ SUPPORT
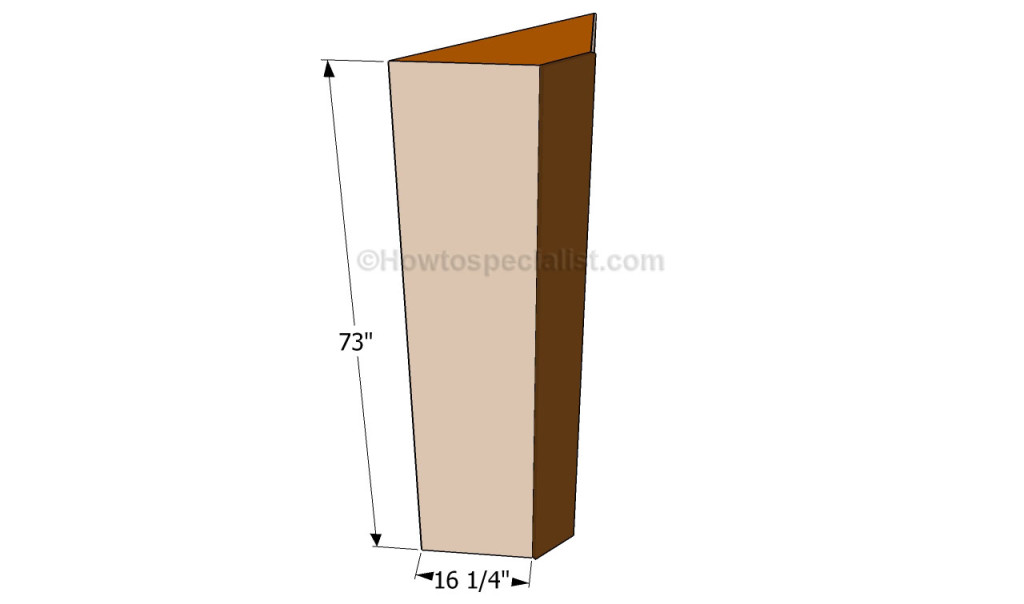
- B – 2 pieces of 1/4 plywood – 16 1/4″ x 73″ SIDES
- C – 6 pieces of 1×12 – 30 1/2″ SHELVES
- D – 2 pieces of 1×3 – 73″, 4 pieces of 1×2 lumber – 25 3/4″, 2 pieces of 1×3 lumber- 25 3/4″ TRIMS
- 1 piece of 1×8 lumber – 8 ft
- 1 piece of 1/4″ plywood – 3’x8′
- 2 pieces of 1×12 lumber – 8 ft
- 2 pieces of 1×3 lumber – 10 ft
- 1 piece of 1×2 lumber – 10 ft
- 2 1/2″ screws
- 1 1/4″ screws
- glue, stain
- wood filler
Tools
- Safety gloves, glasses
- Miter saw, jigsaw, pocket hole jig
- Chalk line, tape measure, spirit level, carpentry pencil
- Drill machinery and drill bits
Tips
- Apply several coats of wood stain to the wooden components
- Adjust the size of the shelves, according to your needs and tastes
Time
- One Day
Related
How to build corner shelves
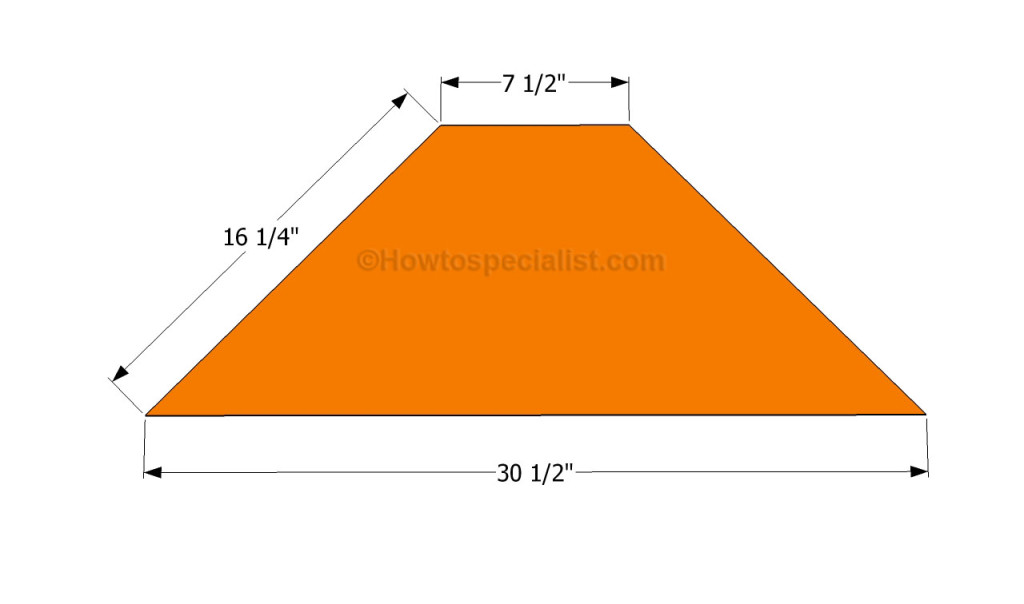
The first step of the project is to build the shelves for the corner storage rack. As you can see in the image, you need to cut the lumber at 30 1/2″, by using a good circular saw. Afterward, miter cut both ends of the shelves at 45º, if you want to get a professional result. Smooth the cut edges with medium-grit sandpaper, along the wood grain.
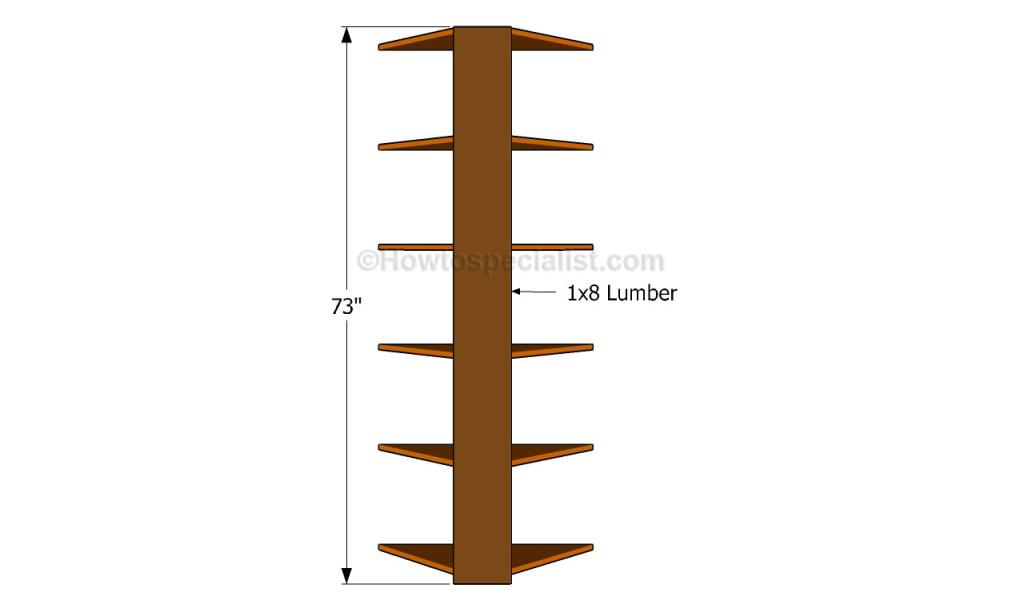
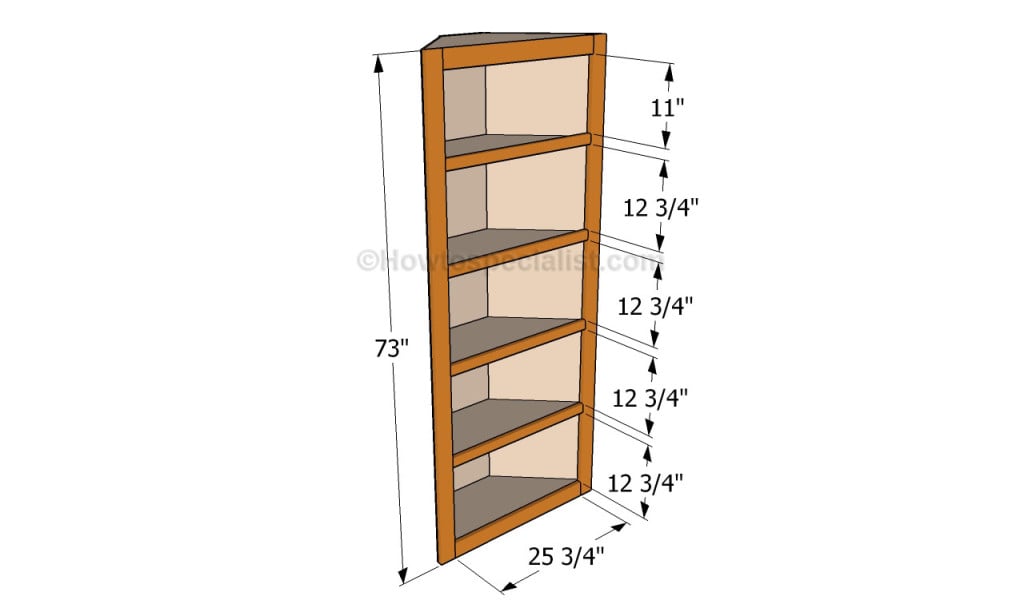
After cutting the shelves at the right size, you need to attach them to the wooden support. As you can easily notice in the plans, we recommend you to drill pilot holes trough the support and to insert 1 1/4″ wood screws into the shelves. Add glue to the joints, to enhance the bond of the joints.
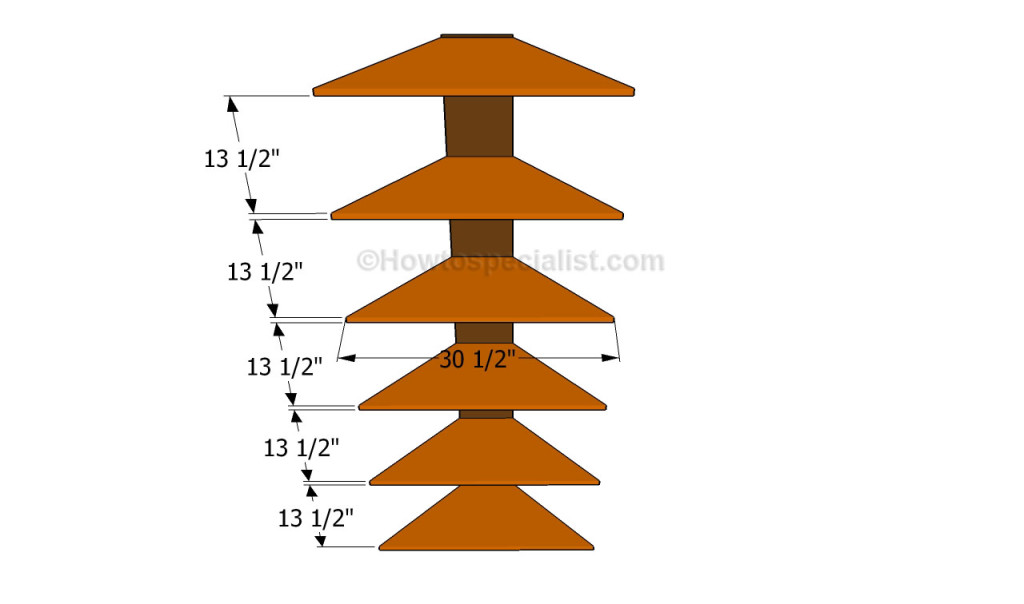
It is essential to place the shelves equally spaced, using the information form the image. Nevertheless, it’s up to you the number of shelves or distance you leave between them. Align the components at both ends and use a spirit level to check if the shelves are horizontal. Use a carpentry square to ensure the corners are right-angled.
Attach 1/4 plywood to both sides of the rack. In order to get an accurate result, we recommend you to mark the line on the plywood sheet and get the job done with a circular saw having a fine blade. Add wood glue to the joints and insert 1 1/4″ finishing nails into place.
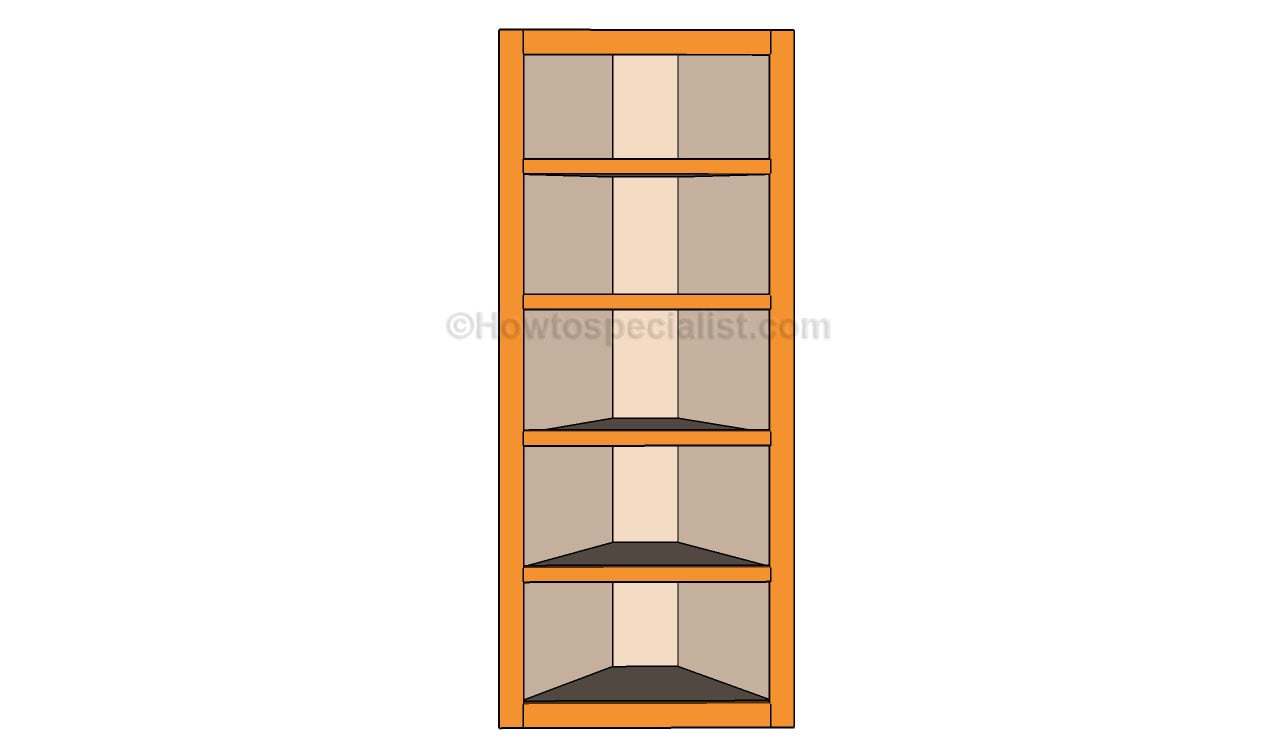
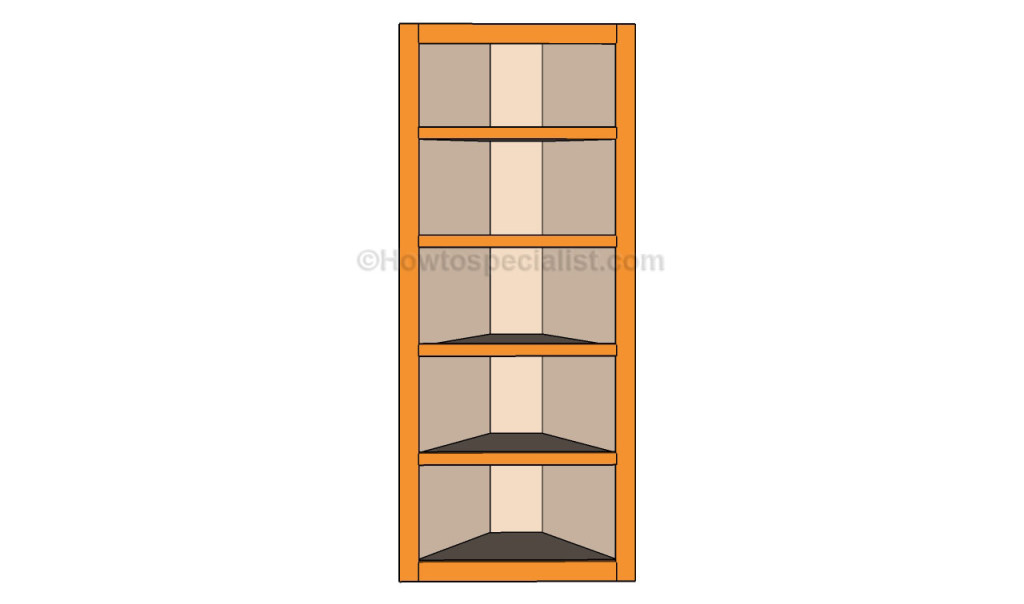
If you really want to enhance the look of the shelves and to add character to your project, you could attach trims to the front face of the shelves. As you can see in the image, you need to fit 1×3 trims to the perimeter edges and 1×2 lumber to the rest of the shelves. Add glue and insert 1 1/4″ finishing nails, after aligning the trims at both ends.
Last but not least, you should take care of the finishing touches. In order to build a professional corner shelves, you have to fill the holes with a good wood filler and smooth the surface with 120-grit sandpaper along the wood grain, after the compound has dried out.
Thank you for reading our project about how to build corner shelves and we recommend you to check out the rest of the projects. Don’t forget to share our projects with your friends, by using the social media widgets.

