This article is about how to build a shoe rack. If you have too many pairs of shoes and don’t have enough space to store them properly, you can try to build a custom shoe rack by yourself. Generally speaking, building a shoe rack is a fun project, as you can use several wood working techniques, together with your design skills. In this article, we show you the shoe rack plans, but it is up to you if you want to customize it according to your needs and tastes.
First of all, you have to decide the shoe rack dimensions, according to your needs. In most of the cases, you need a significant storage capacity, so it would be better to design the shoe rack as big as possible, but to still fit in your closet or hallway. The second issue refers to the materials you are going to use for the shoe rack. On one hand, you could buy wooden planks (1 – 1 1/2” thick), which have a nice appearance and are very resistant over time, or you could simply order laminate planks, which come at a lower price and are more practical when doing a diy project.
In order to make the shoe rack in a professional manner, you have to use proper tools. If you don’t want to buy them, you could just rent them or borrow them from one of your friends. Therefore, you are going to need a drill machinery with torque control, an electric screwdriver and a circular saw (or a jig saw).
Made from this plan
Materials
- A – 2 wooden boards – 14”x36” SIDES
- B – 1 wooden board – 14”x30” TOP
- C – 1 wooden board – 13”x30”, 1 wooden board – 4″x30″ BOTTOM
- D – 1 piece of 3/4″ plywood – 31 1/2″x36″ BACK
- E – 3 pieces of 11”x29 3/4” of plywood SHELVES
Tools
- Level, measuring tape, L-square, pencil
- Rubber hammer, hammer
- Jig saw, handsaw
- C-clamps, drill machinery
- Electric screw driver with torque control
Tips
- Read safety and disclaimer pages
- Select with great care the wood boards, otherwise the shoe rack would look bad
- Use a good drill machine with torque control
Related
Building a shoe rack

Building a shoe rack
A wooden show rack is practical as you can deposit your shoes in it and better use the hallway space. In addition, it is quite simple to make a show rack, provided you use the right tools and techniques. Fortunately, we will show you in this step by step article how to make your own shoe rack, by using our free shoe rack plans.
Shoe rack plans
Before you start making the shoe rack, you should draw a complete plan, otherwise it would be almost impossible to build it in a professional manner. Consequently, decide its dimensions from the very beginning, as to be able to fit you needs and then order the materials.
Continue the project by fitting the shelves. As you can see in the image, you need to build the shelves form plywood and 1×1 lumber. Fit the shelves into place, making sure you place them at angle (about 5º). Use a spirit level to make sure the shelves are level.
In order to reinforce the structure of the frame, you need to apply the back of the show rack. Use 1/4 plywood and finishing nails. Don’t forget to check if the corners are right-angled, before fitting the plywood into place.
After you have built the shoe rack frame, using the laminate planks and wood screws (#8×2” wood screws) you can also install doors for each shelf. This operation is recommended for those who will place the shoe rack in a highly visible area, as to add a nice feature to the rack.
How to make a shoe rack

Fastening shoe rack frame
Use a smart setup to fasten the shoe rack frame. Therefore, use four C-clamps and lock into position the two wooden boards, as shown in the image.
Use a l-square to make sure the corners are right angled and adjust them if necessary. It is essential to make pilot holes before inserting the screws (to avoid spiting the wood), therefore you should use a drill machinery and wood dill bits (make sure they are compatible with the screws you use).

Inserting the screws in the wood frame
Use an electric screwdriver to insert the screws, making sure you use low speeds at first. Do not insert the screws too tightly, otherwise you risk damaging the wooden boards. Three screws for each corner are enough for rigid joints.

Shoe rack frame
After you have built the frame, your shoe rack should look similar to the one in the image. Consequently, make sure you have installed at least 2 wood screws at every corner joint, as to get a resistant rack.
In order to obtain the desired result, you should use a proper set-up. Consequently, you should use a 4×4 piece of timber and lock the corner joints, using several C-clamps. In this way the corner joints will be firmly set into position, and you will be able to drill the holes in the wooden planks.

Building a Shoe Rack
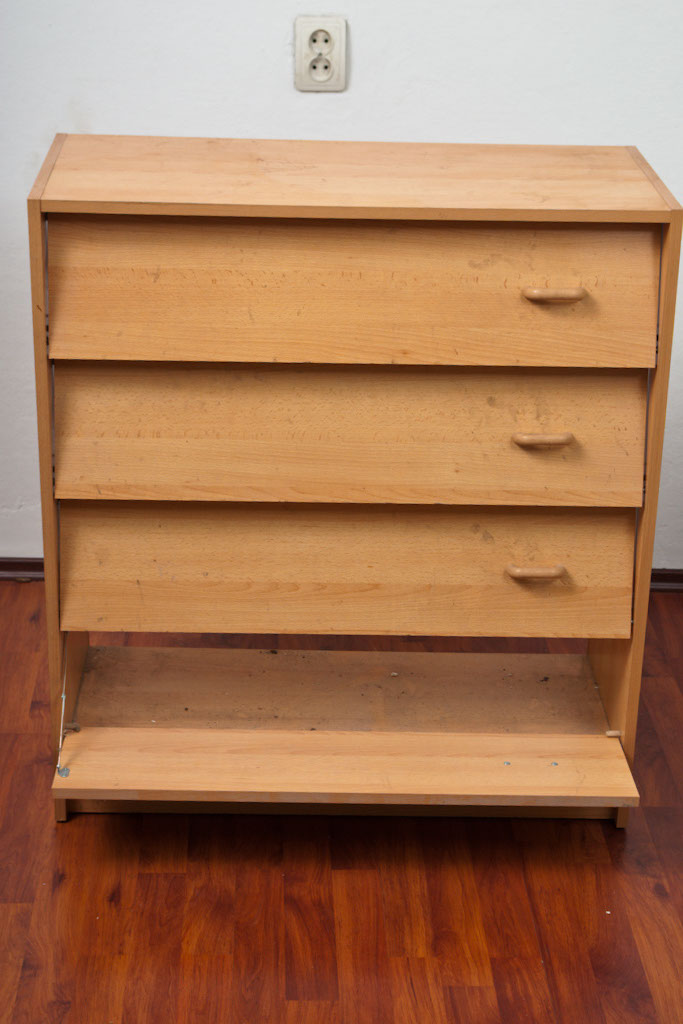
After you install the doors of the shoe rack, it should look like this. The door handles could be made of wood or you could go for a modern look. It all depends on your tastes and needs, as the possibilities are virtually endless, being limited only by our imagination.
As we have already said, you can even choose not to build doors for the shoe rack, if you consider you don’t need this feature. Your shoe rack would be as practical even without them. Consequently, if you do not want to do a more complex project, you can choose to build only the shoe rack frame and the shelves.

shoe-rack-shelves-support
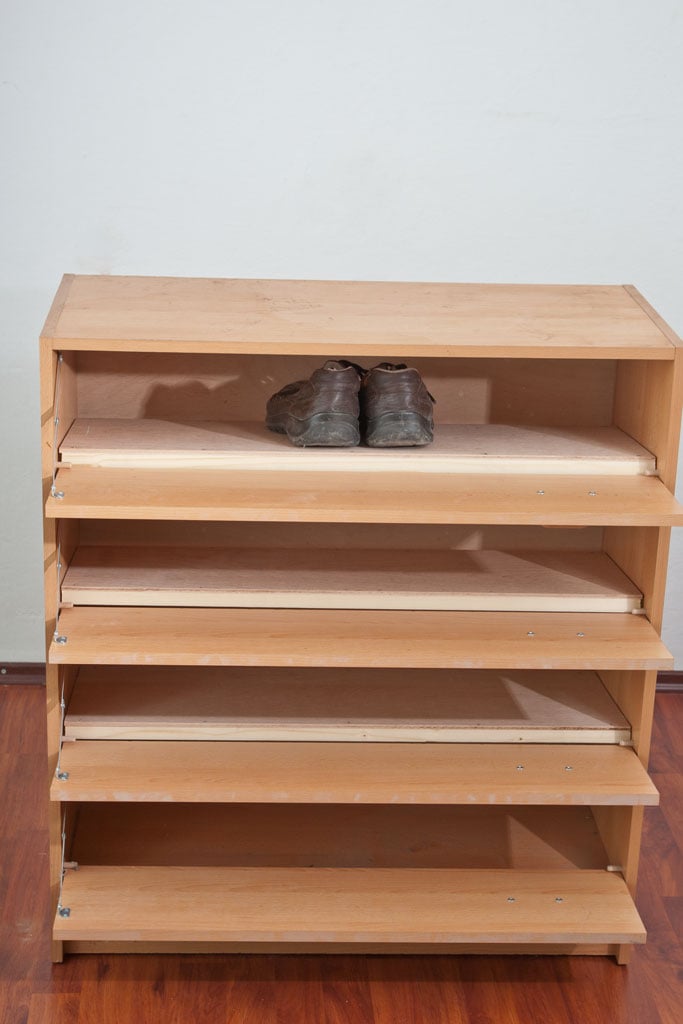
In this image you can see one possible way in which you can attach the shoe rack doors. Consequently, you could install light hinges, as to be able to close and open each shelf of the shoe rack.
On the other hand, you should notice the two metal pins which will support each shelf on both sides of the shoe rack. On the other hand, you can also fasten the shelves directly to the frame with screws, but you won’t be able to remove them temporary (we recommend you to use metal pins).
Building shelves for the shoe rack

Materials for making a shoe rack
In order to build the shelves for the shoe rack, we recommend you to use 1×1 timber for the brackets, and a thick plywood (2/8” thick). You can buy a less thick plywood, but from our experience we recommend you to choose the first option, as it would be much more resistant over time.

Shelf brackets
First of all you have to place the two pieces of 1×1 timber, as to be parallel, at a distance equal to the width of the plywood shelf.

Shoe Rack shelf
After you have placed the plywood over the wooden brackets, you have to use finishing nails to lock the two components together. Consequently use nails every 10” and a hammer.

Building shoe rack shelves
After you have inserted the nails in the plywood, your shelf should look similar to the one in the image.

Cutting shelf brackets
Use a hand saw to cut the 1×1” wood brackets. Make sure you cut the timber exactly over the edge of the plywood shelf.

Installing shoe rack shelves
After you have built the plywood shelves, you have to install them inside the shoe rack frame. Consequently, you should first install 2 metal pin supports (or wood plugs) on each side of the shoe rack, for each shelf.
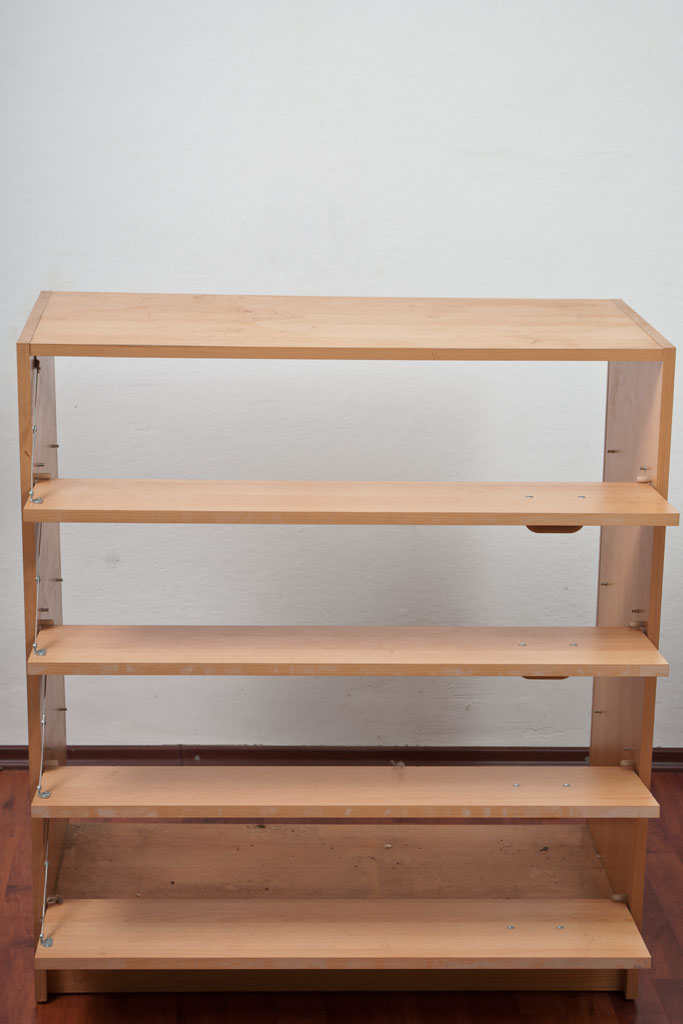
Remember that in the image you see the back of the shoe rack, that is why the shelves are angled towards you and not oppositely. You could install the shelves a little angled (10-20º), as to increase the space of each shelf. In addition, in this way you could deposit more of your shoes in the rack.

Installing plywood on the back of the show rack
After you have installed all shelves inside the shoe rack, you should use a hammer to lock into position the back of the frame. Consequently, use a tape measurement to determine its dimensions, and go the your local diy store to buy a thick plywood.

The back of the shoe rack
After you have installed the back of the shoe rack, the piece of furniture should look like this. Consequently, use finishing nails every 10” around the perimeter of the shoe rack. When installing the plywood back, make sure the corners of the shoe rack are 90º angled, otherwise it would look bad and won’t resist over a long period of time.

How to make a shoe rack
If you have followed our guidelines, you should have a brand new shoe rack, which will ease the burden of organizing your house. In addition, the use of proper materials will guarantee that you will enjoy the shoe rack for a long period of time. Do not forget that you can customize the shoe rack according to your needs, so you can modify its dimensions to fit your needs and tastes.
Thank you for reading our article on how to make a shoe rack and we recommend you to check out the rest of our furniture projects. Please share our projects with your friends, by using the social media widgets.


