This step by step woodworking project is about free squirrel feeder table. This is a super simple project you can make in just a few hours. A very good idea would be to ask your kids to join you and pass down a few skills. You weather resistant lumber and under any circumstance do not apply toxic substances to the components. Make sure you check out my top projects, for a healthy dose of building inspiration.
We recommend you to invest in the best materials you could afford. Therefore, you should buy quality lumber, such as pine, cedar or redwood. Always take accurate measurements before adjusting the size of the components at the proper size. Drill pilot holes trough the components before inserting the wood screws, to prevent the wood from splitting. See all my Premium Plans in the Shop.
Made from this plan
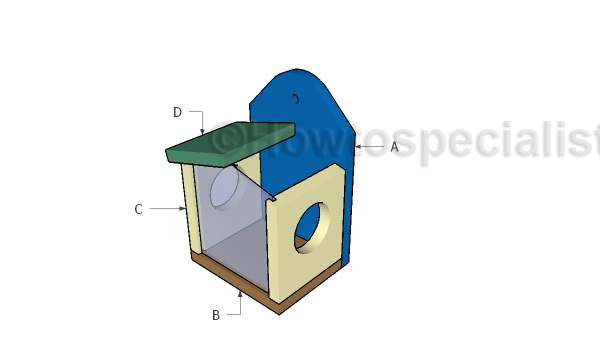
Materials
- A – 1 pieces of 1×8 lumber – 11 1/2″ long BACK
- B – 1 piece of 1×6 lumber – 7 1/2″ long BOTTOM
- C – 2 piece of 1×6 lumber – 6 1/4″ long SIDES
- D – 2 pieces of 1×6 lumber – 5 1/4″ long ROOF
- E – 1 pieces of 1/8″ plexiglas – 6 1/2″x7″ long FRONT WALL
- 1 pieces of 1×6 lumber – 6′
- 1 pieces of 1×8 lumber – 6′
- 2″ brad nails
- Plexiglas
- wood glue
- wood filler
Tools
- Safety gloves, glasses
- Miter saw, jigsaw
- Chalk line, tape measure, spirit level, carpentry pencil
- Drill machinery and drill bits
Time
- One Day
Squirrel Feeder Plans
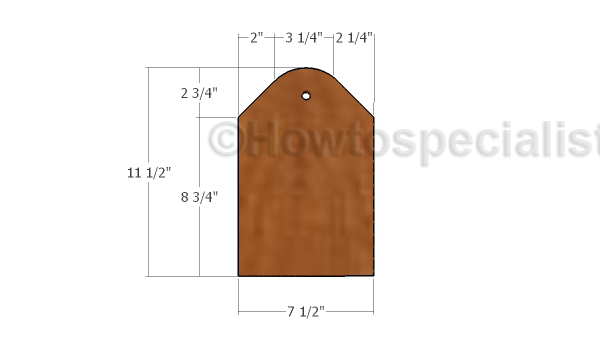
Building the back support
The first step of the project is to build the back for the squirrel feeder. As you can notice in the diagram, you need to use a piece of 1×8 lumber. If your slat is just 7 1/4″ wide you can cut the components from 1x10s or use the as they are with minimal modification to the plexi-glass front wall.
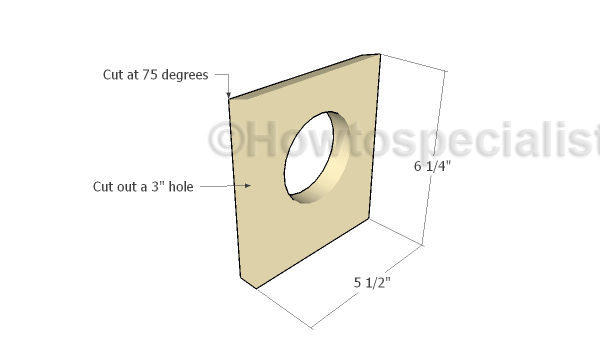
Building the sides
Build the sides for the feeder from 1×6 lumber. As you can easily notice in the diagram you need to make a bevel cut to the top of the components. Cut the top edge at 75 degrees using a table saw or a miter saw. Next, you need to cut out the entrance holes into the sides, using a jigsaw. Just mark the middle of the panels and mark the 3″ in diameter circle with a pencil. Smooth the edges with sandpaper for a neat look.
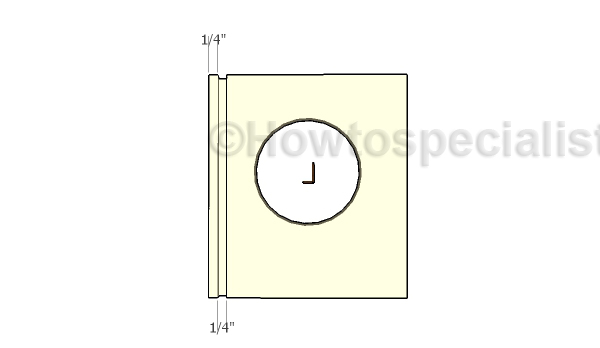
Cutting the grooves
Next, you need to make 1/4″x1/4″ grooves to the sides of the squirrel feeder. The groves will keep the front wall into place, so make sure you take accurate measurements and make it as accurately as possible.
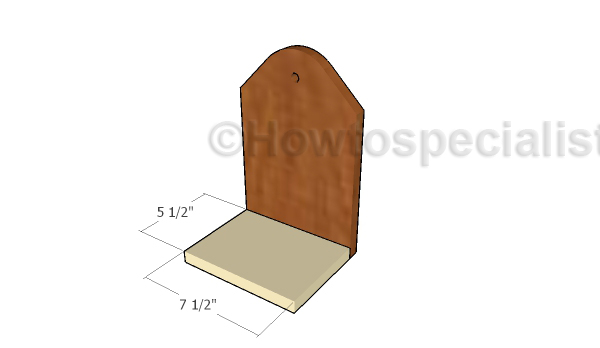
Building the bottom
Build the bottom of the feeder from a piece of 1×6 lumber. Add glue to the joints, align the edges flush and make sure the corner is right-angled. Use 2″ brad nails to secure the back to the bottom component.
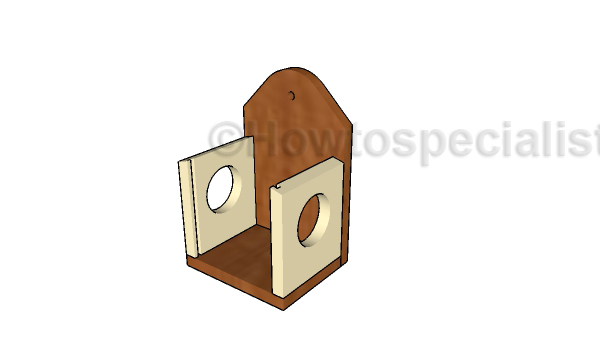
Continue the project by fitting the sides to the squirrel feeder. Align the edges with attention, add glue to the joints and insert 2″ brad nails through the back and through the bottom to secure them tightly into place.
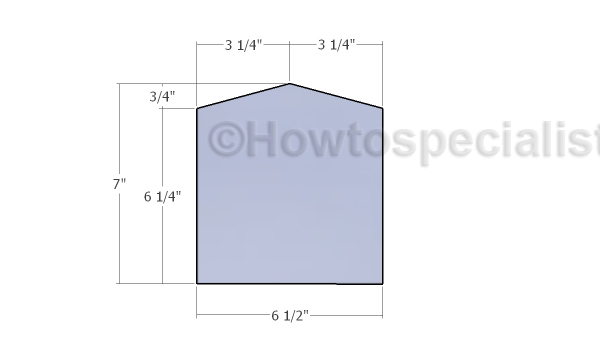
Building the front screen
Build the front wall from clear plexiglass. Mark the cut lines on the panel and get the job done with a hacksaw. Smooth the edges with fine grit sandpaper, before sliding it to the front of the feeder.
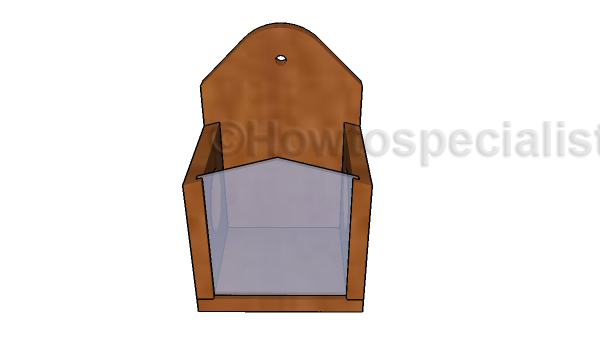
If you use 1/8″ thick plexiglass the panel will slide easily into the 1/4″ grooves. If you use 1/4″ thick plexiglass, you might have to put some extra elbow grease.
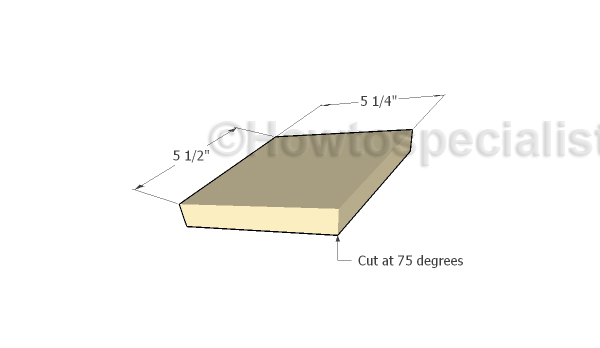
Building the roof
Build the roof for the squirrel feeder from two pieces of 1×6 lumber. As you can easily notice in the diagram, you need to cut one edge at 75 degree.
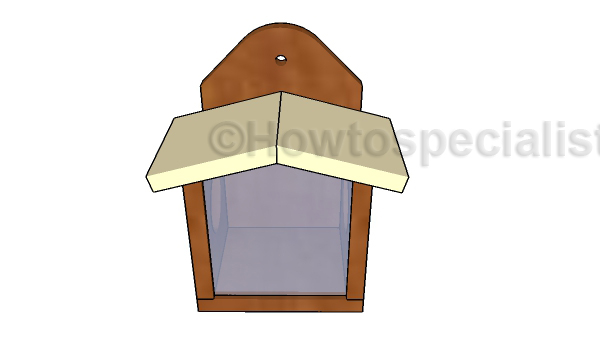
Fitting the roof
Fit the pieces to the top of the feeder, as shown in the diagram. Leave no gaps between the components and add glue to the joints. Use 2″ brad nails to secure the components into place. Make sure you do not apply any toxic substances to the feeder, as it will contaminate the food for the squirrels. If you use weather resistant lumber, the components will not be affected by the elements.
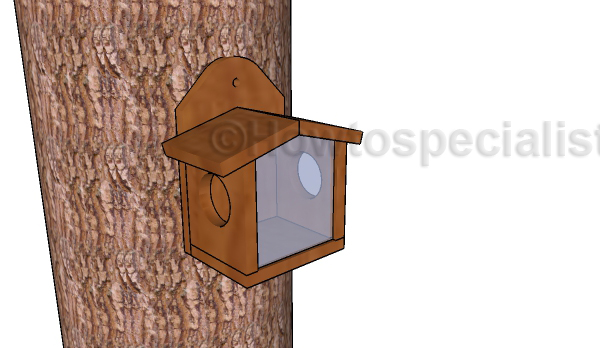
Squirrel feeder plans
Thank you for reading our project about free squirrel feeder table and we recommend you to check out the rest of the projects. Don’t forget to LIKE and SHARE our projects with your friends, by using the social media widgets. SUBSCRIBE to be the first that gets our latest projects.
