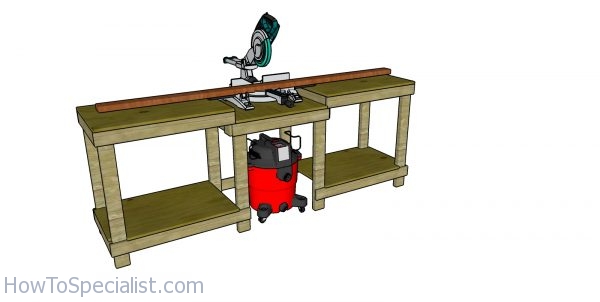
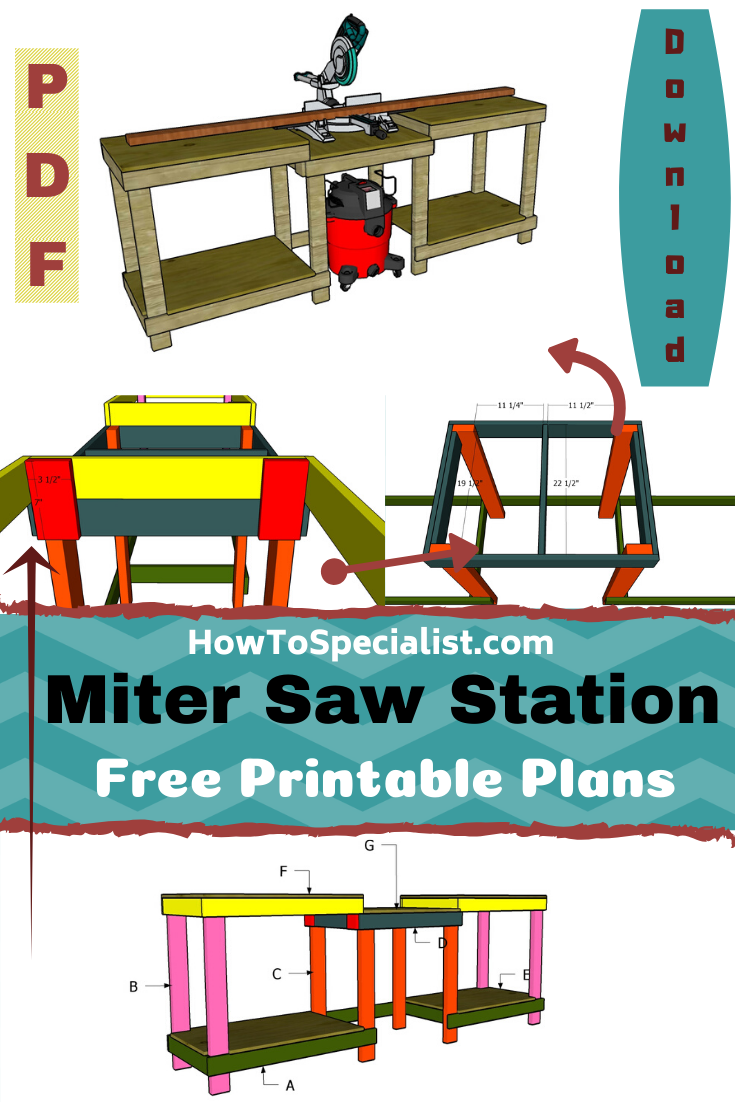
This step by step woodworking project is about miter saw station plans. This is a super detailed tutorial with step by step 3D diagrams, instructions and full Cut / Shopping lists so you can build this in one weekend. A cut diagram plan is also included so you can save materials and get a little waste. The miter saw table features two side extensions and two lower shelves, so you can make the most of the space. See my other DIY projects HERE.
We recommend you to invest in the best materials you could afford. Therefore, you should buy weather-resistant lumber, such as pine or cedar. Always take accurate measurements before adjusting the size of the components at the proper size. Drill pilot holes trough the components before inserting the wood screws, to prevent the wood from splitting. PDF downloadable plans with premium features in the Store.
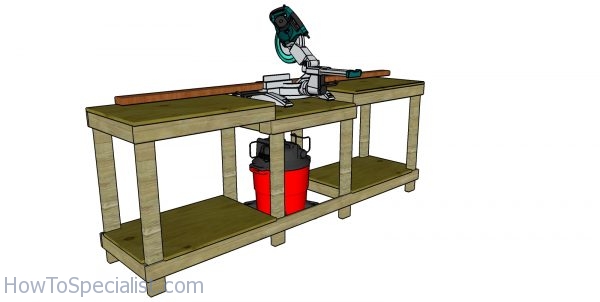
Made from this plan
Miter Saw Stand Plans
Building a miter saw station
Materials
Tools
- Safety gloves, glasses
- Miter saw, jigsaw
- Chalk line, tape measure, spirit level, carpentry pencil
- Drill machinery and drill bits
Time
- One Day
Related
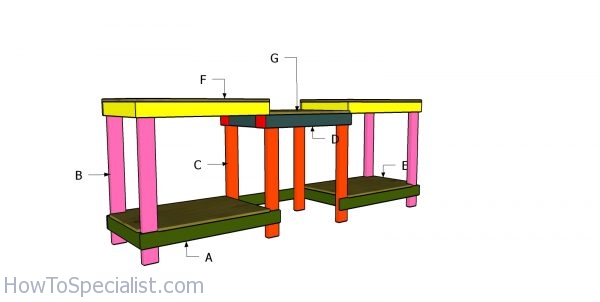
Build a miter saw station
First of all, we need to cut the components for the frame of the miter saw station. Therefore, use a saw to cut all the components for the station, using the info from this diagram. Notice that some components require 1x4s and some components require 2x4s. (included in the premium plans)
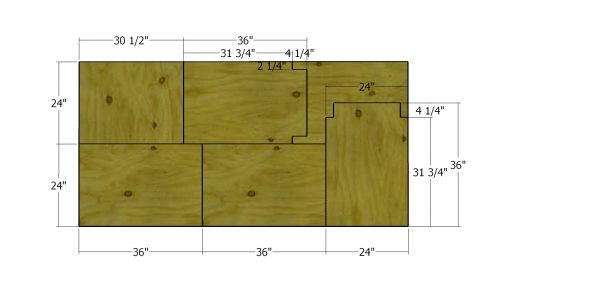
Cut diagram – Miter saw station
Next, we need to cut the panels for the tabletops and for the lower shelves. Use 3/4″ plywood as it is more durable than 1/2″ plywood. Mark the cut lines on the sheets and get the job done with a table saw. Alternatively, you can use a track saw.
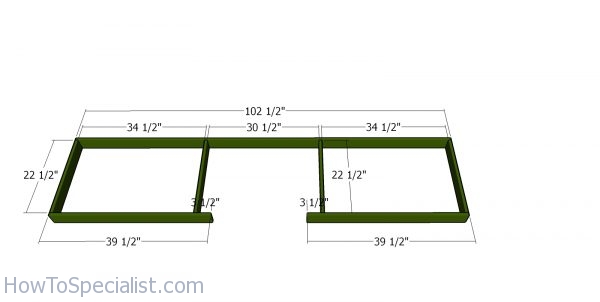
Base frame
Now, we need to assemble the lower frame for the miter saw station. As you can see in the diagram, you have to align the components and make sure the corners are square. Drill pilot holes and insert

Fitting the legs to the miter saw station
Attach the 2×4 legs to the lower frame, as shown in the plans. Make sure the legs are perfectly plumb. Check if the corners are square. Drill pilot holes through the frame and insert 1 5/8″ screws. Use at least 2 screws for each joint.
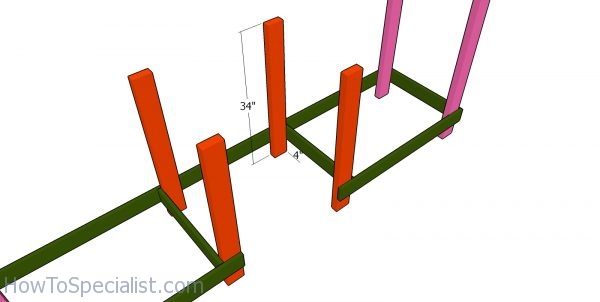
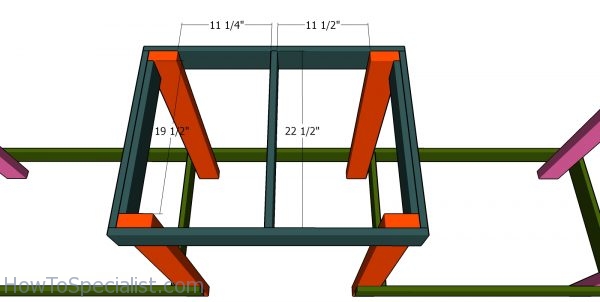
Miter saw table posts
Attach the 2×4 legs to the center of the miter saw station. Plumb the legs, drill pilot holes through the frame and insert 1 5/8″ screws. I recommend you to clamp the legs to frame before inserting the screws. That will hold everything locked together, while you drive in the screws.
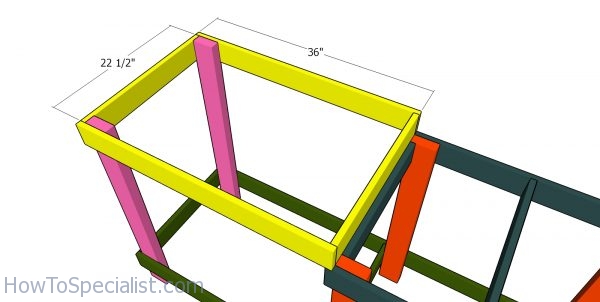
Miter table top frame
Build the frame for the table that will hold the miter saw. Cut the components from 1×4 lumber and attach them to the top of the legs, using 1 5/8″ screws. Make sure the edges are flush and check if the corners are square.
Tabletop frame
Build the frames for the side extension tables from 1×4 lumber. Drill pilot holes through the slats and insert 1 5/8″ screws to lock them into place tightly.

Cleats
Use these small pieces of 1x4s to lock the side extension frames to the main frame of the station. Drill pilot holes and insert 1 1/4″ screws to lock them into place.

Lower shelves
Cut the notches to the lower shelf panels and attach them into place with 1 5/8″ screws.
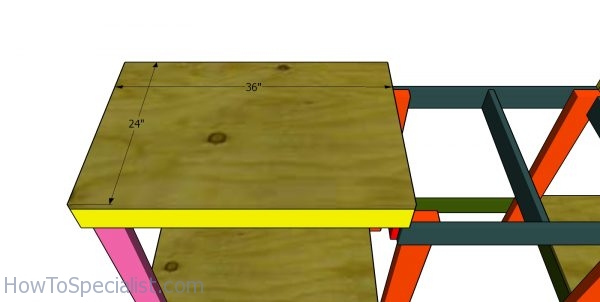
Side extensions – top
Fit the plywood sheets to the side extensions. Align the edges flush and insert 1 5/8″ screws to lock them into place tightly.
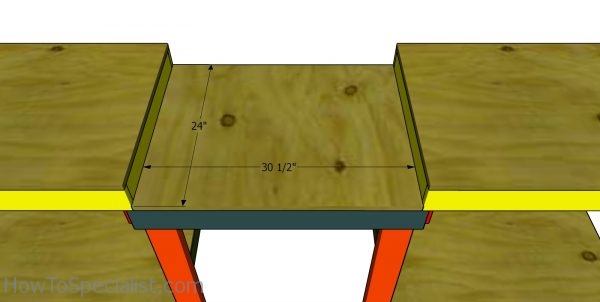
Miter saw table top
Fit the 3/4″ plywood panel to the center module.
Miter Saw Station Plans – HowToSpecialist
Last but not least, you need to take care of the finishing touches. Fill the holes with wood putty and smooth the surface with 120-220 grit sandpaper. Apply a few coats of paint over the components, if you want to enhance the look of the project.
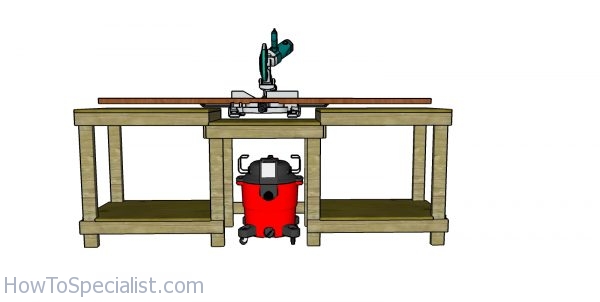
Miter Saw Station Plans – back view
You can even add caster wheels to the legs, if you want your miter saw station to be mobile. Remember to invest in the caster wheels that come with brakes. You can make a lot of changes to the plan so they suit your needs. For example you can add ore shelves or you can frame one of the side extensions as storage drawers.
How to build a miter saw station
This miter saw station features storage shelves and a dedicated area for a vacuum that you can connect to the saw and keep your lungs clean. Even if it is not folding, the miter saw stand is compact enough so you can fit it in your garage or workshop. If you like my project, don’t forget to SHARE it on Facebook and Pinterest.

Pin it for later!
Thank you for reading our project about miter saw station plans and I recommend you to check out the rest of the projects. Don’t forget to LIKE and SHARE our projects with your friends, by using the social media widgets. SUBSCRIBE to be the first that gets our latest projects.
