This step by step woodworking project is about wooden drill charging station plans. I have designed this space saving charging station so you can keep all your drills and other battery powerd tools, in one place. You can build this simple charging station with just one sheet of 3/4″ plywood. See my other DIY projects HERE.
We recommend you to invest in the best materials you could afford. Therefore, you should buy weather-resistant lumber, such as pine or cedar. Always take accurate measurements before adjusting the size of the components at the proper size. Drill pilot holes trough the components before inserting the wood screws, to prevent the wood from splitting. See all my Premium Plans HERE.
Made from this plan
Drill Charging Station – Free DIY Plans
Building a charging station
Materials
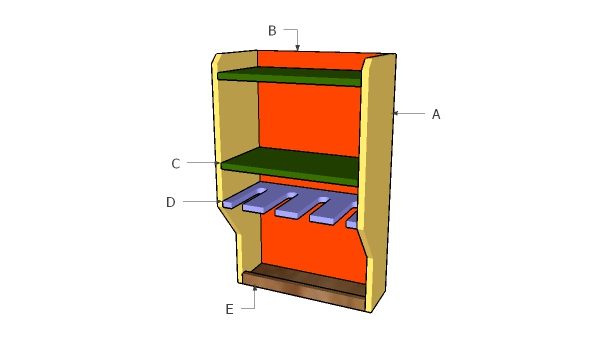
- A – 2 pieces of 3/4″ plywwod – 10″x30″ long SIDES
- B – 1 piece 3/4″ plywood – 17″x30″ long BACK
- C – 2 pieces of 3/4″ plywood – 9 1/4″x17″ long SHELF
- D – 1 piece of 3/4″ plywood – 9 1/4″x17″ long SUPPORT
- E – 1 piece of 3/4″ plywood – 4 1/2″x17″ long, 1 piece of 1×2 lumber – 17″ long LOWER SHELF
- 1 piece of 3/4″ plywood – 4’x8′
- 1 piece of 1×2 lumber – 2′
- French cleat
- 1 5/8″ screws
- wood filler , wood glue,
- hardware cloth, staples
Tools
- Safety gloves, glasses
- Miter saw, jigsaw
- Chalk line, tape measure, spirit level, carpentry pencil
- Drill machinery and drill bits
Time
- One Day
How to build a plywood drill station
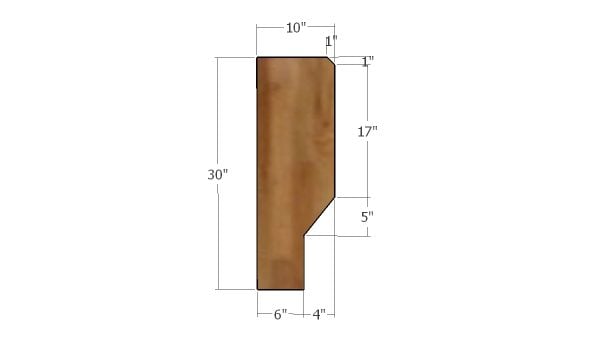
Building the sides
The first step of the project is to build the sides for the drill storage station. As you can see in the diagram, you need to mark the cut lines on the 3/4″ plywood sheets and then get the job done with a circular saw. Smooth the edges with sandpaper.
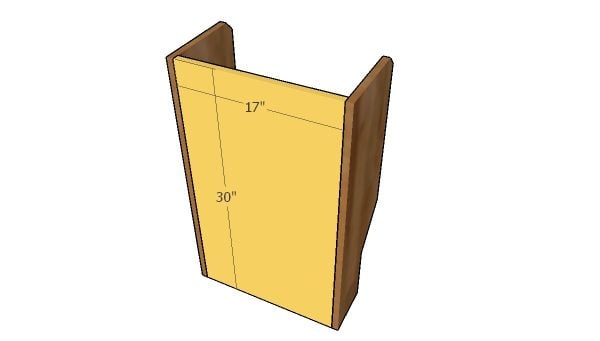
Assembling the drill charging station frame
Use 3/4″ plywood for the back of the charging station. Cut the panel at the right dimensions and then drill pocket holes along the sides. Align the edges with attention and make sure the corners are square. Insert 1 1/4″ screws to assemble the frame of the shed together tightly.
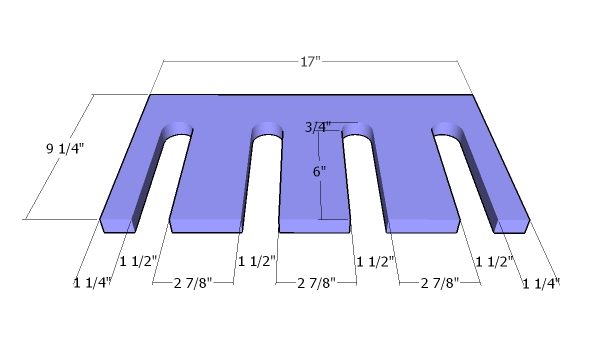
Drill storing shelf
Use 3/4″ plywood for the storage support for the drills. As you can see in the diagram, you need to mark the cut lines and then make the slots with a jigsaw. Smooth the edges with sandpaper thoroughly.
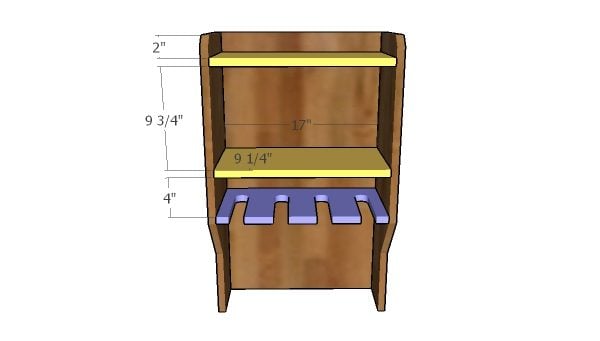
Fitting the shelves
The next step of the project is to attach the support and the other two shelves to the frame of the charging station. Therefore, drill pocket holes along the sides and back of the shelves and then secure them into place with 1 1/4″ screws. Make sure the corners are square and align the edges with attention.
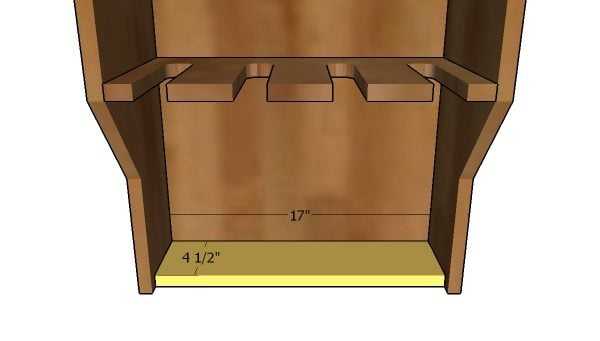
Lower shelf
Attach the 3/4″ plywood lower shelf to the bottom of the station. Drill pocket holes along the sides and back of the shelf and insert 1 1/4″ screws. Align the edges flush.
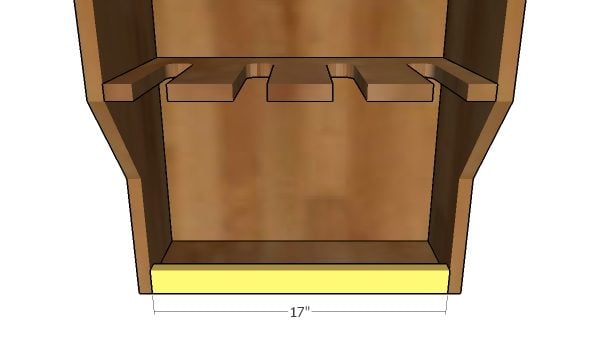
Lower shelf trim
Attach a 1×2 trim to the lower shelf. Use 2″ brad nails to lock it into place tightly.
Drill charging station plans free
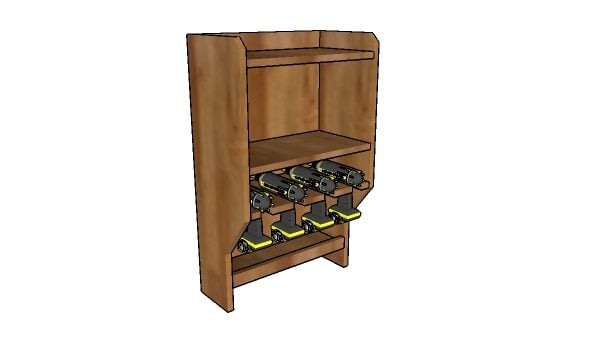
Last but not least, you need to take care of the finishing touches. Fill the holes with wood putty and smooth the surface with 120-220 grit sandpaper. Apply a few coats of paint or stain over the components to protect them from the elements and to enhance the look of the tool stand. Drill a hole to the side of the charging station, so you can fit the charging extension cord.

How to build a drill charging station
Make sure you check all the workshop plans HERE. If you like my project, don’t forget to SHARE it on Facebook and Pinterest.
Thank you for reading our project about drill charging station plans and I recommend you to check out the rest of the projects. Don’t forget to LIKE and SHARE our projects with your friends, by using the social media widgets. SUBSCRIBE to be the first that gets our latest projects.