This diy article is about how to make a dowel joint. Generally speaking, wood pegs are used when making furniture or when joining together tightly several pieces of wood. In most cases it won’t be enough to fasten the wood joint of the wooden pieces by using glue, but you also have to make a dowel joint using wood pegs. This techniques is quite old but very efficient, as it creates a secured joint between two or more wood parts.
Usually, you also have to use glue around the dowel pins, as it will enhance the strength of the wood joint, especially if you lock the components together with several clamps. After the glue has dried out, the dowel joint will be even stronger than a regular piece of wood, provided you use the proper techniques and tools. See all my Premium Plans in the Shop.
Materials
- Wood dowels / dowel pegs
- Wood glue
Tools
- Level, rubber hammer, measuring tape
- Clamps, drill machinery and bits
- Metal dowel points
- Framing square, carpenter pencil
Tips
- Read safety and disclaimer pages
- Use a good drill machine with torque control
- Use metal dowel points, as to make a proper dowel joint
- The best option is to use a dowel jig
- Leave at least 1/2” from the edge or corner of the wooden part, when drilling holes
My best tips for maxing a dowel joint:
Dowel joints are a great way to join pieces of wood for a clean, strong, and professional-looking connection. They are often used in furniture making and cabinetry because they provide hidden strength and are relatively easy to create with the right tools. Here are my best tips for making a dowel joint successfully.
1. Gather the Right Tools and Materials
Before you get started, make sure you have all the necessary tools and materials:
- Dowels (wooden rods that will serve as the joint)
- Drill with the correct-sized drill bit (to match the dowel size)
- Dowel jig (optional but highly recommended for precision)
- Clamps
- Wood glue
- Measuring tape or ruler
- Pencil
- Mallet (to gently tap the dowels into place)
2. Measure and Mark Your Wood
Start by aligning the two pieces of wood you want to join. Use a pencil to mark the exact position where the dowel holes will be drilled. Be sure to mark both pieces of wood so the dowel holes will line up perfectly when they’re joined. The spacing and number of dowels will depend on the size of your project, but a good rule of thumb is to place a dowel every 6-8 inches.
3. Use a Dowel Jig for Accuracy
A dowel jig is highly recommended because it ensures your holes are drilled at the same depth and are perfectly aligned. Place the jig over your marked spots on the wood, ensuring the jig is secure and aligned with your markings. A well-placed dowel jig will help prevent misaligned joints, making your dowel joint much stronger.
4. Drill the Holes
Using the correct-sized drill bit (the same size as the dowel), drill holes into the marked spots on both pieces of wood. Depth stops on your drill bit can help ensure the holes are the right depth, usually half the length of the dowel. Make sure you drill straight into the wood to avoid angled holes, which can weaken the joint.
5. Check the Fit of the Dowels
Before applying any glue, test the fit of the dowels by inserting them into the drilled holes. The dowels should fit snugly without forcing them in. If they’re too tight, lightly sand the dowels to ensure they slide in easily. If they’re too loose, you may need a slightly larger dowel or more glue.
6. Apply Wood Glue
Once you’re satisfied with the fit, remove the dowels and apply wood glue inside each of the drilled holes. Apply a light coat of glue around the dowel itself as well. Be careful not to use too much glue, as excess glue can ooze out and create a mess.
7. Insert the Dowels
Insert the dowels into the holes of one piece of wood first. Use a mallet to gently tap the dowels into place if necessary, ensuring they’re fully seated in the holes. Then, align the second piece of wood over the dowels and push them together. You can use a clamp to hold the joint firmly while the glue dries, ensuring the pieces are tightly connected.
8. Clamp and Let the Glue Dry
After the dowels are in place, use clamps to hold the joint tightly together. Make sure the pieces are aligned correctly before tightening the clamps. Wipe away any excess glue that may have squeezed out, and let the joint dry for at least 24 hours to ensure the bond is strong.
9. Sand and Finish
Once the glue has dried and the clamps are removed, check the joint for any unevenness. Sand the joint smooth, making sure the surface is flush. You’re now ready to stain, paint, or finish your wood project as desired.
Bonus Tip: Use a Center Finder for Precision If you don’t have a dowel jig, you can use a dowel center finder. This small metal tool fits into the drilled holes and leaves a mark on the opposite piece of wood when pressed together, ensuring perfect hole alignment for your dowel joint.
Drilling holes for dowel joint

Marking the holes for dowel pegs
If you don’t have a dowel jig (which is the best option when making a dowel joint), you have to use a L-square to mark the spot where you are going to drill several holes. Consequently, first draw a line over the median of the wooden post. Next, use the l-square or a tape measure to mark the exact spots where you are going to dill the holes (in our case the intersection of the lines).

Drill bit for installing dowel pins
In order to get the job done in a professional manner, we have to use wood dowels and a sharp drill bit. Most dowel pegs range from 1/2” up to 1/4”, according to the type of your project. If you want to joint together furniture boards, you have to use in most cases 1/4” dowel pegs, as for bigger parts you can install 1/2” wood dowels.

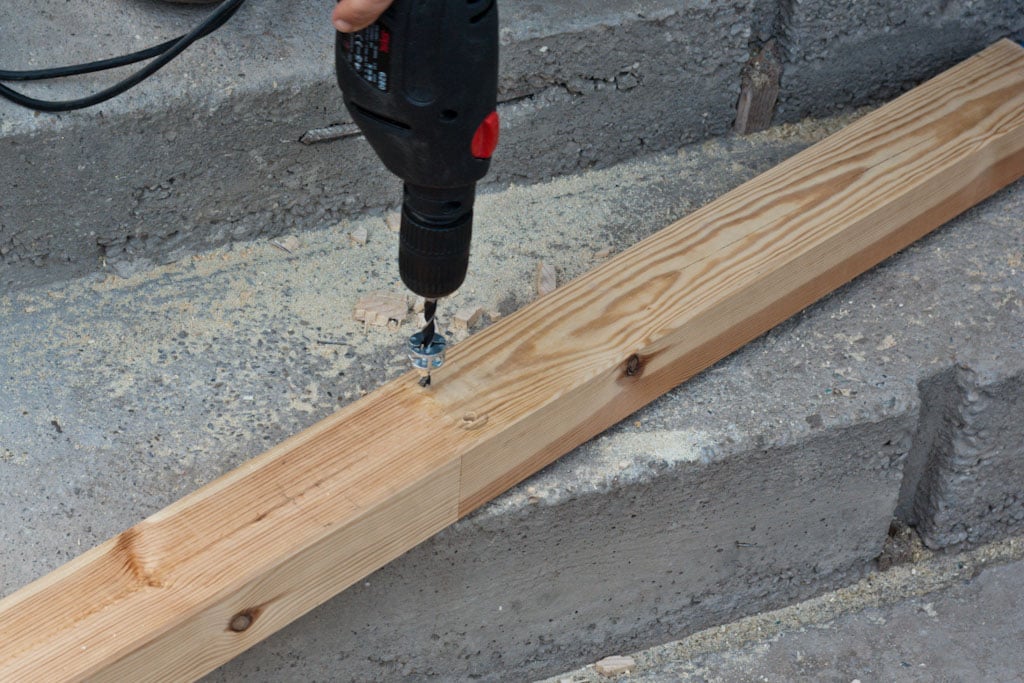
Drilling holes in the wood joint parts
Next, use a good drill machinery with torque control to drill several holes. If the pieces of wood you want to lock together are no larger than 3-4”, then 2 wood plugs will do just fine.

Holes for installing dowel pegs
When drilling the holes make sure you hold the drill machinery perpendicular on the wood board’s surface. Although it might look difficult to drill the holes without a dowel jig, we assure you can do it with little practice.
Drilling the mating holes in the other wood part

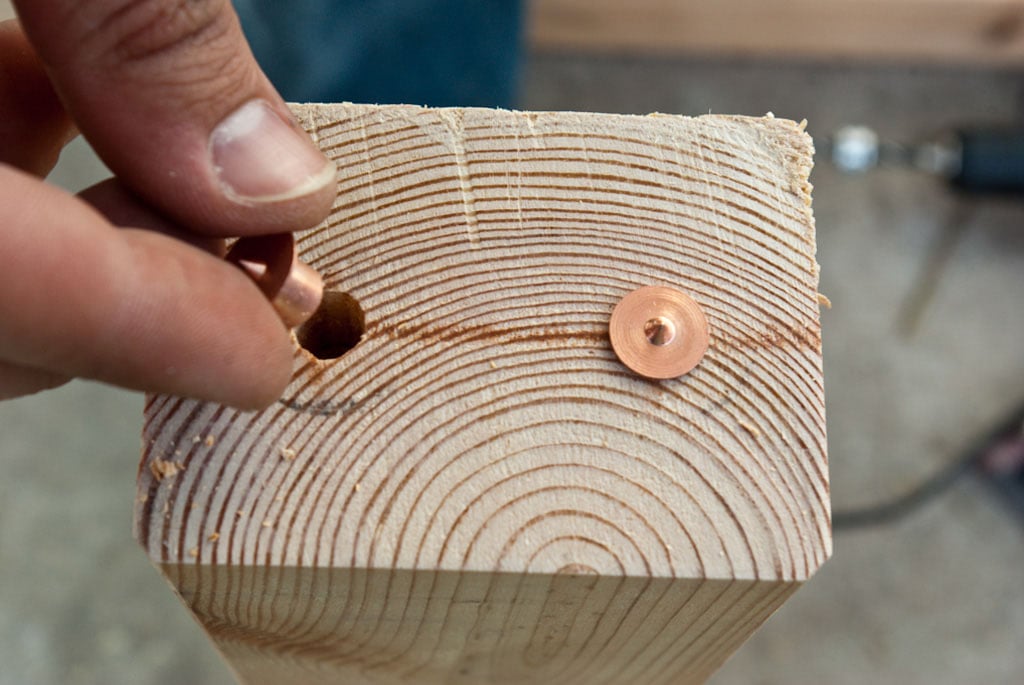
Using metal dowel points
Next, we have to drill the holes in the other half of the wood joint. Consequently, we have to use metal dowel points, as to make sure the two components are aligned properly. Put the dowel point in the drilled holes, making sure they are set accurately into position.

Marking the mating holes in the second component
Next, place the second component over the first piece of wood, making sure their edges are perfectly aligned. If you are joining two small pieces, then you could set the components together beside a straight wall or a work bench.

Drilling holes with brad-point drill bit
Next, we have to drill holes in the second piece of wood, as to join together the two halves using dowels. As to make sure the two parts will match each other, you have to drill holes over the marks, using the same technique described above.

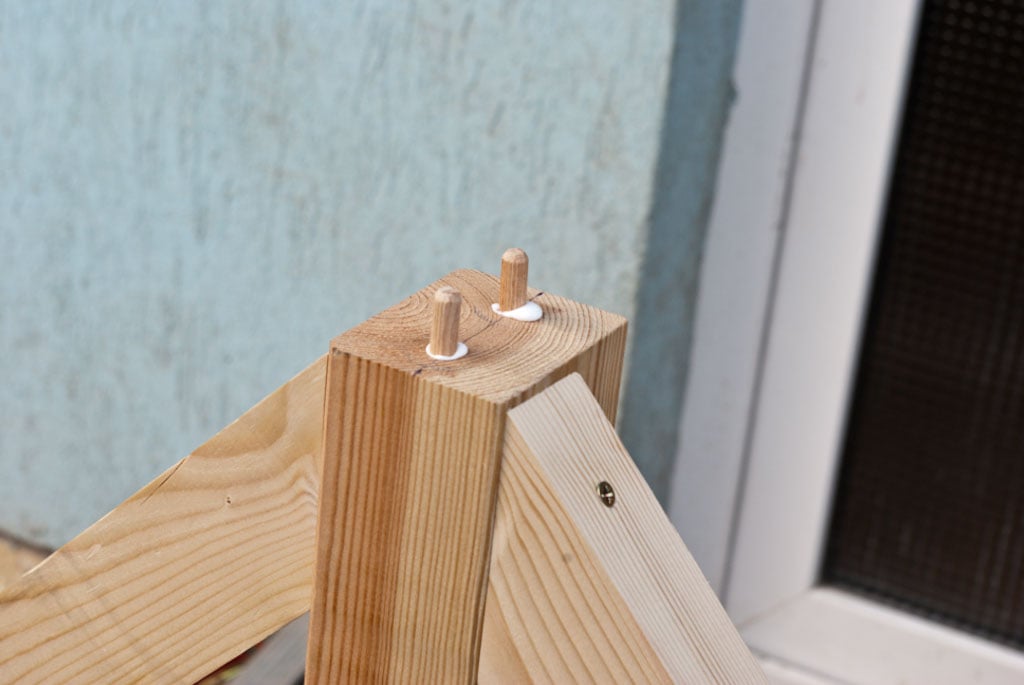
Installing dowel pegs
Next, as our project regarding how to join wood with dowels is almost done, we have to install the dowel pegs. Consequently, pour a little wood glue in the holes and them tap firmly the wood dowels until you have inserted half of them.

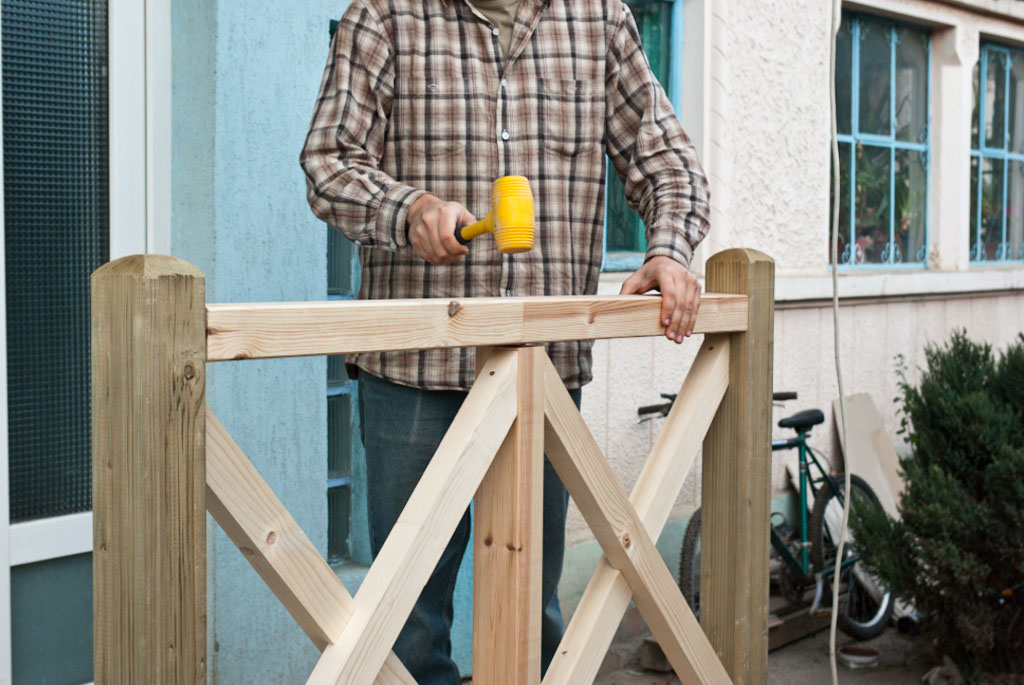
Fastening wood joint with dowels
Last but not least, we have fastened the dowel joint by locking together the two wood pieces. Before tapping the top part with a rubber mallet, you have to make sure the components are aligned properly. Next, use more glue in the holes of the other half, before locking them firmly.
By following these tips, you can make a strong and precise dowel joint that will add durability and a professional finish to your woodworking projects. Whether you’re building furniture or assembling smaller pieces, dowel joints are a great option for invisible, sturdy connections.
Thank you for reading our article on how to make a dowel joint, and we recommend you to check out the rest of our projects. Please SHARE and LIKE our projects with your friends, by using the social media widgets. SUBSCRIBE to be the first that gets our latest projects.
