This article is about how to remove wall tile. Removing a wall tile is a basic techniques which is very useful for any home improver, as there are cases when you have to replace an old, poor-looking ceramic tile. Consequently, you have two alternatives: to hire a qualified professional (which will charge you a couple hundred bucks, according to the surface) or to get the job done by yourself, by using our guidelines. In this step by step article we show you how to remove wall tiles without breaking them.
Nevertheless, there are some cases in which you might want to remove a wall tile without breaking it, which represents a more complex task. However, if you pay attention when working, you will be able to remove the tile from the wall without breaking it, in several minutes. Tough, you should understand that this operation is possible only when we speak about an ending row of wall tiles, otherwise it is almost impossible to remove a tile in the middle of the room, without breaking it. Therefore, before starting the project, you should pay attention to these aspects, as to take the right decisions for your needs.
As to protect yourself from possible injuries, you should wear safety gloves and glasses. In addition, you should work with great care and attention, as to learn how to remove wall tiles in a professional manner. Removing wall tiles requires just a few basic tools and a little of concentration, as virtually anybody is able to finish this project. Don’t forget to check out the rest of the tile projects, if you want to see more step by step guides.
Made from this plan
In order to remove wall tiles, you need the following:
Materials
- Water
Tools
- Safety gloves, Eye protection
- Chisel, Hammer, Scraper
Tips
- If you want to remove the tiles without breaking them, you should first remove the grout
Time
- 10 minutes for each tile
How to remove a wall tile
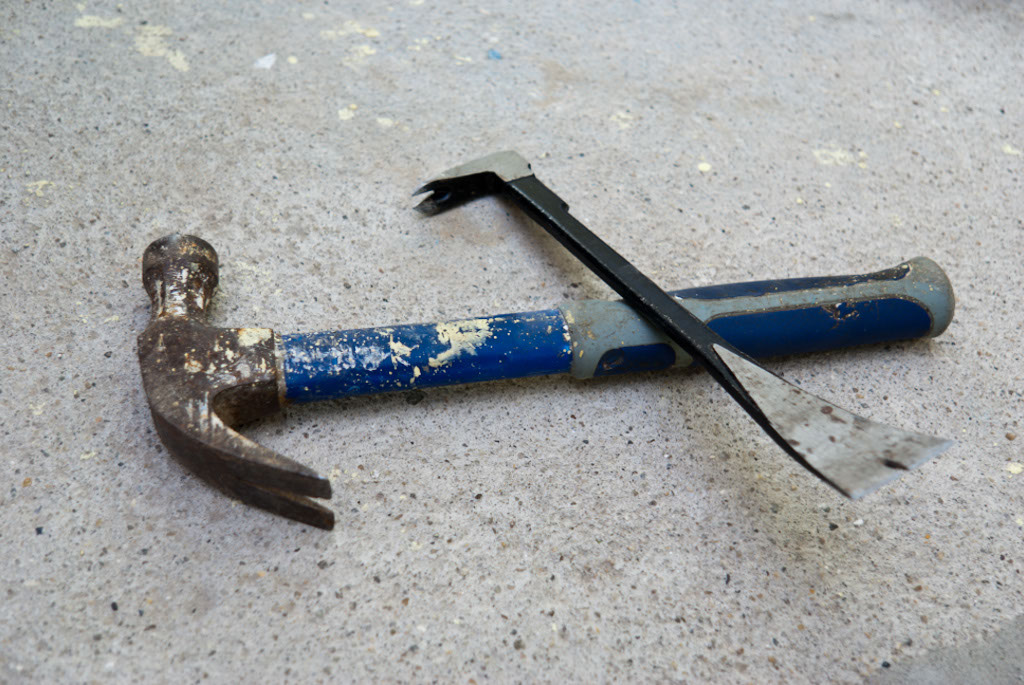
Chisel Chisel and hammer to remove tiles
In order to remove wall tiles, one needs several tools: a hammer, a good chisel with two ends and a scraper. Of course that you can do this operation mechanically by using a drill machine with hammering function, but if you want to remove the tiles without breaking them it is better to do it by hand.
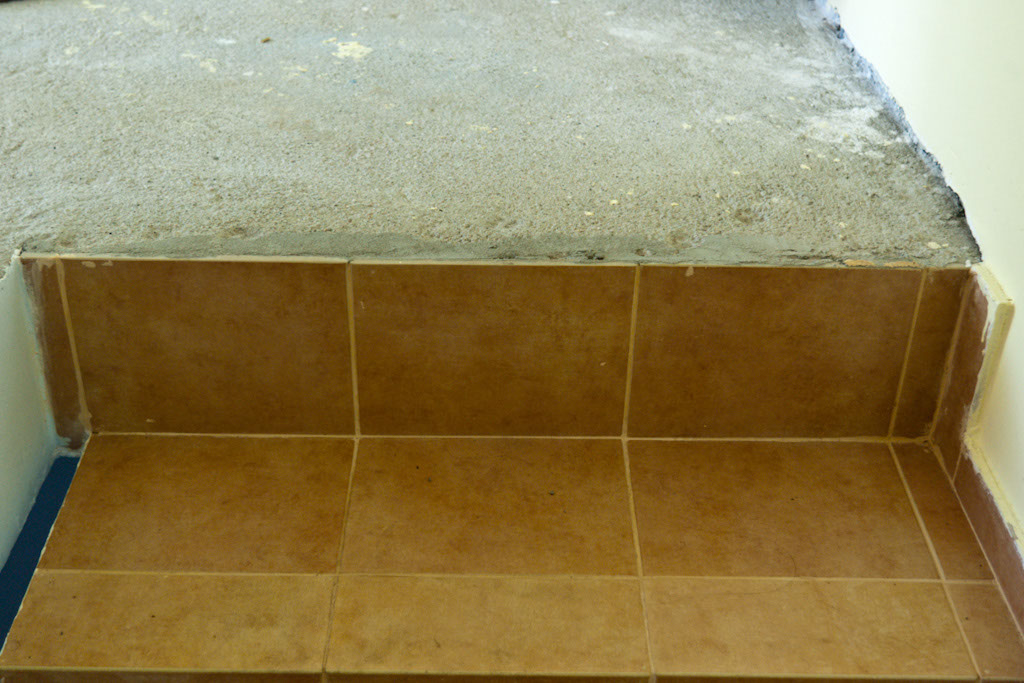
Removing wall tile
In this image you can see the wall tiles we are about to remove without breaking them. You might notice that there is only one row of ceramic tiles on the wall, but this aspect is secondary, as the techniques are the same.
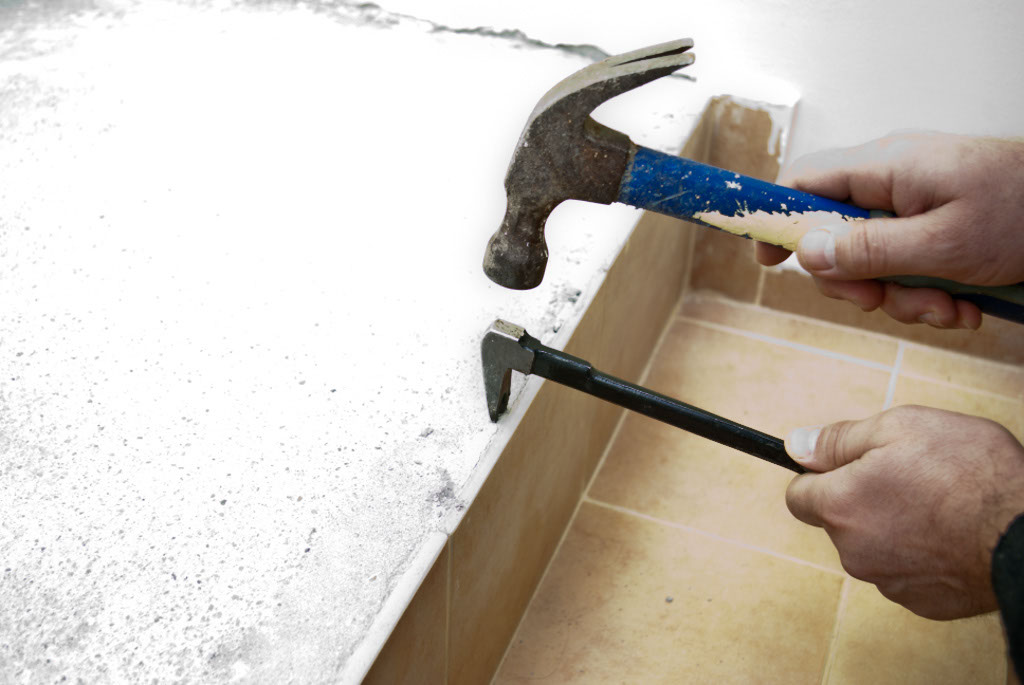
Using a chisel to remove wall tile
Next, you have to use a scraper to remove the grout between the wall tiles. This step is very important if you don’t want to break the tiles during the removal process. You should go along the grout between the tiles several times, by using the edge of the scraper.
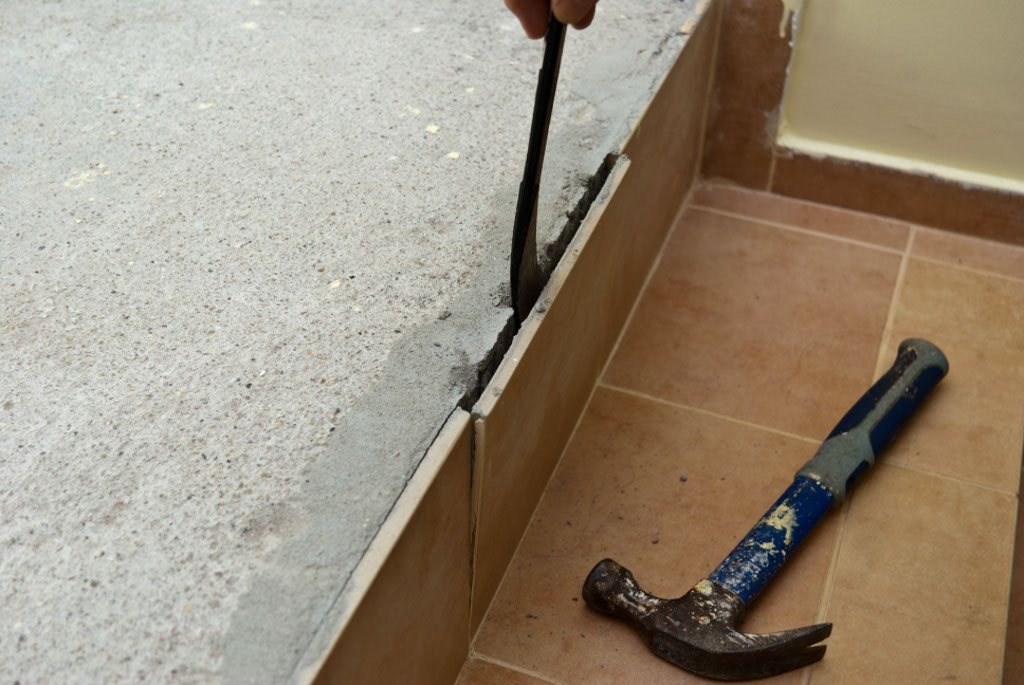
Removing tile from wall without breaking it
Next, you should use the wider end of the chisel and tap it with the hammer, along the upper edge of the wall tile. If it doesn’t fall from the first attempt, you shouldn’t force it as you risk breaking it in half. Instead, you should tap the chisel incrementally, along the width of the ceramic tile, until you have removed it from the wall.
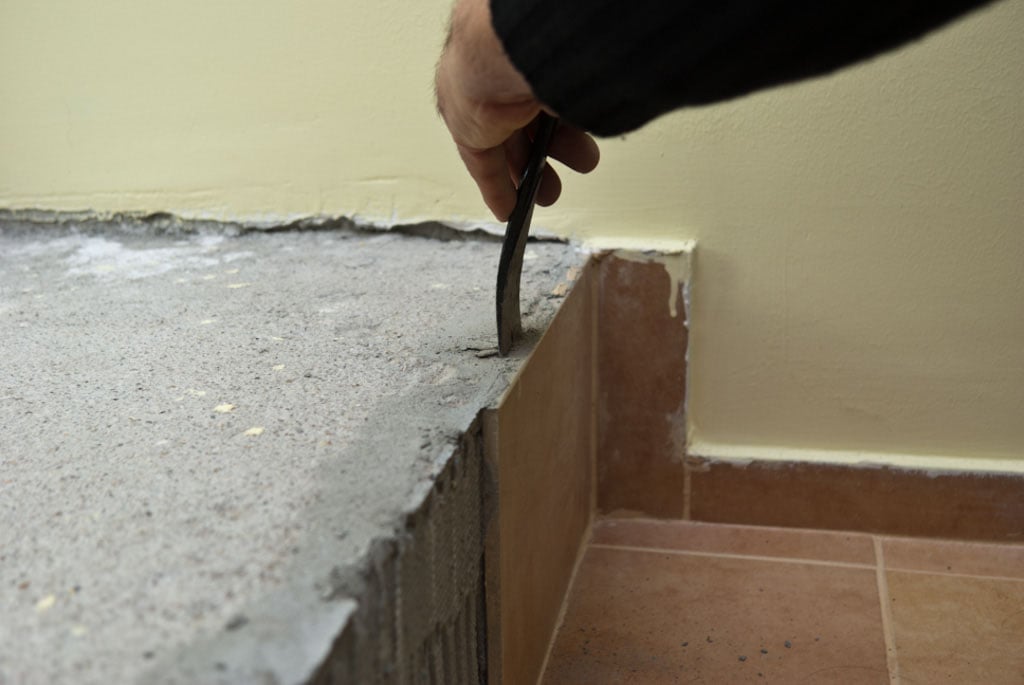
Removing ceramic tile with a chisel
After you have removed the first wall tile, if necessary, you should continue the process by removing the tiles on the same row. Consequently, you should use the same techniques as to remove the tiles from the wall.
Work with patience, as an amateur diy-er could easily make a mistake. Nevertheless, if you are attentive you should be able to get the job done in a professional manner. In most of the case, you can remove the tiles without breaking them, but there are cases when the bond is to strong.
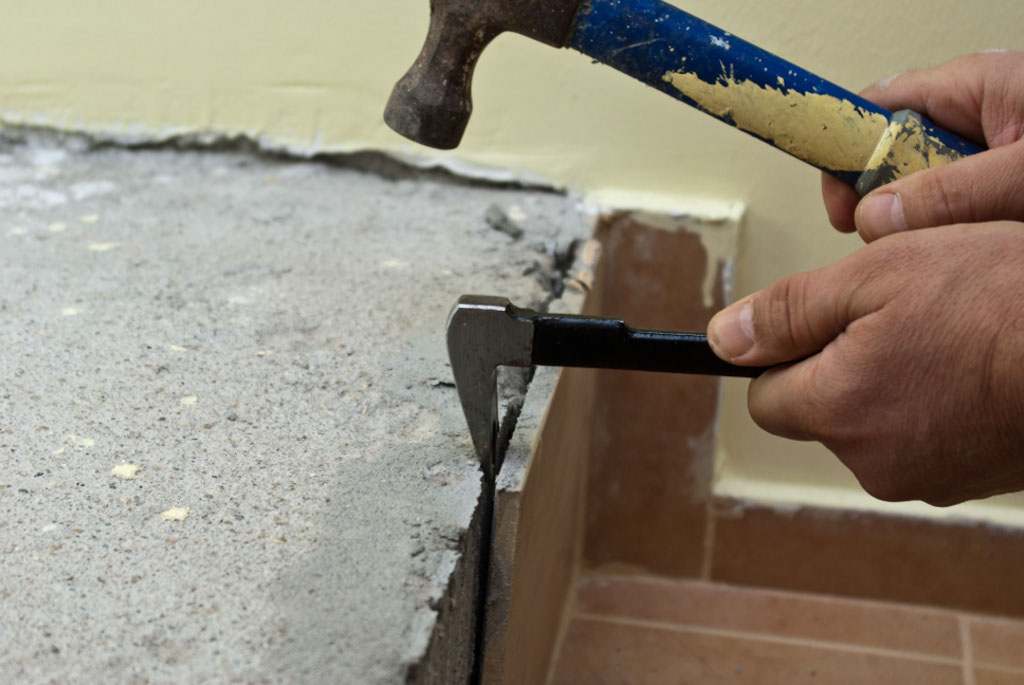
Tapping the chisel with a hammer
The essential aspect of this project is to use the chisel properly. Consequently, do not apply too much force when tapping the chisel or else you risk breaking the wall tile.
You should use the chisel along the upper edge of the wall time, from one end to the another. Nevertheless, this projects depends also on the type of adhesive behind the ceramic tile. If it a strong type of adhesive, then you might not be able to remove the wall tile without breaking it at all.
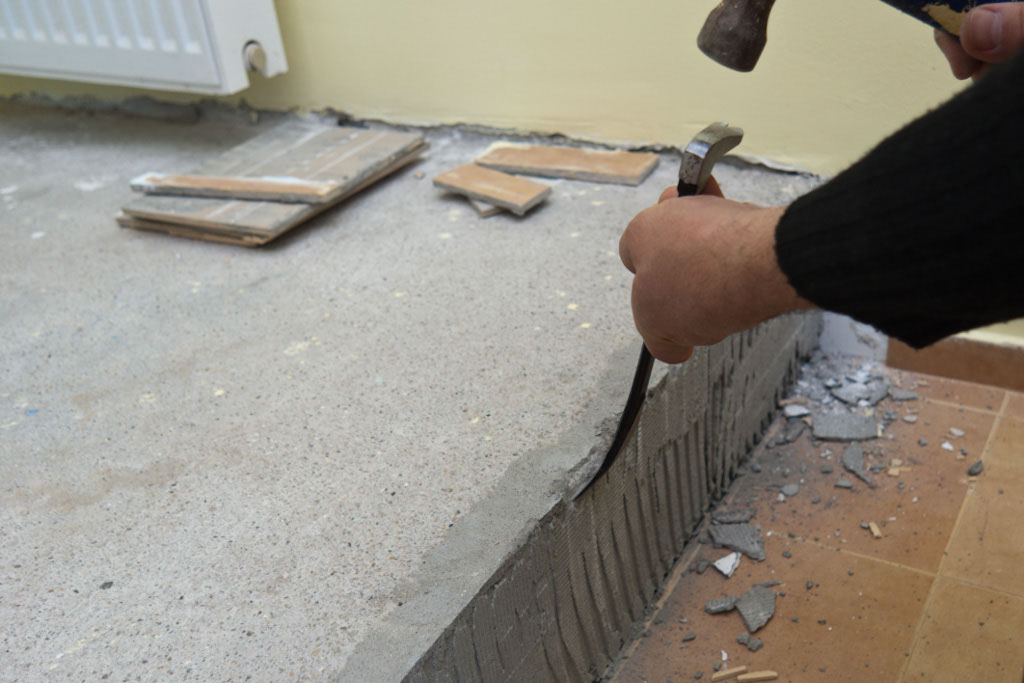
Removing tile adhesive
Last but not least, you should remove the tile adhesive from the wall and from the back of the ceramic tiles. Therefore, you should use the same chisel to remove the adhesive from the wall, by tapping it with a hammer progressively.
Best tips to remove wall tiles
Removing wall tiles can be a bit challenging, especially for beginners, but with the right approach, you can do it without damaging the walls too much. Here are my best tips to help your readers tackle this project:
1. Gather the Right Tools: Before you start, make sure you have all the necessary tools. You’ll need a chisel, hammer, putty knife, utility knife, tile scraper, and safety gear like gloves, goggles, and a dust mask. A heat gun or hairdryer can also be helpful to loosen stubborn adhesive.
2. Protect Surrounding Areas: Before starting, cover nearby surfaces like floors, countertops, and fixtures with plastic sheeting or a drop cloth to protect them from flying debris. You might also want to turn off the water supply if you’re working near plumbing fixtures to avoid any accidental damage.
3. Score the Grout Lines: Use a utility knife to score the grout lines around the tiles you’re removing. Cutting into the grout helps separate the tiles and makes them easier to pop off without damaging surrounding tiles.
4. Start at a Loose Tile or Edge: If you have any loose or cracked tiles, start there. If all the tiles are intact, begin at an edge, corner, or seam. Use your chisel or putty knife to get underneath the tile. If the tile resists, lightly tap the back of the tool with a hammer to loosen the adhesive.
5. Pry Tiles Off Gently: Once you’ve got the chisel under a tile, gently work it back and forth to pry the tile away from the wall. Go slowly and avoid forcing it too much, as this can damage the underlying drywall or backer board. If the tiles aren’t budging, use a heat gun to soften the adhesive.
6. Remove Stubborn Tiles with Care: If a tile is particularly difficult to remove, don’t use excessive force. Instead, break the tile into smaller pieces using a hammer. Place a cloth over the tile to prevent sharp pieces from flying, then carefully pry off the pieces one by one.
7. Scrape Off Old Adhesive: After all the tiles are removed, use a scraper or putty knife to get rid of any remaining adhesive or grout on the wall. If the adhesive is tough to remove, a heat gun can soften it, making scraping easier.
8. Repair the Wall Surface: Once the adhesive is gone, inspect the wall for any damage. You may need to patch small holes or cracks with spackle or joint compound. For larger damage, you might need to cut out and replace sections of drywall or backer board.
9. Clean the Wall Thoroughly: Before installing new tiles or painting, clean the wall thoroughly to remove any dust, dirt, or remaining adhesive. A damp cloth should do the trick.
10. Dispose of Tiles Safely: Broken tiles can be sharp, so be careful when handling them. Use heavy-duty garbage bags to dispose of tiles and adhesive. Check with your local waste management for proper disposal methods, especially if your tiles are older and may contain hazardous materials like lead or asbestos.
By following these steps, your readers can successfully remove wall tiles with minimal damage to the wall beneath. This method ensures a smooth surface for whatever comes next, whether it’s a fresh tile installation or a different wall treatment altogether!
Thank you for reading our article on how to remove wall tile and we recommend you to check out the rest of our articles. Please share our articles with your friends, by using the social media widgets.
