This article is about how to install a drywall ceiling, either on wood or on metallic frames. The most difficult part of this project is to lift the drywall boards. You could rent a drywall jack, or ask another person to help you hang the drywall boards. However, if you choose to build a metal stud frame, the process will take a little long, but the quality of the project will be extraordinary. Installing a drywall ceiling is not difficult, provided you use proper tools and materials and understand the basic techniques. Remember that you have to install the sheets of drywall perpendicular to the direction of the joists.
Although installing a drywall ceiling is not an easy job, with the help of another person virtually any experienced diy-er can finish such a project. The most difficult stage is to lift the drywall boards up to the ceiling, while the rest of the operations are just common-sense. Therefore, you can either rent a drywall jack for several days, or use a ladder and ask a friend to assist you. If you don’t afford to rent the drywall jack, you need someone to hold the sheet into position, while you drive in the screws.
As you probably now, drywall panels come usually in the following dimensions: 4’x8′, 4’x9′, 4’x10′, 4’x12′, with a thickness ranging from 1/3 inches to 5/8 inches, but the most commonly used drywall boards are the 1/2 inches and 5/8 inches thick. Read carefully our article and you will learn the skills required to hang a drywall ceiling in a professional manner. If you are not prepared to work by yourself, consider hiring a qualified contractor, even though this will increase the cost of your remodeling project.
Made from this plan
Materials
- Drywall
- Drywall screws
Tools
- Safety gloves, safety glasses
- Electric screwdriver
- Utility knife, measuring tape
- Framing square, pencil
- T-square
Tips
- Be careful when manipulating the drywall boards, as they are heavy
- If you can afford, buy or rent a drywall jack
- When installing the screws you should make sure you do not insert them to deep in the drywall, as thy might damage the panels
Preparing the drywall ceiling installation
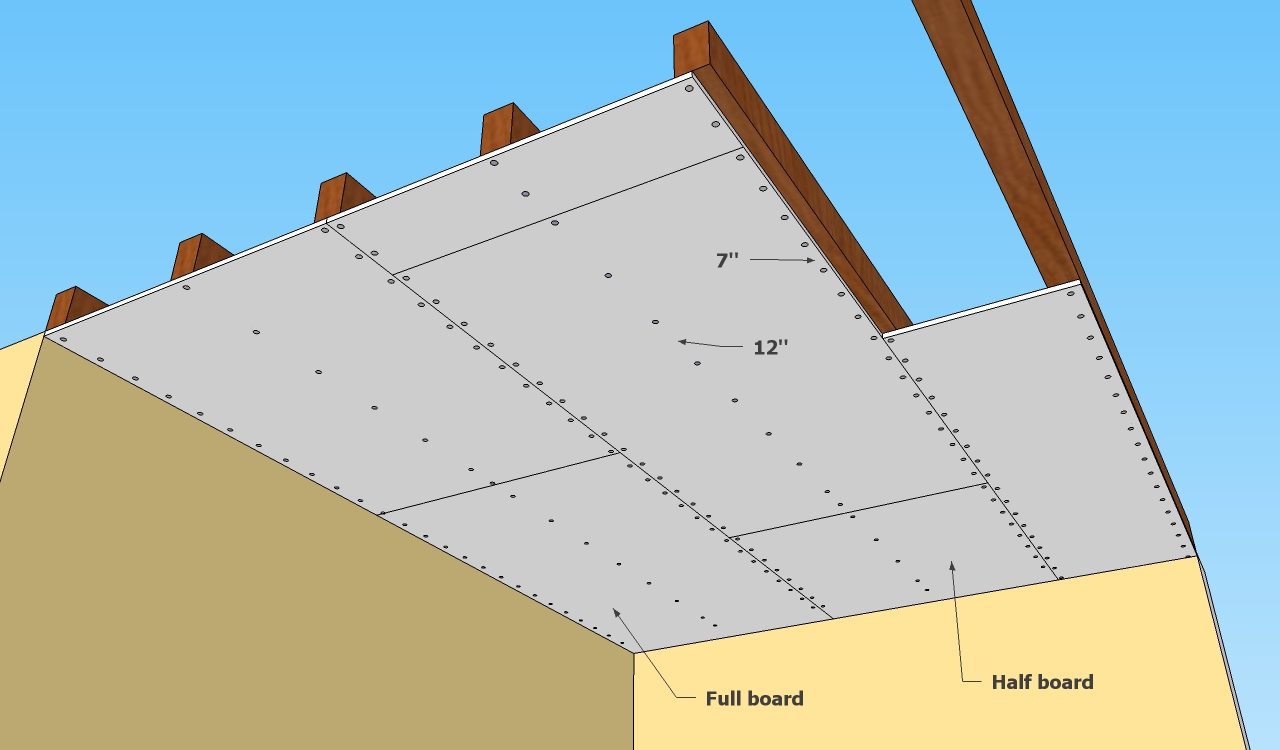
Drywall ceiling layout
Before installing the drywall ceiling, you have to understand that you have to use a proper layout, as to get the job done in a professional manner. Consequently, you have to start with one corner of the room, by using a full drywall board.
The next row of drywall must start with half of a drywall sheet, as to create a proper layout. In addition, when inserting the screws make sure you observe the right spacing, as to secure the boards properly.
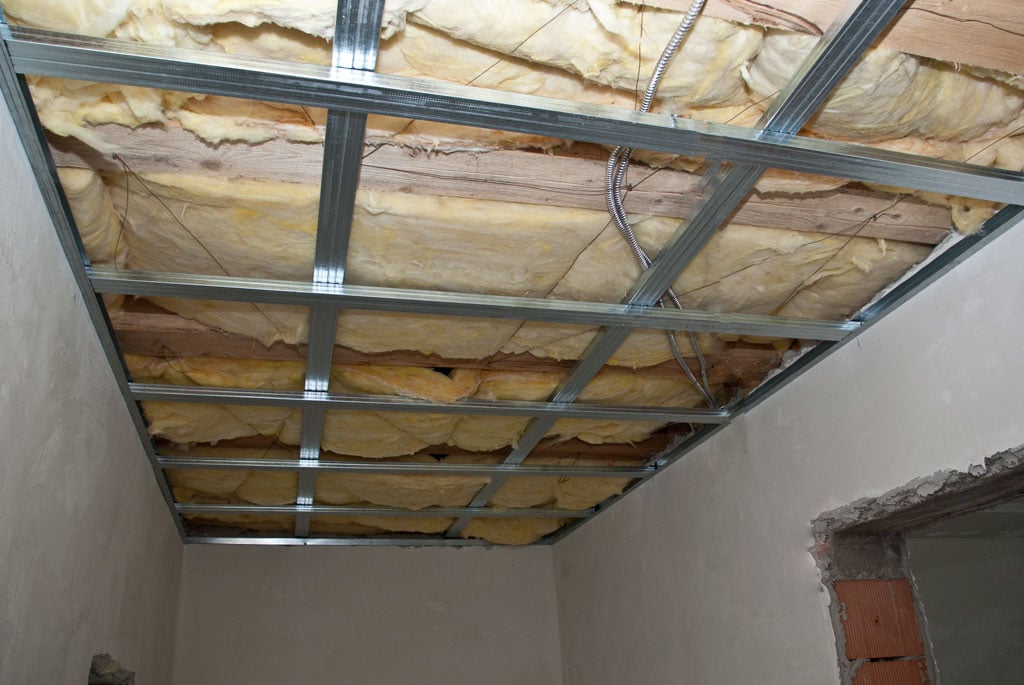
Metal stud ceiling frame
The first step of the project is to evaluate the structure of the ceiling, made of either wood studs or of metal studs. As you can see, in our case we will install the drywall ceiling on a metal stud frame, but you can install drywall boards on wood studs, as well.
The first thing you have to evaluate is if the ceiling frame is level. This aspect is very important, as otherwise the ceiling won’t have a pleasant appearance and in time the joints between the drywall boards will crack.

Installing polyethylene vapor barrier
After we have made sure the ceiling frame is level and secured properly, we’ve decided to install mineral wool insulation and an anti-vapor foil, for both saving energy and ensuring a long lifespan for the drywall ceiling. The anti-vapor foil can be installed on a double adhesive tape or can be locked with staples. The main aspect is to make sure the foil is fixed properly and it doesn’t make folds.
Work with patience and make sure your ladder is installed on a level surface.
How to install drywall ceiling
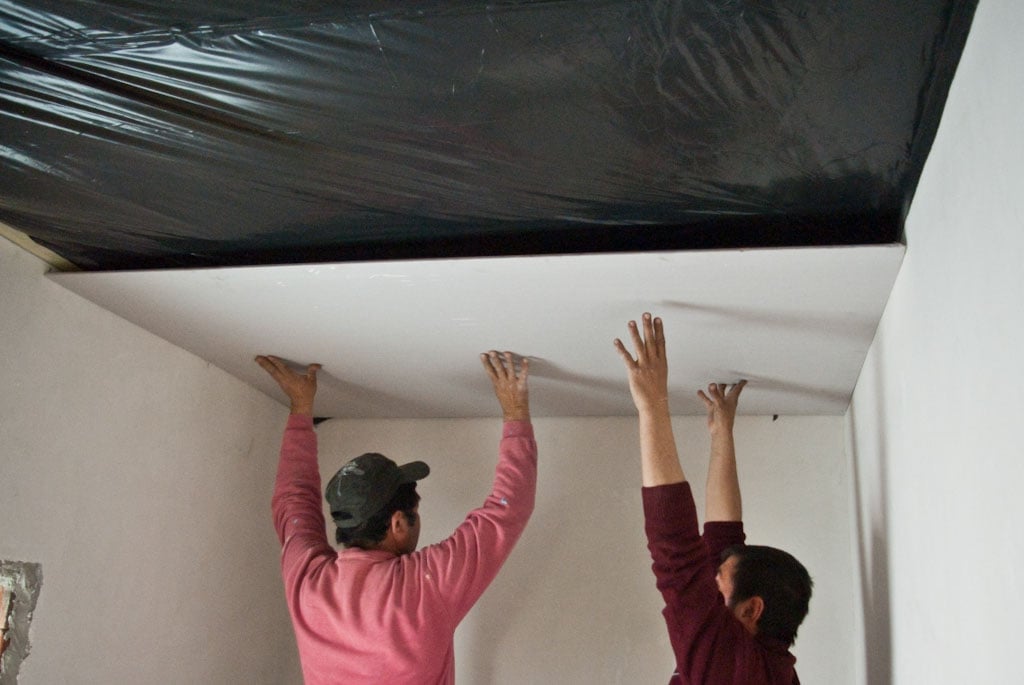
Installing drywall on ceiling
When installing the drywall ceiling start from a corner, making sure the boards are as close as possible to the walls. If the corners of the room are not right angled, you should cut the drywall panels as to fit perfectly into place.
All edges of the drywall boards should be fastened to the ceiling studs. When connecting two drywall boards, you should screw them on the same stud, the joint line being exactly over the stud’s median. Lock the drywall boards into position with several screws, along edges and in the middle.
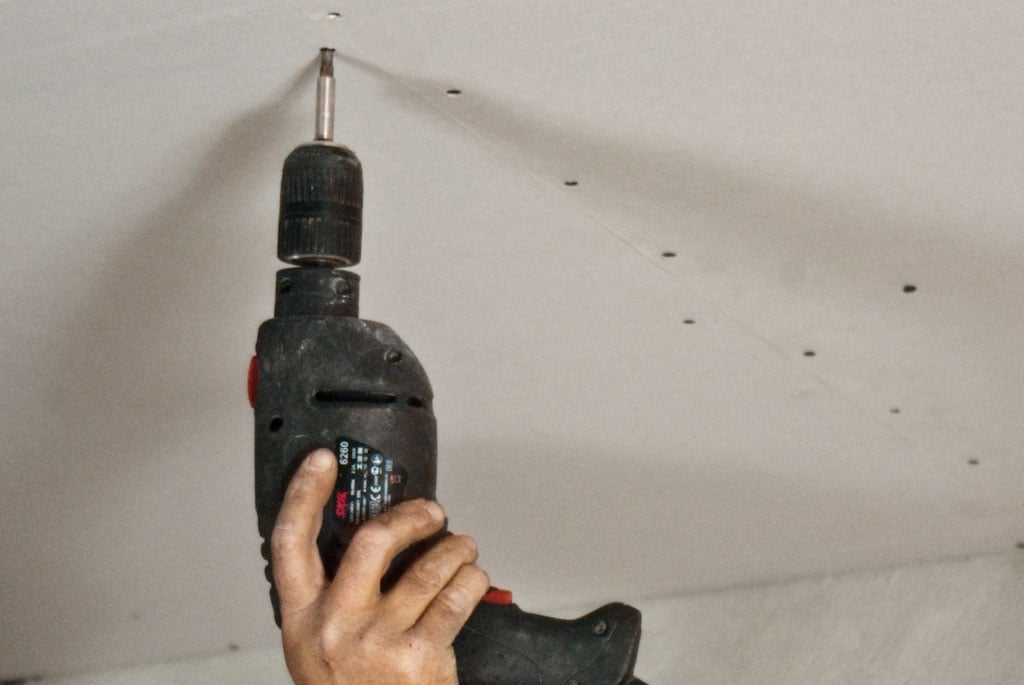
Fixing the drywall ceiling with screws
Afterwards, continue fastening the drywall with screws, using an electric screwdriver. If you install 1/2” drywall, then you should use 1-1/4″ drywall screws, as if you are installing 5/8” drywall a better option would be 6 x 1-5/8″ screws.
This size of the screws is very important, as the rigidity of the ceiling is also based on the type of screws you are using. Along walls, we have installed screws every 7”/15 cm, while inside the boards we have installed the screws every 12”/30 cm. Don’t insert the screws too close to the edge of the drywall panels, but leave around 1/2” to prevent cracks.

Drywall ceiling joints
After you have installed the first drywall board, you should continue with the next boards. Therefore, work with great care to make sure you align them properly.
Drive in the screws, as to make sure their heads are aligned with the drywall surface. In order to make a proper job we recommend you to use a screwdriver with torque control, as you can adjust the speed.

Installing drywall ceiling boards pattern
When installing a drywall ceiling, you have to use the stretcher bond pattern. Therefore, you have to start the the next row with half of a drywall board and continue it with full boards.
In addition, you might have to cut several holes in the drywall boards for smoke detectors, for electrical wires for light fixtures of for ventilation appliances. In order to get the job done professionally, you should use a drill machinery with torque control and masonry drill bits.
Continue installing the drywall boards in the same manner described previously. When installing a drywall ceiling it is important to follow the layout, otherwise it won’t be durable.
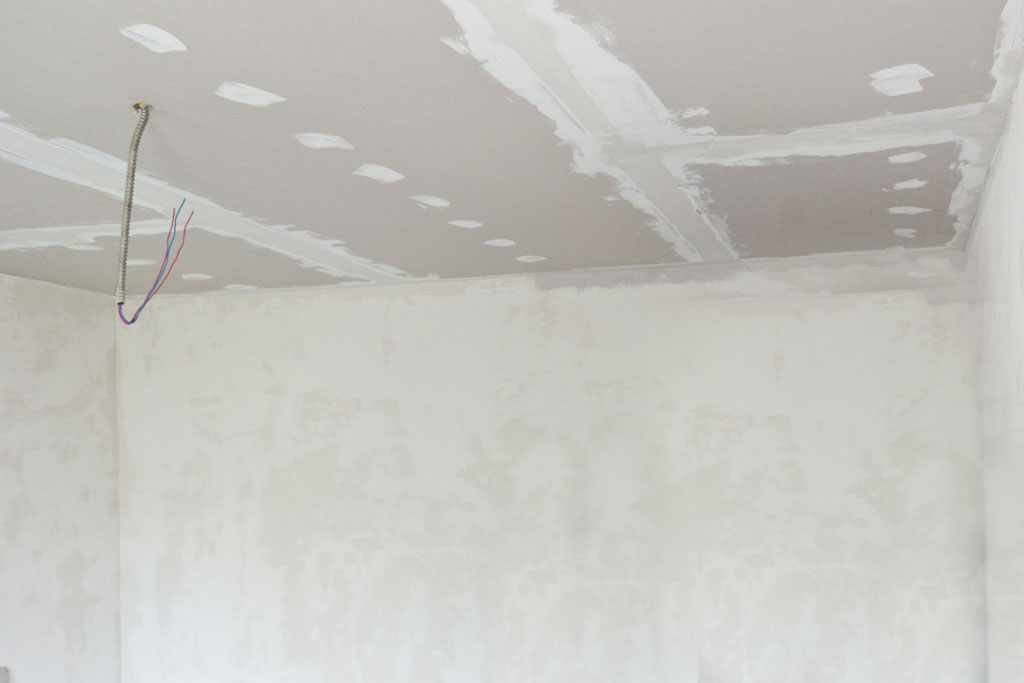
Finishing drywall ceiling
After you have installed the drywall ceiling, you have to finish the joints by applying putty and drywall paper. This step is not difficult, but it is essential for a neat look.
Therefore, you should cover the screw heads and the drywall board joints by using a large trowel, paper tape and drywall putty. Remember that you have to apply at least 2 layers of putty. After you have applied the putty, you have to sand it a couple of times (using at first medium grit sandpaper and then fine grit sandpaper), until it will look properly.
Cutting drywall boards
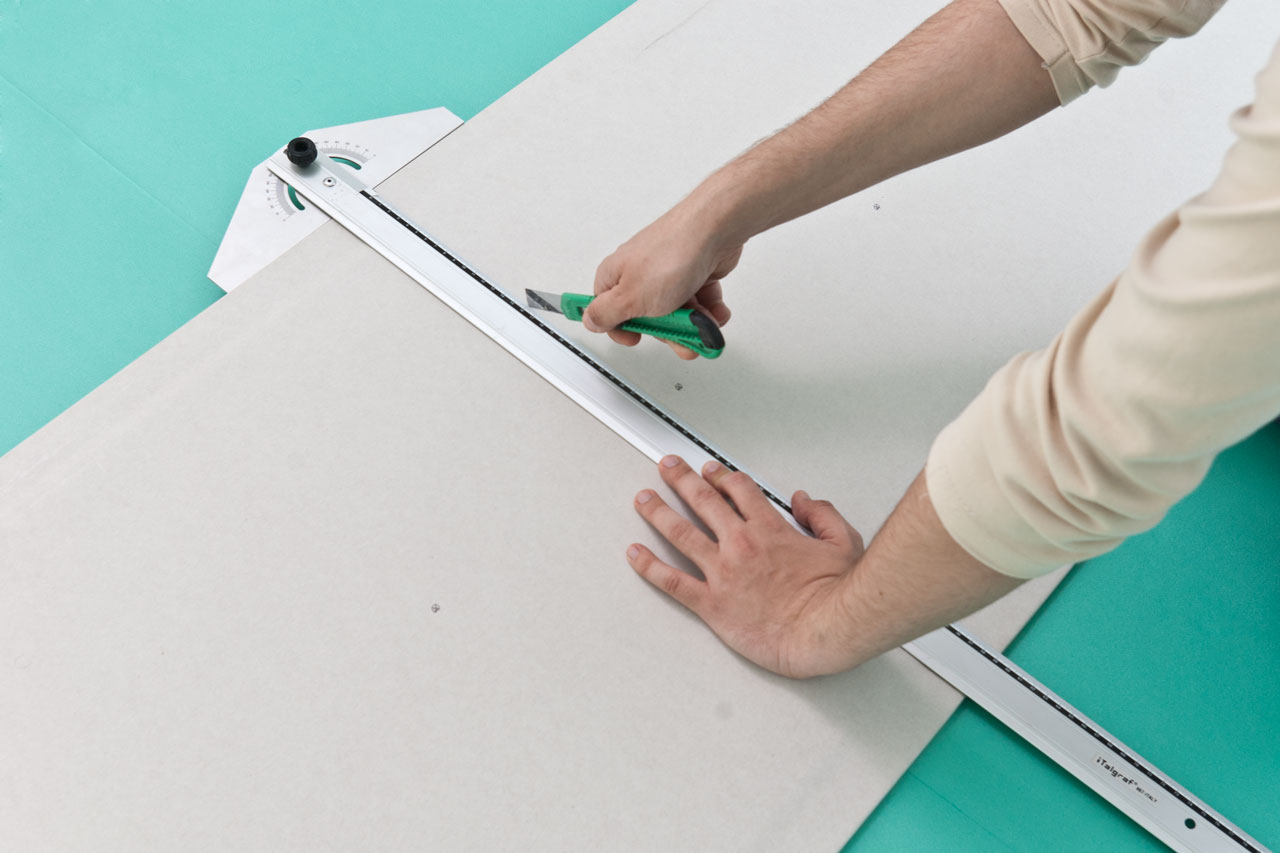
Cutting drywall
In order to cut the drywall boards, you should mark the exact dimension on the plasterboard, using a pencil and a T-square. Use a tape measurement, to make sure you make accurate marks on the sheet.
The next step is to use a sharp utility knife and to go several times over the drawn line, as top make sure you have cut it deeply. Bend the board alongside the cut and split the two drywall boards by cutting the paper layer with a utility knife.
My best tips on installing a drywall ceiling:
Installing drywall on a ceiling can be a bit more challenging than doing walls, but with the right tips and tools, you can achieve a professional-looking result. Whether you’re updating a room or working on new construction, these tips will help you tackle a drywall ceiling project with confidence.
1. Gather the Right Tools
Having the right tools on hand can make the job much smoother. You’ll need:
- Drywall sheets (typically 1/2 inch thick for ceilings)
- Drywall screws (1-1/4 inch or 1-5/8 inch)
- Drill or screw gun
- T-square
- Utility knife
- Drywall lift (or a couple of helpers!)
- Joint tape and compound
- Taping knife and sanding block
A drywall lift is especially helpful when installing ceiling drywall, as it holds the sheet up while you secure it in place.
2. Measure and Plan the Layout
Before you start cutting and hanging sheets, measure the ceiling space carefully and plan your layout. Try to place the seams in locations where they’ll be least noticeable. Stagger the sheets so that no four corners meet at one point, which helps prevent cracking later on.
3. Install Furring Strips or Strapping (Optional)
If your ceiling joists are uneven, consider installing furring strips or strapping across them to create a level surface for your drywall. These thin strips of wood help ensure a smoother ceiling and make it easier to attach the drywall securely.
4. Cut Drywall Sheets to Size
Measure and cut your drywall sheets to fit your ceiling space. For clean cuts, score the drywall with a utility knife along a straight edge, snap it along the score line, and cut through the backing paper on the other side. Use a T-square to ensure precise cuts.
5. Use a Drywall Lift or Team Up
Drywall sheets are heavy and awkward to handle, especially on the ceiling. If possible, use a drywall lift to raise the sheets into place and hold them while you secure them. If you don’t have access to a lift, working with a partner is a must. It’s tough to hang ceiling drywall solo!
6. Start in the Corner
Begin hanging drywall at one corner of the room and work your way across. Make sure the first sheet is square with the room, as this will set the tone for the rest of your installation. Secure the drywall to the ceiling joists using drywall screws, placing screws every 12 to 16 inches along the joists.
7. Stagger the Seams
To reduce the chance of cracking over time, stagger the seams of your drywall sheets. This means offsetting the seams between adjacent rows of drywall, so that no two seams meet at a single point.
8. Avoid Overdriving Screws
When attaching the drywall, be careful not to overdrive the screws. The screw heads should sit just below the surface of the drywall without breaking through the paper. Overdriving can weaken the hold and make it harder to finish the seams.
9. Tape and Mud the Joints
Once all the drywall is up, it’s time to tape and mud the joints. Apply a thin layer of joint compound over the seams, press drywall tape into the mud, and smooth it out with a taping knife. Once dry, apply two to three more layers of compound, sanding between coats to achieve a smooth finish.
10. Finish the Edges
For clean edges around corners or where the ceiling meets the wall, install corner bead. It protects the drywall edges from damage and provides a sharp, clean line. Use joint compound to blend the bead with the rest of the ceiling.
Bonus Tip: Prime and Paint! After your drywall is installed and sanded smooth, apply a coat of primer to seal the surface and prepare it for paint. Once primed, you’re ready to paint your ceiling in the color of your choice.
By following these tips, you’ll have a drywall ceiling that looks smooth, sturdy, and professional. With some patience and attention to detail, even a ceiling can be a great DIY project.
Thank you for reading how to install drywall ceiling, and we also recommend you to read the other articles, related to drywall ceiling. Please LIKE and SHARE our articles using the social media widgets. SUBSCRIBE to be the first that gets our latest projects.


3 comments
Good article. Very informative. However, am I reading/seeing this incorrectly ? The article states that the boards should be installed perpendicular to ceiling joists however, the first illustration shows boards parallel to the joists.
Install it as in the pictures.
this is demonstrating the wrong way to hang drywall should be perpendicular to ceiling joists, please correct your article.