This article is about how to fix a mall hole in drywall. Fixing small, medium or large holes in drywall is not as difficult as it might seem, provided you use the right tools and materials. Generally speaking, there are many ways of repairing a hole in drywall, but in this step by step article we will show you how to get the job done in a professional manner, by using a backing support. This method is straightforward and can be done by anyone, just make sure you follow our guidelines and pay attention to our tips. If you work wit patience and with judgement, you will fix the hole smoothly and none will be able to guess any evidence of the damaged area.
The backing support (one or several wooden strips, according to the size of the hole) should be 4 inches longer than the height of the hole. In this manner, you will be able to secure the wooden strip to the drywall, by inserting several screws. If the hole is wider than 6” we recommend you to install symmetrically at least two wooden strips, otherwise you have to center just one. CLICK HERE to see a lot more projects about fixing drywall in a professional manner.
Before fixing the small hole in drywall, you have to prepare thoroughly the surface. Therefore, you have to use a pencil and a L-square to draw a square or a rectangle around the damaged area. Next, use a drywall saw or an utility knife to cut the drywall, making sure you go over the cut lines. By cutting out a square or a rectangle around the damaged area, it will be much easier to fix the wall with a patch. Pay attention to the wires or pipes that could be inside the wall.
Made from this plan
Materials
- Drywall board, drywall screws
- Fiberglass mash
- Drywall compound
- 1×2 Wooden strips
Tools
- T-square, tape measure, carpentry pencil, utility knife
- Large trowel
- Drywall saw
- 100-grit Sandblock
Tips
- Use an utility knife with a sharp blade
- Uut the patch to fit perfectly in the hole
- Turn off the electricity before cutting the hole in the wall
- Don’t apply the compound in thick layers, otherwise it will crack after it dries out
Time
- 2 Hours
Preparation for fixing a small hole in drywall

Hole in drywall
Step 1: Use a carpentry square and a pencil to draw a square or a rectangle around the damaged area. Next, cut out the surface with a drywall saw or an utility knife. If the hole is smaller than 2” you could try to fix it by applying compound and several pieces of mesh net. If the hole is larger, you should either patch it or install a wooden strips to support a piece of drywall.

Tools for fixing small hole in drywall
Step 2: In order to fix a small hole in drywall like a pro, you need several tools and materials. First of all, you should use a screwdriver to insert several screws in the drywall. Next, you should also use several wood stripes (1×2) to support the drywall patch and drywall screws to secure the backing support and the patch.
Last but not least, you need mesh net to cover the seams and compound to finish the surface in a professional manner.

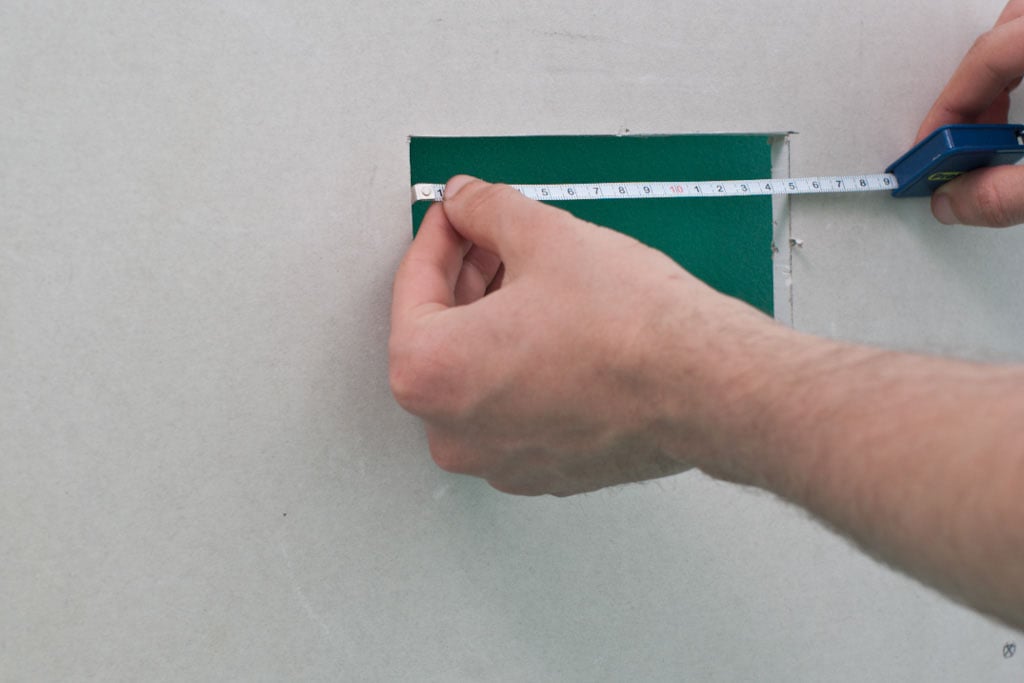
Measuring hole in drywall
Step 3: Use a tape measure to determine the dimensions of the rectangular hole. Next, cut a piece of drywall with a jigsaw / drywall saw, having these dimensions in mind.

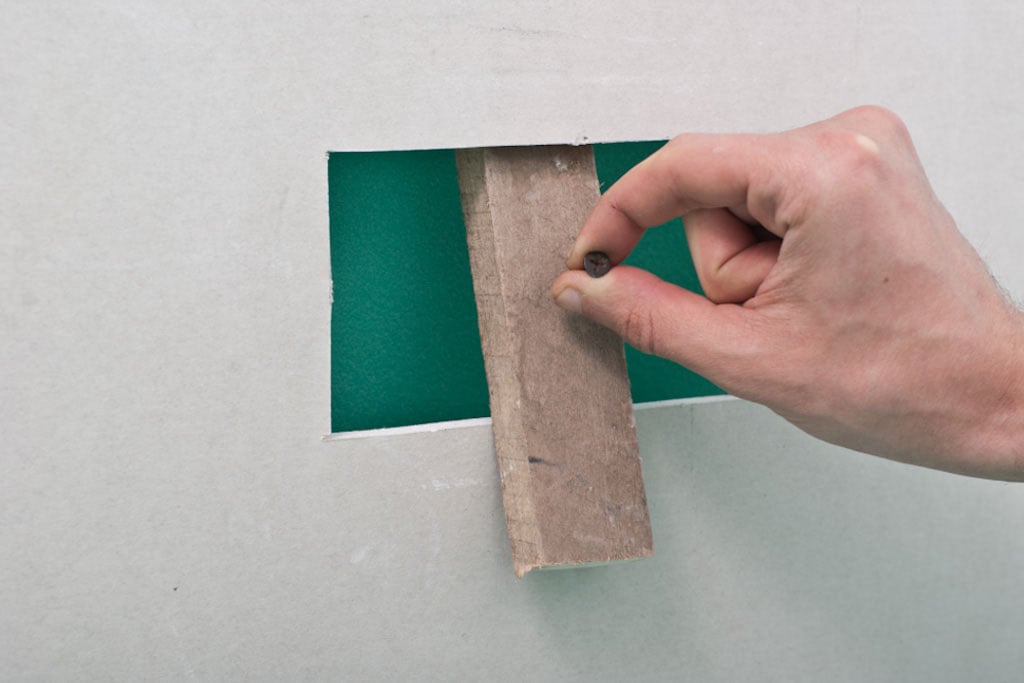
Driving in screw in the wood strip
Smart 4: Cut a wooden strip 4 inches longer than the height of the hole, to use it as backing support. Next, drive in a drywall screw in the middle wooden strip, to help when locking it into position. If you don’t insert the screw, then it will be difficult to secure it to the existing wall.
How to fix a small hole in drywall

Installing the support backing
Step 5: Place the wood strip in the hole, positioning it in the middle. Work with great care as to get the job done in a professional manner.

Securing the wood strip with screws
Step 6: Secure the wood stripes to the drywall, by driving in several screws at the top and bottom of the hole. If you have to install several strips, you should place them symmetrically.

Backing support
You can see in the image the backing support for the drywall patch. Notice that the heads of the screws are sunk about 1/16”, without tearing the paper layer. Fixing a small, medium or large hole in drywall is straight forward, if you follow our guidelines.

How to fix hole in drywall
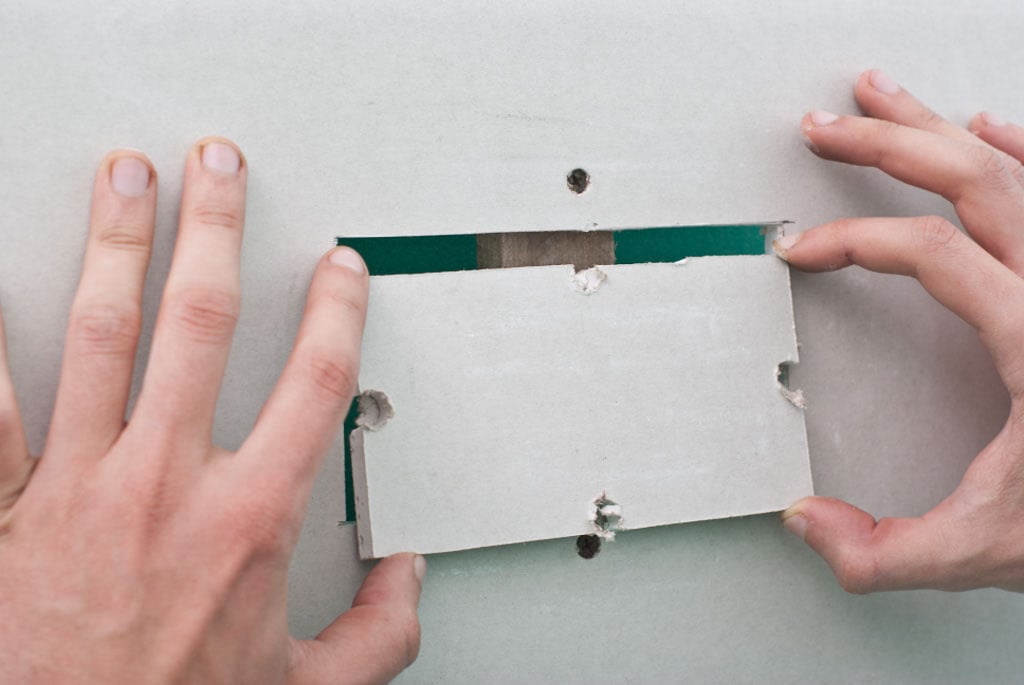
Step 7: Place the drywall patch inside the hole to check if it fits into position. If it is slightly too large, we recommend you to adjust its dimensions to fit into position without any issues. Under any circumstances don’t force the drywall piece to fit into position, otherwise the surface won’t be level.

Fixing hole with a patch
Step 8: Lock the drywall piece into position by driving in several screws in the backing support. If you have cut the drywall piece at the appropriate dimensions, it will fit into position easily.
How to repair a small hole in drywall

Covering the seams with mesh tape
Step 9: Cover the seams between the patch and the existing wall with mesh net. The best method to apply the mesh tape is to press it firmly with a large trowel. Work with patience and apply mesh net over all seams.

Cutting mesh tape

Repairing hole in drywall
After you have installed mesh net over the seams, you should get a result similar to the one in the image. Work with great care and with judgement, if you want to obtain a professional result. Fixing a small hole is easy, but finishing the surface makes the difference between poor job and a successful project.

Covering the mesh tape with mud
Step 10: Prepare a small quantity of compound and cover the screw holes and the mesh net, by using a large trowel. It is essential to apply several coats of mud, if you want a professional result.

How to fix small hole in drywall
Step 11: Apply the second coat of mud, after the first one has dried thoroughly. Work with patience and make sure you spread the compound as evenly as possible, otherwise you will have to sand the surface several times before obtaining the desired result. Keep the pointer finger in the center of the large trowel and apply the second coat on a larger surface. If the surface is not perfectly level, you will have to sand it the next day.

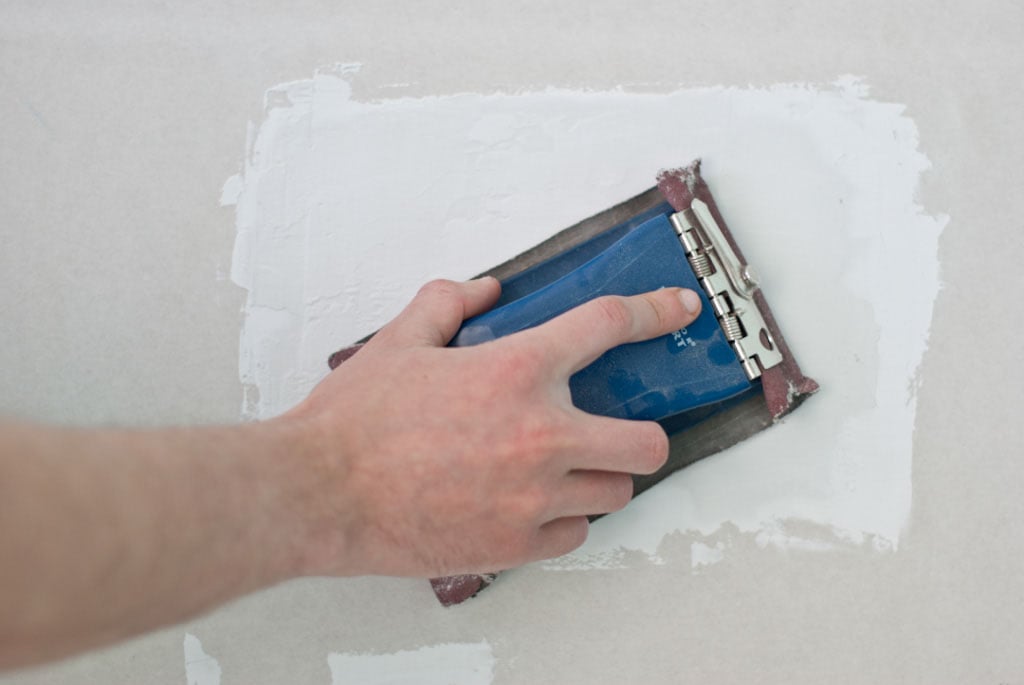
How to fix small hole in wall
Step 12: Sand the whole surface with medium grit sandpaper, as in the image. Use circular moves and even out the surface, if you want to obtain a professional result.
My best tips to fix small holes in drywall:
Fixing small holes in drywall is a simple task, and with the right approach, you can get flawless results. Here are my best tips for fixing small holes in drywall:
1. Clean the Hole: Start by cleaning up the area around the hole. Use a utility knife to remove any loose debris or frayed drywall paper. Make sure the edges of the hole are smooth for a cleaner patch.
2. Use Pre-Mixed Spackle or Lightweight Joint Compound: For small holes (like nail or screw holes), pre-mixed spackle or lightweight joint compound works perfectly. It’s easy to work with and dries quickly, giving you a smooth finish.
3. Apply in Thin Layers: Apply the spackle or joint compound using a putty knife. Use a thin layer to fill the hole, pressing it in to ensure good adhesion. Feather the edges of the compound by applying less pressure as you move outward. Multiple thin layers will give you a better finish than one thick layer.
4. Let it Dry Completely: Allow the spackle or joint compound to dry completely before sanding or adding another layer. Depending on the product, this can take anywhere from 30 minutes to a few hours. Check the drying time on the package for specifics.
5. Sand for a Smooth Finish: Once the spackle is dry, use fine-grit sandpaper (120-150 grit) to smooth the surface. Sand lightly until the patch is flush with the surrounding wall. Be careful not to over-sand and damage the drywall.
6. Apply a Second Coat if Necessary: If the patch has shrunk or there are still low spots, apply a second thin coat of spackle or joint compound. Let it dry and sand it smooth again for a perfectly level surface.
7. Prime Before Painting: After sanding, apply a small amount of primer to the patched area before painting. This helps the paint adhere evenly and prevents the patch from showing through. Once the primer is dry, paint over the patch to match the surrounding wall.
8. Use Self-Adhesive Mesh for Larger Small Holes: For slightly larger holes (around 1-2 inches), apply self-adhesive mesh tape over the hole before using spackle or joint compound. This provides extra support and prevents cracking later.
By following these steps, your small drywall holes will disappear, leaving you with a smooth, seamless wall ready for painting!
Thank you for reading our article about how to fix a small hole in drywall and we recommend you check out the rest of our projects. Don’t forget to SHARE and LIKE our projects with your friends, by using the social media widgets. SUBSCRIBE to be the first that gets our latest projects.
EXPLORE MORE IDEAS:


