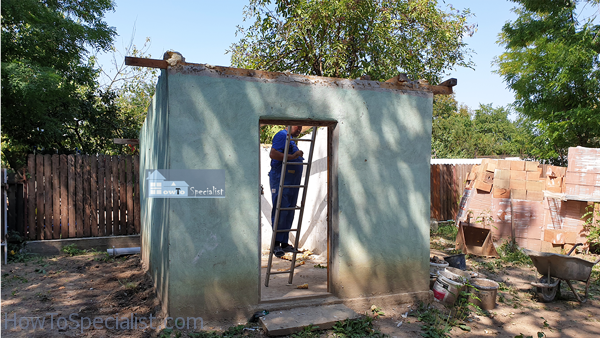
This article is about how to build a concrete and brick garage. After building the countryside house, I decided to make and addition for my tools and car. I didn’t have enough space and time to build a larger building, so this 20×20 is not the best, not the worst. I might use it in the future as a workshop only space, therefore I added insulation to the floor, ceiling and walls. In addition, I built a chimney if I add a fireplace in the future.
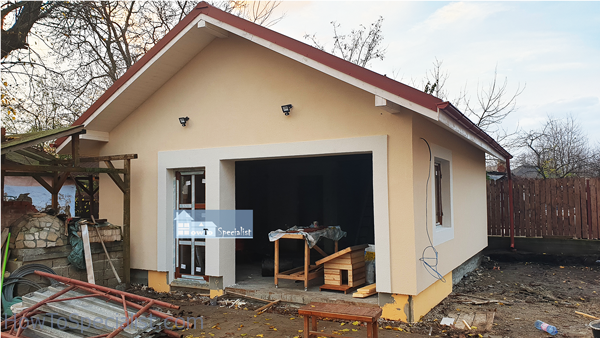
The total budget for this garage / workshop project was 20000 usd, because I really didn’t have any shortcuts and invested in best materials. I still have many things to do, but for the time being it serves its purpose gracefully. My garage features a large 8 ft door fully automated, and it also comes with a man door and generous windows on both sides. See all my Premium Plans HERE.
Made from this plan
Materials
- Fine sand and gravel
- Cement or premixed concrete
- Wooden boards
- Nails and screws
- Reinforcing bars – to build the reinforcing structure
Tools
- Safety gloves, glasses
- Measuring tape, carpentry pencil, l-square, spirit level
- Concrete mixer – to mix the concrete
- Hammer and circular saw – to build the formwork
- Float – to finish the concrete
Time
- 3-months
Brick Walls Construction – Video!
How to Build a Concrete and Brick Garage
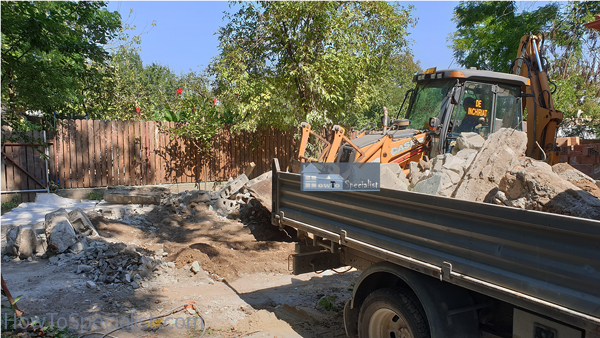
Tearing-down-the-old-building
I had a small storage building where I wanted to build by 20×20 garage. Therefore, first we had to take it down. We started with the door and the roof.
Small-shed-demolition
Next, we used the backhoe digger to tear down the brick walls and to grade the land. You can see a more detailed video on how to demolish the building HERE.
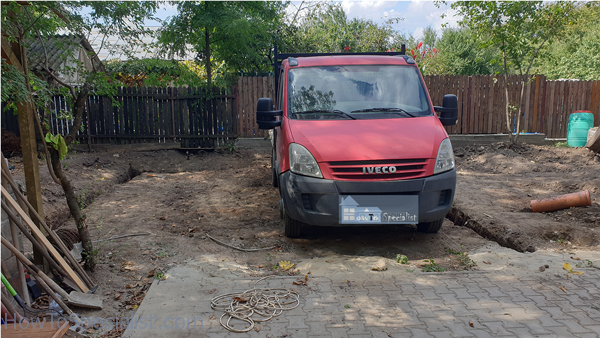
Digging-out-the-garage-foundation
Next, we laid out the foundation trenches for the garage and dug them by hand. I live in an area with earthquakes, so the footings need to be reinforced with rebar beams and be deeper than the frost line. Pretty complex and expensive for a garage, but the building codes are there for a reason.
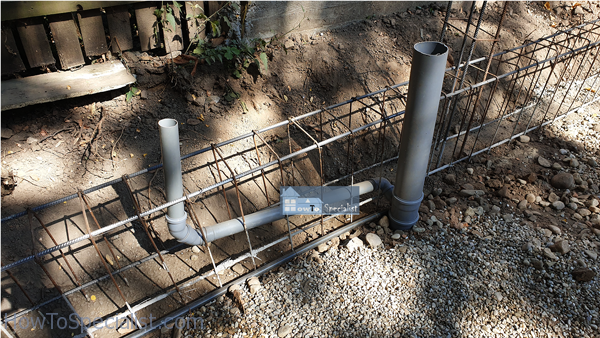
sewage-pipes-for-bathroom
We set the beams to the trenches and then installed the pipes for water supply and for sewage. I’ve planned to create a small bathroom inside the garage, as I might use it as a workshop, later on.
Filling-out-the-foundation-footings-with-concrete
We filled the trenches with concrete.
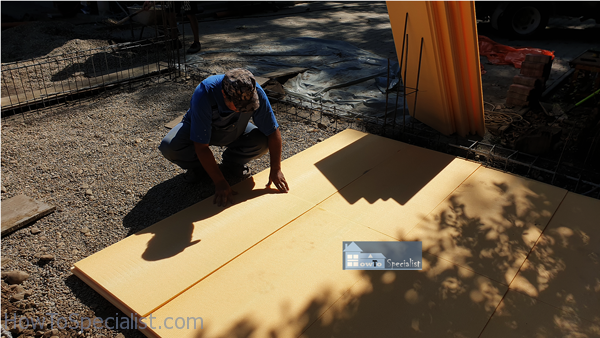
Underfloor-insulation-sheets
I compacted a 2″ layer of gravel ad then installed rigid foam insulation, to keep everything nice if I decide to heat the garage in the future.
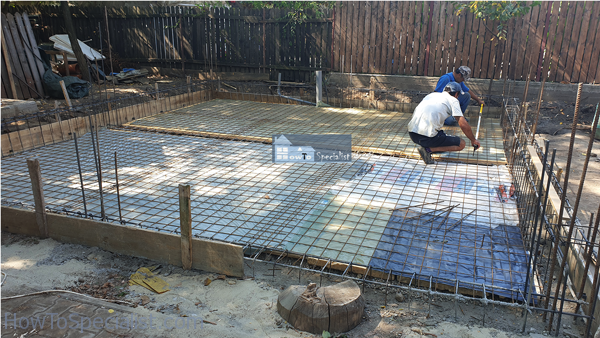
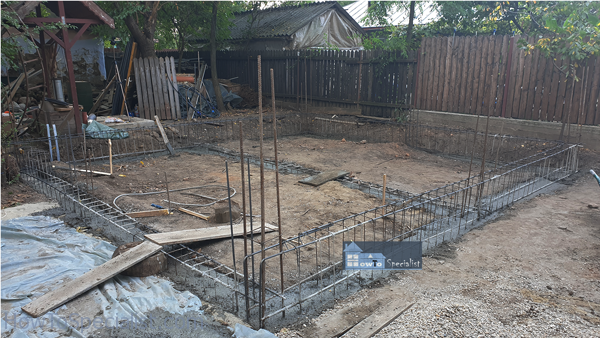
Formwork-for-garage slab
Next, we set rebar mesh to reinforce the floor slab.
Assembling-the-rebar-columns
You can see here assembling the rebar columns.
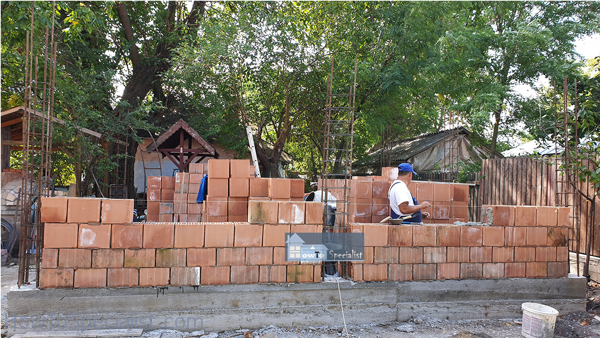
Laying-out-the-brick-walls-for-garage
We built the brick walls. You can see in the video more details on how to do that. You can also take a look over this video.
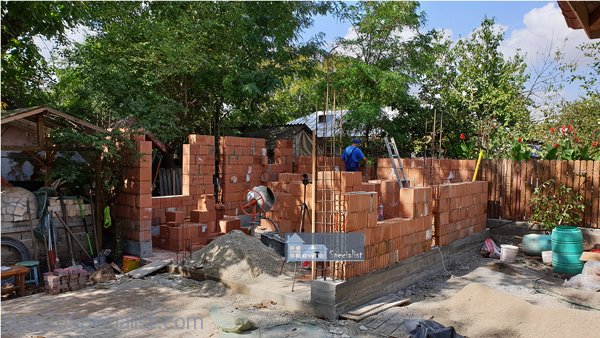
Garage-brick-walls
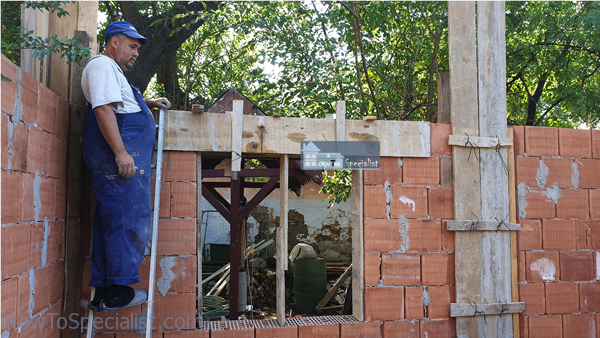
Window-formwork
Next, we build the formworks for the beams that go on top of the brick walls.
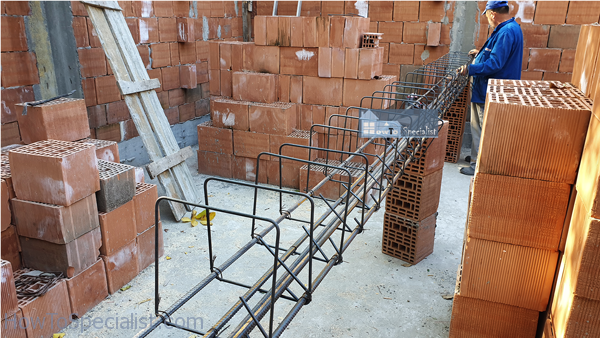
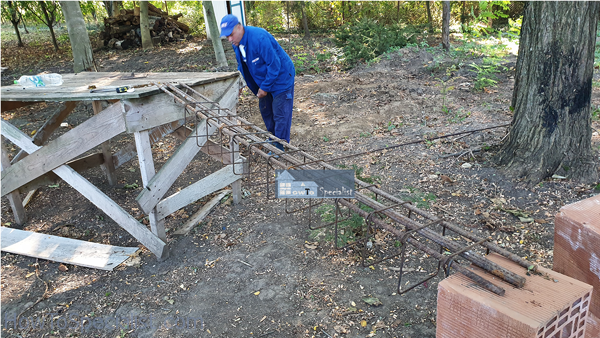
Assembling-the-rebar-beam
We also built a rebar beam that goes to the middle of the garage and it has the purpose of supporting the ceiling and the roof. As a reference, the beam used 6 #14 rebars.
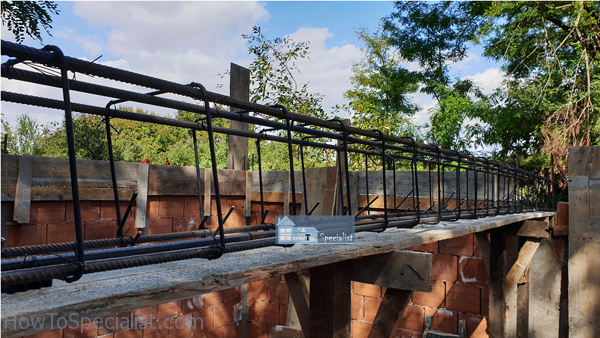
Installing-the-middle-rebar-beam

Fitting-the-ceiling-joists
Notice the beams for the ceiling. The beams join over the concrete beam I have talked about earlier.
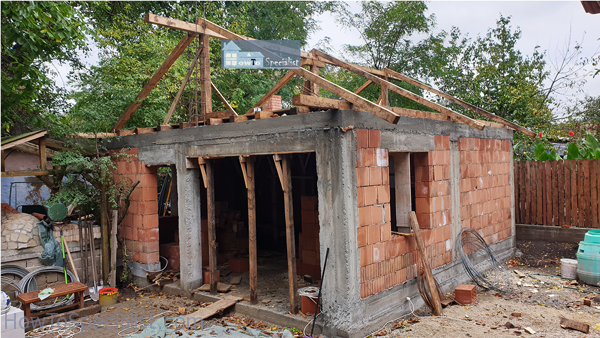
Fitting-the-rafters
Notice the structure of the roof. All rafters go on top of a ridge beam.

Fitting-the-ridge-beams
Joining the ridge beams on top of a support.
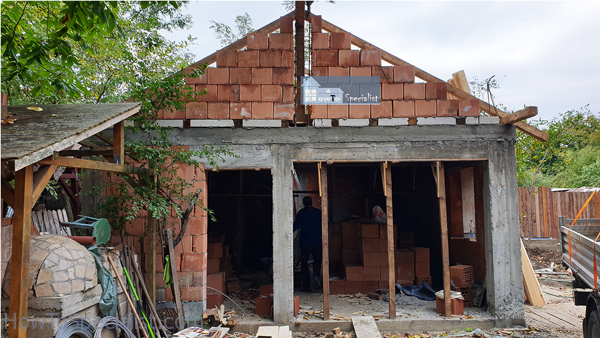
Fitting-the-gable-ends
We filled the gable ends with bricks.
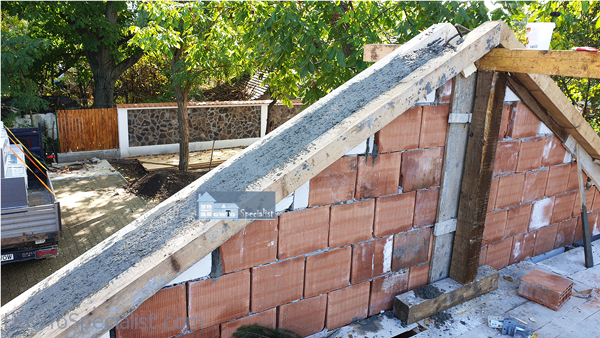
Gable-end-beams
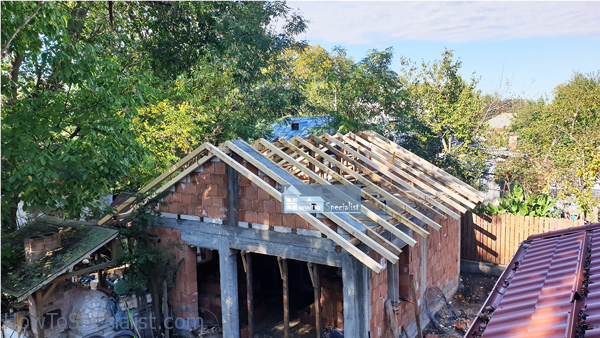
Rafters
We also set the overhangs to the front and back of the garage.
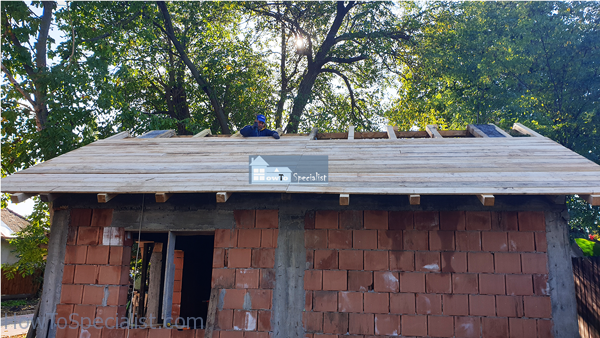
Fitting-the-roof-slats
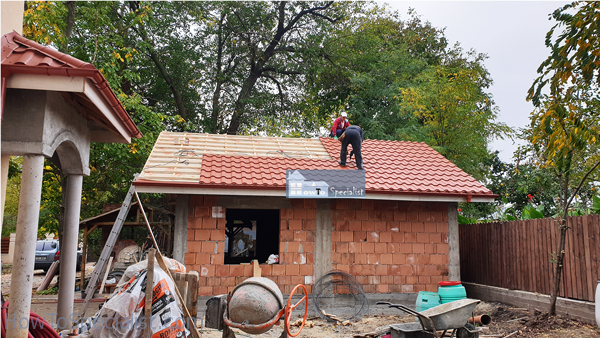
Metal-roofing
We used metal shingles to cover the roof, because I wanted it to match the style and design of the house. We had a team doing the job for us.
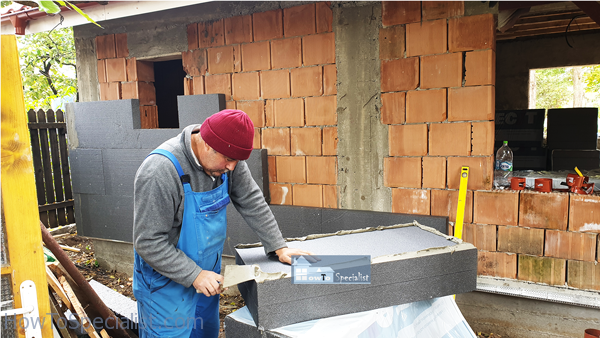
Fitting-the-insulation-sheets
Next, we installed the rigid foam insulation sheets to the exterior of the garage. Notice the adhesive and how you need to spread it along the exterior edges of the boards. Use a saw to cut out the boards around the windows. You can see the process in the video, as well.
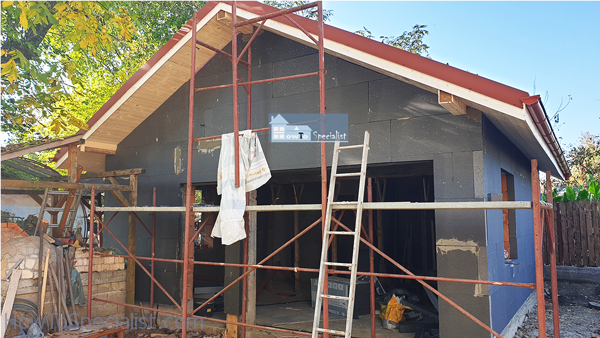
Rigid-foam-insulation—garage
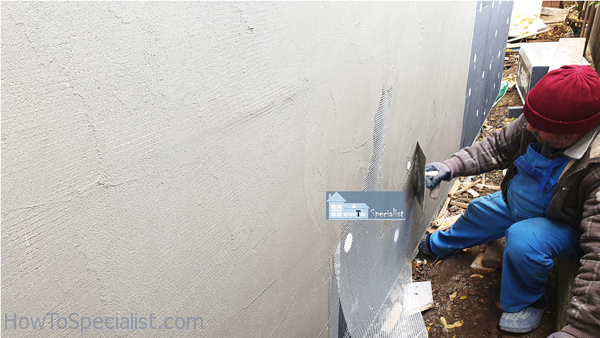
Insulation-plastering
We rendered the insulation with fiberglass mesh and with adhesive. You need 2 coats.
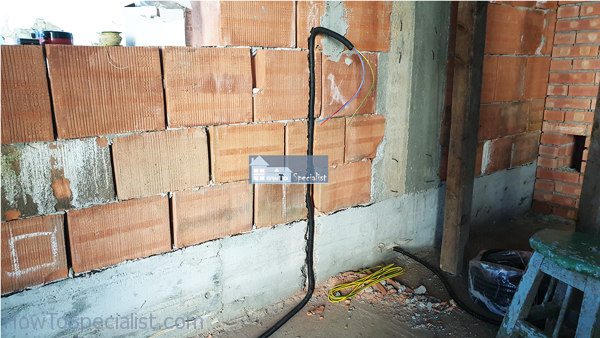
Electrical-wiring
Notice the electrical wires inside the garage. Here, I mention that you need to think ahead and set a power outlet for car charging. I don’t own an electrical car yet, but when I will, the garage will be ready for fast charging it. Bonus point for me :)
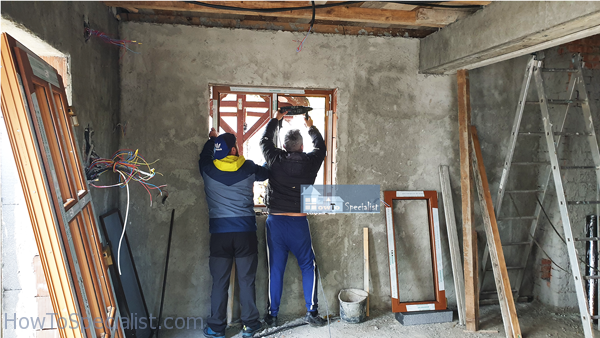
Fitting-the-PVC-windows
Next, you can see the installation of the PVC windows, matching the ones I have bought for the house. They were pretty expensive, but they are high quality and with great insulation properties.
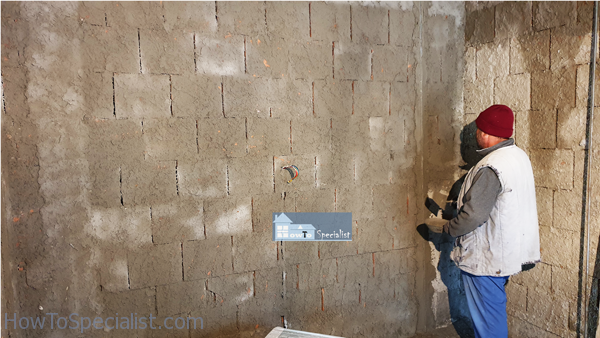
Cement-render
We cement rendered the interior walls. It is a time consuming process, but I can assure you the end result is far superior as compared to mechanized wall plaster.
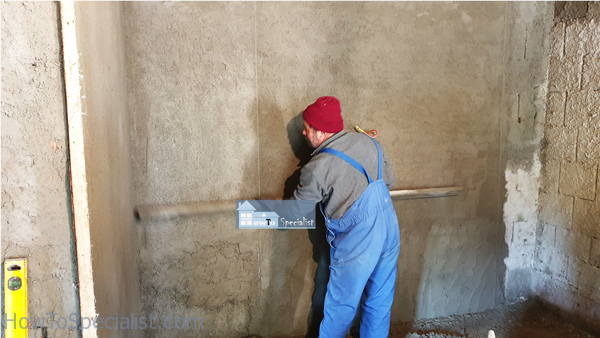
Cement-rendering
You can see in this image, the 3 coat of plaster and smoothing the wall process.
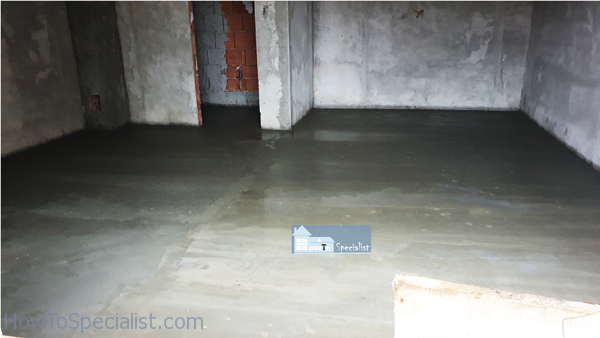
Floor-screed
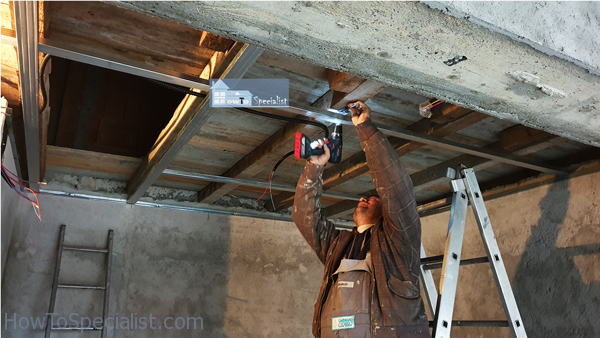
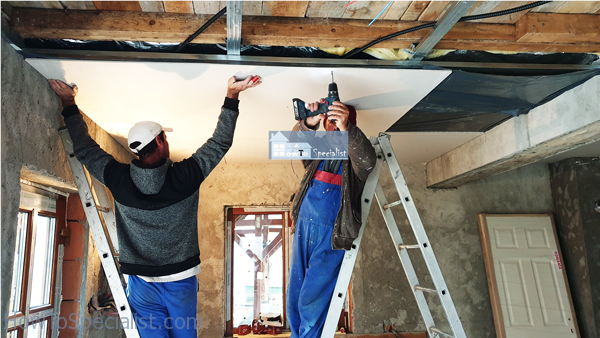
Metal-stud-ceiling
We also insulated the ceiling and to do that, we had to install a metal stud frame. Make sure the frame is perfectly level.
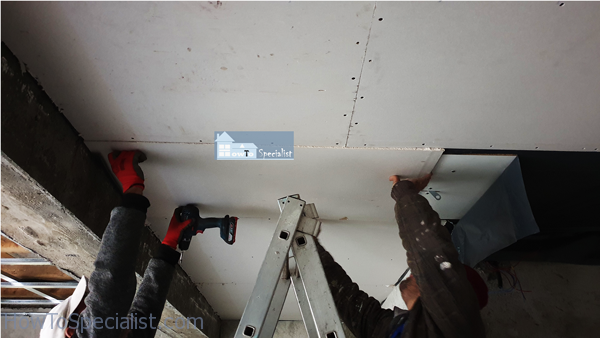
Drywall-ceiling
Next, we installed the mineral wool insulation batts and closed it with drywall.
Hanging-drywall-ceiling-sheets
Primer

Decorative-paint
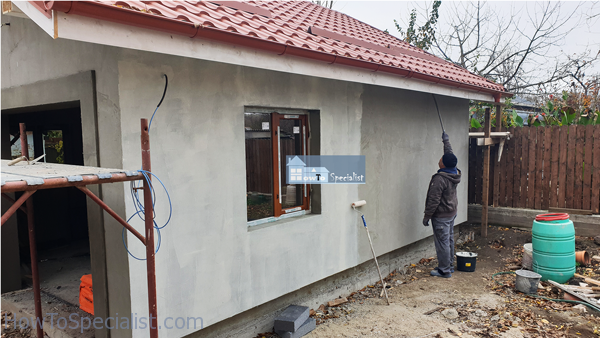
We painted the exterior of the garage to match the house color scheme. Really pleased with the result.
DIY-brick-garage
The video provides a lot more visual info on how we built this large garage / workshop. There are many things to say, but I will keep it simple and I let the video to speak.
My best tips to build a concrete and brick garage:
Building a garage with concrete and bricks may seem like a huge project, but with the right preparation, tools, and steps, you can tackle it like a pro! Whether you’re looking to create extra space for your cars, a workshop, or just some storage, here are my best tips to help you build a durable, long-lasting concrete and brick garage.
1. Plan & Design First
Before grabbing your tools, spend time planning the size, layout, and overall design of your garage. Key things to consider:
- Size: Do you need space for one car or two? Consider extra room for storage or a workbench.
- Foundation Type: Decide whether you want a slab-on-grade foundation or a more traditional poured concrete foundation.
- Local Building Codes: Make sure to check for any permits and local building codes before starting your project.
2. Gather High-Quality Materials
For a sturdy garage, using the right materials is key. Here’s what you’ll need:
- Concrete: This will serve as the foundation and floor. I recommend a mix that is durable and well-suited for supporting heavy vehicles.
- Bricks: Choose bricks that match the look of your home, but also make sure they’re durable enough to stand up to the elements.
- Mortar: Make sure you use the proper mortar to bond your bricks together and create a strong structure.
3. Lay a Solid Foundation
The foundation is critical to the garage’s longevity and structural integrity. Here’s how to get it right:
- Excavation: Dig to the depth required for your foundation. If you’re in an area prone to frost, make sure to dig below the frost line.
- Formwork: Create forms for the concrete foundation, ensuring they are level and square.
- Pouring Concrete: Mix your concrete and pour it evenly into your forms. Use a screed to level the surface and make sure it’s smooth.
4. Bricklaying Basics
Building with bricks may seem intimidating, but it’s all about getting the basics right.
- Start with a Solid Base: Lay the first row of bricks with care, ensuring they are perfectly level. This will set the foundation for the rest of the walls.
- Use a String Line: Keep your walls straight by using a string line as a guide for each layer of bricks.
- Mix Mortar Correctly: Mortar that’s too wet or dry won’t bond properly. Follow the instructions on the mortar mix for best results.
- Trowel Techniques: Use a trowel to apply the mortar evenly and ensure there’s enough between each brick for a strong bond.
- Brick Spacing: Maintain consistent spacing between bricks by using spacers to create uniform gaps for mortar joints.
5. Incorporate Reinforcements
For extra stability, especially in areas with heavy winds or seismic activity, reinforcement is crucial:
- Rebar: Place rebar into the foundation before pouring concrete to increase strength.
- Lintels and Bond Beams: Use concrete or steel lintels above garage doors and windows to support the weight of the structure.
6. Add Insulation
If you plan to use your garage year-round, it’s a good idea to insulate it:
- Wall Insulation: Insulate between the brick and inner framing to maintain a comfortable temperature inside the garage.
- Garage Door: Invest in an insulated garage door to keep cold air out and warmth in.
7. Roofing & Finishing Touches
Once the walls are up, it’s time to finish the structure:
- Roof Options: A gable or hip roof is ideal for a garage. Use trusses for support and choose a roofing material that complements your home.
- Doors & Windows: Install garage doors and windows to provide ventilation and natural light, making your garage functional and comfortable.
- Electrical & Plumbing: Consider whether you’ll need lighting, power outlets, or even a water supply. Plan this during the building phase to avoid future headaches.
8. Seal & Protect
To make sure your garage lasts for decades, protect it from the elements:
- Seal the Concrete Floor: Use a concrete sealer to prevent cracking and water damage over time.
- Brick Sealing: Applying a water-resistant sealant to the exterior bricks will help them withstand rain, snow, and extreme temperatures.
Thank you for reading our article on how to build a brick house and we recommend you to check out the rest of our project. Don’t forget to share our articles with your friends, by using the social media widgets.