This article is about how to build a brick house. Building a brick house has many advantages as compared to timber frame homes, as it is more resistant to fire, floods and storms. In addition, the brick houses have a better thermal efficiency as the large bricks store the heat and then radiate it slowly into the rooms during the cold winter nights. In addition, choosing bricks over drywall improves the sound insulation of your house. In terms of costs, nowadays building a brick house is very close to the construction of a timber frame home. If you build your brick house correctly, you will enjoy its conform for many years, as it will resist against windstorms and earthquakes.
As compared to light constructions, a brick house will store the heat and radiate it slowly during the night. Therefore, due to its unique features a brick house will be easier to maintain and you will spend less money on the heating bills. In addition, if you choose to insulate the walls with polystyrene sheets, you will increase the thermal efficiency of your bricks house. Adding double glaze windows and a proper preparation for the cold season will further enhance your house insulation and decrease the heating costs.
A brick house will also have a better sound insulation, as compared to timber frame constructions. The concrete floors and the brick walls just stop the sounds better than drywall partitions do. Although building brick partitions might be more expensive and time consuming as compared to timber frames, it pays off the investment if you like privacy. Before building the concrete foundation, you have to thoroughly prepare the site, by cleaning the plant material. If the ground water is very close to the surface of the site, you should install a drainage system, otherwise the concrete foundation will be damaged by the moist soil.
Made from this plan
In order to build a brick house, you need the following:
Materials
- Fine sand and gravel
- Cement or premixed concrete
- Wooden boards (2×4 and 2×10) – to build the forms
- Nails and screws
- Reinforcing bars – to build the reinforcing structure
Tools
- Safety gloves, glasses
- Measuring tape, carpentry pencil, l-square, spirit level
- Concrete mixer – to mix the concrete
- Hammer and circular saw – to build the formwork
- Float – to finish the concrete
Tips
- Lay the concrete foundation on the site properly
- Install a rigid net of rebars
- Use a concrete pomp to pour the concrete if the site is inaccessible to trucks
Time
- 3-12 months
Brick Walls Construction – Video!
Building a brick house

Building a brick house
Building a brick house by yourself is impossible in most of the cases, as the amount on work needed is over your physical capacity. Nevertheless, you can decrease the labor costs if you carry out some task by yourself, such as supervising the workers and making sure the construction process goes smoothly. We recommend you to read as much as possible about building a brick house before starting the project, as you will avoid many costly mistakes.
Smart tip: Building a house with bricks and concrete has many advantages over the timber frame system. First of all, a brick construction resist better to windstorms, floods and fires. This aspects might look minor, but we can assure you they make the difference on the long run. In addition, it is easier to maintain a brick house as it doesn’t rotten nor it is affected by termites, as in the case of a wooden house. The only thing which requires your attention is to freshen up the look of your house by applying new a coat of paint every 3-5 years.
How to build the brick house foundation

Building foundation formwork
Step 1: Dig the trenches for the concrete foundation. A brick house needs a sturdy foundation, therefore you have to dig deep trenches and install a rigid structure of reinforcing bars. Consult a qualified structural engineer to determine the depth of the footings (according to the soil structure) and the needed amount of rebars.
Step 2: Build the wooden form for the concrete foundation. Before pouring the concrete you have to use 2×10 wooden boards to build the form and secure it with 2×4 braces.

Brick House Construction
Step 3: Pour the concrete foundation. If you want to keep costs as low as possible, you could mix the concrete by yourself with a power mixer. Nevertheless, it will take longer and the concrete wouldn’t have the same quality as the one from your local company (they add special additives to enhance the concrete rigidity).
Step 4: The foundation will dry out is several weeks. Nevertheless, you should leave it for about one week and then you can build the brick walls. The first step is to move the bricks on the concrete slab and to lay the walls.
How to build the brick house

Building brick house
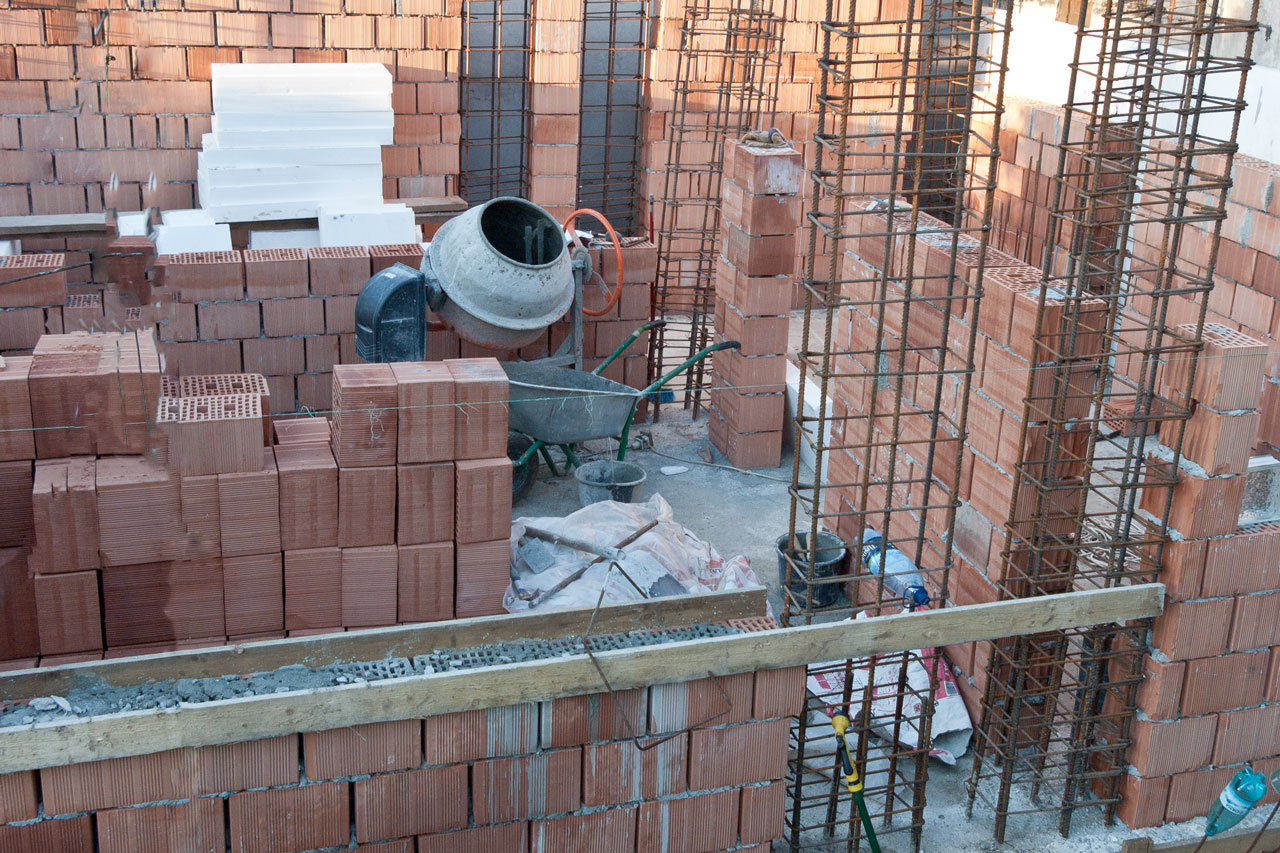
Step 5: Build the brick walls as straight as possible, using a string to guide you. After you lay each row, you should raise the string. Leave about 1/3” between the bricks and use mortar to secure them.
Step 6: Leave enough space for windows and door openings, following the house plans. Use a plumb line or a large spirit level to make sure the walls are perfectly vertical. After you have lain six rows of bricks, you should use metal ties to secure the wall to the pillars.

Building ceiling formwork
Step 7: Build the form-work for the concrete ceiling. In order to pour a concrete ceiling, you have to use 2×10 wooden boards and 4×4 posts to support the weight of the rebar structure and of the concrete. If you can afford, we recommend you to rent adjustable metal posts, as they will secure the ceiling formwork better.
Step 8: Pour the interior concrete stairs once with the ceiling. In this manner, the concrete stairs will bond to the ceiling and increase the rigidity of your house. Read more about how to pour concrete interior stairs.
Work with great care and with good judgement, as to get the job done in a professional manner. Use a spirit level to make sure the walls are perfectly plumb and a tape measure to check if the measurements are accurate. Use the right mix of concrete for every job, otherwise the foundation and the ceiling might crack over time.

Building concrete ceiling
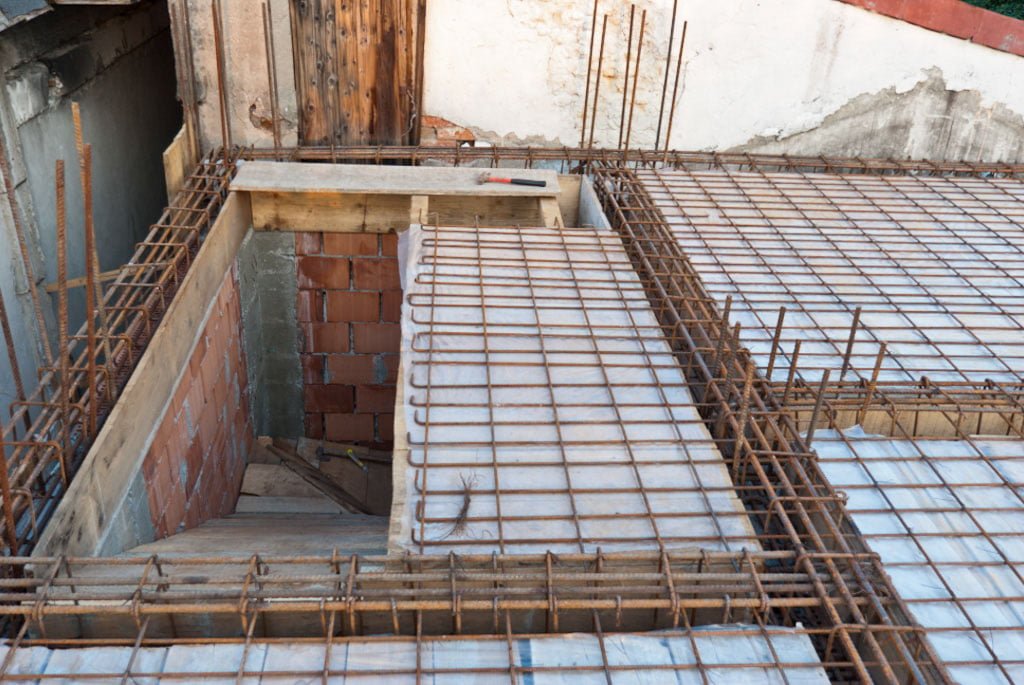
Step 9: Install the reinforcing structure for the concrete ceiling. As you can see in the image, you need to install a dense net of rebars and beams over the walls. In addition, we recommend you to place a plastic foil under the reinforcing structure, otherwise the concrete juice would leak through the gaps between the wooden boards.
Step 10: Pour the concrete ceiling. Compute the needed volume of concrete and order it to your local concrete company. Rent a pomp and vibrate the concrete, to remove the air pockets.

Building brick walls
Step 11: Build the brick walls in the same manner as shown above. Remember that the concrete pillars must be rigid and bond the walls together.
Step 12: Make sure you use the right mix of mortar, otherwise the bricks won’t be secured properly. Work with great attention and wear appropriate safety gear for each procedure. Take accurate measurements and follow the plans, otherwise you would spend a great amount of money to fix the issues.

Building wood floor
Step 13: Use large wooden beams to build the attic flooring or pour a concrete ceiling. Next, you have to fasten wooden boards to the beams, making sure they are in great condition (they should not be cracked, curved or chipped).
If you cannot handle these procedures by yourself, you should hire a qualified team of builders. From our experience, we can assert that building a brick house is not an easy job especially if you don’t have any expertise in the field.

Brick house construction
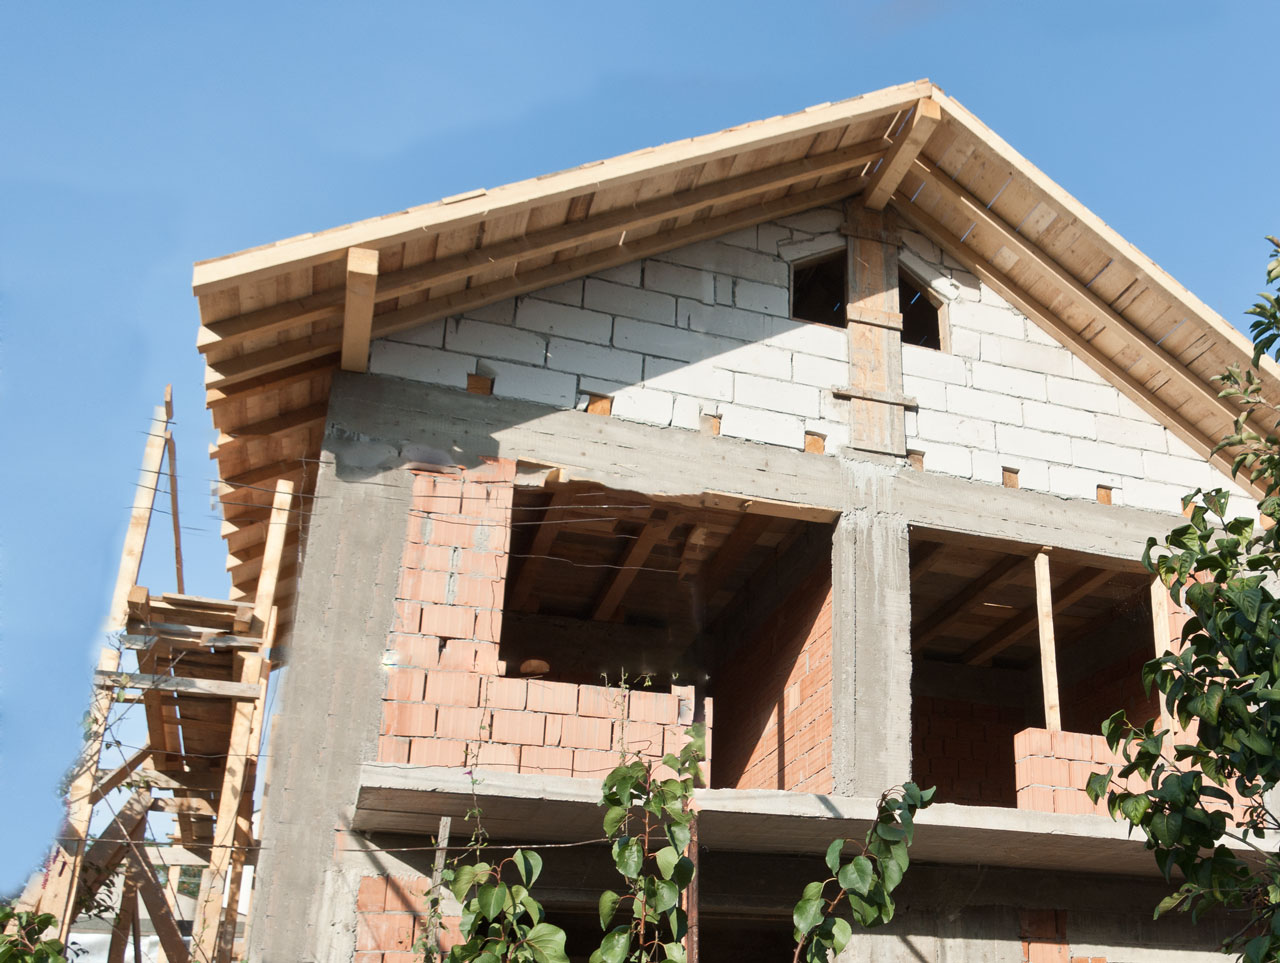
Step 14: Use wooden beams and boards to build the roof of your brick house. Work with patience and make sure you follow the construction plans. Next, you have to insulate the roof against the heat and vapors, by installing tar paper.
Step 15: Install asphalt or metal shingles to your roof, to protect it against rain. Each of these approaches has its own advantages and disadvantages (the metal shingles are more durable), but you should choose the one which fits you needs and budget.

How to build a brick house
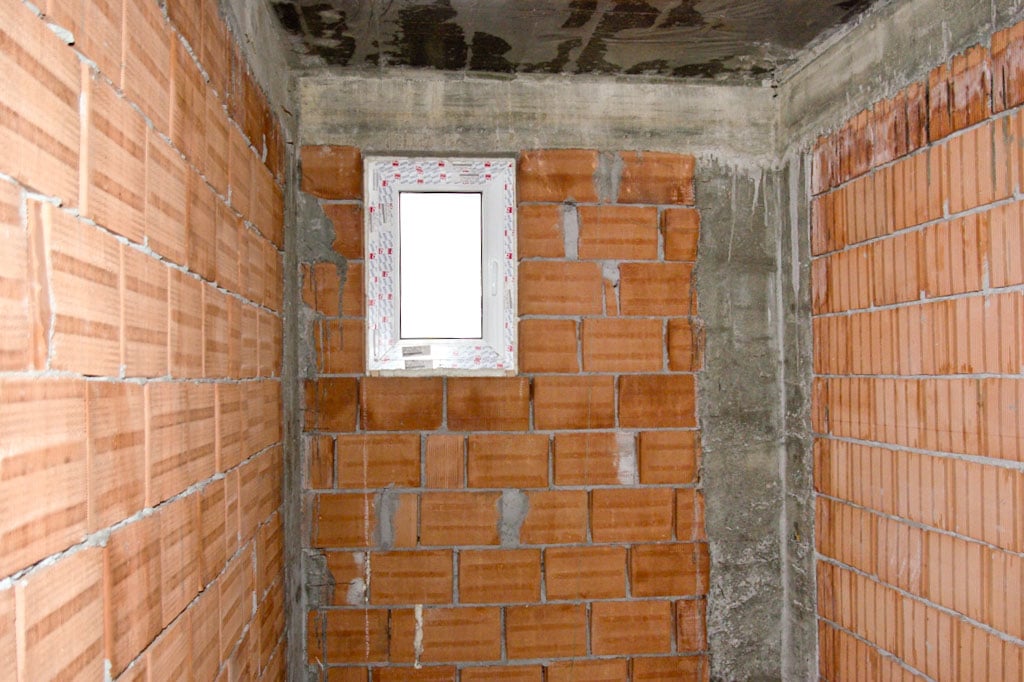
Step 16: After you have built the brick house, you should install the windows. Therefore, measure the window openings and order them from your local supplier. From our experience, we recommend you to install Pvc windows, as they are very durable, easy to maintain and insulate your house properly.
The Pvc windows come in a large variety of shapes, colors and designs, so that you can choose the one which fit your needs and tastes best. If you don’t like their aspect, you could install pricier windows, with a more exquisite look.
How to finish brick house

Electrical system for brick house
Step 18: Install the water pipes and the electrical cables in the brick walls. Create grooves in the brick walls and fit the electric cables and the water pipes inside them. Afterwards, the cement render will cover the groves and secure the pipes into location.
Smart tip: From our experience, we recommend you to mark the location of the electric cables and pipes in a notebook, to avoid accidents when driving in screws to the walls (hanging a picture or a cabinet).

Cement rendering walls
Step 17: Cement render the brick walls. Use a power mixer to prepare cement render and cover the walls till you obtain a nice finish. There are cases in which you could apply the plaster directly over the brick walls, but in most of the cases it is advisable to cement render the walls first. This process is time consuming, but if you understand the basic techniques, you will get the job done in a professional manner. Use a spirit level to make sure the walls are perfectly plumb. In addition, work with great care and apply the cement render as uniformly as possible.

Insulating house with polystyrene sheets
Step 19: Install polystyrene sheets insulation on the exterior walls. The installation of polystyrene sheets will improve the thermal insulation of your house, while keeping costs under control. If you use quality and efficient bricks, there are situations in which you don’t have to add the insulation layer, but in most of the cases the polystyrene sheets will decrease the heating costs during winter by 30-50%. You can finish the polystyrene insulation with mud and then apply texture paint. If you use the right techniques, the exterior finish will resist for many years, just make sure you use quality materials.

Painting brick house
Step 20: After you have applied the texture paint on the polystyrene insulation, you should dissemble the scaffolding and continue the work by installing the front door and the interior doors.
Remember that a brick house has many advantages as compared to light constructions, but you have to put a lot of effort in order to obtain a great result. Therefore, you have to use the right mix of concrete for each job, follow the plans and take accurate measurements.

Leveling screed
Step 21: Pour screed to cover the heating pipes and the electric cables. Screeding a floor is not difficult if you use a straight edge and a large level, to make sure the floor is perfectly horizontal. In most of the cases, the layer of screed should be around 2”, as to cover the irregularities and the cables, but you can adjust it to fit your needs. The screed is a mix of sharp sand and cement and it should be semi-dy.
If you can afford, we recommend you to pour a thin layer of self leveling screed to make the floor perfectly horizontal.
My best tips to build a house with efficient bricks:
Building a brick house using energy-efficient bricks can significantly improve the sustainability, comfort, and energy performance of your home. Here are my best tips for building a brick house with efficient bricks:
1. Choose Energy-Efficient Bricks: Opt for insulated bricks or hollow bricks, which are designed to trap air and provide better thermal insulation. Clay bricks with air pockets or autoclaved aerated concrete (AAC) blocks*are highly efficient, offering excellent insulation and reducing the need for additional materials to improve energy performance.
2. Use Double or Cavity Walls: Construct double-brick or cavity walls with an air gap between the two layers of bricks. This space improves insulation by reducing heat transfer between the exterior and interior walls. You can also fill the cavity with foam or fiberglass insulation for even greater efficiency.
3. Incorporate Insulated Mortar: Use insulating mortar when building with bricks. Mortars that contain insulating additives, like perlite or vermiculite, help reduce heat transfer through the mortar joints, making the wall more energy-efficient.
4. Install External Insulation: For added efficiency, consider applying external insulation to the outside of the brick walls. Rigid foam or insulated sheathing can be attached to the exterior and then covered with siding or cladding. This keeps the thermal mass of the bricks inside the home, helping maintain temperature stability.
5. Optimize Brick Orientation: Design your house with passive solar orientation in mind. Position windows, walls, and rooms to maximize natural sunlight during the winter and provide shade during the summer. Efficient bricks, combined with the right house orientation, can reduce heating and cooling needs.
6. Use Reflective Roofing and Proper Ventilation: Pair your energy-efficient brick walls with reflective roofing materials that reduce heat absorption. Ensure your home has proper ventilation, including attic vents and insulated windows, to manage airflow and prevent overheating.
7. Install Weep Holes and Vapor Barriers: Energy-efficient homes need proper moisture management. Install weep holes at the base of your walls to let moisture escape, and use vapor barriers to prevent moisture buildup inside the walls. This prevents damage to insulation and keeps your home more energy-efficient.
8. Seal All Gaps and Joints: Ensure that all gaps, cracks, and joints are properly sealed with caulking or expanding foam to prevent air leakage. A well-sealed home prevents drafts and keeps the home’s temperature stable, which maximizes the efficiency of your brick walls.
9. Add Insulation to Floors and Ceilings: Combine your energy-efficient brick walls with proper floor and ceiling insulation. Installing high-quality insulation in the roof and between floors can prevent heat loss and make the entire home more efficient.
10. Consider Sustainable Building Practices: Use recycled or locally sourced bricks to reduce the carbon footprint of the building materials. Sustainable construction practices like rainwater harvesting and solar panels further enhance the energy efficiency of your home.
11. Incorporate Thermal Mass: Efficient bricks, especially when used in thick walls, provide excellent thermal mass. Thermal mass absorbs heat during the day and releases it at night, stabilizing indoor temperatures and reducing the need for artificial heating and cooling.
12. Use Energy-Efficient Windows and Doors: Ensure your brick home has energy-efficient windows and doors, such as double or triple glazing. These windows work well with energy-efficient bricks by minimizing heat loss and keeping the indoor temperature consistent.
13. Build to Code: Always build according to local energy efficiency codes and standards. Many regions have guidelines for wall thickness, insulation requirements, and energy-saving measures that must be followed to maximize efficiency.
By following these tips, you’ll build a brick house that is not only durable and aesthetically pleasing but also energy-efficient, helping you save on heating and cooling costs while reducing your environmental impact.
Thank you for reading our article on how to build a brick house and we recommend you to check out the rest of our project. Don’t forget to share our articles with your friends, by using the social media widgets.

4 comments
what about drainage piping ? do you just put it on the ground before pouring cement on it ? or do you drill the ground to install those pipes ?
You need to set the pipes for drainage and water supply, before pouring the concrete slab. You need to frame a hole in the foundation, before pouring the concrete, then install the pipes, compact the soil and pour the slab.
Very informative article, thank you.
I’m considering building in Bangladesh with bricks, mainly because bricks is readily available. The country is usually very hot and humid. Is it therefore necessary to have the polystyrene insulation? ideally I’d want a solution where the heat stays out of the house as much as possible. Not sure if polystyrene is a used component in that country yet.
Rockwool makes for a better choice, but it doubles the costs