This step by step woodworking project is about how to build a teeter totter plans. I designed this wooden seesaw a year ago, but I was caught up with work and forgot to share it on the blog. I’ve always wished that I had my very own teeter totter, so even if I am past the childhood years I now have the resources to build one. Personally, I think the project came out great and after using it extensively I can report that it’s super sturdy! See my other DIY projects HERE.
We recommend you to invest in the best materials you could afford. Therefore, you should buy weather-resistant lumber, such as pine or cedar. Always take accurate measurements before adjusting the size of the components at the proper size. Drill pilot holes trough the components before inserting the wood screws, to prevent the wood from splitting. See all my Premium Plans in the Shop.
Made from this plan
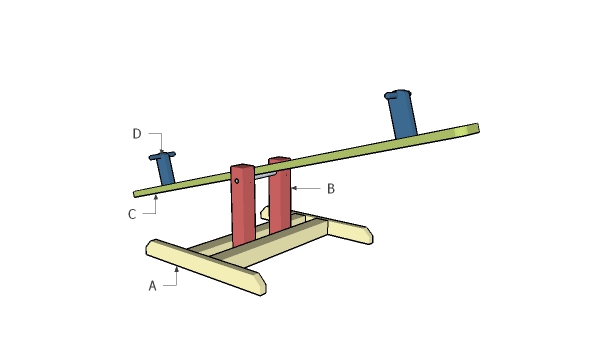
Materials
- A – 2 pieces of 4×4 lumber – 35 1/2″ long, 2 pieces of 2×4 lumber – 34 1/2″ long BASE
- B – 2 pieces of 4×4 lumber – 20″ long SUPPORT
- C – 1 piece of 2×8 lumber – 96″ long PLANK
- D – 2 pieces of 2×4 lumber – 8 1/2″ long, 2 pieces of 3/4″ dowels – 7 1/2″ long HANDLES
- 2 pieces of 4×4 lumber – 6′
- 1 piece of 2×8 lumber – 8′
- 1 piece of 2×4 lumber – 8′
- 2 1/2″ screws, 5 1/2″ screws
- pipe strap clamps, 3/4″ thereaded rod, nuts, washers
- 3/4″ dowel
- stain, glue
Tools
- Safety gloves, glasses
- Miter saw, jigsaw
- Chalk line, tape measure, spirit level, carpentry pencil
- Drill machinery and drill bits
Time
- One Day
DIY Teeter Totter Plans
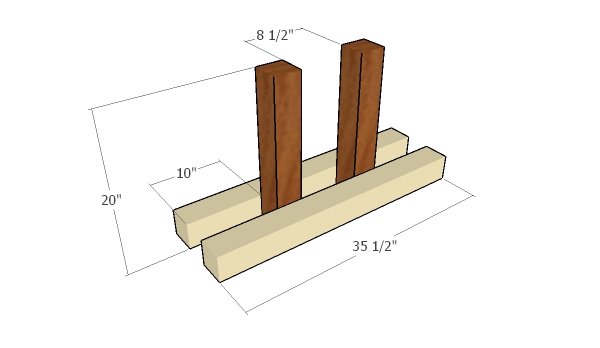
The first step of the project is to build the base for the teeter totter. As you can easily notice in the diagram, you need to build the components from 4×4 lumber. Drill pilot holes through the horizontal beams and insert 5 1/2″ screws into the vertical supports. Make sure the corners are square and use a spirit level to check of the vertical supports are plumb. Moreover, add waterproof glue to the joints.
Remember that you can adjust the size of the vertical supports to suit your needs. If the seesaw will be used by adults or tall kids, you can make the supports 4-6″ longer.
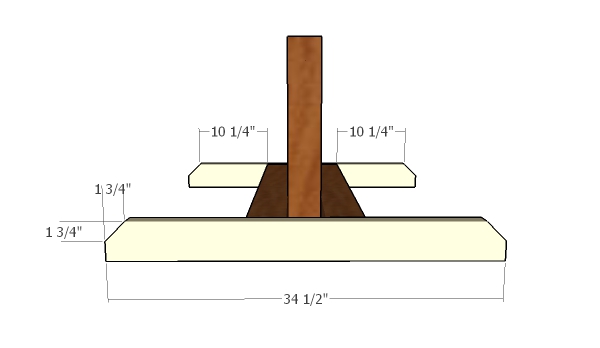
Continue the project by attaching the 2×4 supports to the base of the teeter totter. Center the slats to the base and lock with into place with 2 1/2″ screws, after drilling pilot holes. Add glue to the joints and make sure the corners are square.
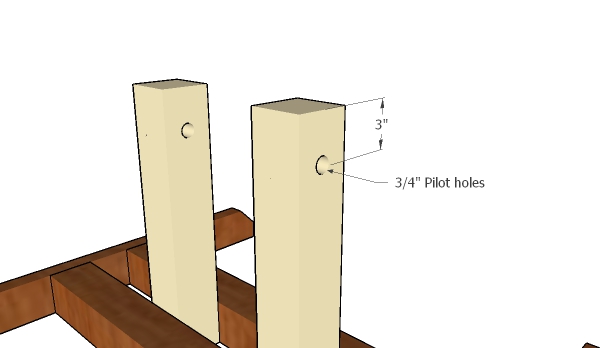
Drill 3/4″ pilot holes through the vertical supports. Make sure you take accurate measurements and make identical holes through both supports.
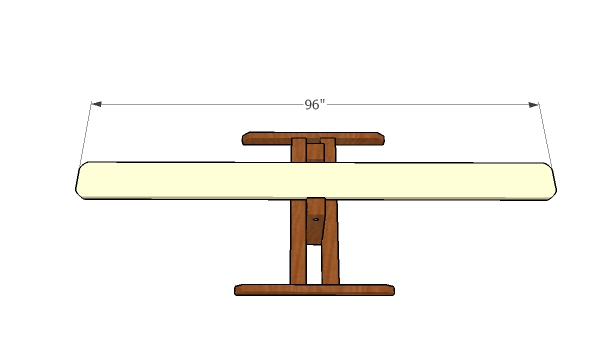
Fit 3/4″ pipe strap clamps to the back of the pivoting beam and insert the 3″ threaded rod through the side supports. The threaded rod should overhang 1 1/2″ inches on both sides of the supports, so you can fit the washers and the nuts. Therefore, cut the 3/4″ threaded rod at 18 1/2″.
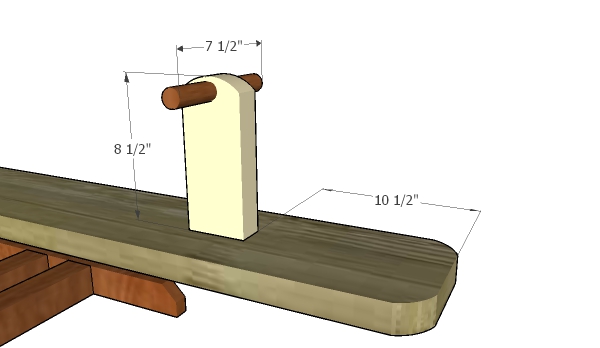
Build the handle base from 2×4 lumber and then add the 3/4″ dowels, after drilling the pilot holes. Lock the handles to the plank with 2 1/2″ screws inserted through the bottom or use L-brackets.
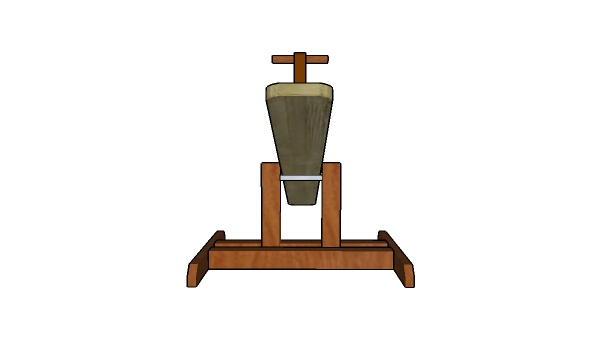
Smooth the surface and the edges with 120-220 grit sandpaper after filling the holes and the dents with wood putty. Afterwards, apply a few coats of paint or stain to enhance the look of the project and to protect the wood from the elements.
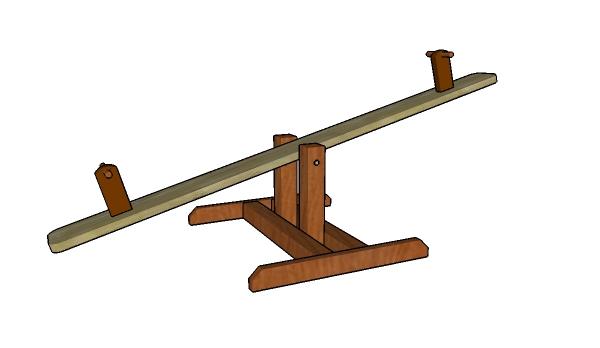
This is an easy project if you use the right plans. Your kids will spend many many hours playing in the backyard, under your supervision.
How to Build a Teeter Totter
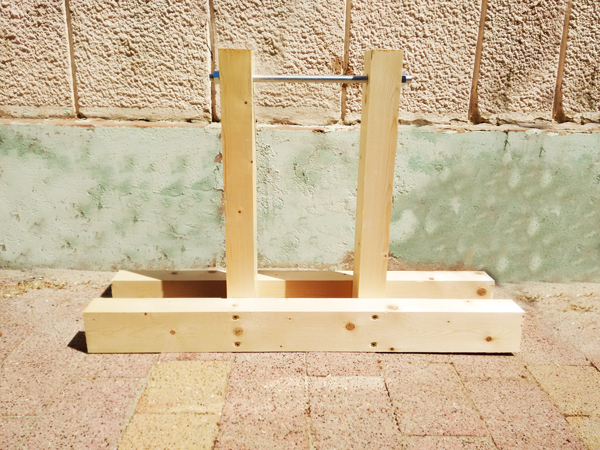
First of all, I built the base for the teeter totter from 4×4 lumber. I drilled pilot holes and then inserted the screws to lock everything together tightly. I also added glue to the joints to enhance the bond of the components. I also drilled the 3/4″ holes through the vertical supports, so I can fit the threaded rod that will support the pivoting plank.
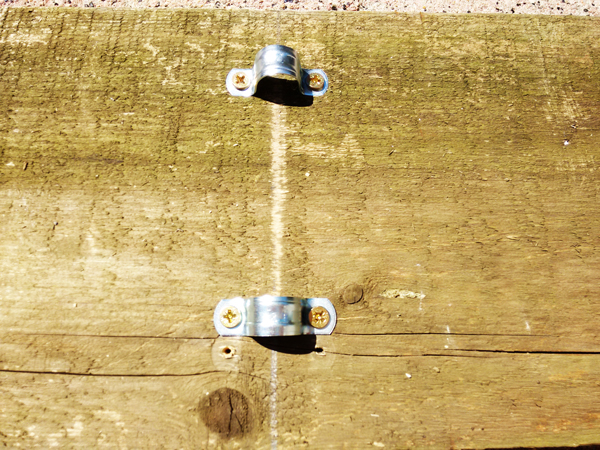
Next, I marked the middle on the back of the pivoting 2×8 plank and attached the pipe strap claps, as shown in the image. It is essential to secure the straps tightly.
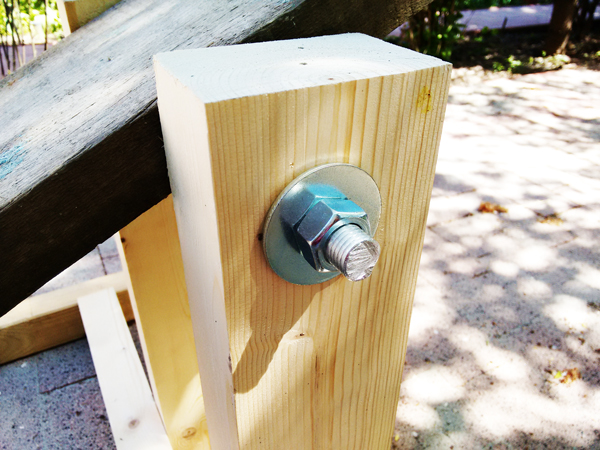
After fitting the threaded rod through the vertical supports and through the strap clamps I attached the washer. In addition, I tightened the nuts at both ends. I recommend you to double check the buts everytime you use the seesaw, as the forces might loosen them.
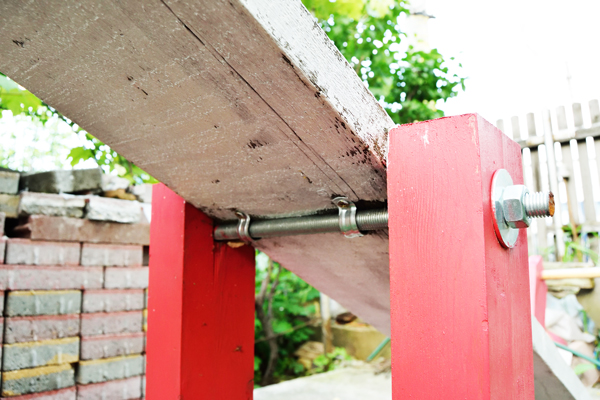
As you can see in the image, the plank will pivot over the threaded rod.
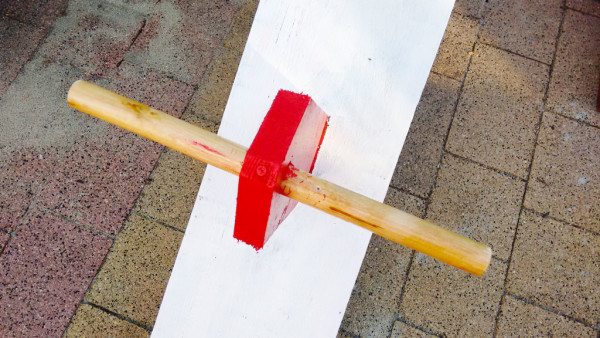
I built the handles using the plans and then secure them to the 2×8 beam with 2 1/2″ screws. I drill pilot holes through the beams and then inserted the screws from underneath into the handles.
I also locked the 3/4″ dowel to the base of the handle with a screw, after drilling the pilot holes.
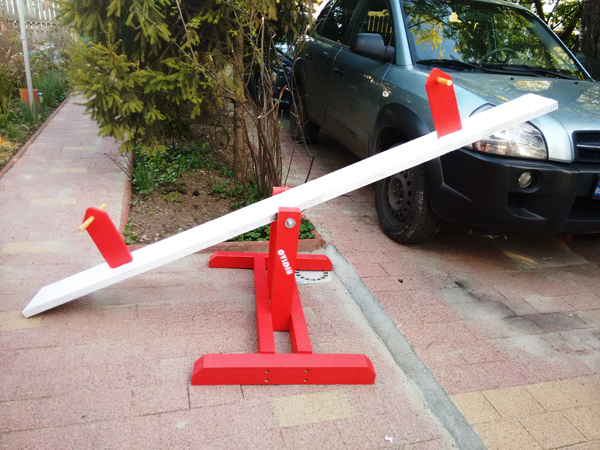
This project came out really nice and it is one of my favorite ones up to now. I can report, after using it for a couple of months, that the teeter totter is extremely rigid and super-fun. As a side note, I really recommend you to check the nuts each time you use the seesaw as they tend to loosen due to the forces that appear. Moreover, install a few L-brackets to hold the handles lock to the 2×8 beam. If you like my project, don’t forget to SHARE it on Facebook and Pinterest.
Thank you for reading our project about how to build a teeter tooter and I recommend you to check out the rest of the projects. Don’t forget to LIKE and SHARE our projects with your friends, by using the social media widgets. SUBSCRIBE to be the first that gets our latest projects.


4 comments
nice work on the teeter totter. If you double nut the bolts or use nuts with nylon inserts, you won’t have to worry about them getting loose these 2 methods work well at keeping them tight.
Thanks for the great tip!
Great looking project however the material list provided for some reason looks a little strange.. It lists A,B,C and D for Sides , shelves, trim and roof.. I think this may be for a different project.. it lists 1×2 lumber and 1/4″ plywood.. not exactly teeter totter materials…
Thank you for letting me know. I have updated the list.