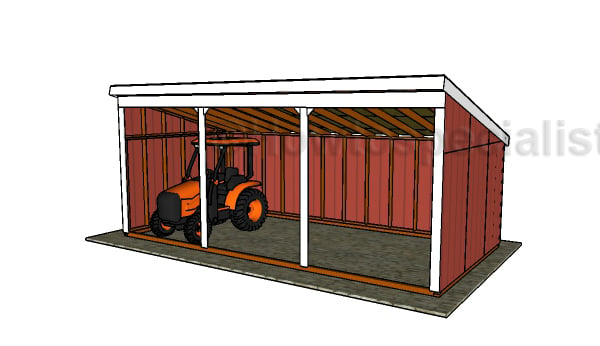
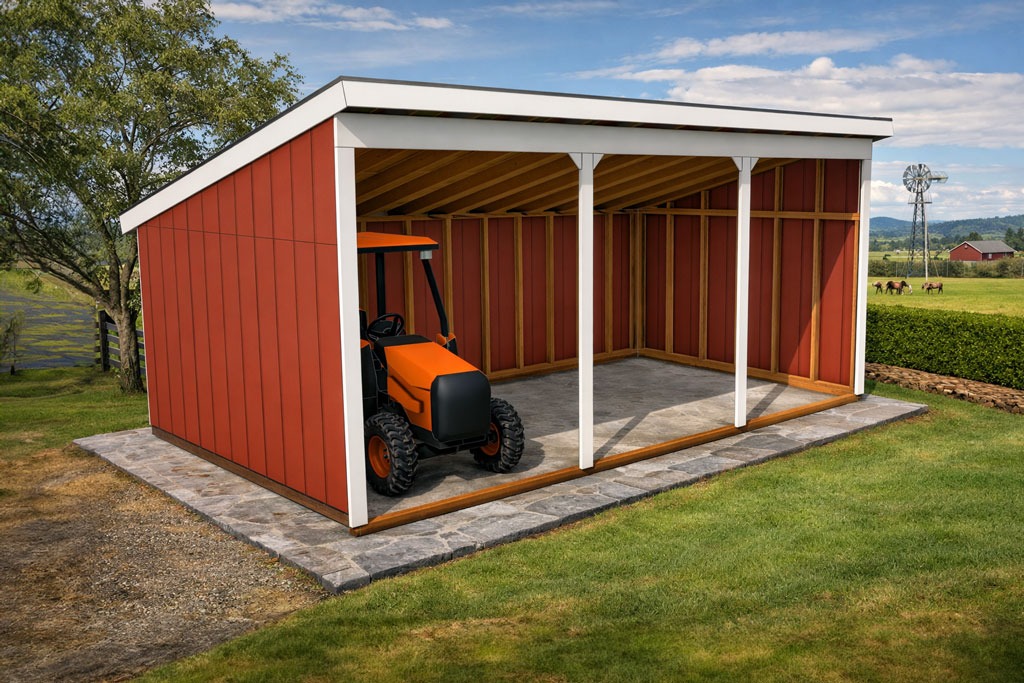
This step by step woodworking project is about free loafing shed plans designed to help you build a strong, practical, and long-lasting shelter for your farm. This 12×24 loafing shed is ideal for storing equipment, feed, tools, or even small tractors, keeping everything protected from rain, snow, and harsh sun. The generous footprint gives you real working space, not just a cramped cover, so you can organize your gear efficiently and move around comfortably.
The wide, fully open front wall makes access effortless, whether you’re driving in equipment, bringing in hay, or simply walking in with tools. There are no doors to slow you down, no tight openings to navigate—just a clean, open entry that saves time and reduces daily hassle. This design also improves ventilation, helping keep the interior dry and reducing moisture buildup that can damage tools or stored materials.
These plans are created with clarity in mind, guiding you through every step with detailed diagrams, precise measurements, and proven building techniques. You’ll know exactly what to cut, where each piece goes, and how everything ties together into a solid structure. The result is a professional-looking shed that you can build yourself, saving thousands compared to hiring a contractor, while gaining the satisfaction of creating something truly useful for your property. Check out PART 2 of the project so you learn how to build the roof. See my other DIY projects HERE.
We recommend you to invest in the best materials you could afford. Therefore, you should buy weather-resistant lumber, such as pine or cedar. Always take accurate measurements before adjusting the size of the components at the proper size. Drill pilot holes trough the components before inserting the wood screws, to prevent the wood from splitting. See all my Premium Plans in the Shop.
Made from this plan
Loafing Shed Plans
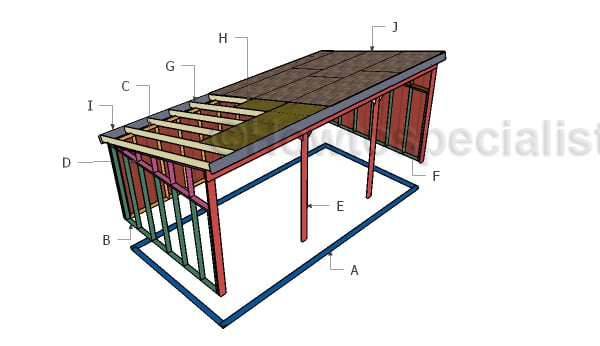
Building a 12×24 loafing shed
Materials
- A – 2 pieces of 4×4 lumber – 144″ long, 2 pieces – 288″ long BASE
- B – 2 pieces of 2×4 lumber – 144″ long, 10 pieces – 80 1/2″ long 2xSIDE WALL
- C – 2 pieces of 2×4 lumber – 281″ long, 13 pieces – 80 1/2″ long BACK WALL
- D – 1 piece – 134 3/4″ long, 1 piece – 139″ long, 1 piece – 2 1/2″ long, 1 piece – 8 1/2″ long, 1 piece – 14 3/4″ long, 1 piece – 21″ long, 1 piece – 27″ long, 1 piece – 33″ long 2xROOF SIDE ENDS
- E – 12 pieces of T1-11 siding – 48″x84″ long SIDING
- 2 pieces of 4×4 lumber – 12′
- 2 pieces of 4×4 lumber – 24′
- 2 pieces of 2×4 lumber – 24′
- 1 piece of 2×10 lumber – 24′
- 4 pieces of 2×4 lumber – 12′
- 37 pieces of 2×4 lumber – 8′
- 12 pieces of T1-11 siding – 4’x8′
- 100 pieces of 3 1/2″ screws
- 500 pieces of 2 1/2″ screws
- 100 pieces of 1 5/8″ screws/brad nails
- 4d nails
Tools
- Safety gloves, glasses
- Miter saw, jigsaw
- Chalk line, tape measure, spirit level, carpentry pencil
- Drill machinery and drill bits
Time
- One Day
Related
Build a 12×24 loafing shed
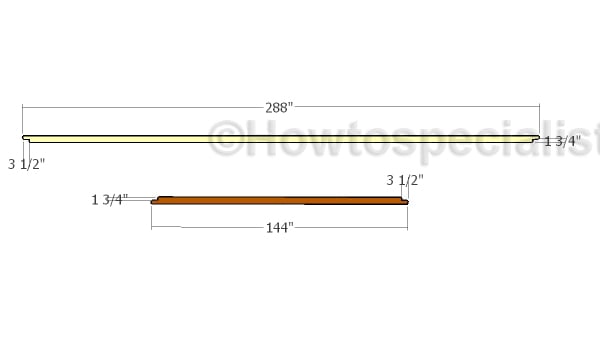
Base Components
The first step of the project is to build the base for the loafing shed. Therefore, you have to cut the components from 4×4 lumber. Make the notches at both ends of the beams, as seen in the diagram. Make parallel cuts to the beams and the clean the recess with a chisel.
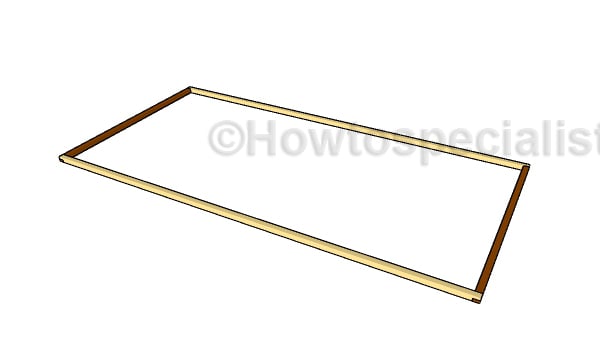
Building the base for the shed
Assemble the beams together, making sure the corners are square. Add glue to the joints, drill pilot holes and insert 3 1/2″ screws.
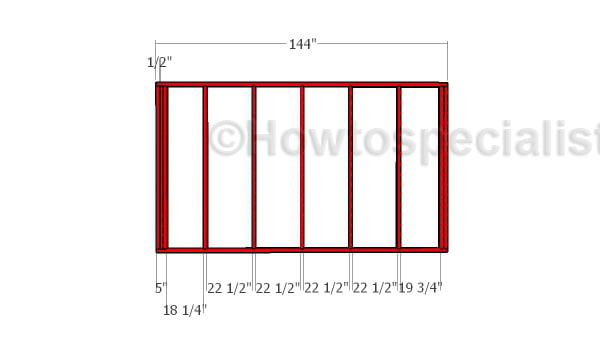
Building the side walls
Assemble the side walls for the loafing shed using 2×4 lumber. Cut the components at the right dimensions. Drill pilot holes through the plates and insert 2 1/2″ screws into the studs. Align everything with attention, making sure the corners are square.
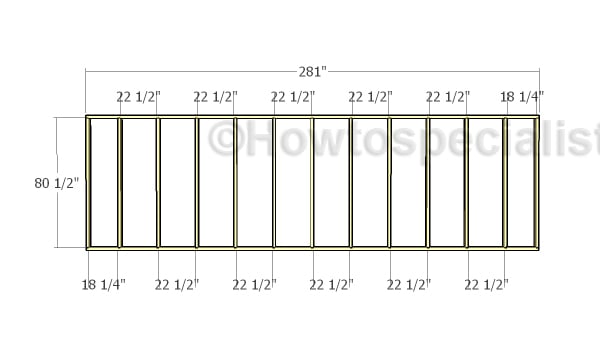
Assembling the back wall
Build the back wall in the same manner, as described above.

Assembling the frame of the shed
Fit the walls to the base of the shed. Plumb the walls with a spirit level, drill pilot holes through the bottom plates and insert 2 1/2″ screws into the base. In addition, lock the adjacent walls together with screws, after drilling pilot holes. Make sure the edges are flush and check if the corners are square.
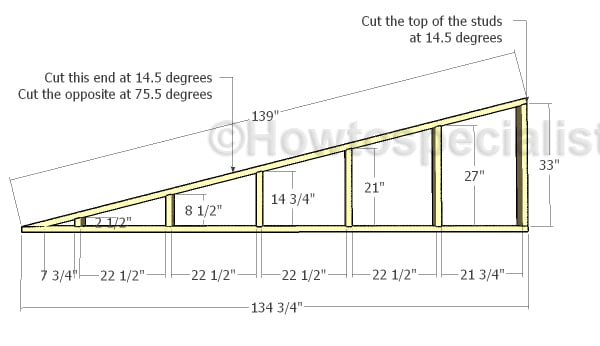
Side roof end frames
Build the frames for the lean to sides. Cut the components at the right dimensions and then lock them together 2 1/2″ screws. Drill pilot holes to prevent the woo from splitting.
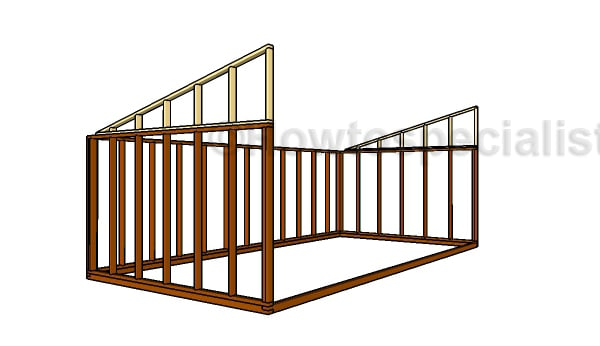
Fitting the side roof end frames
Fit the frames to the side walls. Plumb the walls with a spirit level, drill pilot holes through the bottom plates and insert 2 1/2″ screws to lock them into place tightly.
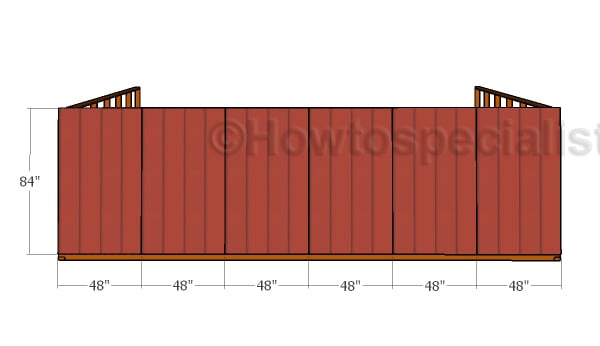
Attaching the back siding
Fit the T1-11 siding sheets to the back of the shed, as shown in the diagram. Align the edges with attention and use 4d nails to secure the sheets to the framing.
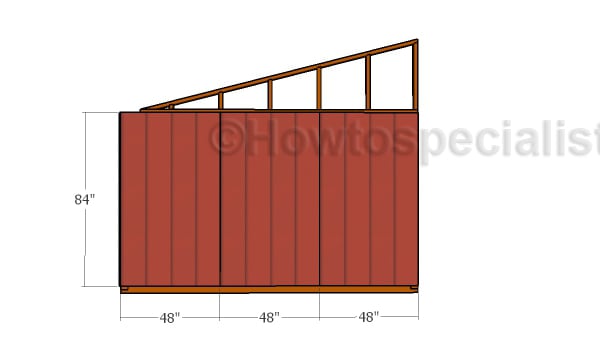
Side siding
Attach the T1-11 siding sheets to the sides, as well. Align the edges with attention and secure them into place with 4d nails.
Loafing shed plans
If you want to learn how to frame the roof for the loafing shed, you need to take a look over PART 2. If you like my project, don’t forget to SHARE it on Facebook and Pinterest.
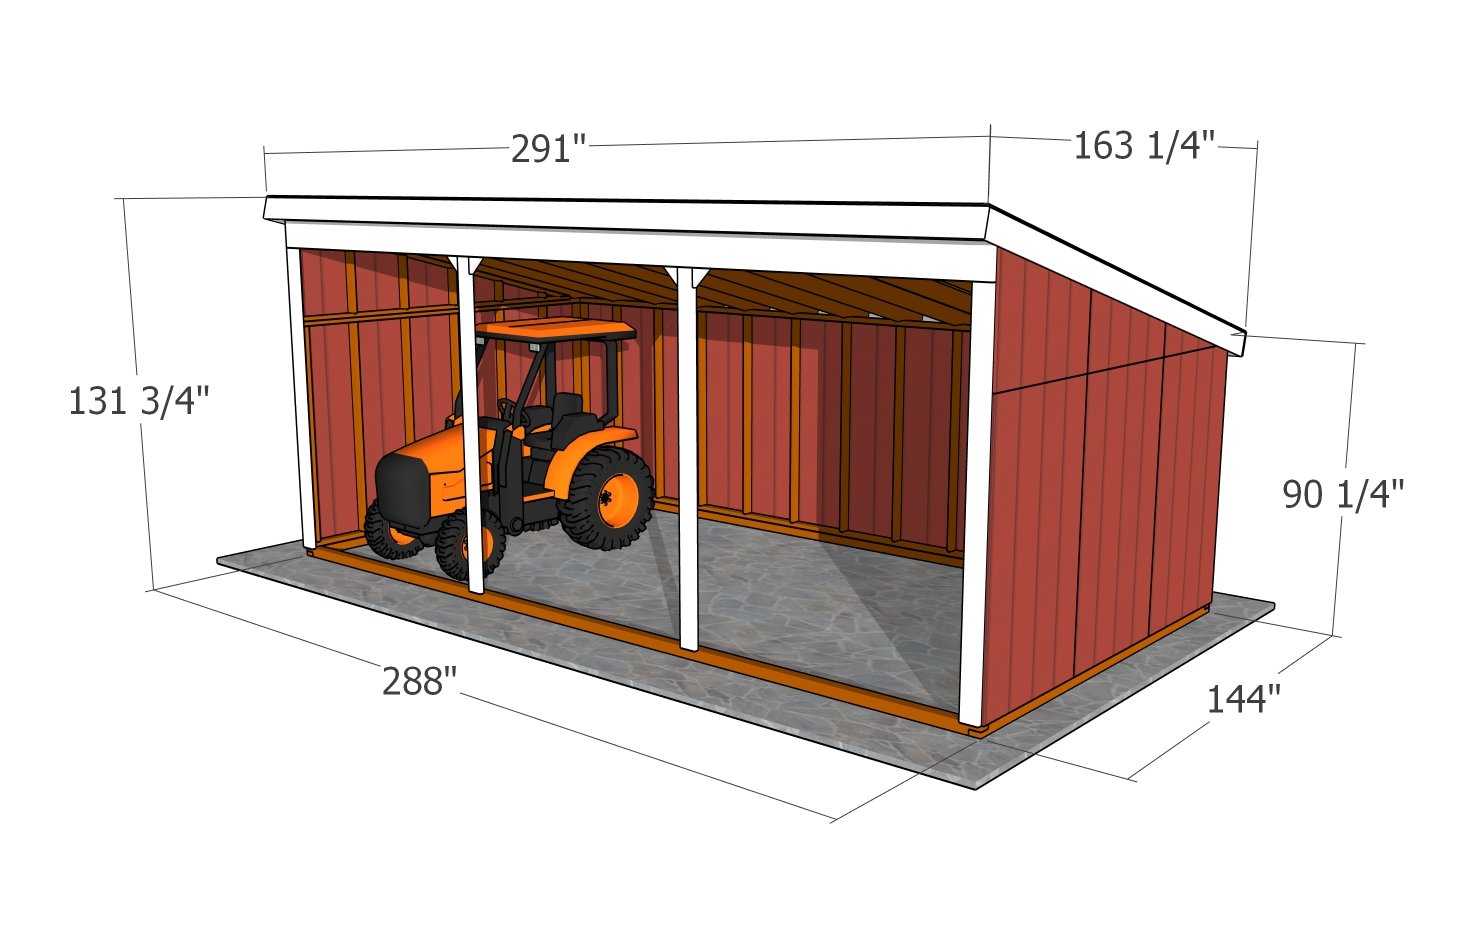
Loafing shed plans – dimensions
Thank you for reading our project about loafing shed plans and I recommend you to check out the rest of the projects. Don’t forget to LIKE and SHARE our projects with your friends, by using the social media widgets. SUBSCRIBE to be the first that gets our latest projects.
<< Previous | Next >>
6 comments
Thanks a lot, but I would like the plans in PDF Format.
You can download all the plans in a PDF format. Read more at: http://howtospecialist.com/faq/
I’m starting this build tomorrow, will let you know the results, maybe even a few pictures. Going to get this up then combine with some ideas from your goat barn. Thanks for putting these up!
That’s great. Looking forward to seeing your project.
Hello Jack, I checked the FAQ section but still can’t seem to find the downloadable plan for the “Free Loafing Shed Plans” anywhere on your site. Is it still available for download? thank you.
Where do you get 24’ 4x4s?