This diy step by step article is about garden arbor plans. Building a grape arbor is a nice addition to any garden, especially that its cost is insignificant as compared to other wooden construction, like a shed or a large pergola. If you know the basic woodworking techniques and use the right tools and materials, you will build an amazing garden pergola with a traditional look, in just a day. Nevertheless, we recommend you to choose the free plans with great care, making sure they come with the list of the needed components and with their sizes. After you complete the project, you should sand the surfaces with medium grit sandpaper and apply several coats of protective paint.
The location of the arbor is essential, as it can either add value to your backyard or on the contrary it can put it in a bad light. From our experience, we recommend you to place it on an alley and consider adding a wooden bench, but you could also add several personal touches that reflect your own personality. In most of the cases, you don’t have to anchor it to the ground, therefore you don’t need to pour concrete footings.
It is essential to use quality materials designed for outdoor use, otherwise they won’t resist against water damage. Therefore, decking posts and slats are perfect for this job, just make sure they are in a good state, without cracks or other visible damage. In order to make the cuts accurately, we recommend you to work with great care and use a circular saw. In addition, if you want to cut decorative ends for the shade elements, you have to use a router or a jigsaw.
Made from this plan
In order to build a garden arbor, you need the following:
Materials
- 7′ long 4×4 or 6×6 wooden posts
- 4” and 6” long nails / screws
- 2×4 support beams (12′ long)
- 2×4 shade elements
- 2×2 slats
Tools
- Safety gloves, glasses
- Circular saw
- Hammer, spirit level, carpentry pencil
- Ladder
Tips
- Plumb the posts using post level clips and braces
- Choose a design that fits your needs and tastes
- Use the arbor ideas that fit into your budget
Time
- One weekends
Garden arbor plans
Arbor plans
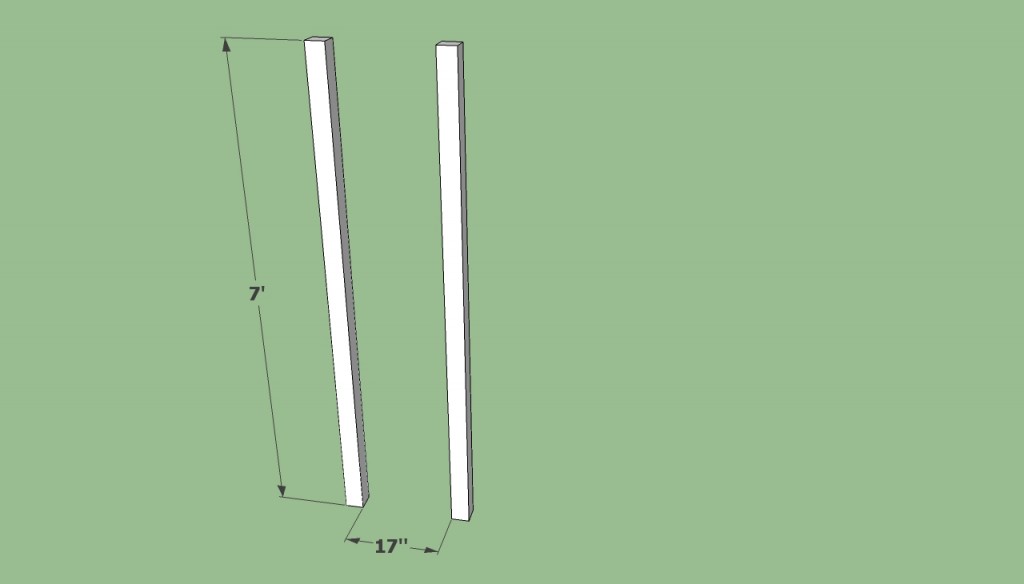
First of all, you should begin the project with the sides of the garden arbor. Therefore, we recommend you to buy 4×4 wooden posts and cut them at about 7′. Nevertheless, don’t forget that you should adjust all these dimensions as to fit your needs, tastes and budget.
Garden arbor plans free
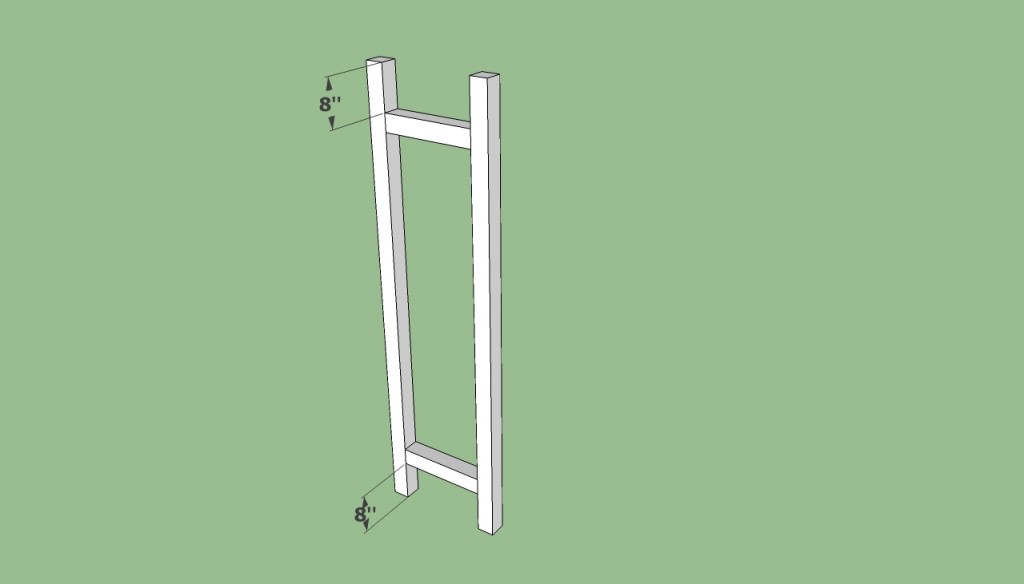
Next, you have to join the two posts with two segments: one placed at the bottom of the arbor and the other one placed at the top. Work with great care, otherwise the corners of the rectangle won’t be right-angled.
Drill several pilot holes through the 4×4 posts and drive in 6” screws in the segments. After you get the job done, fill the screw holes with wood putty and sand the surface with medium grit sandpaper.
arbor plans and ideas
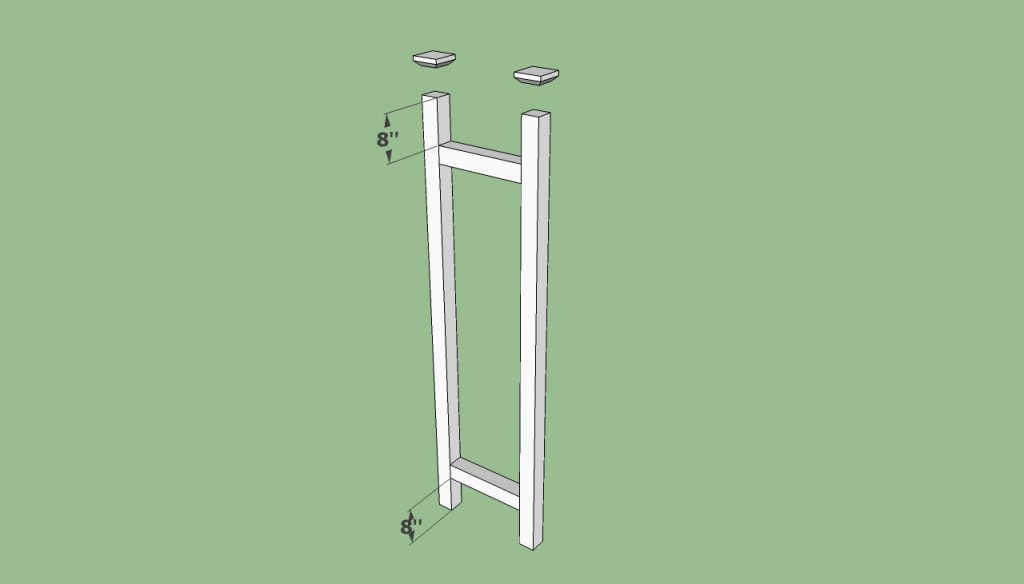
Next, you could cut several post caps from a 6×6 to mask the top of the posts. This step is optional, but from our own experience we consider that applying the post caps would change dramatically the look of your garden arbor.
Wooden arbor plans free
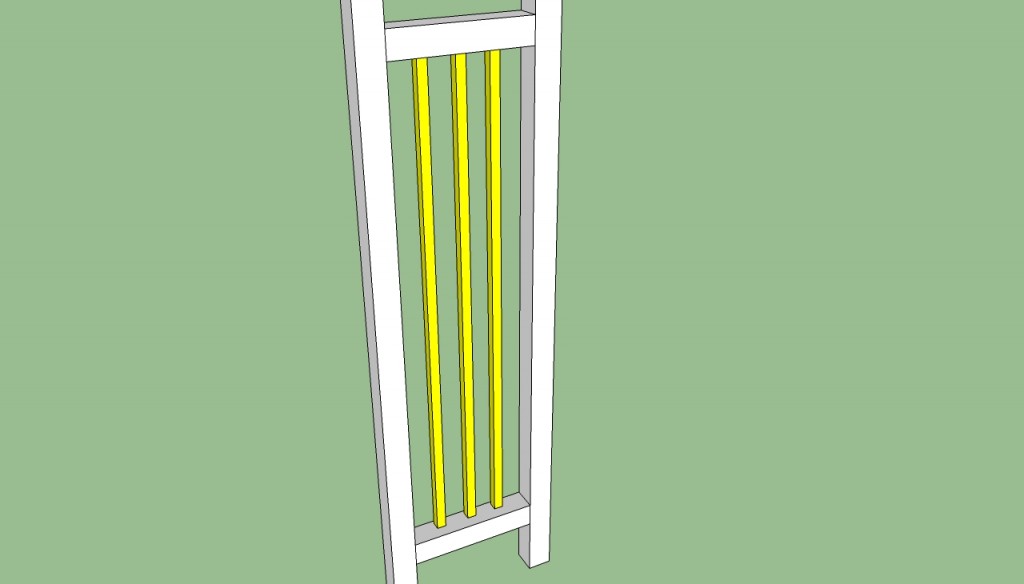
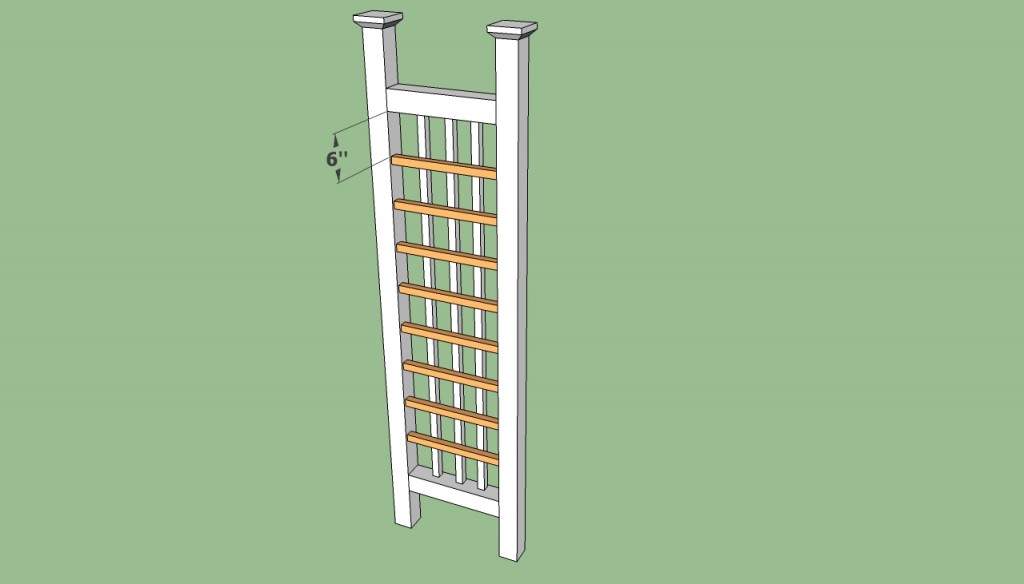
Building the topper panels is easy if you use the right tools and materials. In this project, we recommend you to use 2x2s and install them into place, as in the image.
In order to lock the 2x2s into position, you could toenail them with 3” screws or drive in 6” screws through the 4×4 segments. Work with great care, making sure you plumb and align them properly, before driving in the screws.
Outdoor arbor plans
Next, after you have installed the first 2x2s into place, you have to complete the topper panel by fitting the rest of them, this time perpendicularly. Work with great care making sure you install them equally spaced, otherwise your garden arbor won’t have a symmetrical look.
Simple arbor plans
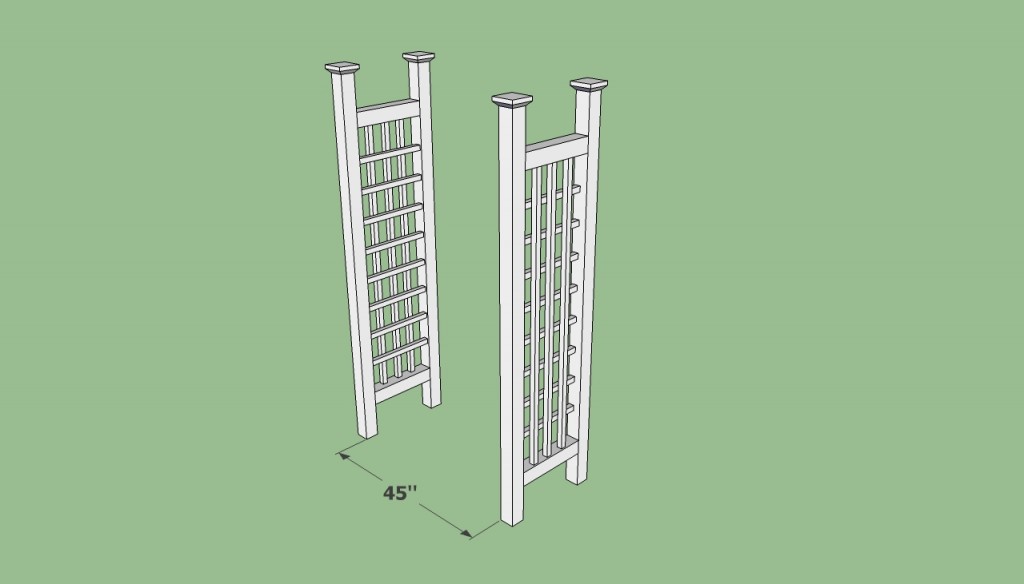
After you have built the first side of the garden arbor, you have to redo the whole steps and build another one. Work with great care making sure you make the cuts accurately and join the parts properly.
In addition, we recommend you to align the components in a professional manner and drive in the screws after you have drilled pilot holes in the wooden components.
Grape arbor plans

Rafter arbor plans
Building the top of the grape arbor is not as complicated as it might seem. On the contrary, it is straight-forward: just adjust the shade elements to the right size and cuts their ends with a jigsaw, to obtain a nice look.

Grape arbor plans
After you have set the support beams into position, you have to get the job done in a professional manner by setting the shade elements. Adjust their size as to overhang about 8” on each side and cut their ends in a decorative manner.
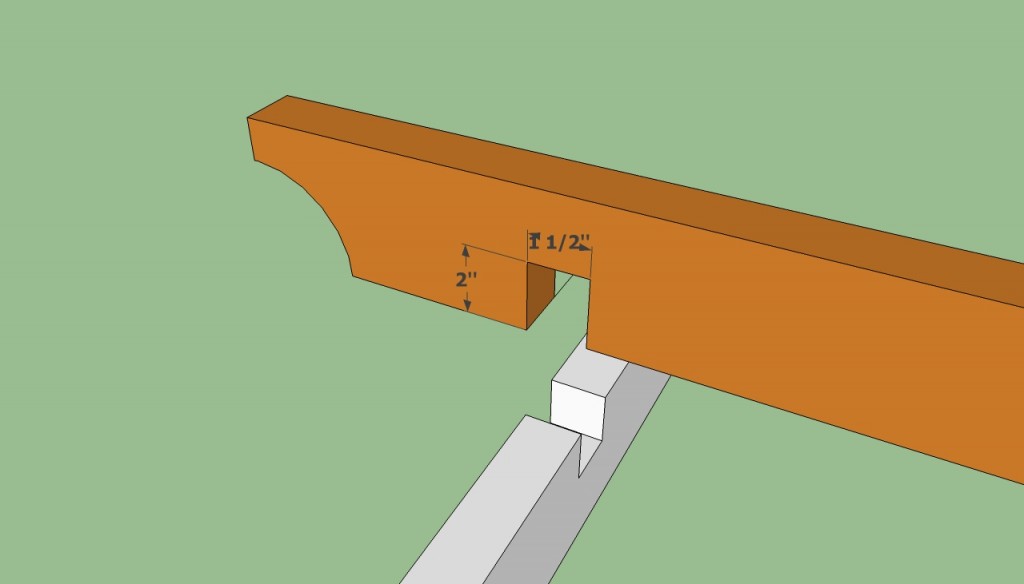
Joining the crossbeams with the support elements can be done in several ways, but we recommend you a method we have tested in many projects.
Garden grape arbor plans
Therefore, we consider that the best arbor design can be obtained in the following manner. First of all, you have to mark the place where the crossbeams meet the support elements. Next, cut 1 1/2” notches, as you can notice in the image.

Garden arbor plans
After you have built the shade elements, you have to secure them into position by inserting several screws. Next, drill the pilot holes and use a screwdriver to insert the screws into position. Place the shade elements as to fit your needs and tastes.
Thank you for reading our article about garden arbor plans and we recommend you to check out the rest of the projects. Don’t forget to share our projects with your friends, by using the social media widgets.
