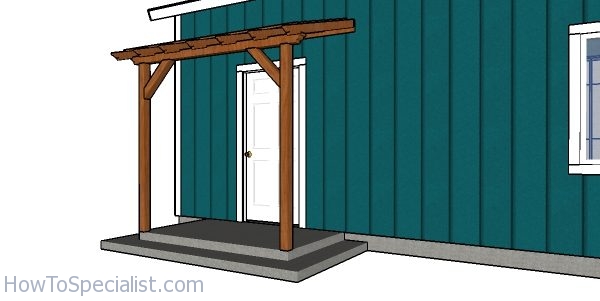
This step by step woodworking project is about free entrance pergola plans. This is a small pergola that you can build attached to the front of the house, to create some shade and to add unique charm to your property. You only need a few boards and beams to change the look of your front entrance and make it look different. You can adjust the size of my plans to suit your needs. See my other DIY projects HERE.
We recommend you to invest in the best materials you could afford. Therefore, you should buy weather-resistant lumber, such as pine or cedar. Always take accurate measurements before adjusting the size of the components at the proper size. Drill pilot holes trough the components before inserting the wood screws, to prevent the wood from splitting. See all my Premium Plans HERE.
Made from this plan
Entrance Pergola – Free DIY Plans
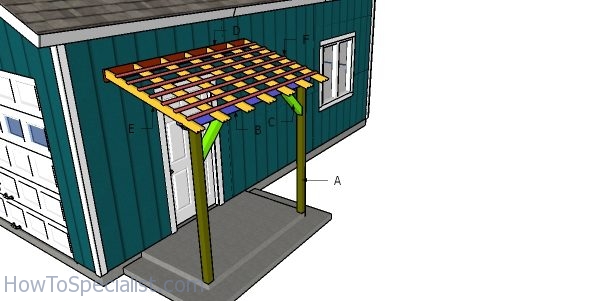
Building a pergola for the entrance porch
Materials
- A – 2 pieces of 4×4 lumber – 80″ long POSTS
- B – 1 piece of 4×4 lumber – 8′ long BEAM
- C – 2 pieces of 4×4 lumber – 24″ long BRACES
- D – 1 piece of 2×6 lumber – 8′ long LEDGER BOARD
- E – 7 pieces of 2×4 lumber – 60″ long RAFTERS
- F – 7 pieces of 1×2 lumber – 8′ long SLATS
- 4 pieces of 4×4 lumber – 8′
- 1 piece of 2×6 lumber – 8′
- 4 pieces of 2×4 lumber – 10′
- 7 pieces of 1×2 lumber – 8′
- 2 post anchors
- 2 1/2″ screws
- 1 5/8″ screws
- stain, wood filler, wood glue
Tools
- Safety gloves, glasses
- Miter saw, jigsaw
- Chalk line, tape measure, spirit level, carpentry pencil
- Drill machinery and drill bits
Time
- One Weekend
How to build a pergola for a porch
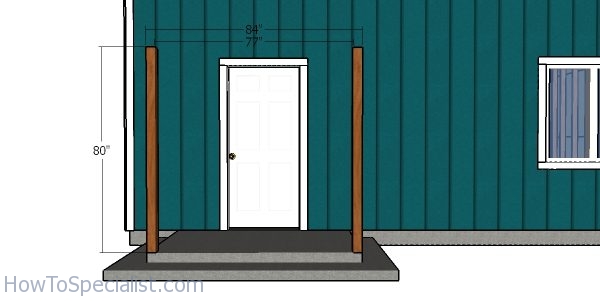
Fitting the posts – front entrance pergola
The first step of the project is to set the posts to the entrance porch. You can do this in several ways, according to the material of the porch. Therefore, if the porch is made from concrete. you need to use an anchor and attach it to the slab with screws. If you have a deck, then you need to set the posts to the frame of the deck.
These plans are made with the assumption you have a concrete porch. Make sure you plumb the posts vertically and align the with attention. Use 4×4 lumber for the posts, but you can also use 6×6 lumber if you want to get a beefy look.
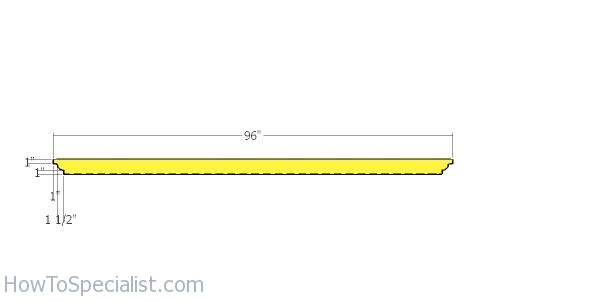
Top beam – pergola
Next, you need to make the decorative cuts to both ends of the beams. Use a jigsaw to make the curved cuts to the beams. You can go wild with the imagination and make all sorts of cuts to the beam.

Fitting the top beam
Fit the beam to the posts, making sure the edges are aligned. Drill pilot holes and then insert two 5 1/2″ screws for each joint. Make sure the corners are square. Check if the beam is perfectly horizontal.
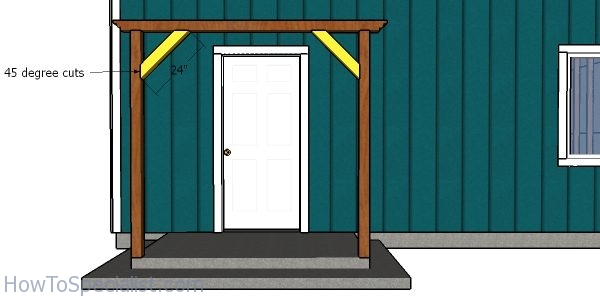
Fitting the braces to the posts – front pergola
Use 4×4 lumber for the braces. Make 45 degree cuts to both ends of the braces. Fit the braces to the pergola and lock them into place with 3 1/2″ screws.
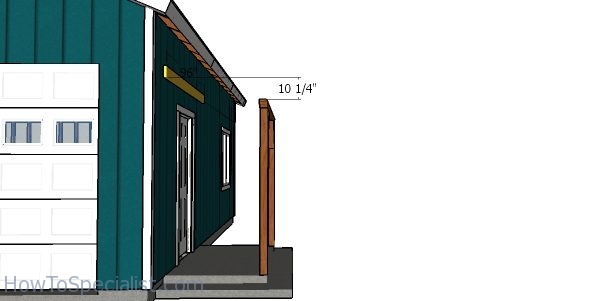
Fitting the ledger board for the entrance pergola
Next, you need to attach the ledger board to the house. This pergola will have a 15 degree roof slope. You can adjust the roof pitch by placing the ledger board higher or lower on the wall. Use a spirit level before drilling the pilot holes and inserting the 3 1/2″ lag screws. Make sure you insert the screws into the wall studs.
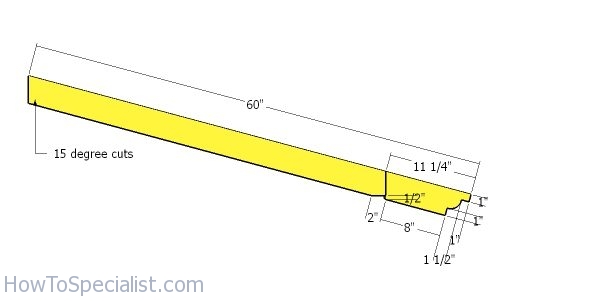
Building the rafters for the entrance pergola
Next, build the rafters for the entrance pergola. Since this is a small pergola you can use 2×4 lumber. Make the cuts to the boards, as shown in the diagram.
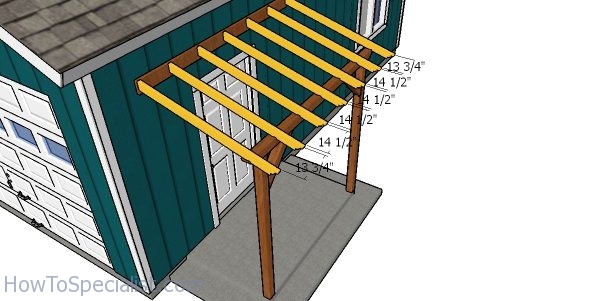
Fitting the rafters – front entrance pergola
Fit the rafters to the top of the beams, as shown in the free plans. Place the rafters every 16″ on center. Use screws to lock the rafters to the beam and to the ledger board.
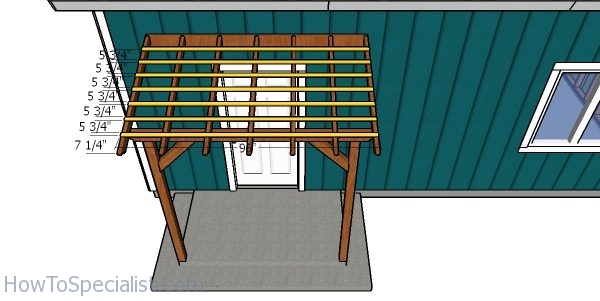
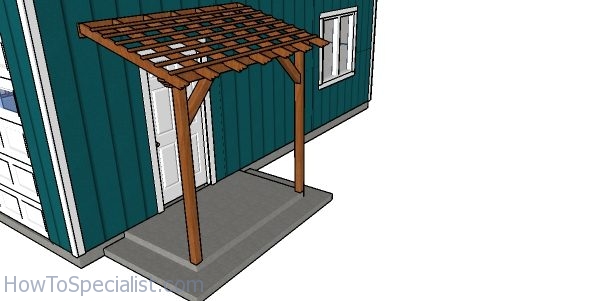
Fitting the top slats – porch pergola
Use 1×2 lumber for the roof slats. These slats will create some shade (you can add more slats) and they will keep the rafters equally spaced.
How to build an entrance porch pergola
Last but not least, you need to take care of the finishing touches. Fill the holes with wood putty and smooth the surface with sandpaper. Apply a few coats of paint or stain to protect the pergola from the elements and to make it match the style of your home.
Entrance pergola plans
See all my pergola plans HERE. If you like my project, don’t forget to SHARE it on Facebook and Pinterest. You shouldn’t miss my 10×10 free standing plans or my 2 post pergola plans.
Thank you for reading our project about free entrance pergola plans and I recommend you to check out the rest of the projects. Don’t forget to LIKE and SHARE our projects with your friends, by using the social media widgets. SUBSCRIBE to be the first that gets our latest projects.
1 comment
Good morning Jack ,I have been a long time follower of your designs and i am trying to download the plans for the entrance roof cover and it is co confuising due to all the adds saying download here so is there anyway you can email me the plans i would appreciate it