This article is about how to build an outdoor wood fired stove. In this project I will show you how to construct an outdoor cooking stove, as to be able to cook your food the traditional way. I have cooked food on the wood fired stove and I can assure you that the taste of any food prepared this way has no match. Nevertheless, I can say that this is not an easy project, as nowadays there are few experts on this field, and finding useful information has proved to be a tough job even for me. Fortunately, in one of my trips I met a gifted artist, who is a leading specialist when speaking of wood-fired stoves and pizza ovens, and who was kind enough to share a few tricks. This is Episode 4 of the Brick Pizza Oven Series, so make sure you take a look over the rest of the articles to see the whole outdoor kitchen completed.
Taking into consideration that many people have asked us to show them how to build a outdoor wood fired stove, we have decided to dedicate an entire article to this project. As we have already stated, you have to think about several aspects before building the outdoor stove, as to make sure you understand the implications of this diy project. In addition, we will show you how to build a concrete table attached to stove, paved with flagstone, as to help you with the pots and pans.
The location of the brick stove must be well ventilated and far away from inflammable substances and materials. Nevertheless, you must have a water supply in the vicinity of the stove, in case you cannot control the fire. As the project consists of building a wood fired stove, it will inevitably generate smoke. Consequently, make sure you construct the outdoor stove, far away from your neighbors windows and trees.
Made from this plan
Materials
- Bricks, refractory bricks – BRICKS
- Fire clay, sand – MORTAR
- Flagstone / soapstone – CLADDING
- Cast iron stove doors – DOORS
- Iron plate cooking surface – COOKING SURFACE
Tools
- Safety gloves, safety glasses
- Brick saw, power mixer
- Hammer, utility knife
- Measuring tape, framing square
- Pencil, T-square, ladder
Tips
- Buy or rent a power mixer to save you from a hard work
- Pay attention to concrete recipes as they are essential for a proper job
- Study the local building codes, before starting the project
Time
- One weekend
Related
- PART 1: Building the base of the pizza oven
- PART 2: Building an outdoor pizza oven
- PART 3: Insulating the brick pizza oven
- PART 4: Building an outdoor stove
- PART 5: Finishing the outdoor pizza oven
- PART 6: Building a shelter for the pizza oven
How to build an outdoor stove
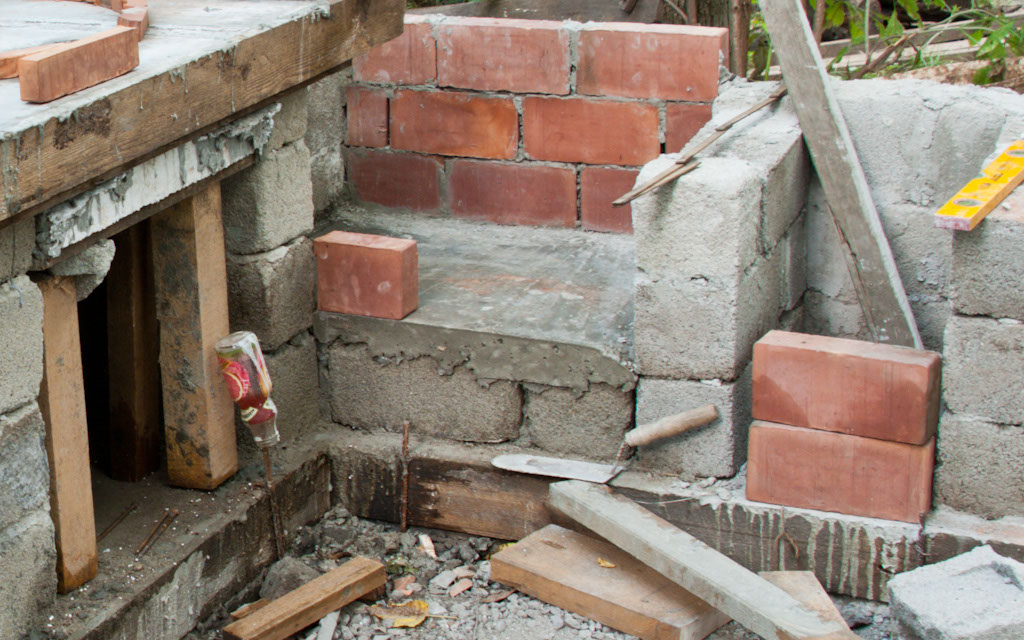
Building the floor of the outdoor stove
The first step of the project is to build the concrete foundation of the future outdoor stove. You can see how to build the foundation, in Episode 1 of the series. Next, start building a brick wall in the back of the concrete platform. As you can see in the image, we build the wall by positioning the bricks on shiner: they are laid on the long narrow side. In this way, we can build the wall quicker, and save materials.
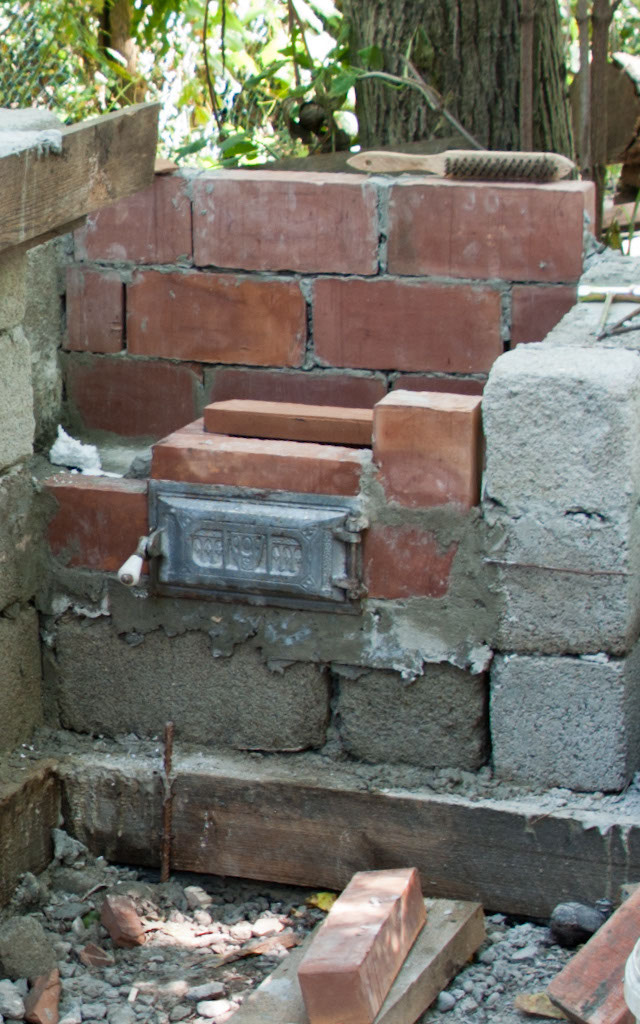
Building the stove ashtray
Next, we have to build the ashtray and install the ash door. This is a key component of our outdoor stove, as after the woods have burned out, the ash will fall down in this compartment.
Cut the bricks using the brick saw to the needed dimensions, and fix them into position using mortar. You can buy premixed mortar or prepare it by yourself, using the following recipe: 3 parts of cement, 5 parts of fine sand and water, as to obtain compound with the consistency of cream.
The ash door must be fixed firmly, but the technique depends on the the fixing system. However, fix the ash door with mortar and wait several hours until it dies out, as to continue building the outdoor stove.
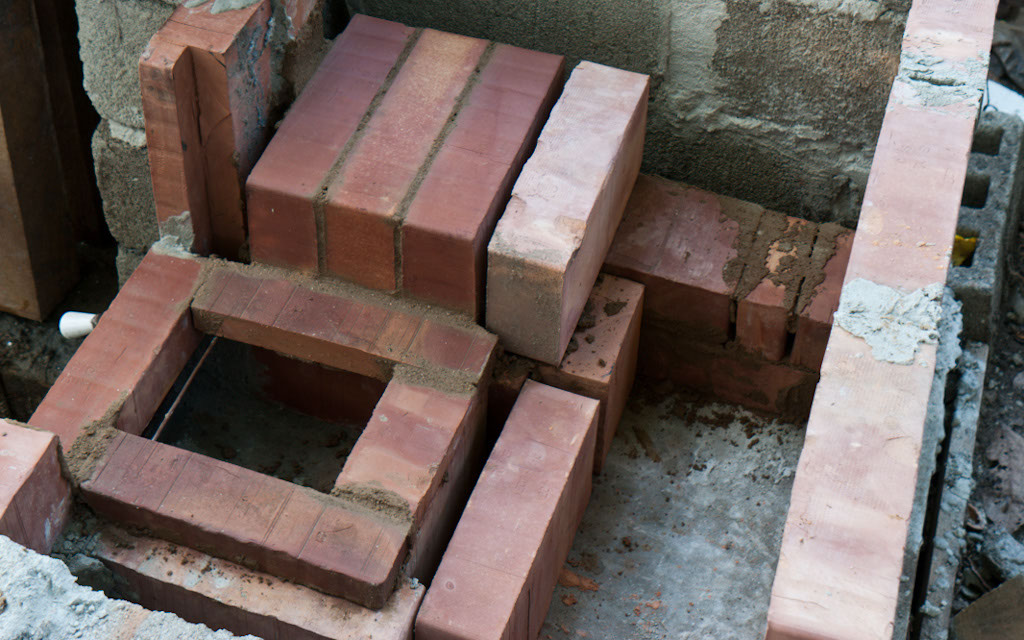
Building the stove firebox using bricks
Over the ashtray, which is in fact a rectangle made of the ash door and three bricks laid on shiner, we install another rectangle made of bricks. This time, we didn’t use full bricks, but only a fraction of them: cut a brick in half longitudinally and then cut it again longitudinally on half. Consequently, you will get four equal pieces from one brick.
Next, fix them over the astray frame, as shown in the image, using fire clay mortar (4 parts of fine sand, 6 parts of fire clay and water).
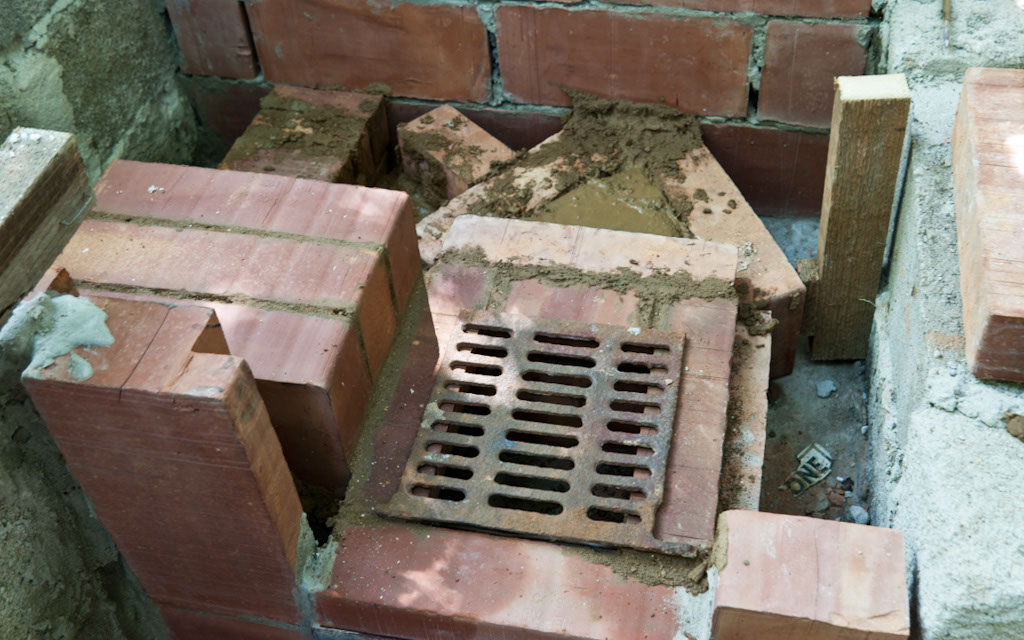
Continuing installing the bricks in the stove firebox
We use the fire clay mortar to glue the bricks together, as it resists the high temperatures produced by the burning woods. If you choose to use cement-based mortar, the firebox and the ashtray will be damaged irreversibly. Fill the holes with clay mortar.
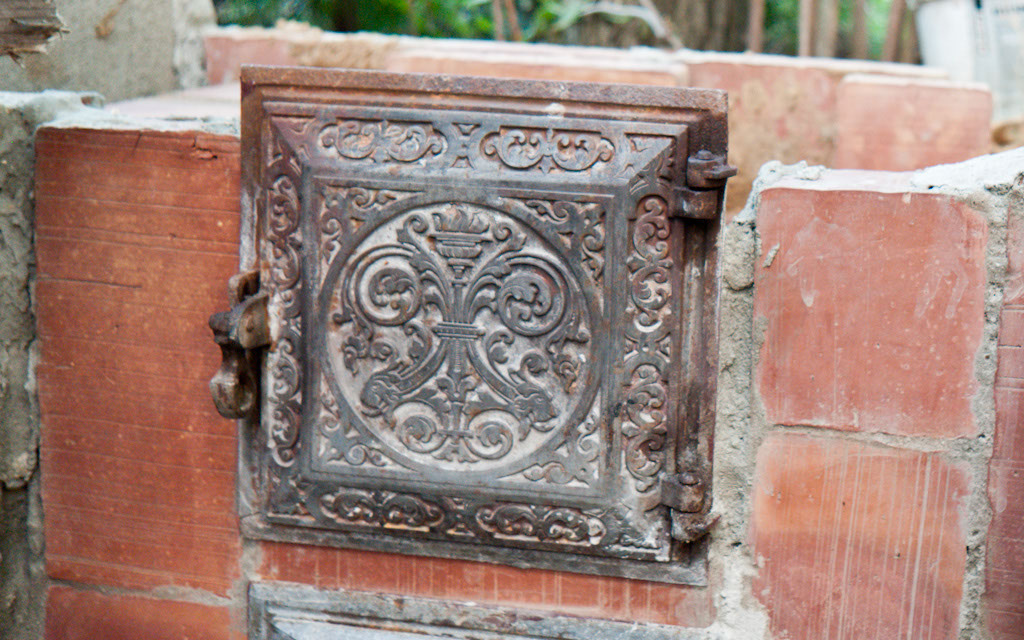
Fixing the fire stove door
Next, fix the stove door on the front wall of the outdoor stove. There are different fixing systems, but the most common one is when the stove door has attached an L-shaped brackets on each side of the door frame. In order to install the door firmly, you must make sure you add a little mortar, but only after you have painted the cast iron with protective primer.
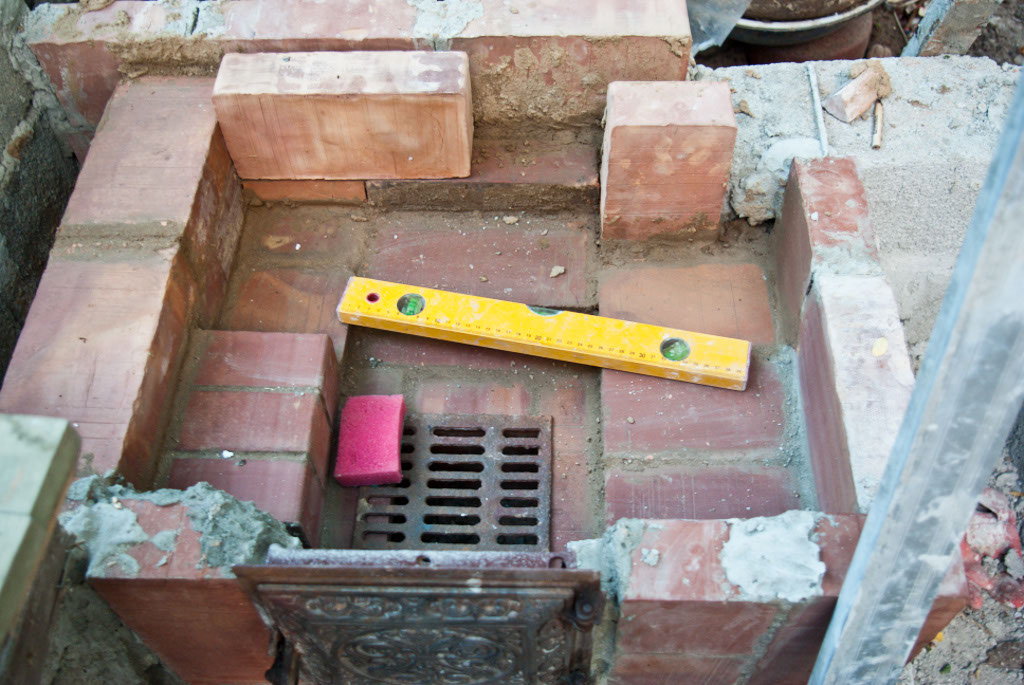
Finishing the stove firebox
Next, continue building the stove floor, by installing the bricks horizontally, as shown in the image. Remember that it is essential to use fire clay mortar, as a cement based mortar won’t resist the high temperatures inside the firebox. Fill the large gaps with a mix of clay and sand.
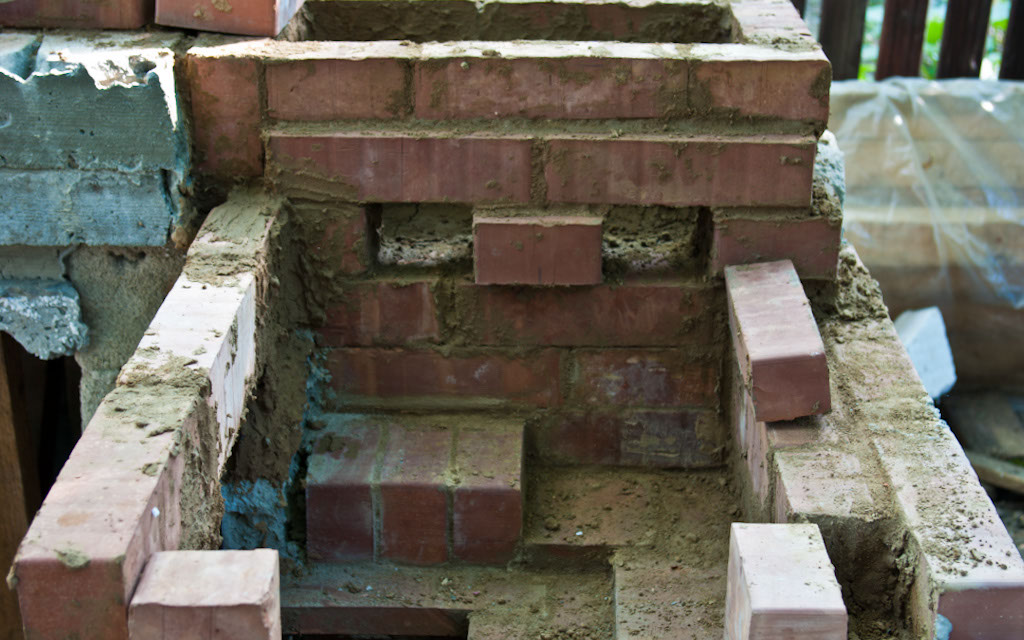
Building the outdoor stove chimney
Next, we have to add several layers of bricks in the left side of the outdoor stove. At the top of the outdoor stove, we have to create two holes, in order to direct the smoke to the chimney.
The smoke channels have to be placed at top of the stove wall, as smoke is hot and has the tendency of rising. We have to construct two holes for several reasons: firstly, we have to create a large exit surface, and secondly we must place a brick in the middle of the hole to support the chimney weight.
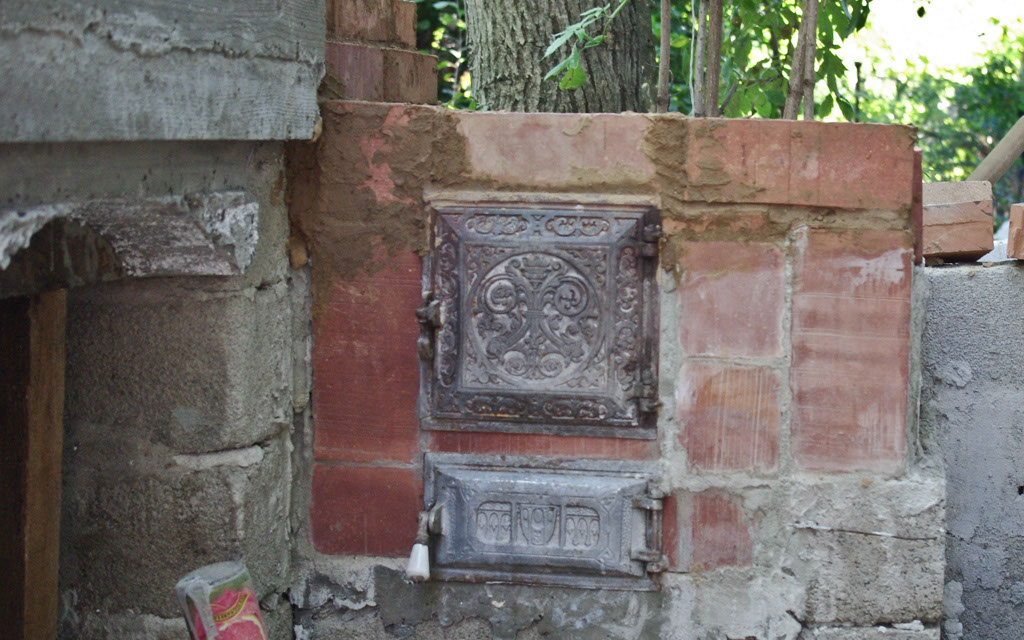
Building the front of the outdoor stove
Next, we can finish building the front wall of the outdoor stove, by adding the last row of bricks. Consequently, you have to decide on the height of the stove, and then find out the dimension at which you have to cut the bricks.
In order to secure the bricks, you can use cement-based mortar, but make sure you use fire clay mortar on the interior side, as to resist the high temperatures developed by the burning woods. In addition, use a spirit level to verify if the base of the cooking platform is perfectly level.
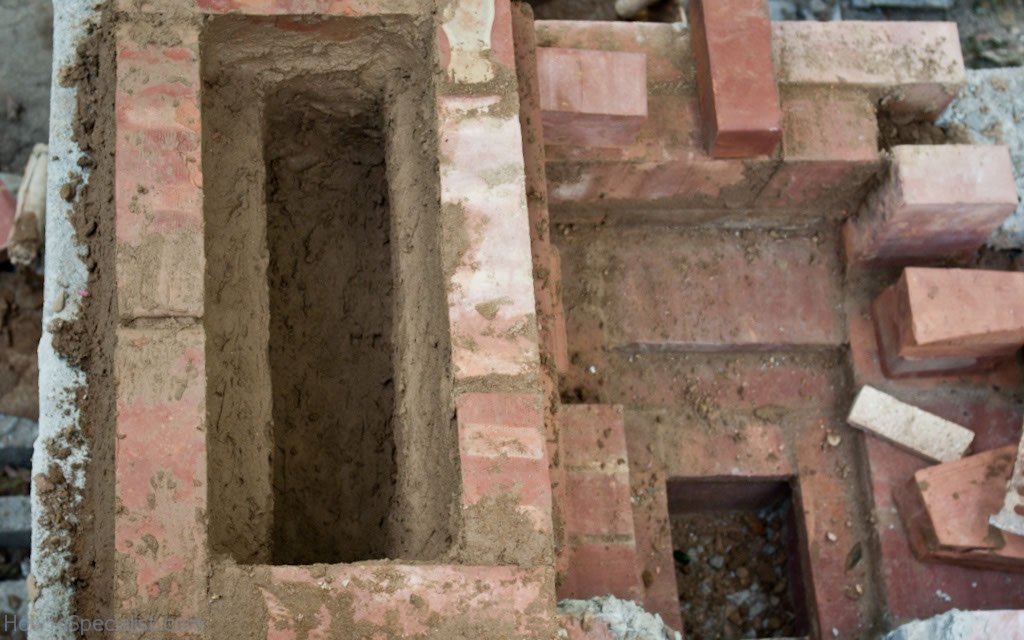
Outdoor Stove Chimney
Next, we have to build the base of the brick chimney for the outdoor stove. You might notice that the chimney is very large, but this is because we will also build a pizza oven. The chimney will have two smoke tunnels: one for the pizza oven and the other for the stove.
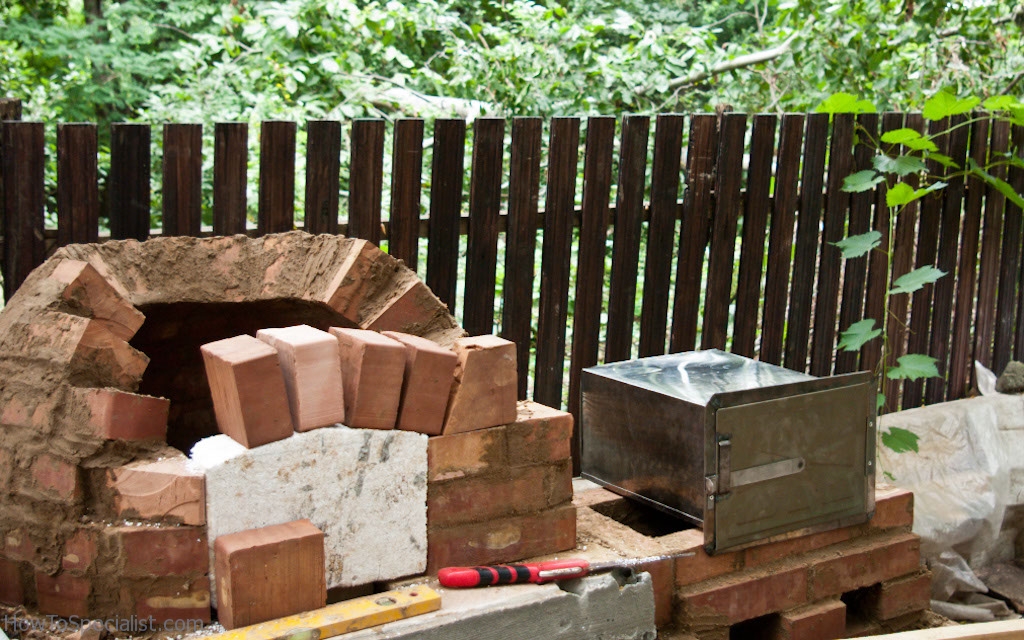
Installing the metal sheet oven
In the right side of the image, you can notice a metal sheet oven. This is a very interesting oven, as it is heated passively by the hot smoke coming from the outdoor stove. In other words, if you start a fire in the stove, you can also cook food in the metal sheet oven.
In order to install the metal sheet oven, you must place it in the middle of the chimney base. Measure the space around the oven, as to know the dimensions at which you have to cut the bricks, in order to continue building the chimney.
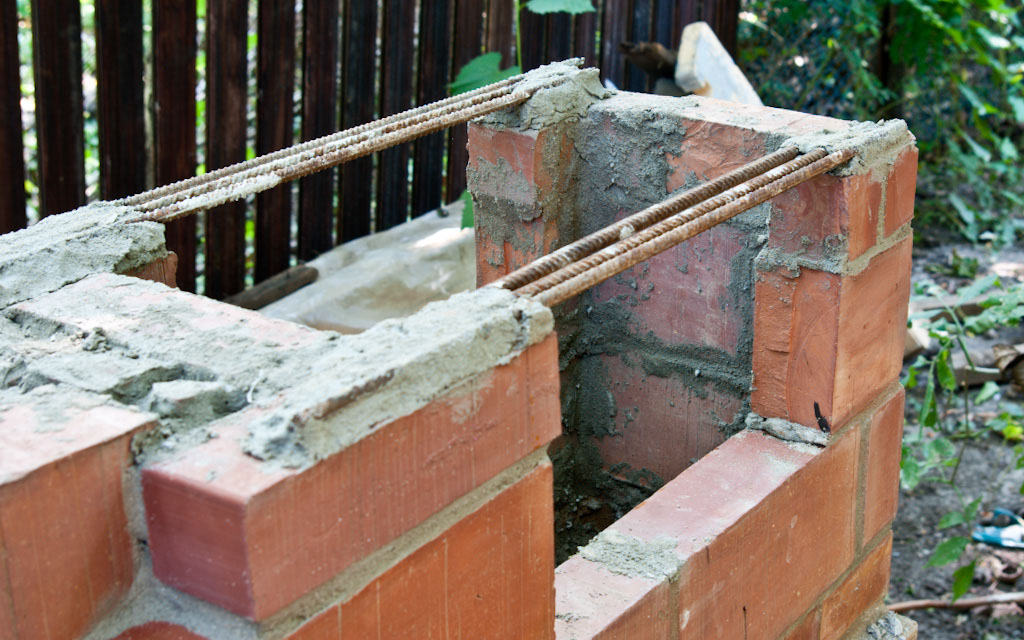
Reinforcing the chimney walls over the metal sheet oven
When building the chimney, lay the bricks on shiner, in order to reduce the cost and complete the project quicker. As this article is not about a professional stove, you can use this method without any worries, jut make sure you use cement-base mortar.
We have installed several steel bars over the bricks, as to make sure the rest of the chimney will be build on a strong base. In this project, we have used #5 / 8 mm reinforcement bars, as to make sure they will support the next courses of bricks.
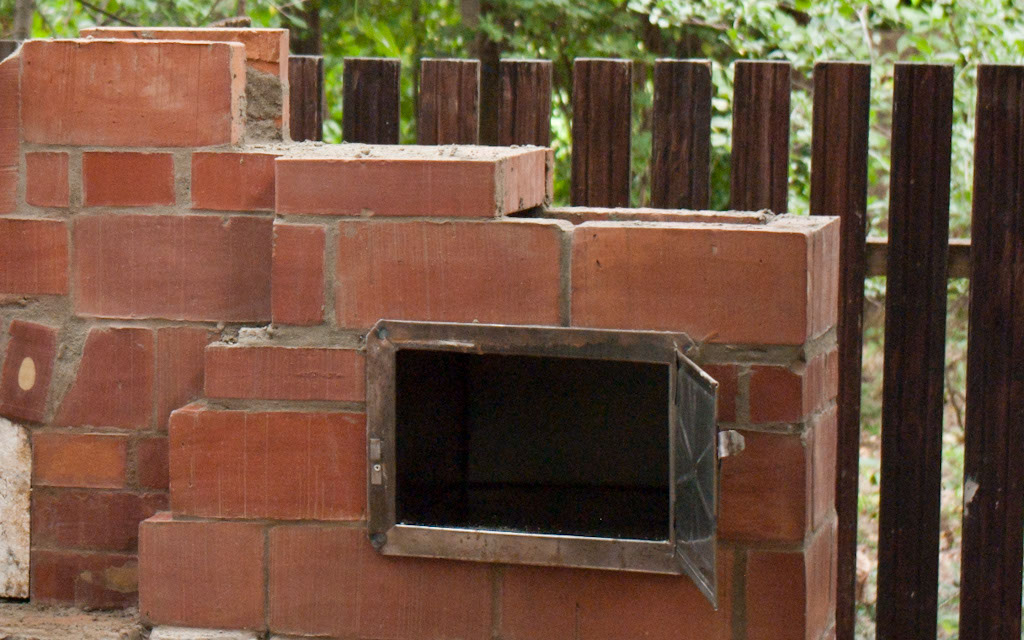
Building the chimney of the wood fired stove
Next, you should notice that in this stage, we will split the brick chimney channel on half, into two equal chimneys: the smoke coming from the pizza oven will go out trough the left side, while the smoke coming from the outdoor stove will exist through the right tunnel. If you build only the stove, a single channel is enough.

Constructing another layers of bricks
If you have followed our guidelines, your chimney should be almost ready. Just work properly, take your time and pay attention to details, if you want to make the job right, from the very first attempt. Make sure the chimney is plumb and remove the excess mortar with a damp sponge.
If you want to build a high chimney, you’ll have to use a folding ladder and ask a friend to give you a hand, as you won’t be able to lift any heavy materials by yourself.
Building an outdoor table attached to the stove
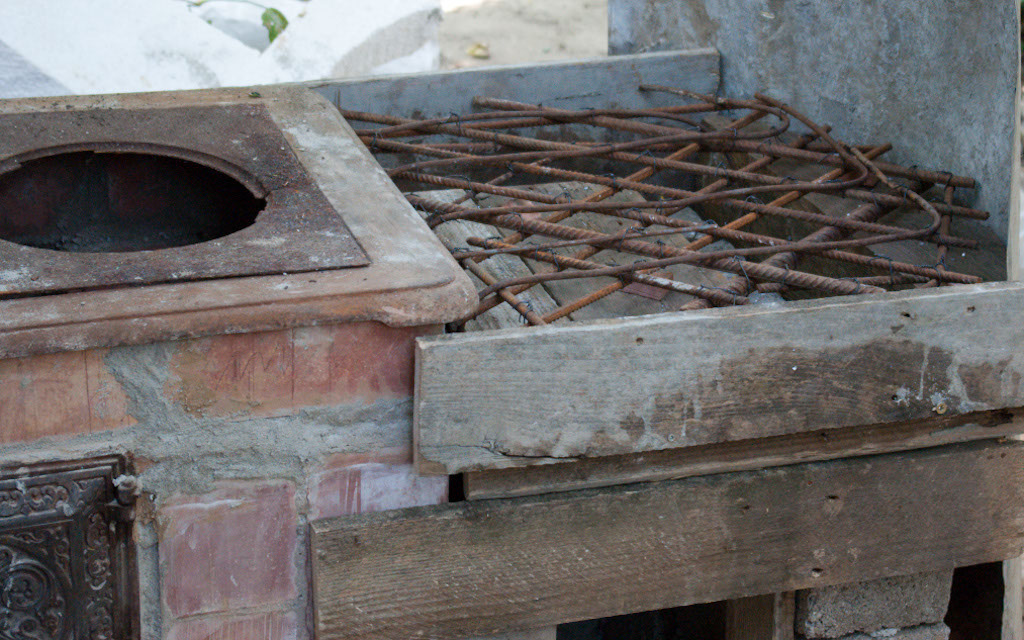
Next, we will build a concrete table, attached to the outdoor stove. For enhanced durability, we have decide to use concrete for the counter-top. Consequently, frame the contour of the table using wood boards and screws. Use a spirit level, to align the form, making sure the sides are perfectly plumb. Then use several #5/ 8 mm rebars to create a reinforcing network.
Place spacers under the reinforcement net, to lift it at least 1”/2.5 cm above the form. The rebars will reinforce the concrete and create a sturdy counter-top.
Paving the countertop with flagstone
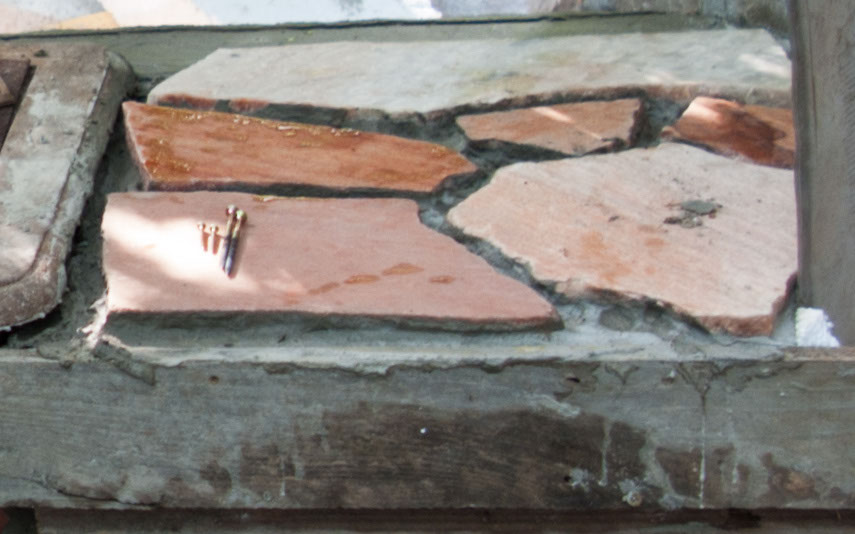
Next prepare concrete using the following recipe: 3 parts fine sand, 3 parts cement and 2 parts of gravel. Pour the concrete in the formwork, and distribute it uniformly on the whole surface.
Next, select several pieces of flagstone and install them over the concrete. When installing the flagstones, use a mallet to make them level. After you have finished this step, wait until the concrete has dried out, as to be able to fill the gaps between the flagstone.
Wood fired outdoor stove
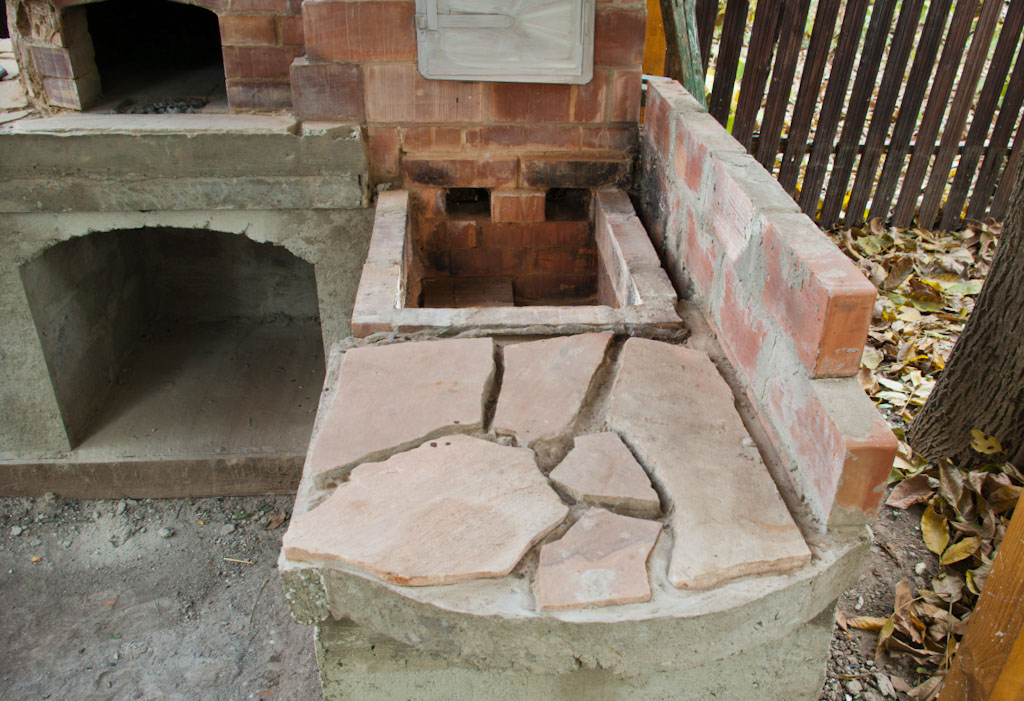
Next, you should wait a couple of days until the concrete has dried out. Meanwhile, you should clean the inside of the wood-fired stove, as to prepare the installation of the iron cooking surface. Nevertheless, let the clay to dry out perfectly, before installing the cooking surface.
Installing the iron cooking surface for the stove
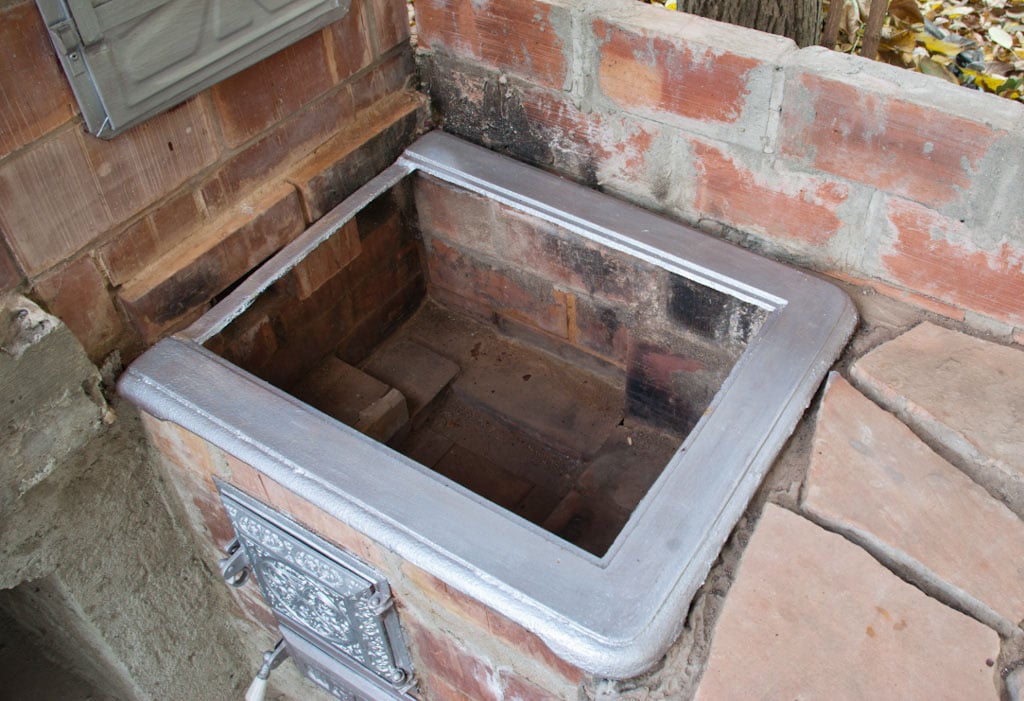
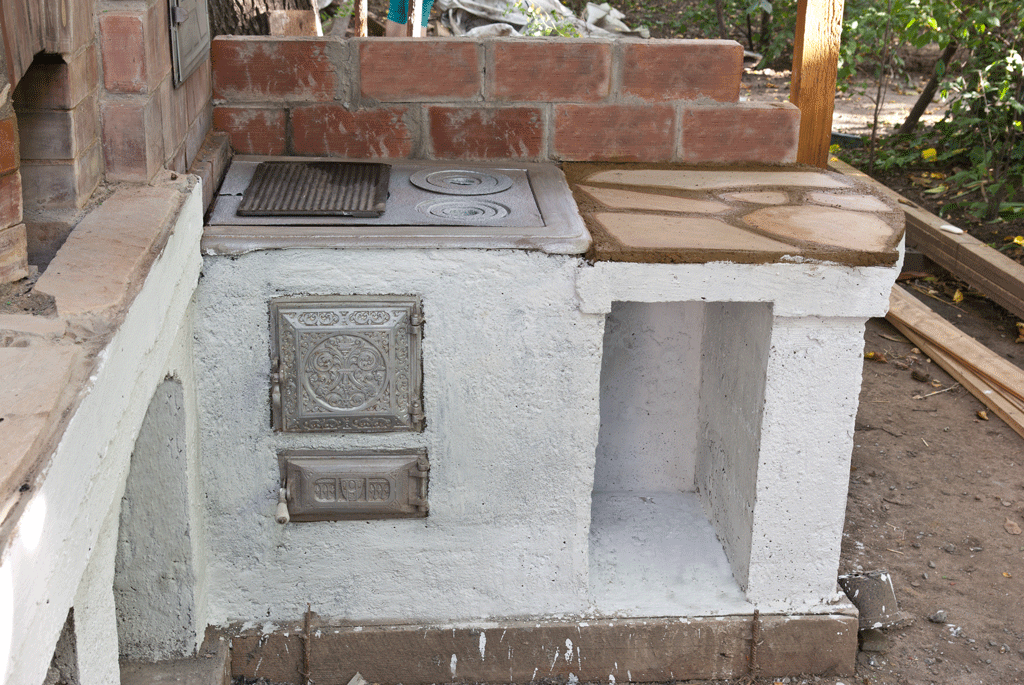
One of the last steps of this project is to install the iron cast cooking surface. Before fitting the cooking surface into position, we must make sure the iron cast is rust free, and painted with two coats of protective paint. Make sure the iron frame is level and installed firmly into position.
Build an outdoor stove
Next, the last step of this project is to install the cooking surface. Unfortunately, up to now we only have an old damaged iron cooking surface, but is good enough to illustrate you the way it should look the outdoor stove.
Nevertheless, we will replace it with a brand new iron cast surface, as soon as we have time to find a local supplier. We hope that now you have a better image on how to build a wood fired stove and will take the plunge to start a diy project.
Thank you for reading our article on how to build an outdoor cooking stove and we recommend you to check out the rest of our projects. Share our projects with your friends, by using the social media widgets.
