In our next project, we’re tackling practical 6×10 Grill Gazebo Plans, perfect for any backyard. We’ll use straightforward woodworking techniques to build a sturdy and functional structure. Join me as we work together to create a welcoming space for outdoor grilling and gatherings. See all my the gazebo plans HERE.
To build a 6×10 Grill Gazebo, you can expect to spend around $1000 to $1500, depending on your choices of materials like cedar for the structure, stainless steel fasteners, and roofing options such as shingles or metal panels. Additional costs include finishes to protect the wood and any tools or decorative elements you might need.
We recommend you to invest in the best materials you could afford. Therefore, you should buy weather-resistant lumber, such as pressure-treated lumber, cedar or redwood. If you use regular pine, I recommend you to apply the appropriate products to enhance its durability. Always take accurate measurements before adjusting the size of the components at the proper size. Drill pilot holes trough the components before inserting the wood screws, to prevent the wood from splitting. See all my Premium Plans HERE.
Made from this plan
6×10 Grill Gazebo – DIY Plans
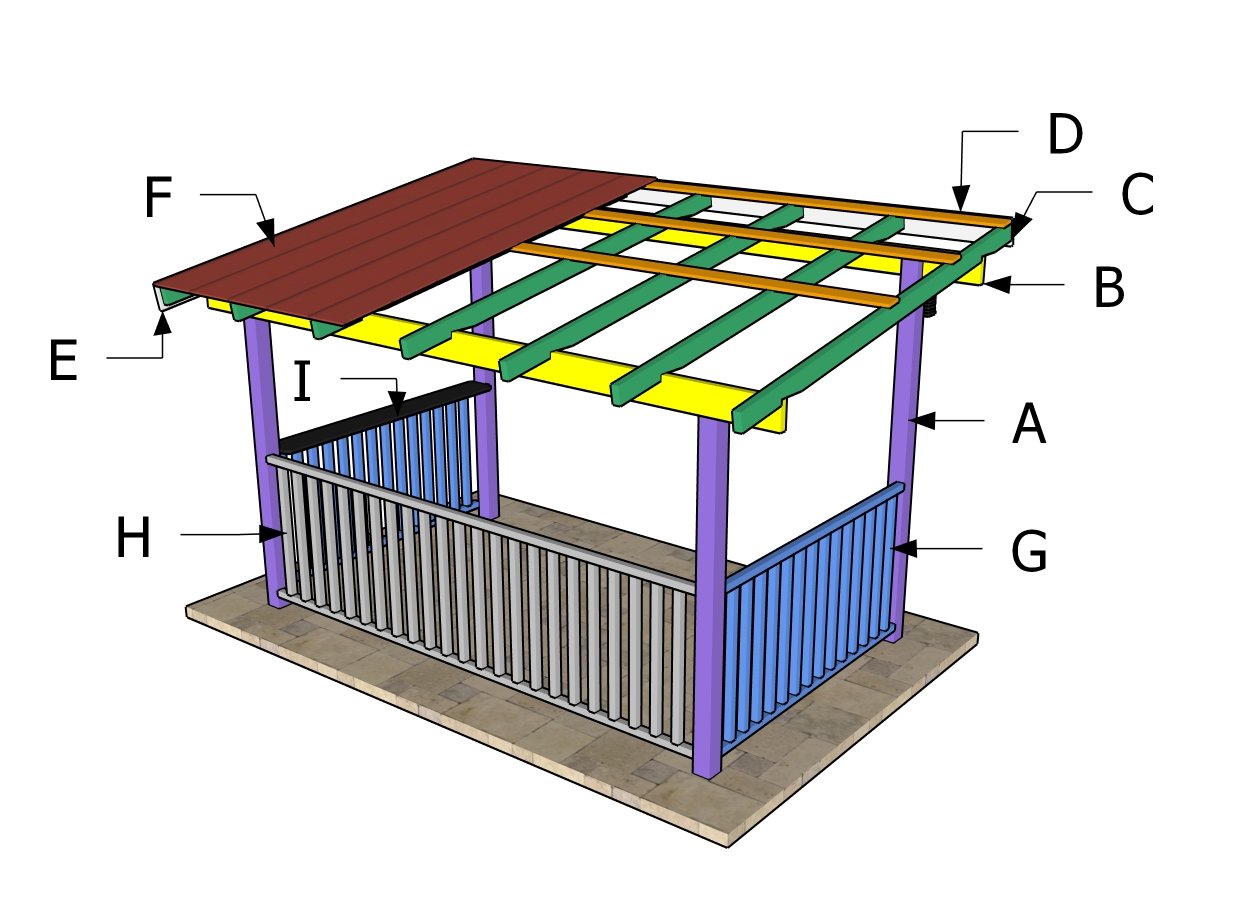
Building a 6×10 grill gazebo
Materials
A – Posts – 4×4 lumber 70″ -2 pieces
A – Posts – 4×4 lumber 82″ – 2 pieces
B – Top plate – 2×6 lumber 12 ft – 2 pieces
C – Rafters – 2×4 lumber 8 ft – 7 pieces
D – Purlins – 1×4 lumber 12 ft – 5 pieces
E – Roof Trims – 1×6 lumber 144″ – 2 pieces
E – Roof Trims – 1×6 lumber 97 1/2″ – 2 pieces
G – Side Panels – 2×2 lumber 65″ – 4 pieces
G – Side Panels – 2×2 lumber 30″ – 28 pieces
H – Back Panel – 2×2 lumber 113″ – 2 pieces
H – Back Panel – 2×2 lumber 30″ – 23 pieces
I – Bar table – 1×8 lumber 65″ – 1 piece
*Buy Premium Plans for Cut and Shopping Lists
Tools
- Safety gloves, glasses
- Miter saw, jigsaw
- Chalk line, tape measure, spirit level, carpentry pencil
- Drill machinery and drill bits
Time
- One Week
How to build a 6×10 pavilion – PDF Download
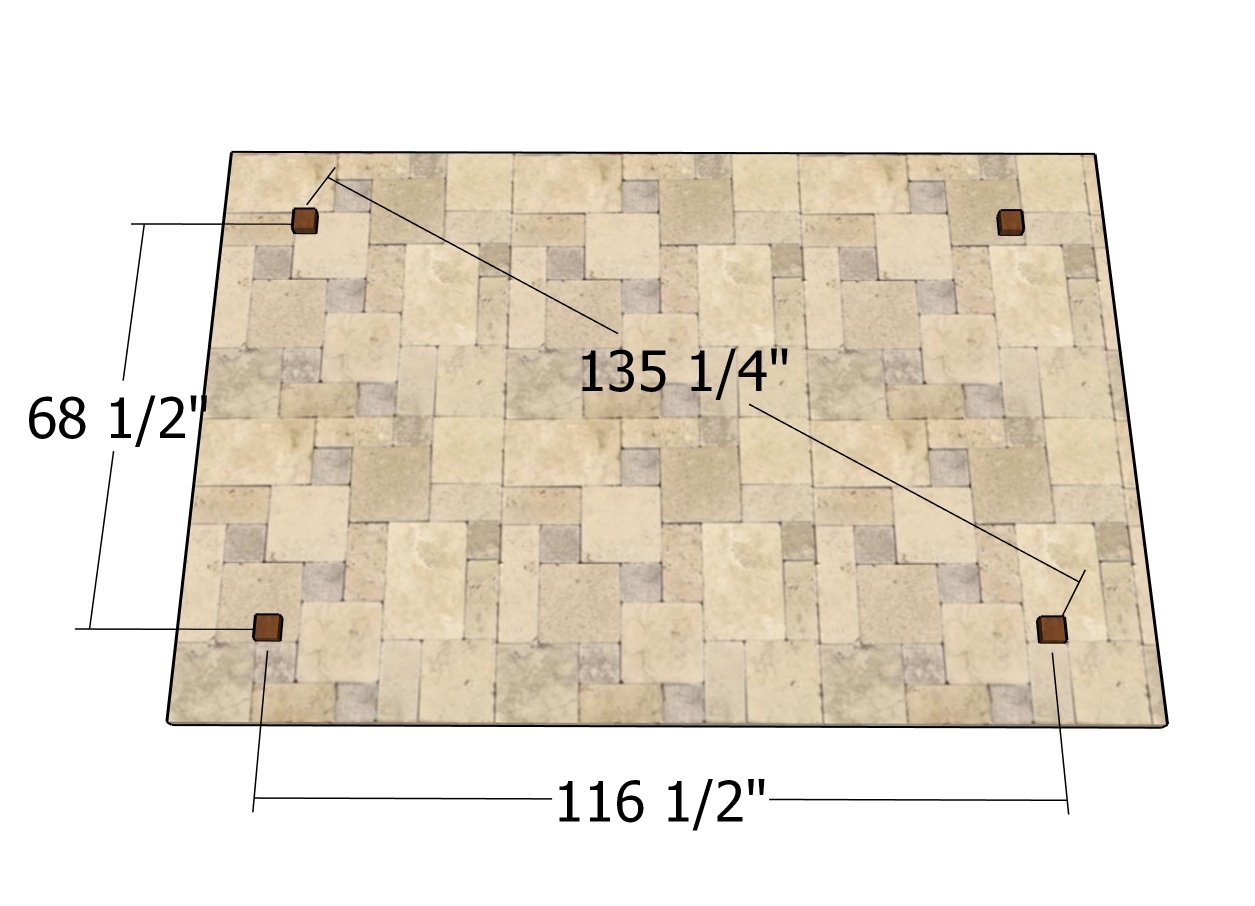
Posts layout
When kicking off our 6×10 Grill Gazebo project, the first step is to lay out the four posts that will form the base of our structure. I like to start by marking the exact locations in the ground where each post will go, ensuring they’re spaced perfectly to match our gazebo’s dimensions. The dimensions shown in the diagram are between axes.
It’s crucial to double-check that everything is square and level because getting this foundation right sets the tone for the entire build. Let’s get our hands dirty and make sure our structure starts off on the right foot!
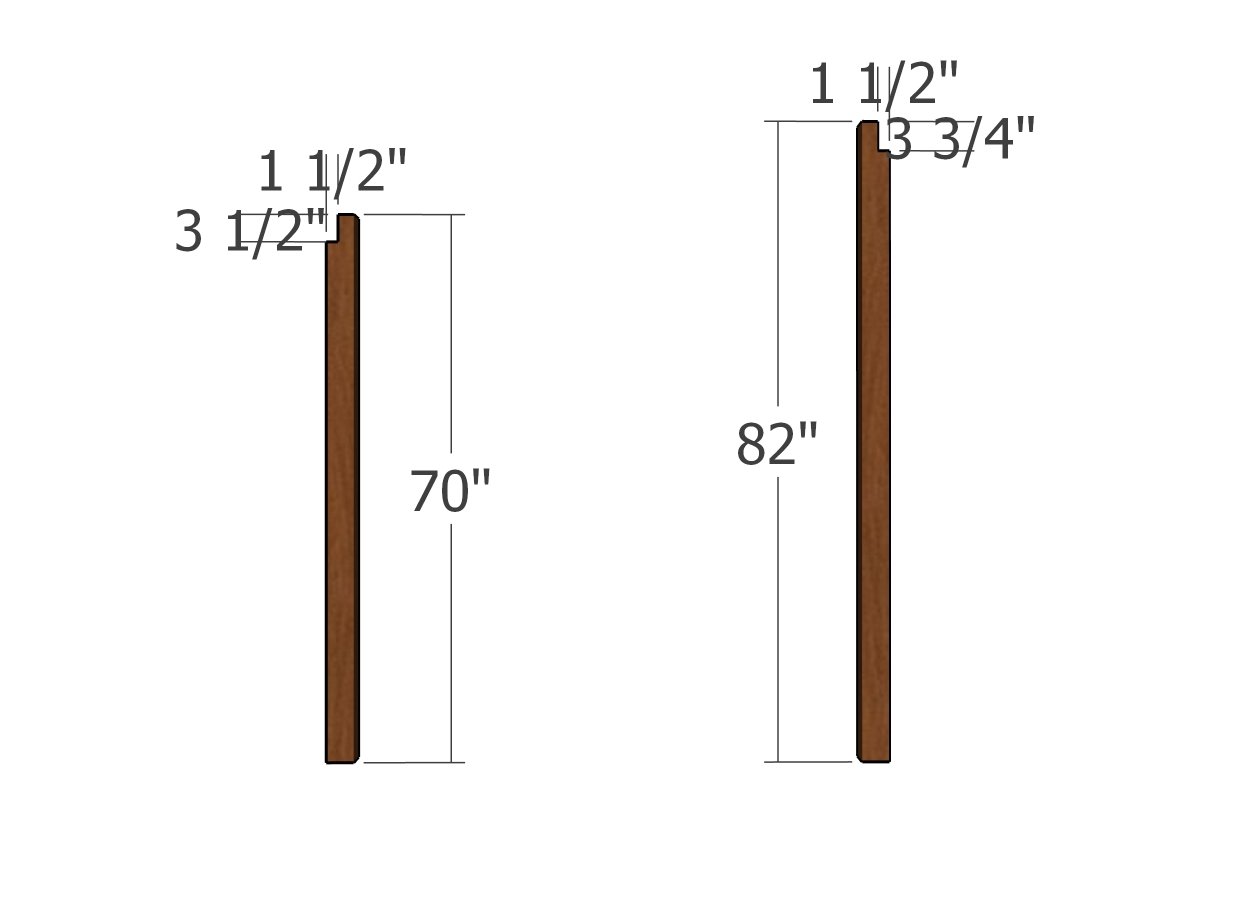
Posts
Next, we need to prepare our 4×4 posts for the Grill Gazebo. We’re going to cut notches at the top of each post to secure the support beams. First, mark the notch area clearly on each post. Then, grab your circular saw and set the blade depth to 1 1/2 inches. Make multiple parallel cuts within the marked area—this technique helps to remove the bulk of the wood. After that, take a hammer to knock out the excess pieces, and finish up by smoothing out the notch with a chisel. This step is key for creating a strong, supportive structure for our gazebo!
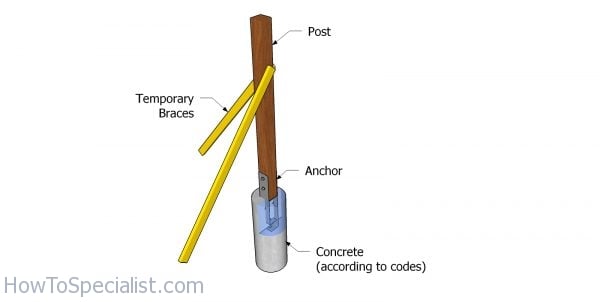
Setting the posts
Start by digging holes for your gazebo posts; each should be about 3 feet deep to ensure a stable base. Once the holes are ready, mix and pour concrete into each one, stopping a couple of inches below the ground level. Insert the post anchors into the center of the wet concrete, ensuring they are upright and properly aligned. Allow the concrete to set partially before mounting the posts and securing them with temporary braces for stability.
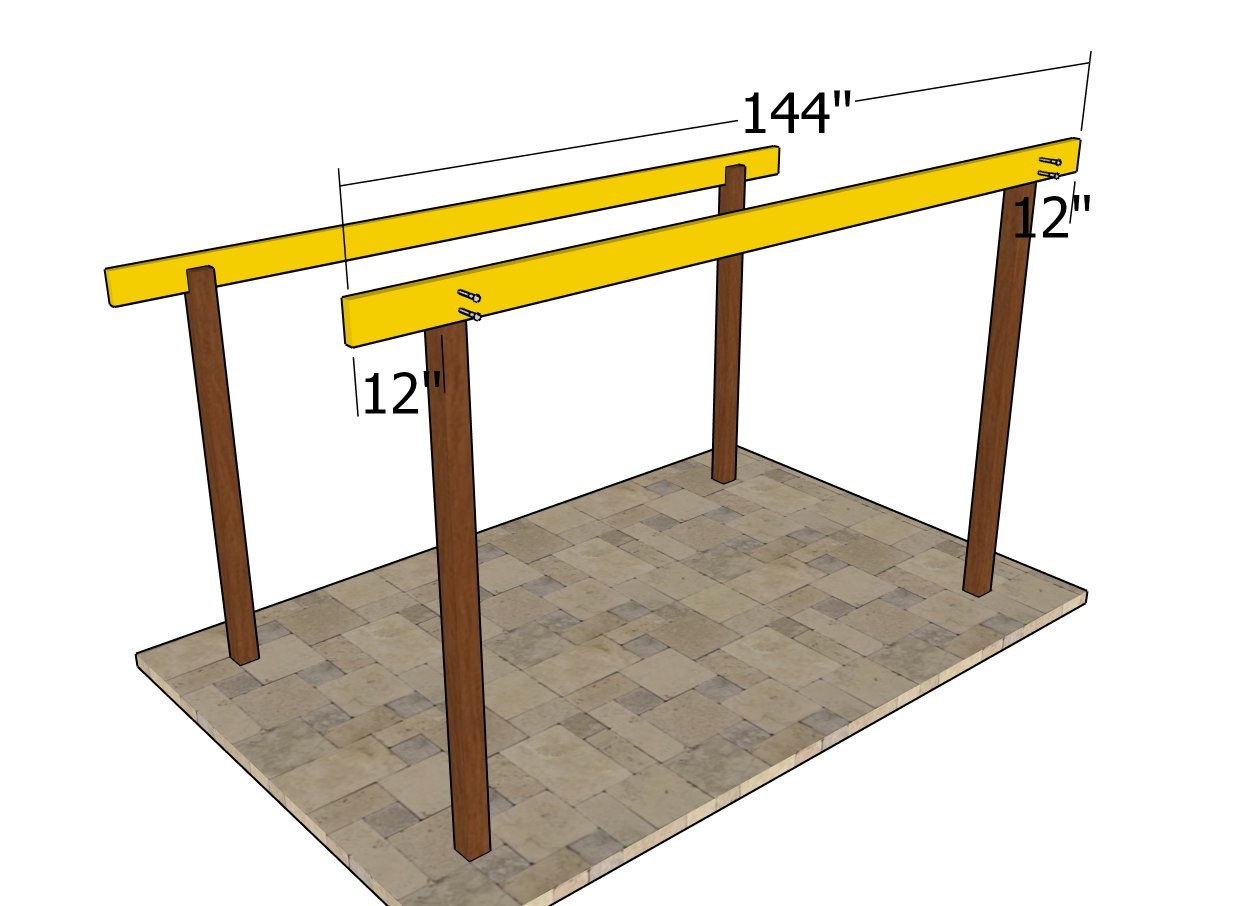
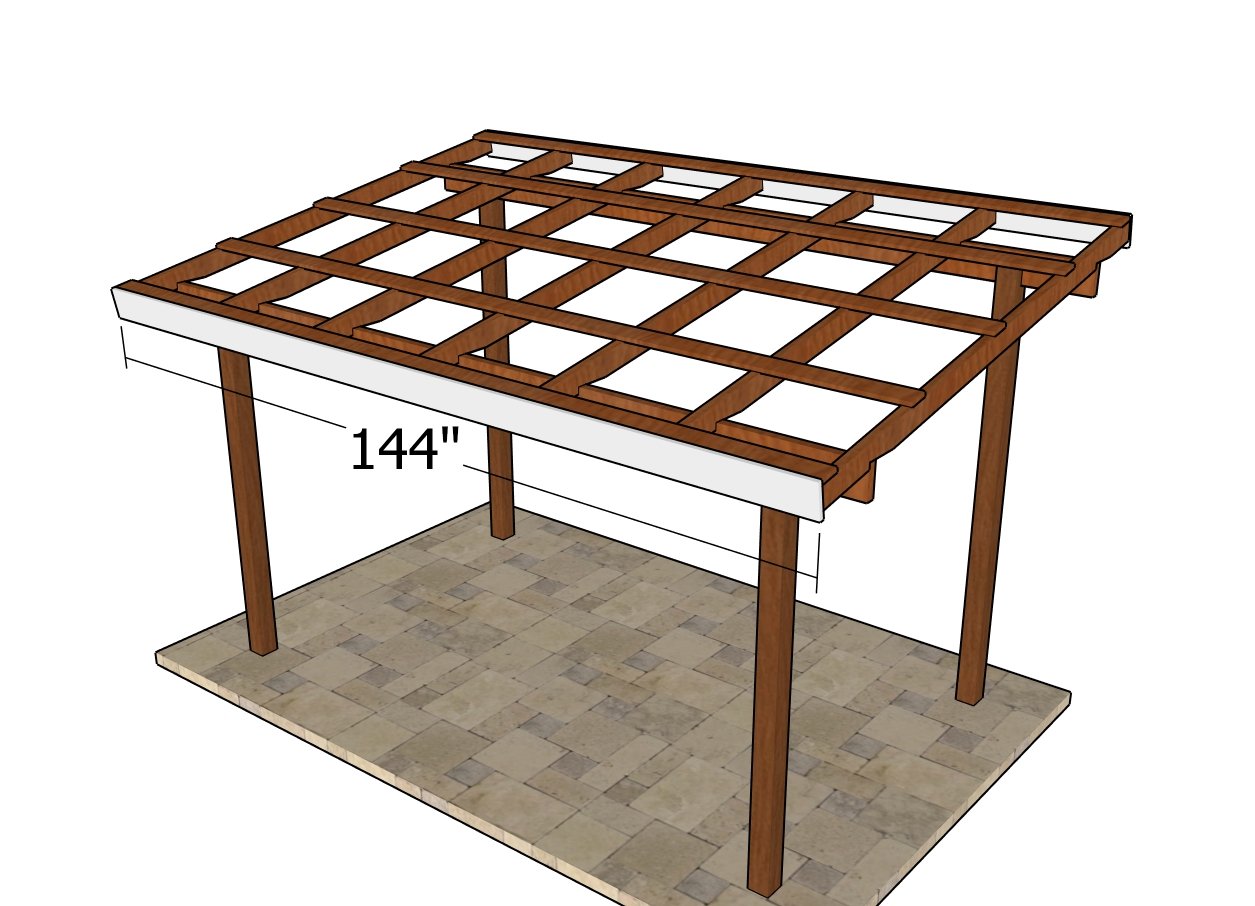
Top beam
Attach the 2×6 beams to the top of the posts. See the 12″ overhangs on both sides of the pavilion. Use a spirit level to make sure the top of the posts are horizontal. Drill pilot holes through the beams and insert 3 1/2″ lag screws to lock them to the posts. Use 2 screws for each joint.
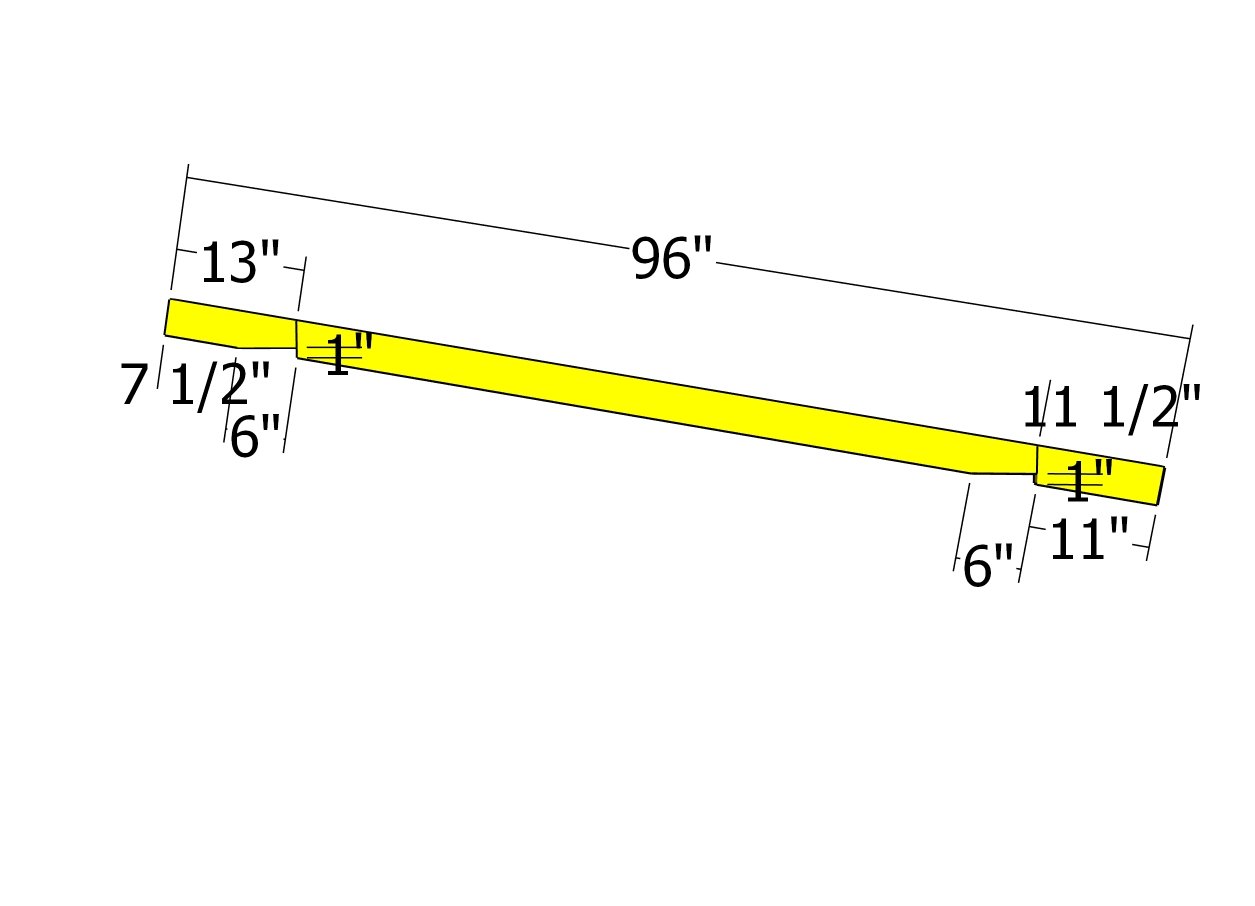
Rafters
When constructing the roof of our Grill Gazebo, we’ll be using 2×4 rafters, which are key to supporting the overall structure. One of the crucial steps in preparing these rafters is making birdsmouth cuts. These notches allow the rafters to sit securely on the top edges of the walls, providing a stable connection that distributes the roof load evenly.
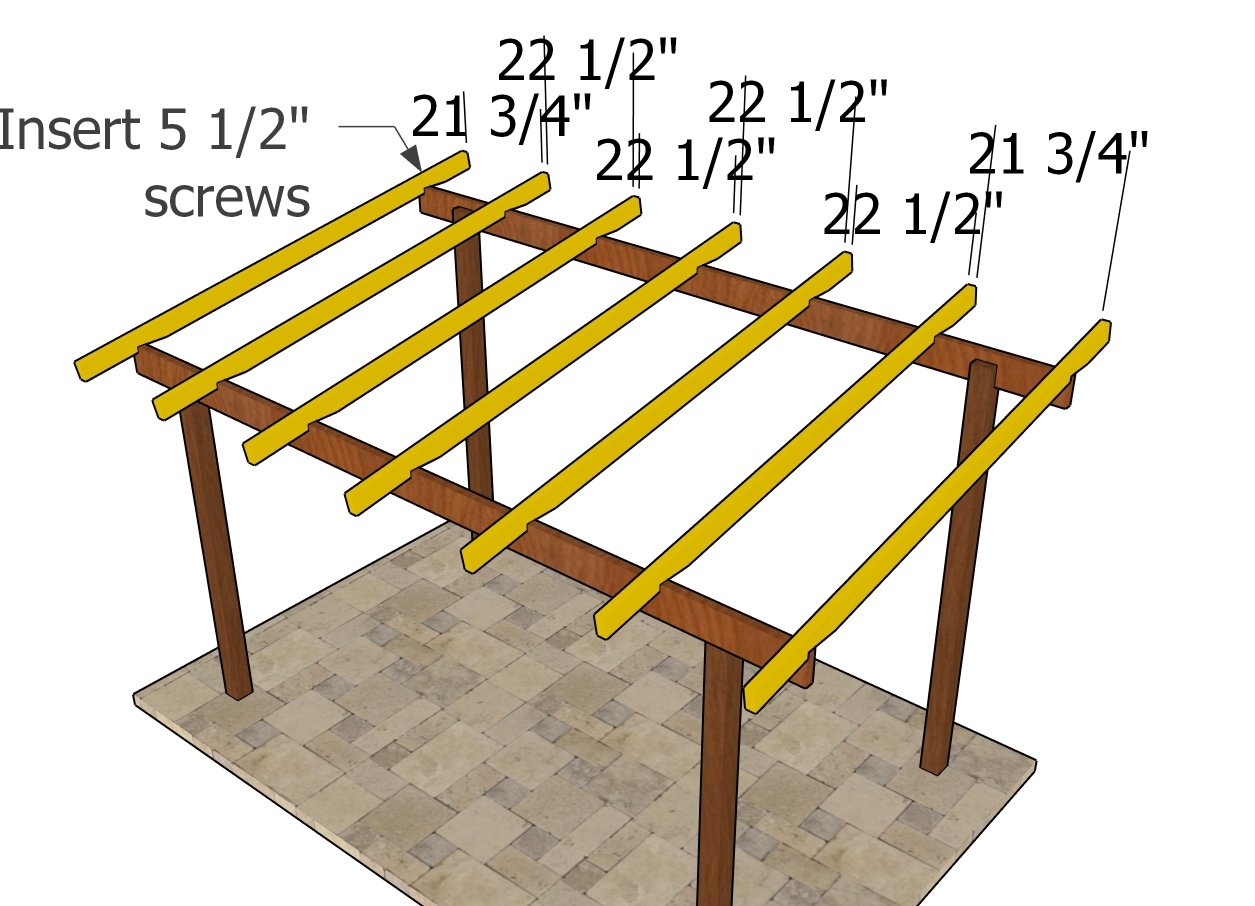
Fitting the rafters
Next, let’s position those rafters on the top plates. Make sure they’re evenly spaced at 24″ on center and perfectly aligned. Next, secure the rafters to the support beams with 5 1/2″ screws. Drill pilot holes through the rafters and insert the screws.
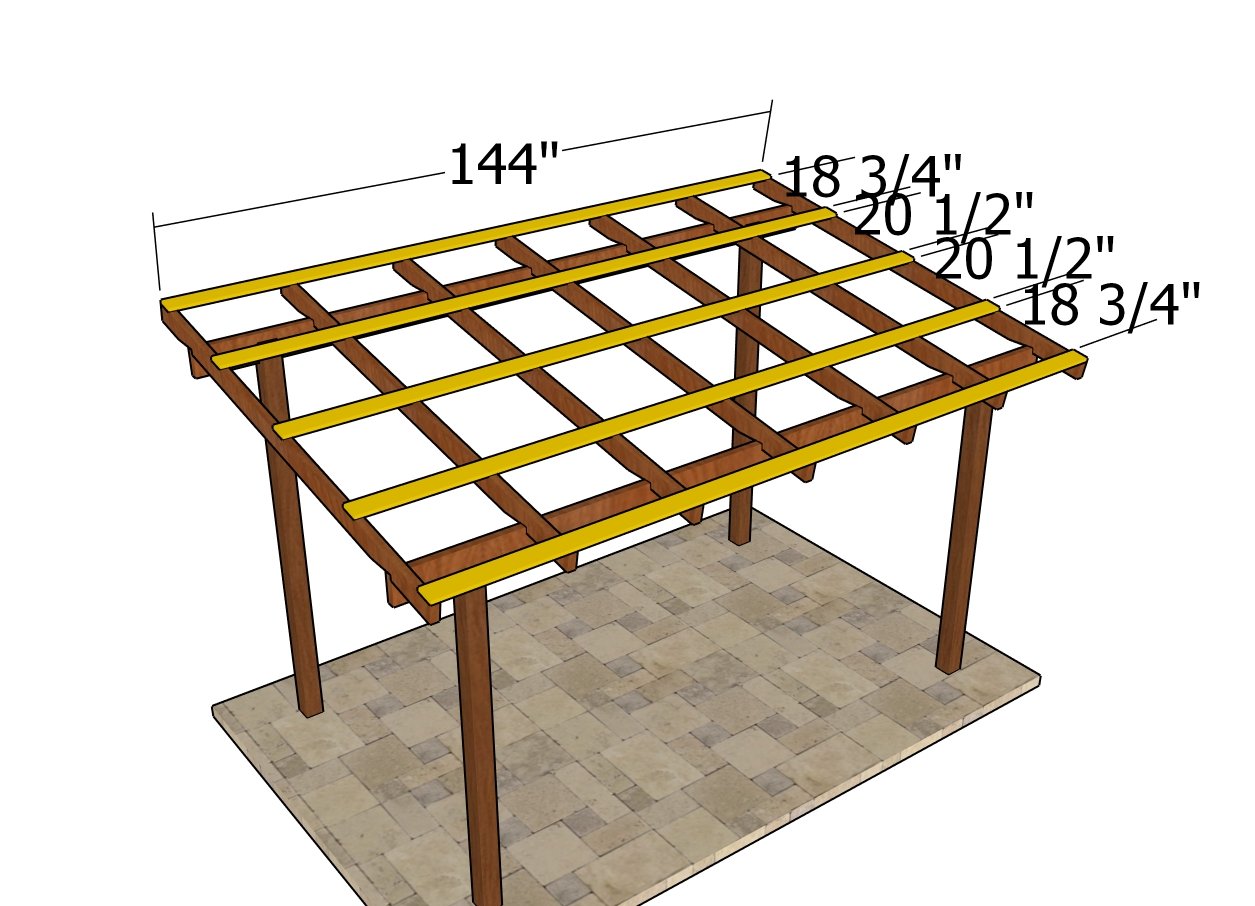
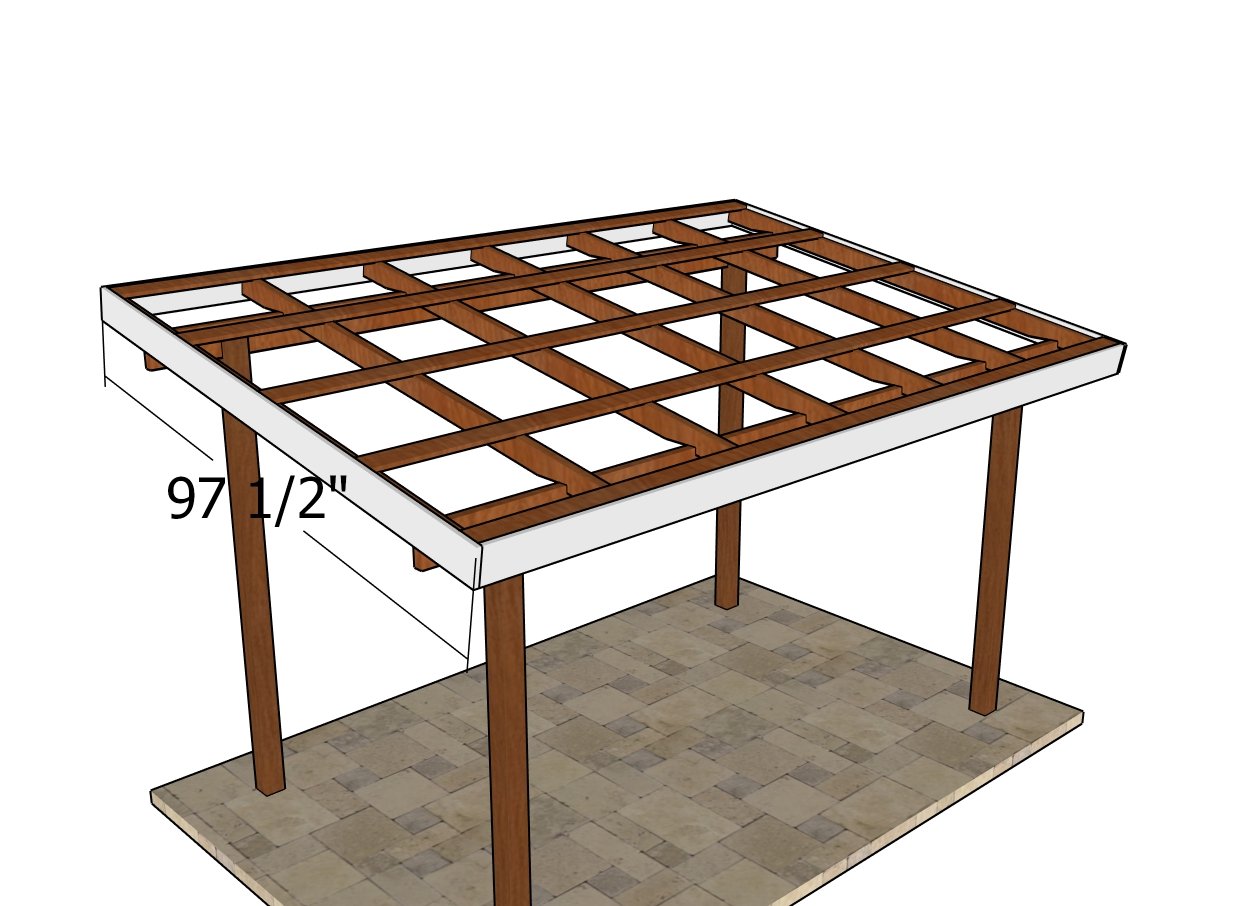
Attaching the purlins
We’re going to use 1×4 purlins for the roof structure. Position the purlins every 24″ on center and secure them to the rafters with 2 1/2″ screws. Make sure to align the edges at both ends before inserting the screws. This will ensure everything is straight and solid.
Front and back trims
Fit the 1×6 trims to the front and back of the pavilion. Align the edges flush and insert 6d nails to lock them to the rafters.
Side trims
Use 1×6 lumber for the sides of the pavilion roof. Attach the trims to the rafters and insert 2″ / 6d nails to lock them into place tightly.
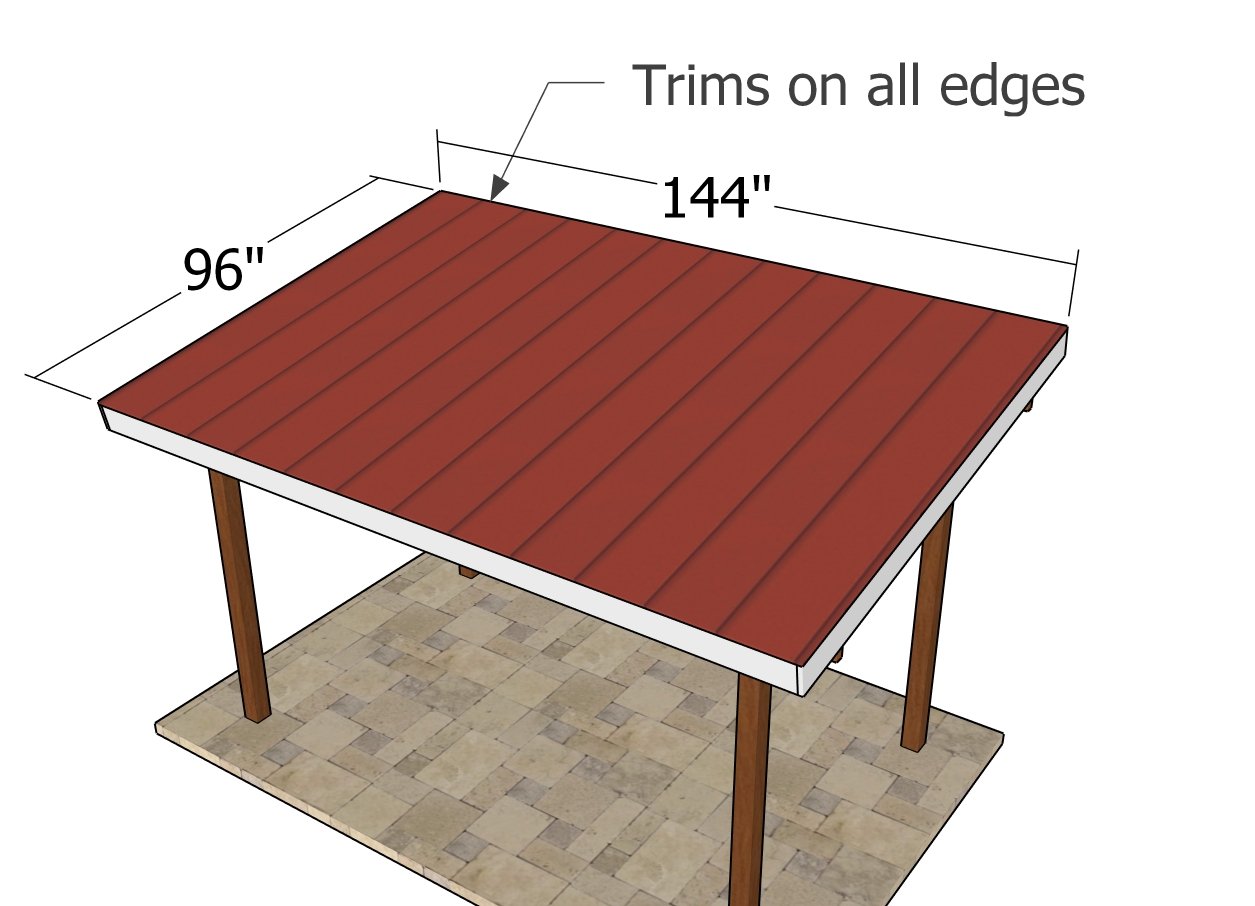
Fitting the roofing
Start by installing the metal roofing panels at one end of the pavilion, aligning the first panel with the edge of the roof and securing it with screws through the pre-drilled holes.
Overlap the next panel by one ridge and fasten it in the same manner, continuing this process across the roof. Finish by attaching metal trim along the edges and eaves to provide a clean look and extra protection against the elements.
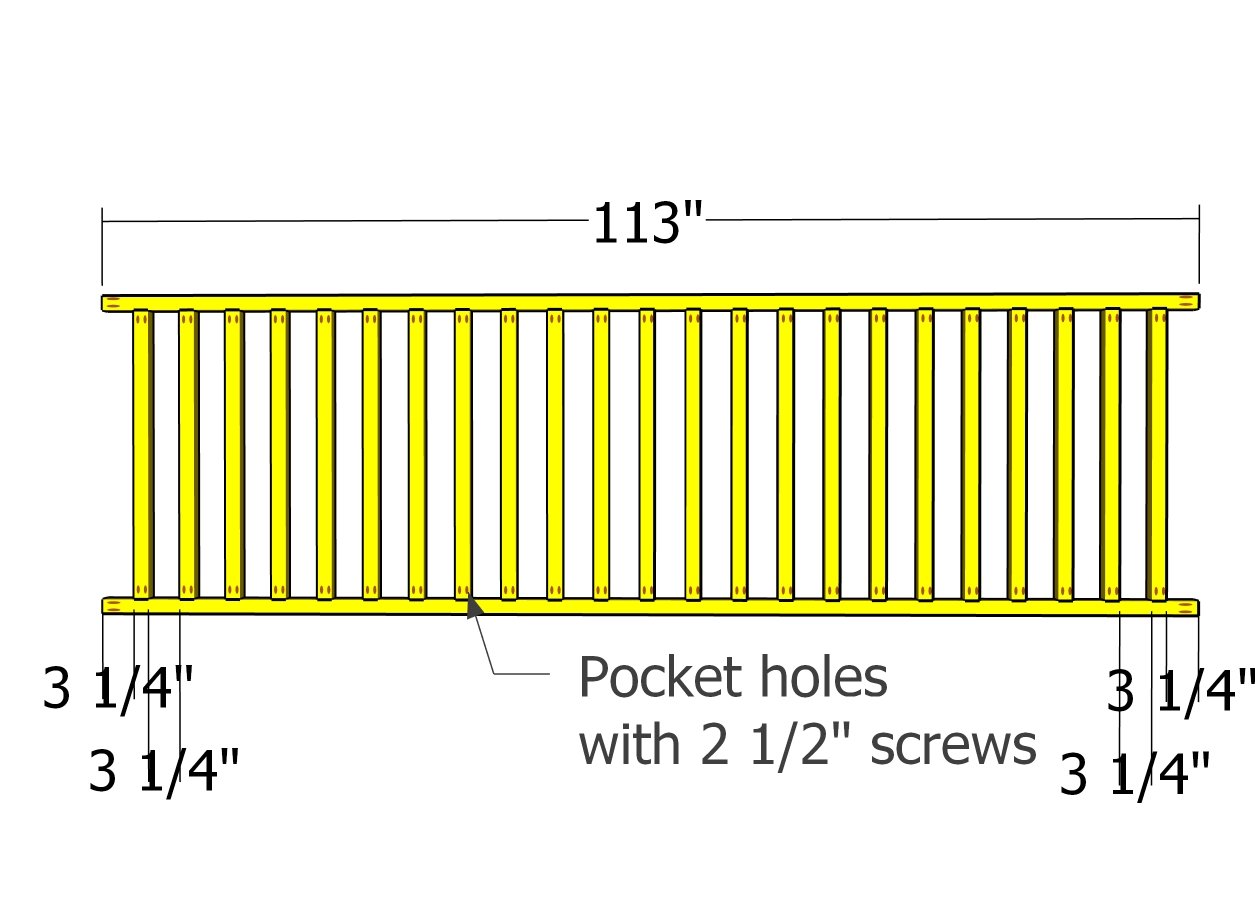
Assembling the back railings
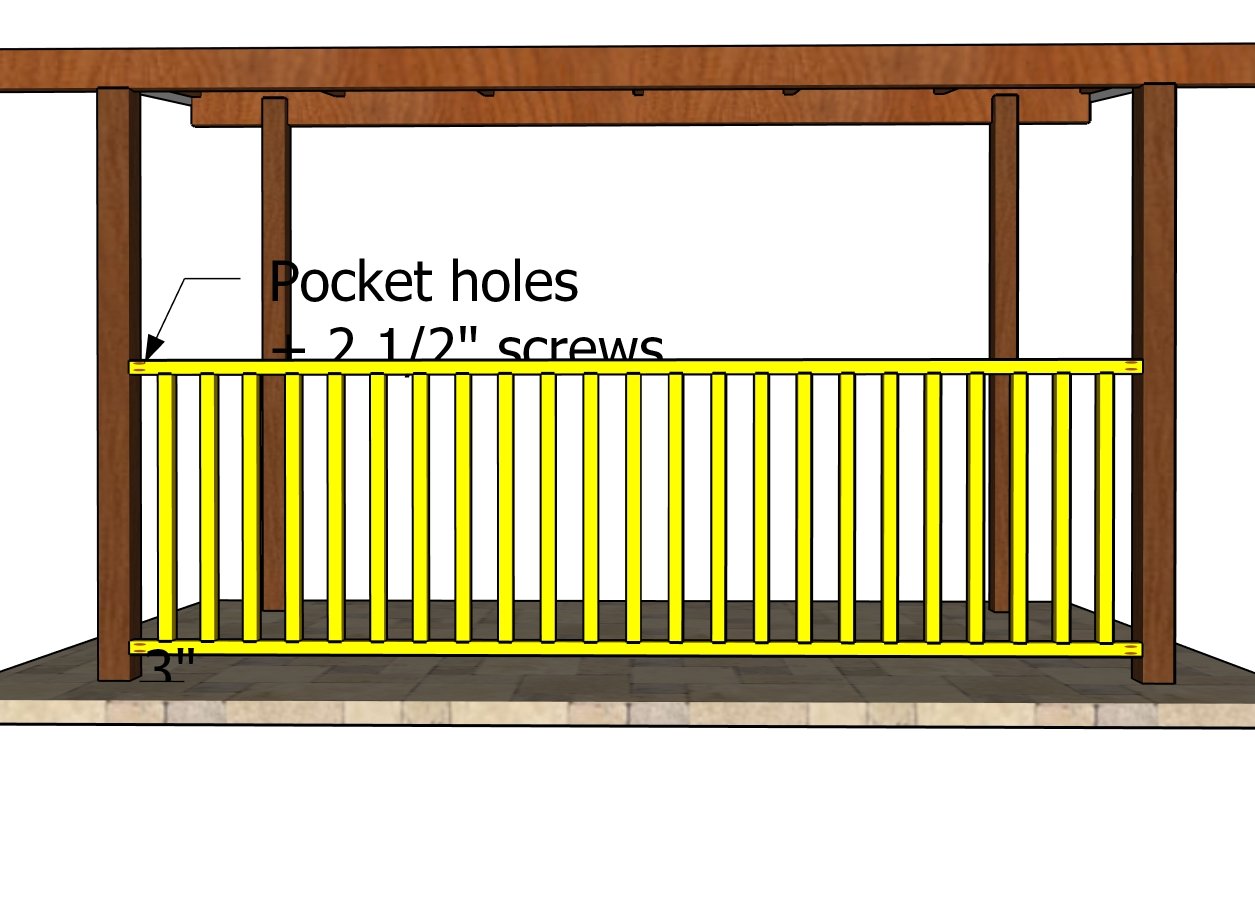
Back railings
When assembling the railings for our Grill Gazebo, we’ll be using 2x2s for a sleek and sturdy design. A great technique for connecting these rails cleanly and securely is by using pocket holes. This method not only simplifies the assembly process but also hides the screws for a more polished look.
Start by cutting your 2x2s to the desired lengths, ensuring each piece is precise for a uniform appearance. Using a pocket hole jig, drill angled holes at the ends of each railing piece. These holes allow you to drive screws diagonally into the frame or posts, creating a tight and almost invisible joint. As you attach each section, use clamps to hold the pieces in alignment and check for level before securing. This method not only streamlines the construction but enhances the gazebo’s overall aesthetics with clean lines and unobtrusive joints.
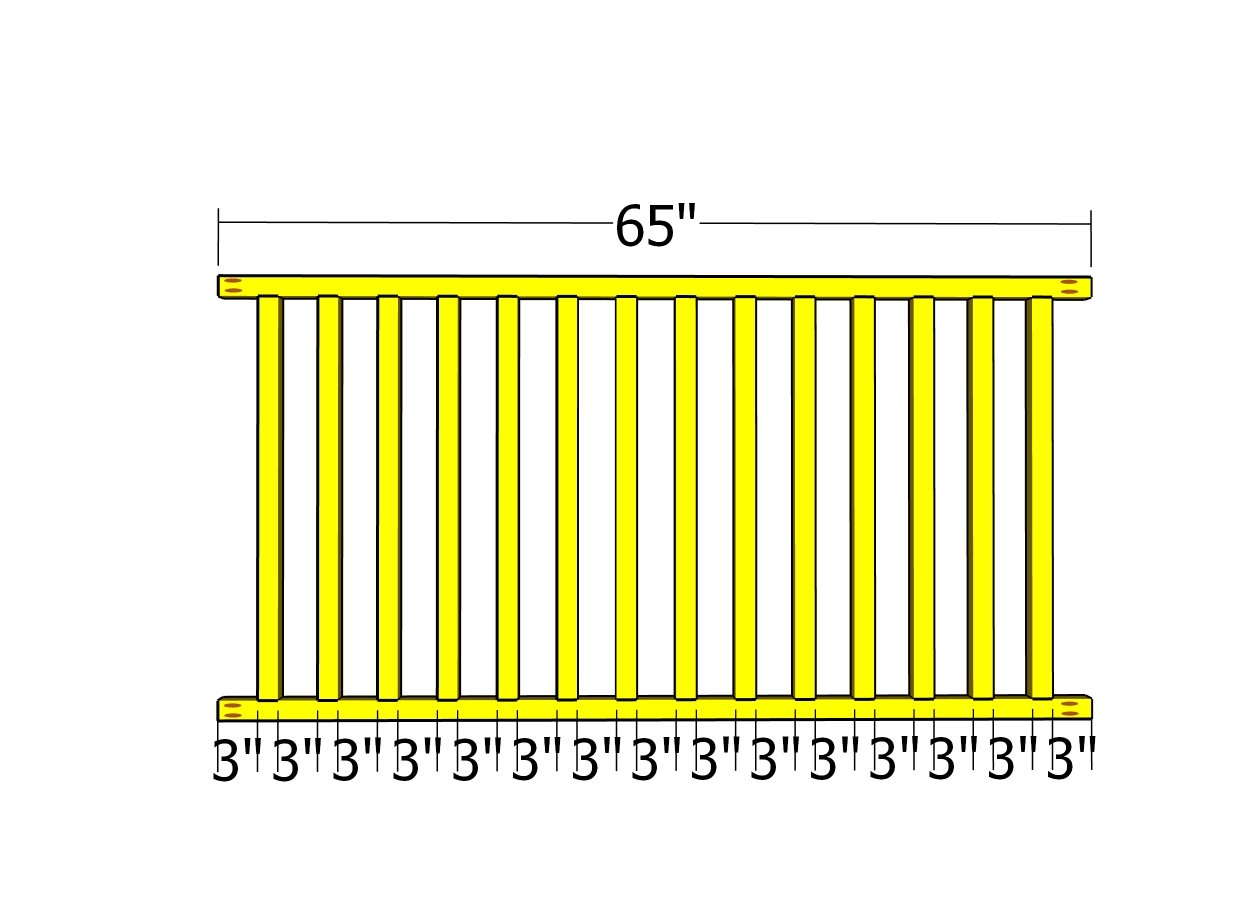
Side railings
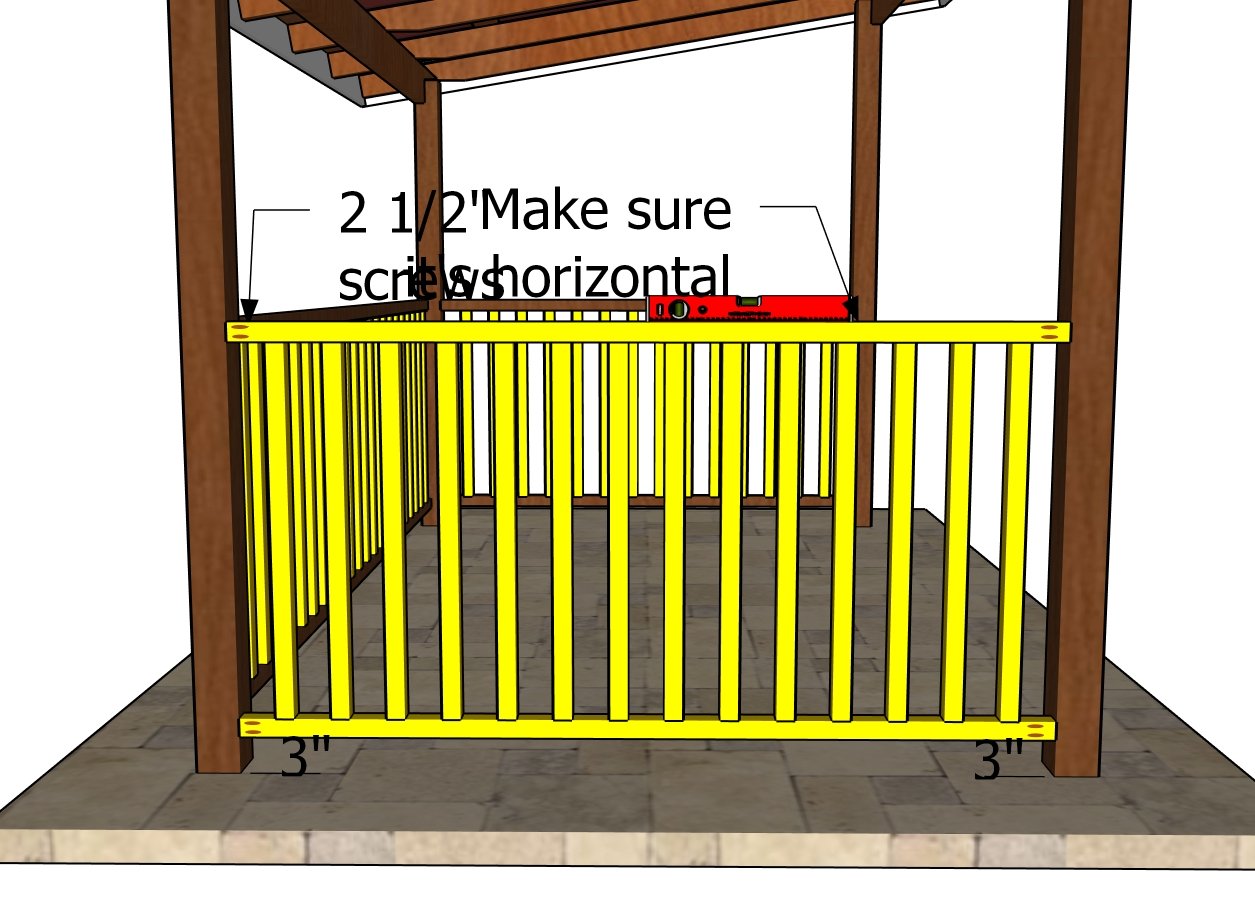
Fitting side railings
Use same techniques for the side panels.
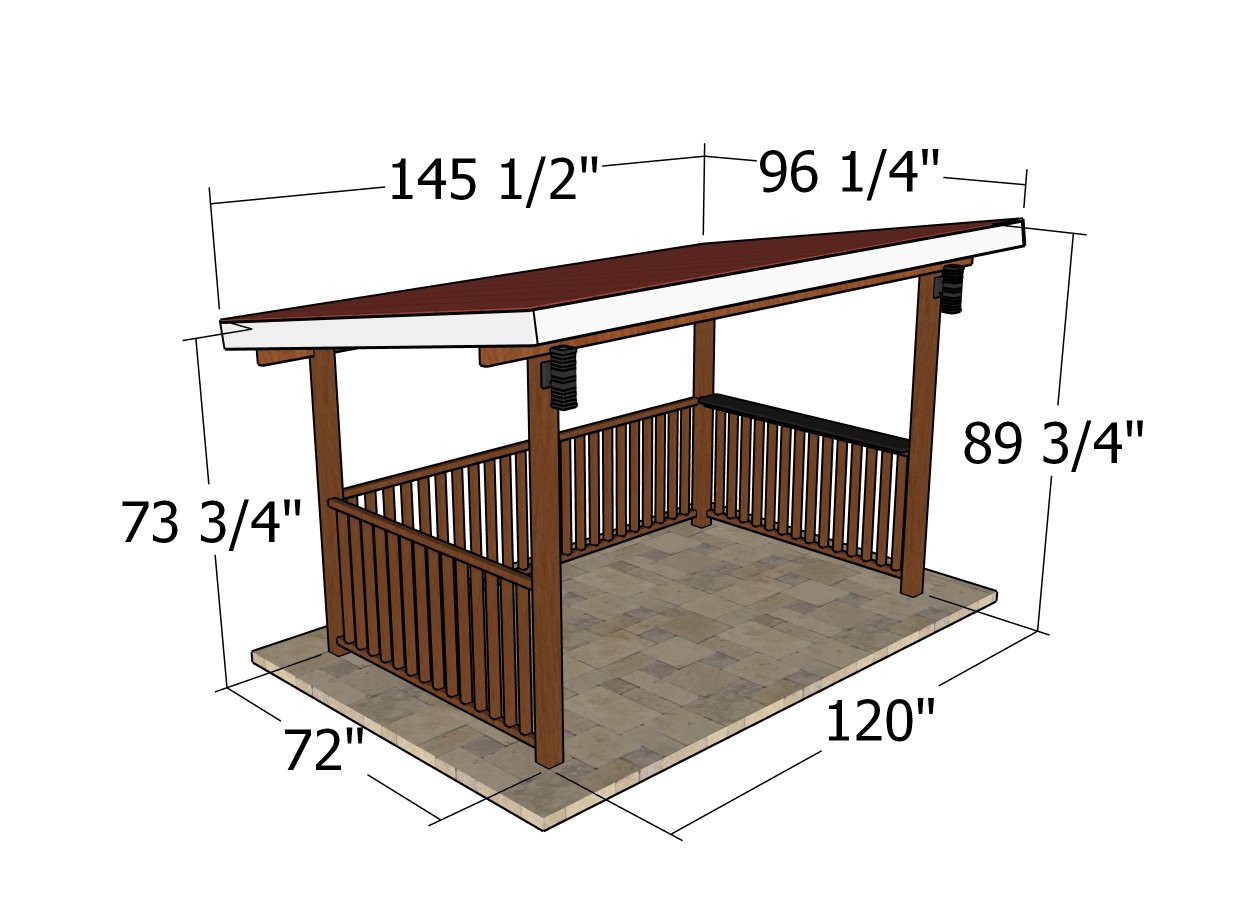
6×10 Grill Gazebo Plans – dimensions
To finish off our wooden pavilion, let’s start by giving all the surfaces a good sanding to knock down any rough patches and get everything super smooth. Next up, we’ll brush on a layer of weather-resistant stain or paint, which will not only protect our wood from the elements but also give it that slick look we’re going for.
Once that’s dry, it’s time to add any personal touches you want—maybe some decorative trim or lighting. Finally, we’ll do a detailed walk-around to make sure everything is solid and looks fantastic, because the last thing we want is any surprises down the line. This is how we make stuff that’s built to last and looks great too!
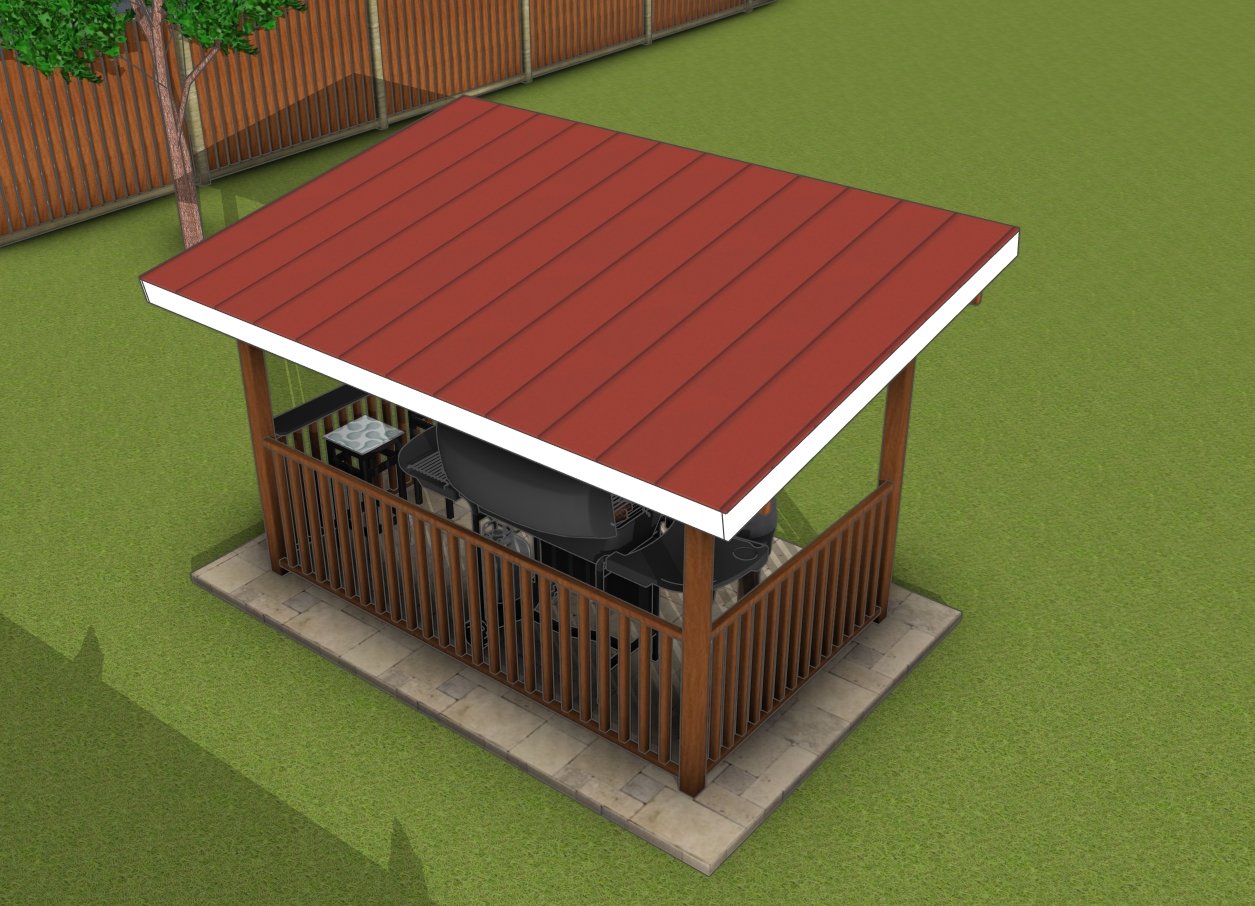
6×10 lean to – top view
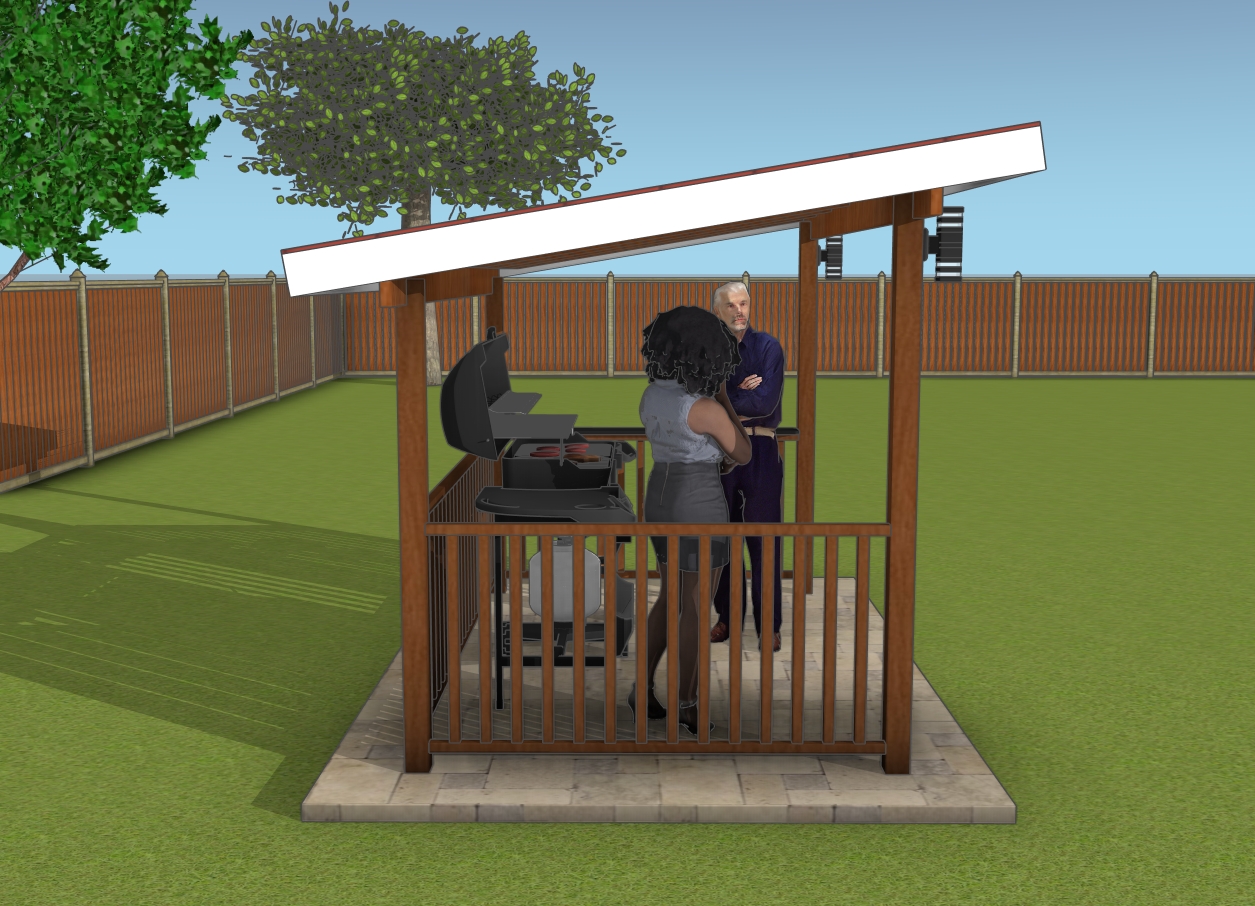
6×10 grill shelter – side view
This 6×10 four-post pavilion with a gable roof is all set! With everything sanded, stained, and secured, it’s ready to handle whatever the elements throw at it. This pavilion is perfect for outdoor dining, a cozy lounging area, or even a workspace for your projects. You can hang string lights, set up some comfy furniture, and enjoy your backyard in style.
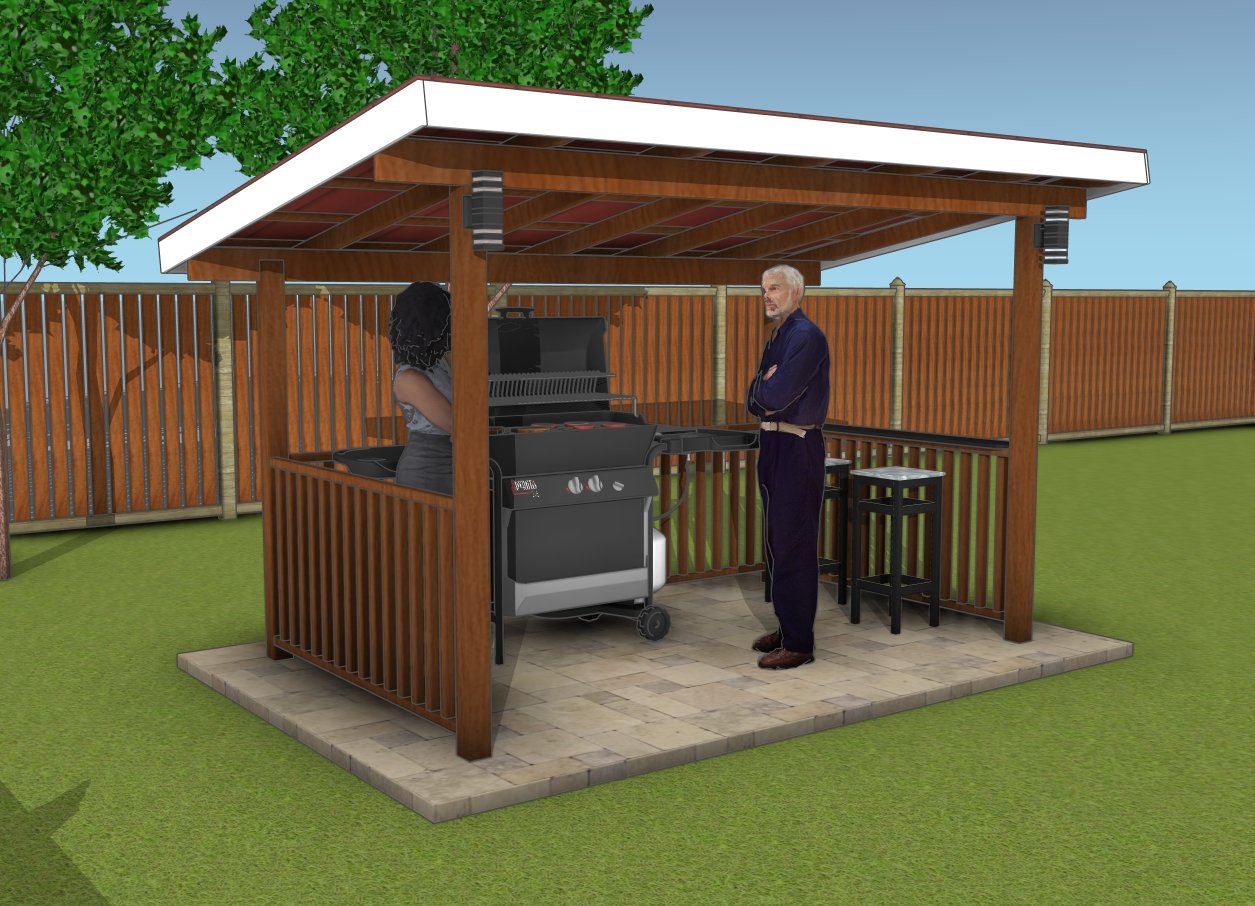
6×10 Grill gazebo plans
Our 6×10 four-post pavilion with that classic gable roof is now complete and ready to take on the great outdoors! After sanding down every surface, applying a tough, weather-resistant stain, and making sure each joint is rock solid, this pavilion is more than prepared for any weather.
It’s the perfect spot for outdoor dining, chilling out, or even tackling some projects. Plus, it’s ideal for covering a grill, keeping your barbecue station dry and ready no matter the forecast.
Go ahead and string up some lights, toss in some cozy chairs, and turn your backyard into a stylish retreat where you can really enjoy your surroundings. This is how we make a space that’s not just functional but a favorite hangout spot too!
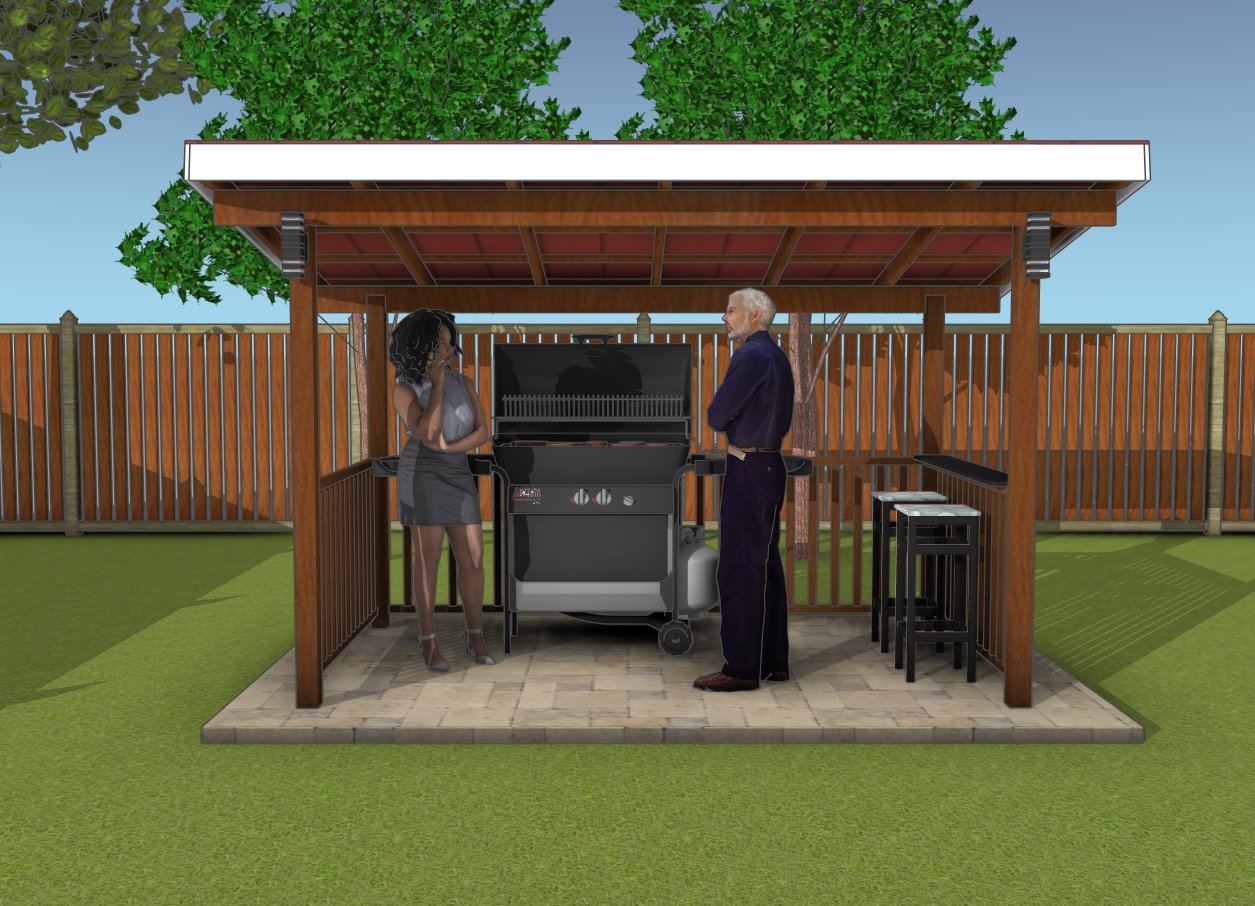
6×10 grill gazebo – front view
This pavilion project, with its detailed steps, creates a functional and attractive addition to any backyard or garden. It’s perfect for outdoor dining, relaxing, or even as a workspace. Follow along, and you’ll have a great-looking pavilion that enhances your outdoor space.
Thanks for checking out my 6×10 grill gazebo plans! Make sure to browse through my other projects for more awesome ideas. Don’t forget to hit that LIKE button and SHARE with your friends using the social media links below.
