There’s nothing more annoying than watching water slowly swirl around your sink or tub instead of draining like it’s supposed to. One second you’re brushing your teeth or rinsing dishes, and the next, you’re staring at a puddle that just won’t budge. At first, you think, Maybe it’ll go down in a second. But it doesn’t. It just sits there, mocking you. That’s when it hits you—you’ve got a clog.
Now, your first instinct might be to reach for a bottle of drain cleaner with a name that sounds like it could melt steel. Or maybe you’re tempted to text your local plumber and fork over a hundred bucks just to have water flowing again. But here’s the truth: you don’t need to panic, call in backup, or pour harsh chemicals down your pipes. Most clogged drains—especially the everyday kind—can be fixed with a few household tools, a little know-how, and a dose of DIY confidence.
Unclogging a drain at home is honestly one of the most approachable fixes out there. Whether you’re a first-time homeowner, a weekend warrior, or a renter just trying to avoid a landlord lecture, this is a repair that’s well within reach. And unlike plumbing jobs that require turning off water lines or sweating copper pipes, this one doesn’t need permits, plumbers, or pricey parts.
All you really need is a little time, a few tools you probably already have under your sink, and a willingness to get your hands (slightly) dirty. So let’s walk through exactly how to diagnose and fix a clogged drain—step by step—without breaking out your wallet or unleashing a bottle of corrosive cleaner that could do more harm than good. Once you’ve learned how to handle this yourself, you’ll be amazed at how empowering it feels. Your drain runs clear, your water flows freely, and you can say, Yeah, I fixed that. Let’s get to it.

First, Identify the Problem
Before you grab a tool or start pouring anything into the sink, it really pays to understand what’s happening behind the scenes. A clogged drain doesn’t appear out of nowhere—it’s usually the result of weeks (or even months) of gradual buildup from things we barely notice in our daily routines. In the kitchen, it’s often a sneaky mix of grease, food crumbs, oils, and bits of soap that cling to the inside of your pipes and slowly narrow the passage until water has to fight its way through. Even if you’re careful about what goes down the drain, traces of fat and food waste can still build up over time, especially if you rinse without running hot water afterward.
In the bathroom, the story’s a little different but just as familiar. Hair is the number one culprit, followed closely by soap scum, toothpaste residue, and products like shaving cream or conditioner that can create a sludgy layer inside your pipes. It doesn’t take much—just a few strands of hair binding with soap to form a net, and suddenly you’ve got yourself a slow drain that gets worse by the day. And let’s not even talk about what gets trapped in those old bathtub stoppers that rarely get cleaned. If it starts with a trickle and turns into a full-on standstill, you know something’s clinging to the walls of your plumbing.
Now, if the water drains slowly but still drains, you’re likely dealing with a partial clog—a buildup along the inside of the pipe that restricts but doesn’t completely block flow. That’s the easiest kind to deal with and usually responds well to simple DIY methods. But if the water refuses to move at all, or backs up the moment you turn on the faucet, the blockage might be more solid—or located in the trap, that U-shaped section of pipe under the sink designed to catch debris and block sewer gas.
The good news? Whether your clog is mild, messy, or somewhere in between, most of these problems can be fixed with just a few tools, a calm approach, and no need to call a professional. You don’t need plumbing experience—just a willingness to try and a little bit of patience. The solutions are simpler than you think, and you might be surprised how much power you have to solve this yourself.
Boiling Water: The Simplest Starting Point
This is the classic, old-school trick that still works wonders—and it’s as simple as it gets. If your kitchen sink is draining slowly and you suspect the culprit is grease or food residue, boiling water is your best friend. Over time, fats and oils from cooking—even tiny amounts—can coat the inside of your pipes. When those fats cool, they harden and stick, creating a slow, sticky mess that narrows the pipe. Pouring boiling water into the drain helps re-melt and loosen that buildup so it can wash away, restoring the flow.
To do this right, bring a full kettle or large pot of water to a rolling boil. Once it’s ready, slowly pour it into the drain in two or three stages, giving the hot water a chance to work its way down in between pours. Think of it like flushing out the pipes gently but effectively. If the water drains faster after the first round, great—go for a second pour just to clear out any lingering sludge.
This method is especially helpful for kitchen sinks, but it’s not a magic bullet for every clog. It won’t do much against tangled hair in a bathroom drain or a solid blockage in the trap, but as a first step in any unclogging effort, it’s always worth trying. It’s safe, free, chemical-free, and sometimes all it takes to get things moving again. Even if it doesn’t solve the problem entirely, it can loosen things up enough to make your next move—like plunging or snaking—way more effective. So don’t underestimate the power of hot water. It’s the most basic DIY fix out there, and more often than not, it earns its keep.
Baking Soda and Vinegar: A Natural One-Two Punch
This method is one of the most popular DIY drain fixes for a reason—it’s chemical-free, budget-friendly, and surprisingly effective on partial clogs or drains that just smell a little… off. If you’re dealing with buildup that isn’t fully blocking the pipe yet, or you’re trying to freshen up a musty sink, the baking soda and vinegar combo is a go-to that’s safe for your pipes and easy to do with stuff you probably already have in the pantry.
Start by pouring about half a cup of baking soda directly into the drain. Try to get it down the pipe and not just sitting at the top. If needed, use a small funnel or gently tap the pipe to help it fall in. Next, pour in one full cup of white vinegar. The moment the vinegar hits the baking soda, you’ll hear fizzing and bubbling—that’s the natural chemical reaction kicking into gear, breaking down gunk like soap scum, residue from toothpaste, light grease, and organic matter lining the inside of the pipe.
Now here’s a pro tip: once the fizzing starts, plug the drain with a rubber stopper or even a damp rag. This helps push the reaction deeper into the pipe rather than letting the bubbles escape straight up. Let the mixture sit for at least 15 minutes—30 is even better if you’ve got the time. This gives the ingredients time to do their work loosening buildup and neutralizing odors.
Once the timer’s up, pour a kettle of freshly boiled water down the drain to flush everything away. The hot water helps wash out the loosened debris and gives your drain a clean finish. In many cases, this method is enough to completely clear a slow drain or eliminate lingering smells caused by bacterial growth.
While it might not tackle heavy-duty clogs like a solid mass of hair or deep food blockages, it’s a fantastic maintenance trick—and one you can safely repeat every few weeks to keep your drains flowing and smelling fresh. Think of it as a natural reset button for your pipes.

Use a Plunger the Right Way
Most people think of plungers as strictly a toilet tool, but the humble cup plunger is actually one of the most underrated weapons in your home repair arsenal—and yes, it works just as well on sinks, tubs, and even floor drains. The key to success lies in creating the right seal and using a little bit of strategy to focus the pressure where you need it most.
Let’s start with the setup. If you’re plunging a bathroom sink, you’ll notice a small hole near the top of the basin—that’s the overflow. If you leave it open, all that air pressure you’re trying to generate will escape right through it. So before you plunge, grab a wet rag and firmly stuff it into the overflow hole to create a tight seal. If you’re working on a kitchen sink with two basins, you’ll want to block the second drain in the same way—use a rubber stopper, a wet cloth, or even a plunger flipped upside down. You want all the pressure directed into the clogged line, not leaking out the other side.
Once you’ve sealed off the escape routes, place your plunger directly over the drain and press down gently to expel any trapped air. Then, give several short, strong pumps while keeping the plunger firmly pressed against the surface. You’re not trying to force water through—you’re building pressure that loosens and dislodges the blockage inside the pipe.
With a good seal and a strong rhythm, you might hear a satisfying gurgle or see water suddenly rush down the drain. That’s your signal that the clog has broken free. In some cases, it may take a couple rounds of plunging, especially if the clog is stubborn or sticky. But more often than not, this simple method is enough to clear up everyday slow drains caused by food bits, soap scum, or even a light hairball. It’s quick, it’s effective, and best of all—it doesn’t cost a dime if you already have a plunger on hand. Just remember to clean your plunger after use, especially if it’s been doubling duty between sinks and toilets. (Trust me—get a separate one for each if you can.)
Hair Removal Tools (Yes, They’re Cheap and Worth It)
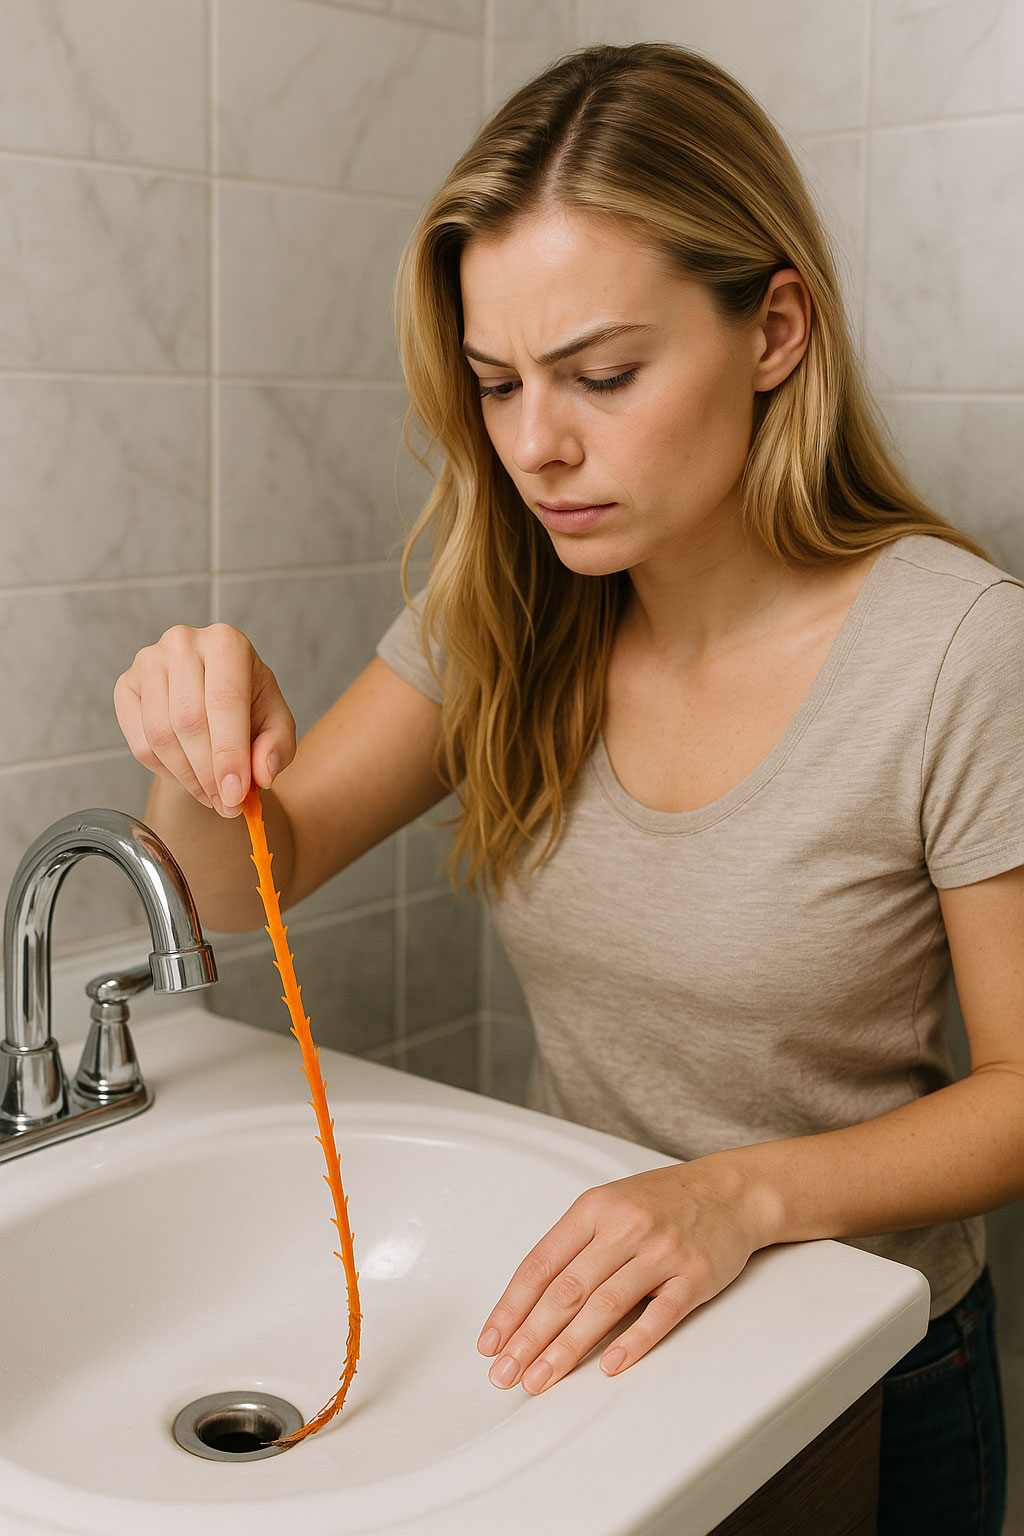
If your bathroom drain has been getting slower by the day—especially in the shower or tub—chances are, the problem isn’t far down the line. It’s probably hair, plain and simple. Between long strands, short stubble, and soapy buildup binding it all together, bathroom drains are practically designed to catch and clog over time. But the good news is, this is one of the easiest clogs to fix, and you don’t need to take anything apart to do it.
Instead of grabbing a wrench or removing the drain cover, reach for one of the most effective little tools in the DIY home fix world: a plastic drain snake, also called a hair removal tool or zip strip. These things are long, flat, flexible plastic strips with tiny barbs along the sides—and they’re absolute magic when it comes to pulling out hair clogs. Best of all, they’re cheap. You can pick one up at any hardware store or order a pack online for under $10.
To use it, just slide the tool down into the drain as far as it’ll go, wiggling a bit to navigate around curves or bends. Then slowly pull it back out. And here’s your warning: what you find on the end is going to be gross. It’s usually a slimy, tangled wad of hair, soap scum, and other mystery gunk that’s been building up for weeks—or longer. It’s not glamorous, but it is effective.
Once the clog’s out, run hot water down the drain for a full minute or two to flush everything clean. You’ll usually notice an immediate difference—the water drains faster, smoother, and without that annoying backup. And just like that, you’ve cleared the problem without tools, chemicals, or a single phone call to a plumber. This is one of those fixes that’s so satisfying you’ll wonder why you didn’t do it sooner. Honestly, it’s worth keeping one of these tools in your bathroom cabinet just for routine maintenance. A quick check every month or two can keep your shower running like new and save you from ever dealing with a full-on clog again.
Clean the P-Trap (The U-Shaped Pipe Under the Sink)
If you’ve tried all the above tricks—boiling water, baking soda and vinegar, plunging, and snaking—and that stubborn drain still isn’t cooperating, it’s time to go old-school and get your hands a little dirty. This is where we take a peek under the sink and check out the P-trap.
Now don’t let the name scare you off. The P-trap is simply the curved U-shaped section of pipe underneath your sink. Its job is to hold a small pool of water that blocks sewer gases from coming back up into your home. But because of its shape, it’s also the place where a lot of debris tends to settle—crumbs, hair, grease, and mystery gunk all find a home there. And over time, that stuff can build up to the point where water just can’t make it through efficiently.
Start by clearing out the cabinet under your sink and placing a small bucket or bowl directly beneath the trap to catch any water that might spill out. Then locate the two slip nuts—these are the plastic or metal rings on either end of the curved pipe. You can usually loosen them by hand, but if they’re stuck, a pair of adjustable pliers will do the trick. Once both nuts are loosened, gently remove the trap and let any trapped water or sludge drain into the bucket.
What comes out might surprise you. Food bits, hardened soap residue, pieces of sponge, chunks of grease—it’s like a time capsule of everything you’ve rinsed down that drain for the past year. Use a bottle brush, old toothbrush, or even a flexible cleaning tool to scrub the inside of the pipe thoroughly. Rinse everything out with hot water, and while you’re at it, give the connecting pipes a quick wipe too.
Before you reassemble, check that the rubber gaskets are seated properly in the slip joints. These are what create a watertight seal once everything’s tightened back up. Carefully slide the trap back into position and hand-tighten the slip nuts. You don’t need to crank them down hard—just snug enough to prevent leaks. Once it’s back in place, run hot water for a couple of minutes and keep an eye underneath to make sure nothing is dripping.
If all went well—and it usually does—you’ll hear that beautiful whoosh of a drain working like it’s supposed to. It’s a satisfying fix, one that gives you a sense of real accomplishment. Plus, now you know how to clean your P-trap anytime things slow down again, and that’s a skill most homeowners wish they had sooner.
What NOT to Do
One of the biggest mistakes homeowners make—especially when faced with a stubborn clog and a bit of panic—is reaching straight for a harsh chemical drain cleaner. It’s easy to see why. Those brightly labeled bottles promise fast results with zero effort, and when water won’t drain, that’s incredibly tempting. But here’s the truth: while chemical cleaners can work, they come with a long list of downsides that often do more harm than good—especially in the long run.
Most of these products, like the well-known Drano or Liquid-Plumr, rely on heavy-duty chemicals like sodium hydroxide (lye) that create intense heat as they react with the clog. That heat is designed to break down grease, soap, hair, and other organic material—but it doesn’t discriminate. It can also weaken PVC piping, crack older metal joints, and even melt plastic components in traps or seals if used frequently or left to sit too long. And if your home uses a septic system, these products can disrupt the natural bacteria your system relies on, leading to bigger issues down the road.
Beyond that, chemical drain cleaners pose a serious safety risk. When mixed with other household products—even unintentionally—they can release toxic fumes or trigger dangerous chemical reactions. If you’ve already tried vinegar or another cleaner and then add a chemical solution on top of that, you could end up creating more than just bubbles. Plus, if the chemical fails to clear the clog and you eventually need to open the drain manually, you’re now dealing with highly caustic liquid trapped inside your pipes—making a routine fix hazardous to your health and your tools.
That’s why it’s always smarter to start with mechanical or natural methods first—like boiling water, baking soda and vinegar, a drain snake, or simply cleaning the P-trap. These approaches are not only safer and easier on your plumbing, but they’re also better for the environment and your indoor air quality. Most minor clogs don’t require a chemical sledgehammer—just a little patience and the right hands-on technique. In short: skip the quick fix in a bottle and stick with the methods that are tough on clogs but gentle on your home. Your pipes—and your peace of mind—will thank you.
When to Call a Pro
There are times when a clog is just too deep or stubborn for DIY solutions. If you’ve tried boiling water, plunging, cleaning the trap, and even snaking—and nothing’s working—it could be a bigger issue in the main drain line or even the venting system. If multiple drains in your house are backing up at once, or you’re dealing with raw sewage coming up, call a licensed plumber immediately. That’s a job for pros with the right equipment.
Wrap-Up: You Can Totally Do This
Unclogging a drain doesn’t require fancy tools, expensive equipment, or a plumbing degree—just a bit of confidence, some everyday items, and the mindset to roll up your sleeves and take control of the problem. You’d be surprised how often people assume a slow drain means calling in a pro, when in reality, most clogs can be cleared up in less than an hour with zero specialized experience.
Whether you’re pouring boiling water to melt away grease, fizzing out buildup with baking soda and vinegar, fishing out a hairy mess with a drain snake, or giving your P-trap a good clean, these solutions are all within reach. They’re simple, safe, and don’t involve anything more complicated than a kettle, a pair of gloves, or a \$5 plastic tool from the hardware store. Best of all, they work—and the feeling of watching water drain properly again is genuinely satisfying.
So the next time your tub fills up halfway through your shower, or your kitchen sink starts to smell like last week’s dinner, don’t default to panic or pricey chemicals. Skip the plumber. Trust your instincts. Take the DIY route and fix it yourself. Because when you handle your own repairs—even the messy ones—you’re not just solving a problem; you’re learning something new and proving to yourself that you’ve got what it takes. And that’s a win every homeowner should experience.