This diy step by step diy project is about how to build a herb planter box with chalkboard faces. This week’s project is about building this basic planter box that can be used for your kitchen herbs or for decor. If you want to learn more about building a pretty planter box out of wood, pay attention to the detailed instructions shown in this tutorial. I managed to build this diy wood rack under 5 $, using common materials and tools.
You should always plan everything from the very beginning, in order to prevent costly mistakes and to save time. If this is your first project, you should read the instructions with attention. Invest in high quality lumber and plywood, as the components will be exposed to bad weather. Protect the components with appropriate paint or stain. You can use the plant stand indoor, as well.
There are a few tips that you should take into account, if you want to get a professional result. Therefore, take accurate measurements and use professional tools when making the cuts or when drilling pilot holes. Align the components at both ends and add waterproof glue to the joints, if you want to create a rigid structure.
Made from this plan
It’s that easy to build a herb planter!
Building a herb planter box

Building a herb planter box
Materials
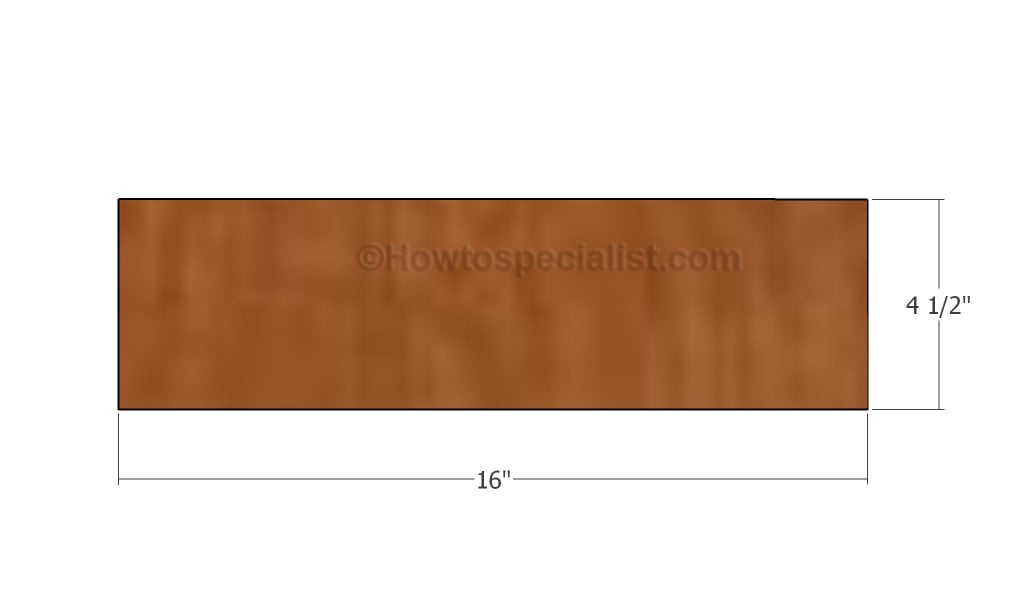
- A – 2 pieces of 1×6 lumber (4 1/2″ wide) – 16″ long, 2 pieces – 3 3/4″ long BOX
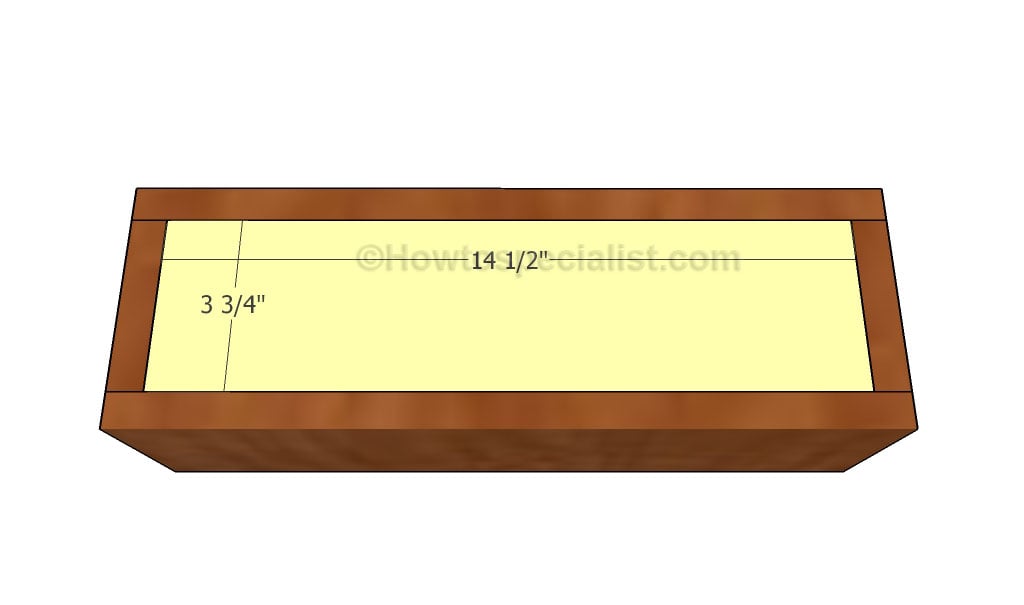
- B – 1 piece of 1×6 lumber (4 1/2″ wide) – 14 1/2″ long BOTTOM
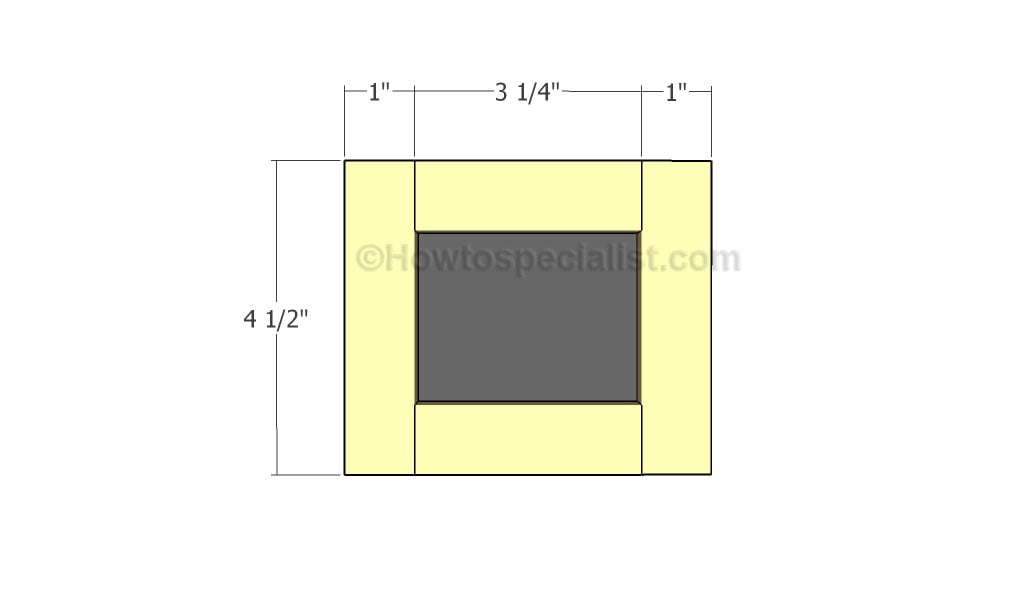
- C – 4 pieces of 1/4″ x 1″ lumber – 3 1/4″ long, 4 pieces – 15″ long, 8 pieces – 4 1/2″ long TRIMS
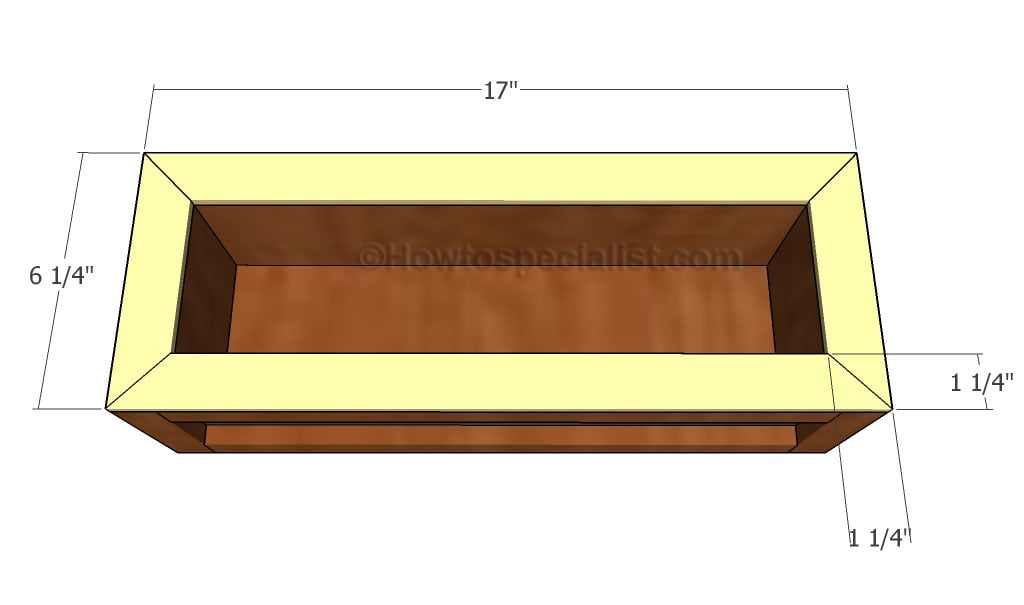
- D – 2 pieces of 1×2 trims (1/4″ thick) – 17″ long, 2 pieces – 6 1/4″ long TOP TRIMS
- 1 piece of 1×6 lumber – 8 ft
- 1 piece of 1×2 lumber – 6 ft (1/4″ thick)
- 20 pieces of 1 1/4″ screws
- glue, stain, chalk paint
Tools
- Safety gloves, glasses
- Miter saw, jigsaw, pocket hole jig
- Chalk line, tape measure, spirit level, carpentry pencil
- Drill machinery and drill bits
Tips
- Use a good miter saw to make the angle cuts
- Drill pilot holes before inserting the screws
Time
- One Day
Related
Herb planter box plans
Building the front and back faces
Build the faces for the planter box from 1×6 lumber. Use a saw to adjust the width of the slats to 4 1/2″.

Assembling the herb box
Next, you need to build the sides of the planter box. Cut the components from 1×6 slats. Assemble the planter box together and lock the components together with 1 1/4″ brad nails and glue. Make sure the corners are square and the edges are flush.
Attaching the bottom
Build the bottom for the planter and fit it to the frame of the box. Make sure the edges are flush and insert 1 1/4″ finishing nails. Add glue to the joints and make sure there are no gaps between the components. Apply chalkboard paint over the exterior of the planter box.
Fitting the side trims
Fit 1/4″ thick strips of wood to the sides of the planter box. Use glue and 3/4″ brad nails to lock them into place.

Fitting the front trims
Fit the strips of wood to the front and back faces of the planter box. Align everything with attention for a professional result.
Fitting the top trims
Fit the top trims to the planter box, as shown in the image. The top trims should have both ends cut at 45 degrees. Use 1 1/4″ or 1 1/4″ wide pieces for the top trims.
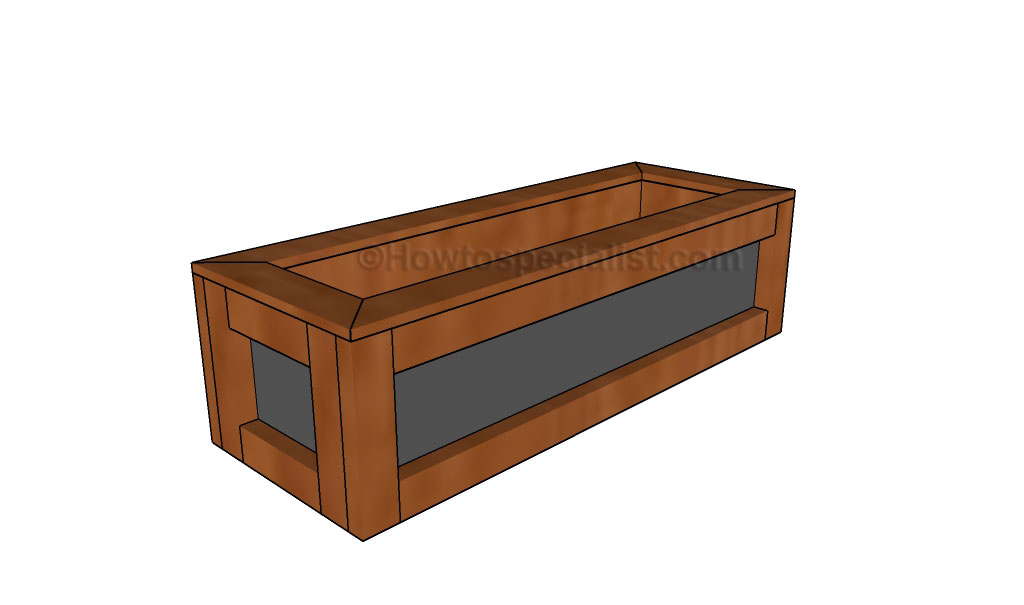
Herb planter plans
Fill the holes with wood putty. Smooth the edges with 120-200 grit sandpaper and remove the residues before staining the components.
How to build a herb planter box

Cutting-the-components
First of all, I cut all the boards to size. Remember that you can adjust the dimensions to suit your needs. Smooth the cut edges with sandpaper and remove the residues.

Assembling-the-planter-box
Add glue to the joints and insert 1 1/4″ nails to lock the components together. I align the edges till they were perfectly flush one with another.

Planter-Box
I fitted the rest of the components and built the frame of the planter box. The corners are square and there are no gaps between the components.

Fitting-the-bottom-of-the-planter-box
I attached the bottom to the wooden box. I made sure the edges were flush.

Inserting-the-screws
I drilled pilot holes through the planter box and inserted 1 1/4″ screws into the bottom slat to create a rigid structure.

Herb-Planter-Box
The herb planter box looks pretty nice so far. No major gaps between the components.

Applying-the-chalkboard-paint
I applied chalkboard paint over the exterior of the planter box. Two coats will cover the surface evenly.

Fitting-the-side-trims
Next, I attached the strips of wood to the sides of the herb planter. You can see in the image that the strips of wood cover the joints.

Fitting-the-rest-of-the-trims
Fit the wood strips to the front and back faces of the planter box. Use glue and 3/4″ brad nails to lock the pieces into place tightly. Leave no gaps between the components.

Attaching-the-top-trims
Cut both ends of the top trims at 45 degrees and fit them to the planter box, as shown in the image. Use glue and brad nails to lock the trims into place. Leave no gaps between the components for a professional result.

DIY-herb-planter-box
The planter box looks nice after fitting the top trims. Next, I will fit the handles to the box.

Drilling-pilot-holes
I drilled pilot holes through the sides of the planter box. Make sure the holes are large enough for the string to fit.

String-handles
Fit the string to the holes, creating a small loop.
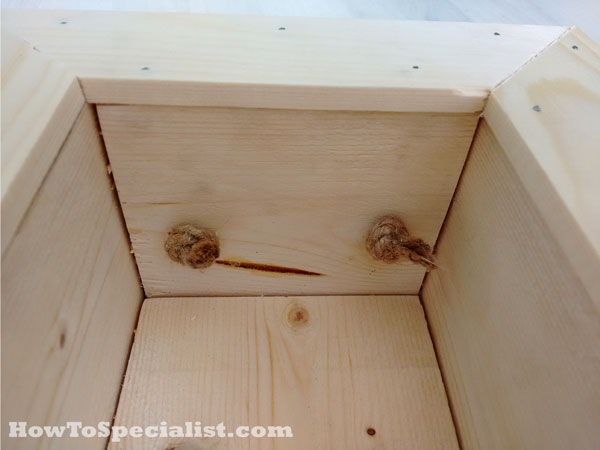
Handle-knots
On the other side of the planter box you need to make knots to the string. You can adjust the size of the handles to suit your needs.

DIY-planter-box-with-chalkboard-faces
This planter box can be also used as a decorative piece. It looks rustic and it is a great addition if you like the style.

Herb-planter-box-plans

Wood Planter

Herb planter
I hope you enjoyed this this step by step tutorial and you should take a look over the rest of my projects. I would love to hear your feedback and to see your pins, likes and shares. If you build this diy firewood rack don’t forget to send a few pics.
Thank you for reading our project about how to build a simple firewood shed and we recommend you to check out the rest of the projects. Don’t forget to SHARE and LIKE our projects with your friends, by using the social media widgets, if you want to help us keep adding free woodworking plans.
