This article is about how to tile a concrete floor. In this step by step guide we explain how to prepare the concrete sub-floor and the main techniques required to lay the ceramic floor, as to help you get the job done in a professional manner. In our case, we had to tile the stair hallway, but you can use these techniques to lay ceramic tile on any concrete floor. We purchased 8”x8” tiles, spacers and thinset, making sure their design and color match with the rest of the room.
First of all, you have to prepare the concrete surface, by removing the bumps and lumps with a large scraper. Use a 4′ level to check if the sub-floor is perfectly horizontal and pour a thin layer of self leveling screed if necessary. Look for cracks and fill them with thin-set, otherwise the cracks might enlarge in time and move the tiles from position. If necessary, clean the concrete floor with an appropriate cleaner, to remove the grease, dirt and other residues.
Vacuum the residues and the particles before starting the tile installation, as to make sure the thin-set will lock them to the concrete sub-floor. In addition, we recommend you to sprinkle water on the concrete surface before installing the ceramic tiles, to increase the bond of the adhesive.
When calculating the needed amount of tiles, you have to multiply the length with the width of the room and add 5-10 percent for cutting waste. From our experience, we can tell you that for regular-shaped large rooms you will waste less tiles, while for small room with a complex layout the chances are that you will have to make more cuts and therefore waste more materials.
Cutting the tiles represent an important task of your project, therefore you have to get familiarized with the tools and techniques. In order to obtain accurate cuts you can use either a tile cutter or a wet saw. Irrespective of your choice you should rehearse on a few tiles, as to get accustomed with cutting tiles properly. Plan the layout of the tiles from the very beginning. We recommend you to install the full tiles in the most visible areas, while the cut ones under radiators or other large items. You can use a chalk line to draw the reference line, as to make sure you install the tiles straight.
Made from this plan
Materials
- Ceramic tiles
- Tile spacers
- Adhesive for ceramic tiles
Tools
- Safety gloves, glasses
- Measuring tape, framing square, pencil
- Ceramic tile cutter, Tile nippers
- Notched trowel, Margin trowel, Bucket
Tips
- Spread the adhesive on small surfaces, otherwise it will get dried soon
- Use a level to check if the floor is horizontal
Time
- 6-8 hours for 100 ft2 / 10 m2
How to tile a concrete floor
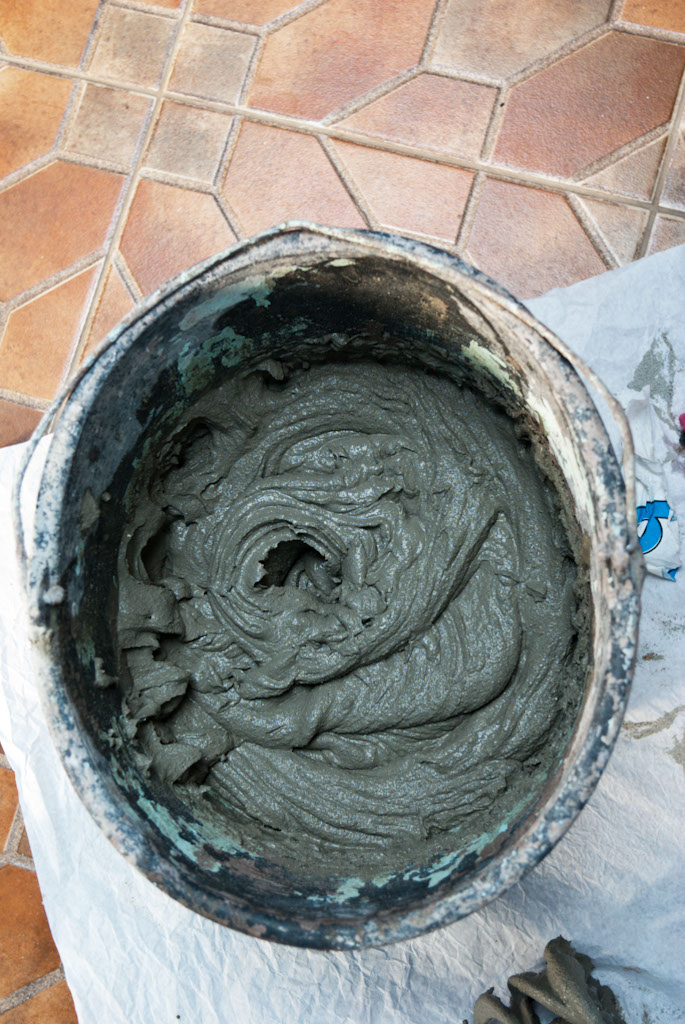
Thin-set
First, we have to mix thin-set in a clean bucket. Therefore, you have to fill one forth of the bucket with clean water and pour the thinset mortar (in this way we avoid creating dust). You can also use mastic adhesives but we recommend you to use a thin-set mortar, as it secures the tiles better and it is more resistant to water and moisture. Nevertheless, read carefully the instructions as to mix the adhesive properly.
Next, you have to leave the adhesive powder soak some water for at least 5 minutes, before mixing the compounds. In this way, the moisture will activate the components of the thinset mortar and it will glue the tiles properly. You can mix the adhesive manually, by using a margin trowel, or you can get the job done quicker with a power drill paddle. If you are using the drill machinery, you have to mix the compounds thoroughly at low speeds, as to prevent creating pockets of air into the mortar.
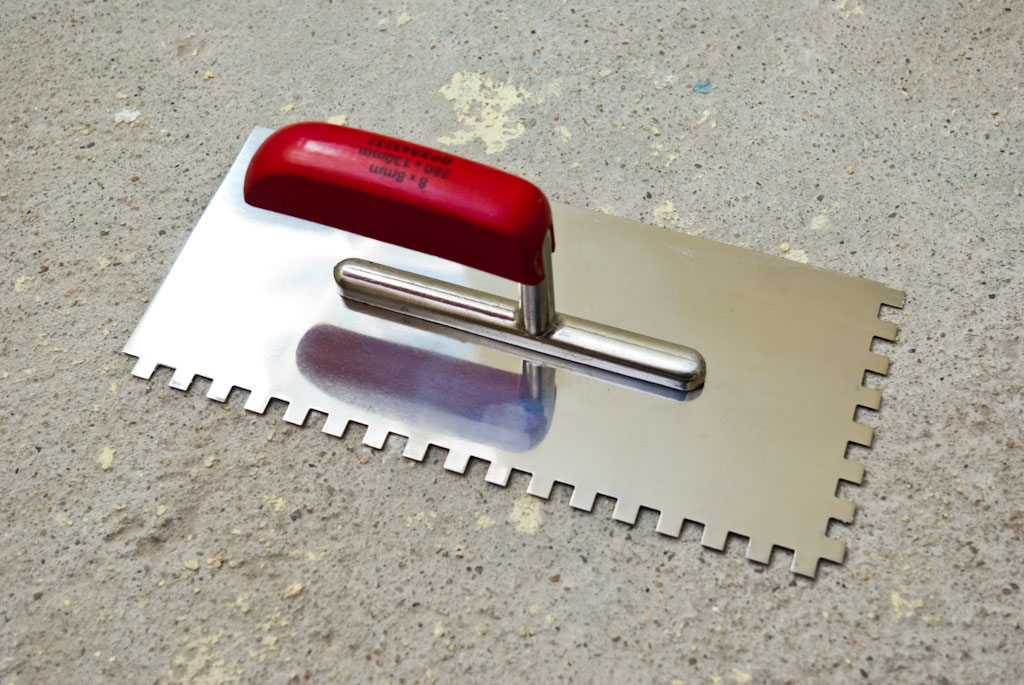
Notched float
Next, you have to use a notched trowel to spread the mortar on the concrete floor. This tool is very useful as it spreads the adhesive evenly on the hole surface, without putting too much effort.
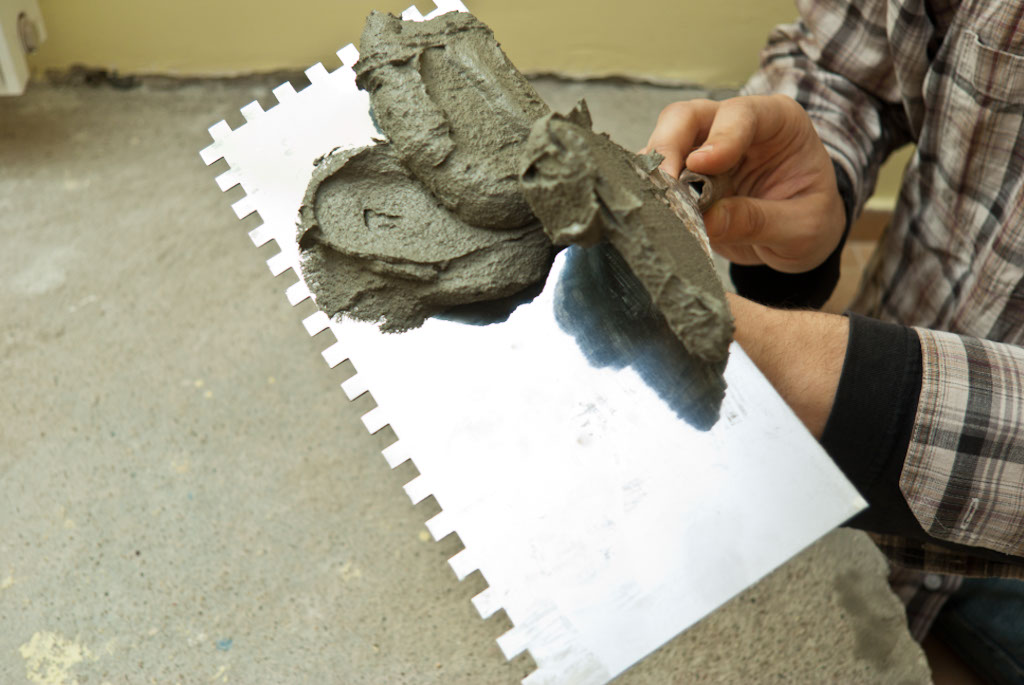
Loading adhesive on trowel
Use a putty knife or a margin trowel to load the compound on the notched trowel, as you can see in the image. Remember that you don’t have to add too much material, otherwise you won’t be able to lay it on the floor. If the thin-set doesn’t fall of the trowel it mean it has the right consistency. In addition, make sure the mortar is mixed properly and it doesn’t have lumps.

Spreading thinset on concrete floor
Next, you have to apply a thin layer of thin-set on the concrete floor, by using the straight edge of the trowel. In this way, you will fill the irregularities with mortar and get an even bed of adhesive. Make sure you spread the adhesive on a small area, otherwise it will get dry before you are able to install the tiles.

Combing tile adhesive
Next, you have to comb the adhesive with the notched side of the trowel. Make sure you hold the trowel firmly at about 45º, as to get an even bed of mortar.
The ridges shouldn’t have a certain direction, but you have to make sure the layer is as even as possible.
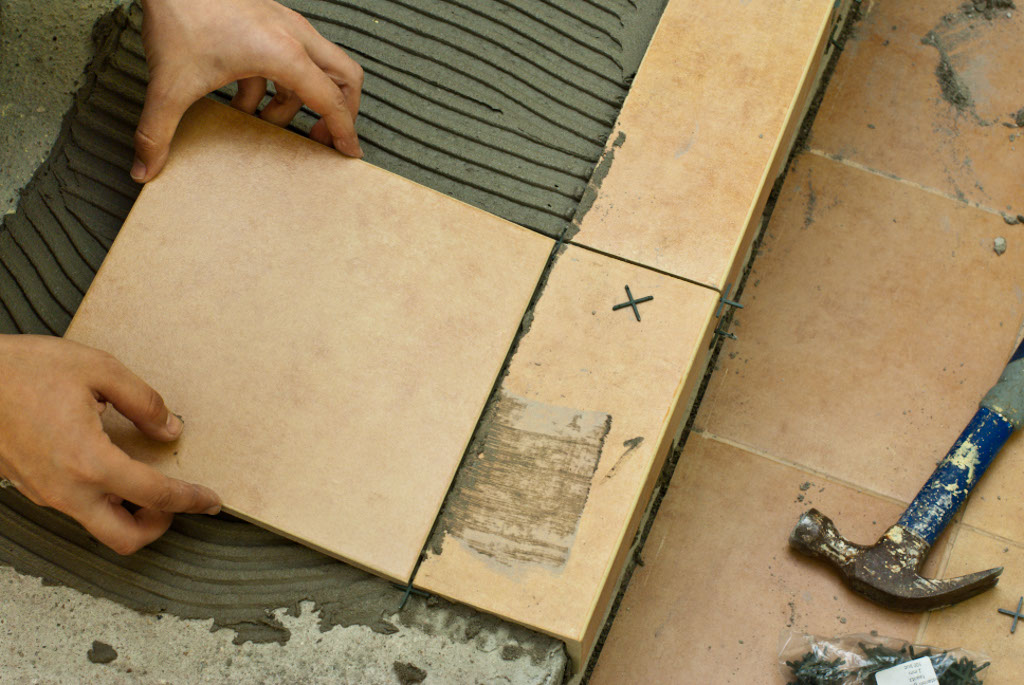
Tiling a concrete floor
Start setting the tiles with one corner of the room. In our case, we had to install them on a stair hallway, therefore we continued the existing layout.
In order to secure the tiles in the adhesive, you have to twist them lightly and add spacers around the corners. The spacers are useful in any ceramic tile project, as they help you be consistent with the gaps between the tiles. The spacers come in several sizes, so it’s up to you the ones you choose to use.
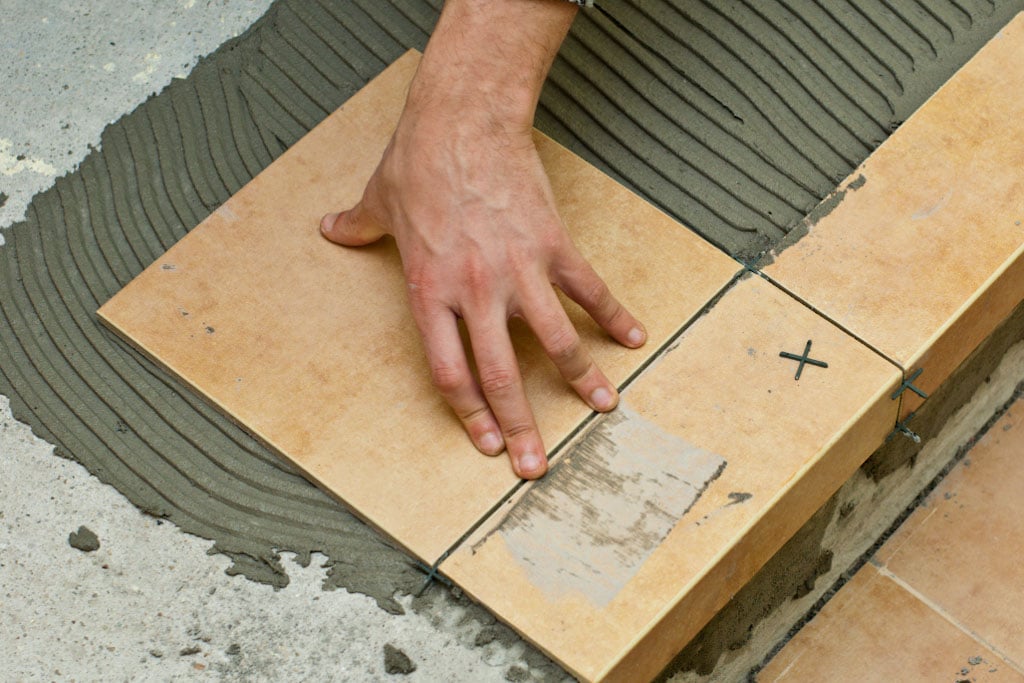
Setting tile flooring
Work with patience and make sure you set the spacers between the ceramic tiles. Make sure the tiles are aligned one with another and then tap them gently. If you don’t have experience in working with tiles, we recommend you to draw a reference line with a chalk line. The line will help you lay the tiles straight, especially in large rooms.
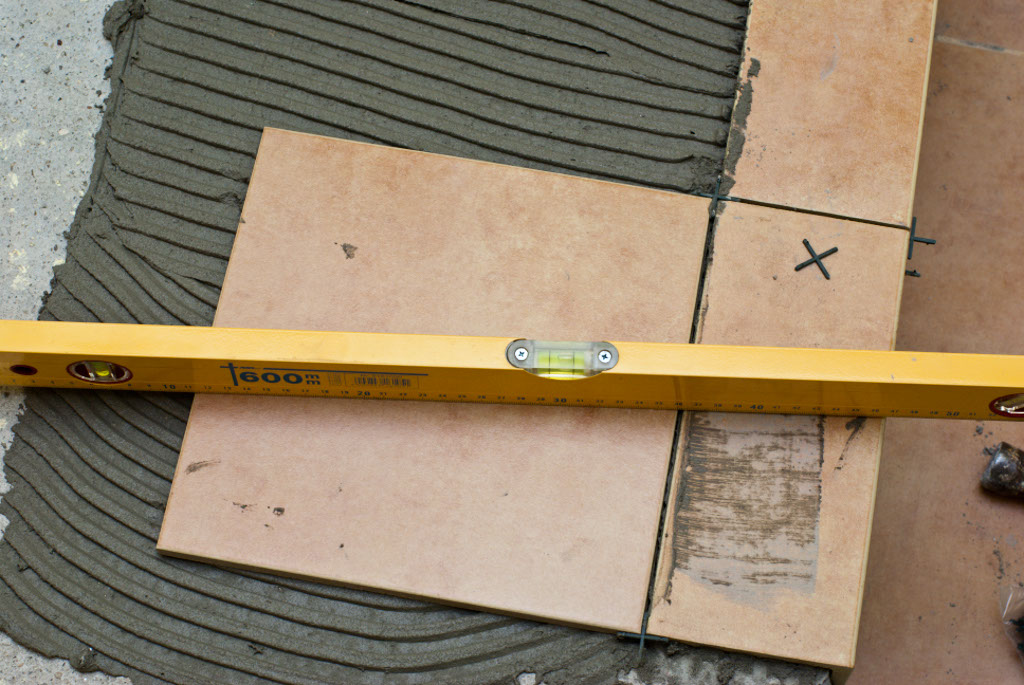
Leveling tile flooring
After you have installed a tile, you have to use a large level to make sure the floor is horizontal. Remember that you should use it regularly, otherwise you might have to remove the tiles and lay them again properly.

Using a mallet to set tiles
If the tiles are not level, you could use a rubber hammer to tap them gently. If you cannot solve the problem in this manner, you could have spread too much adhesive.
Therefore, light the tile from position with the edge of a trowel and remove the adhesive from the back of the tile and from the floor. Next, you have to spread the adhesive again, making sure it is even on the whole surface.
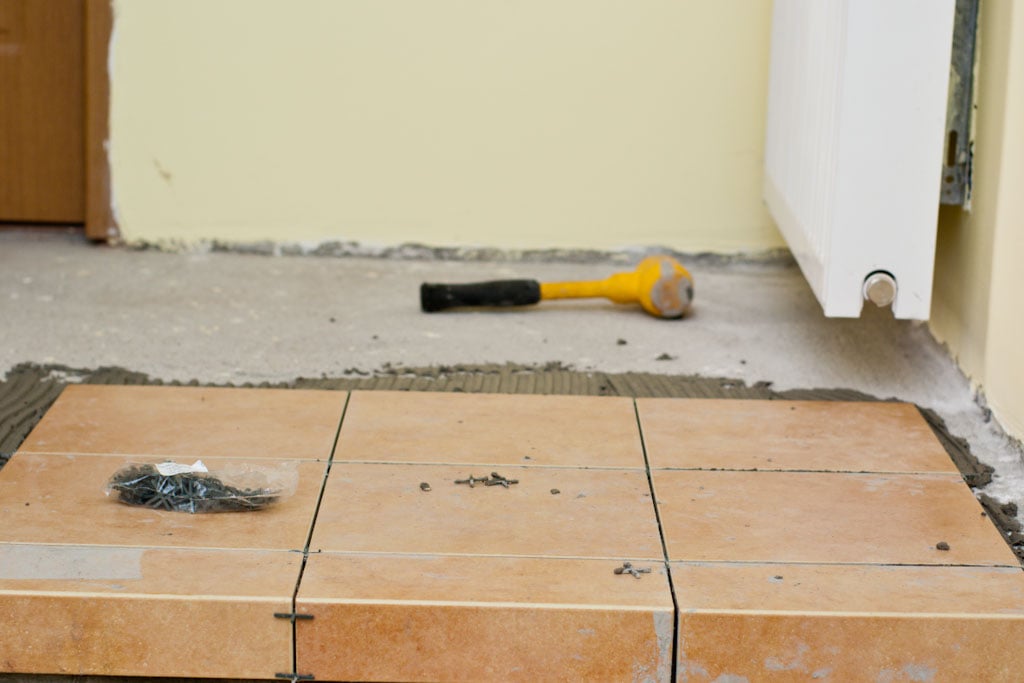
Installing tiles on a concrete floor
Continue laying the next tiles on the concrete floor, in the same manner as described above. Make sure you install spacers, as they keep the tiles aligned and help you get even gaps between the rows.
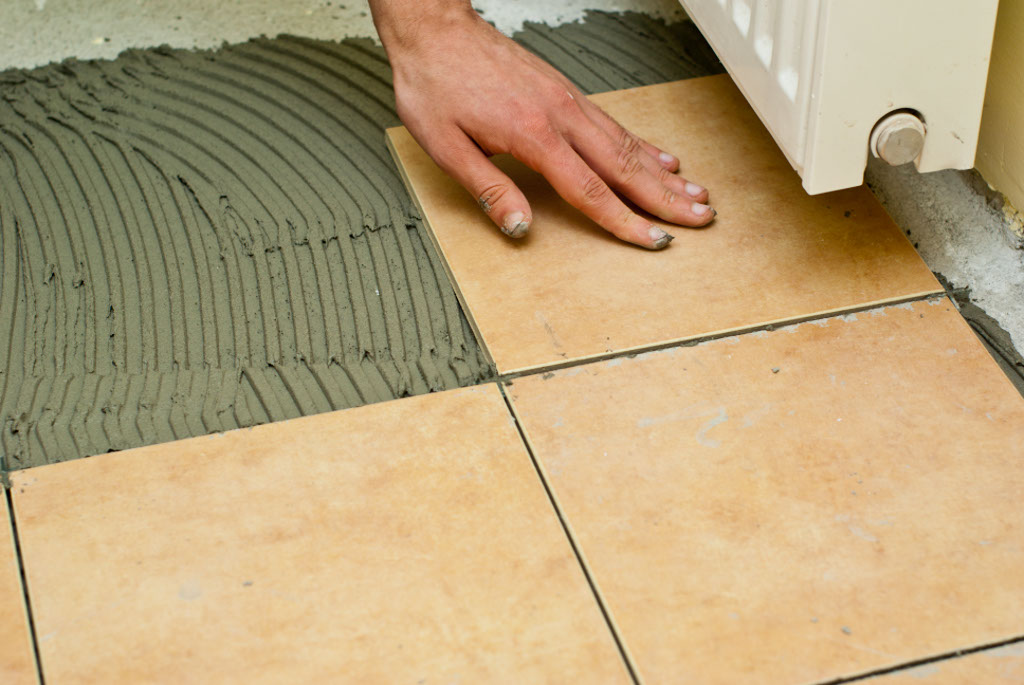
How to tile a concrete floor
Spread thin-set again on a small surface and lay the next tiles in the same manner described above. Work with patience and tap the tiles to lock them into position.
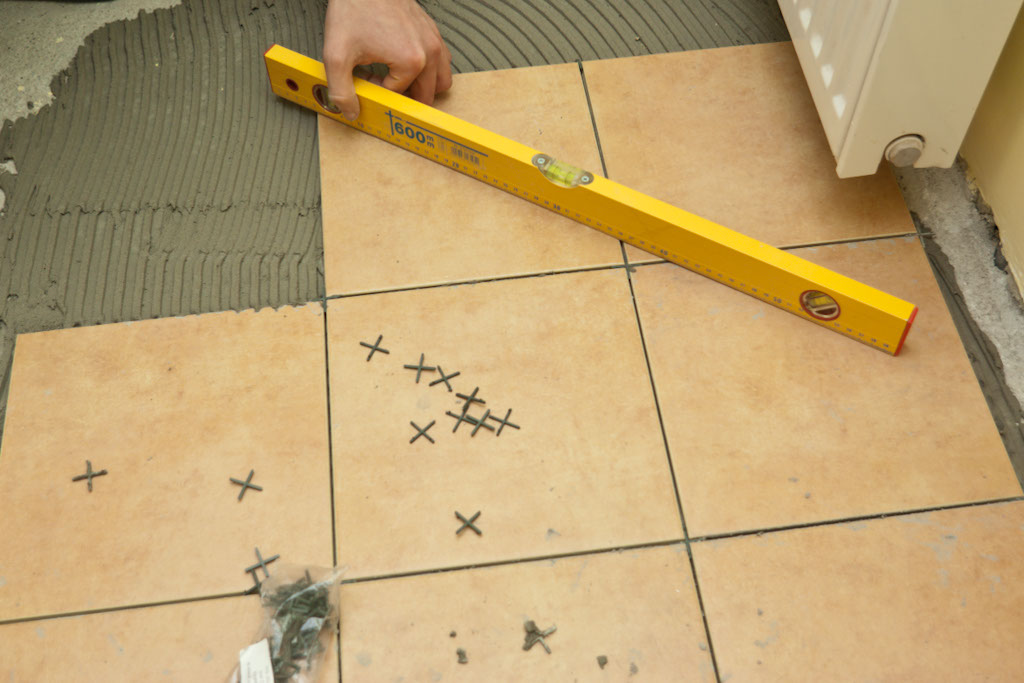
Making sure the tile flooring is level
Use the level to check the alignment of the tile flooring. If you have to tile a large room, you should start with the farthest corner of the room and lay them towards the entrance. In this manner you are able to tile the hole surface on a single day. In other cases, you might have to lay the tiles on half of the room in the first day and complete the project during the next day, after the surface has dried out so you can walk on it.
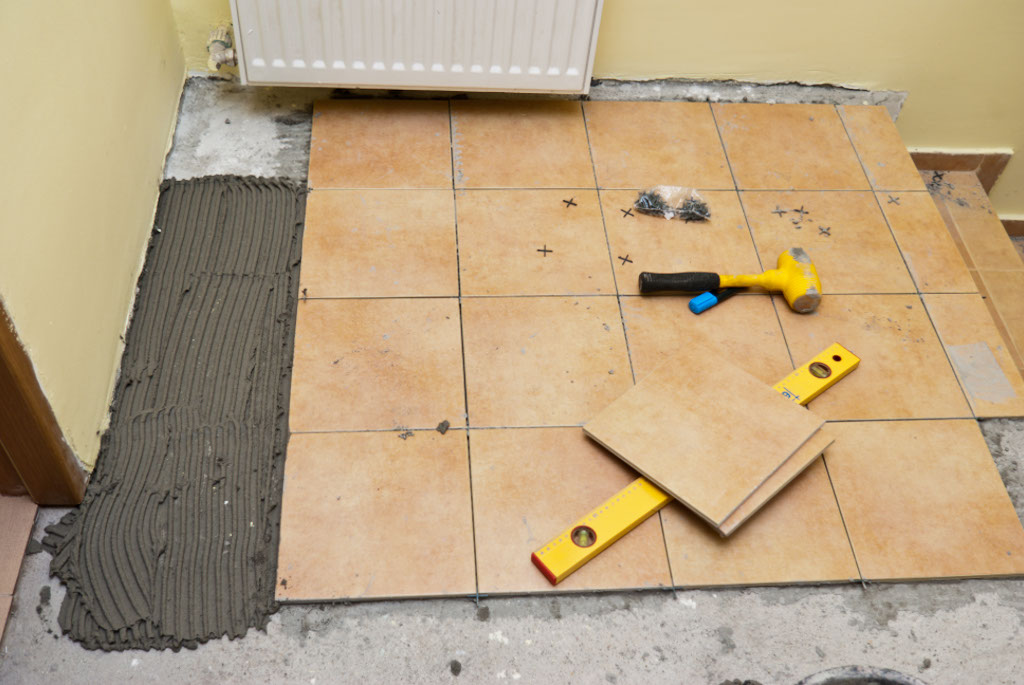
Setting tile along the wall
Next, we had to install tiles along the wall, as you can see in the image. Therefore, we use a tape measure to mark the cut line on the tiles. Afterwards, we have spread thin-set on the area, using the notched trowel.
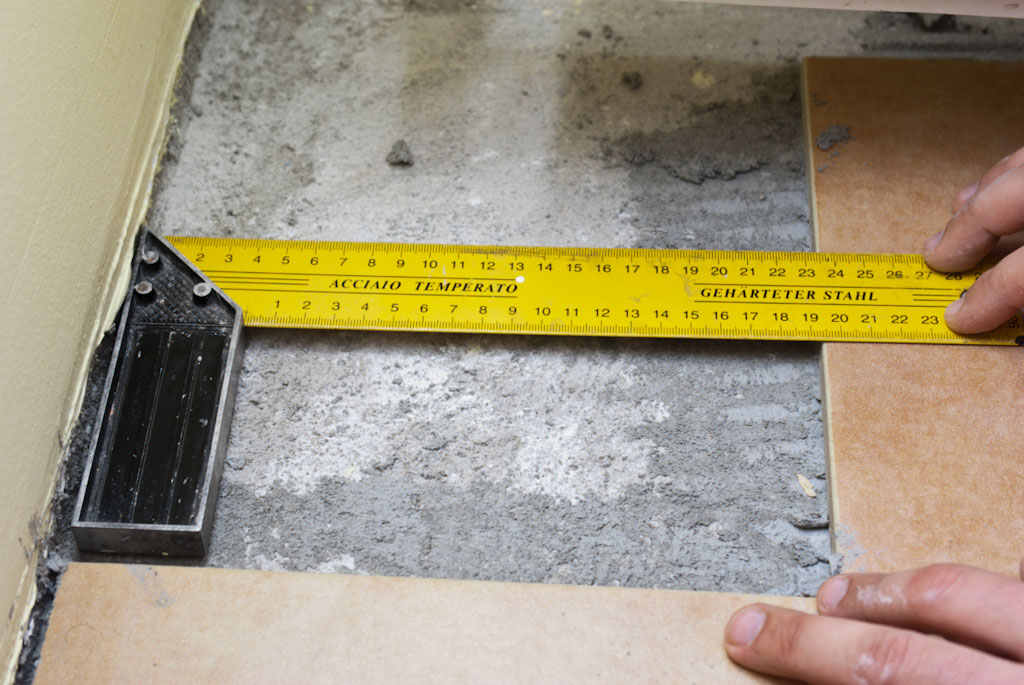
Measuring tile along wall
As we have already said, we have used an L-square to measure the length to the wall. It is essential to take accurate measurements, therefore pay attention while doing this.

Marking the cut line on a tile
Next, we have used a marker and an L-square to draw the cut line on the tile. By using the L-square you make sure the line is perfectly straight. As we are going to cut it with a wet saw, we have drawn the line on the back of the tile.

Cutting ceramic tiles
Cutting ceramic tiles with a wet saw is not difficult, if you fill the tray with water, as to cool the diamond blade and to eliminate the dust. Make sure the blade goes exactly over the cut line, otherwise the tile won’t fit into place.

Spreading thinset t
Next, you have to apply thin-set on the back of the tile, by using the notched trowel. You can spread the adhesive on the concrete floor, but sometimes it is easier to apply it on the back of the tiles.
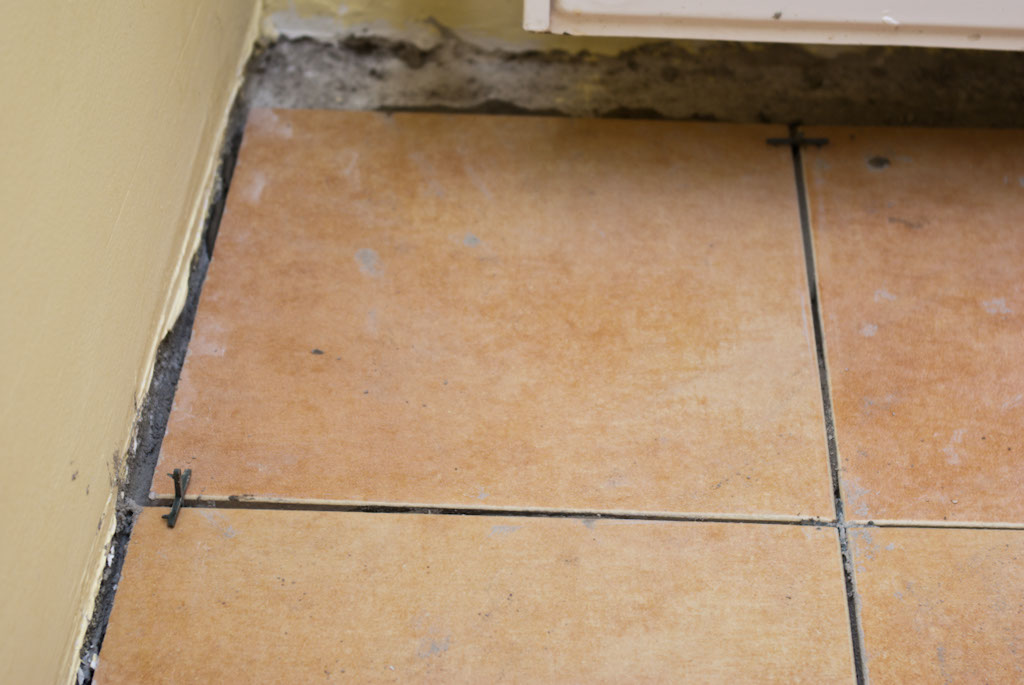
Laying tile on concrete floor
Install the tile into place and use spacers around it, as to create an even gap between the rows. Tap the tile gently with your hand or by using a mallet.
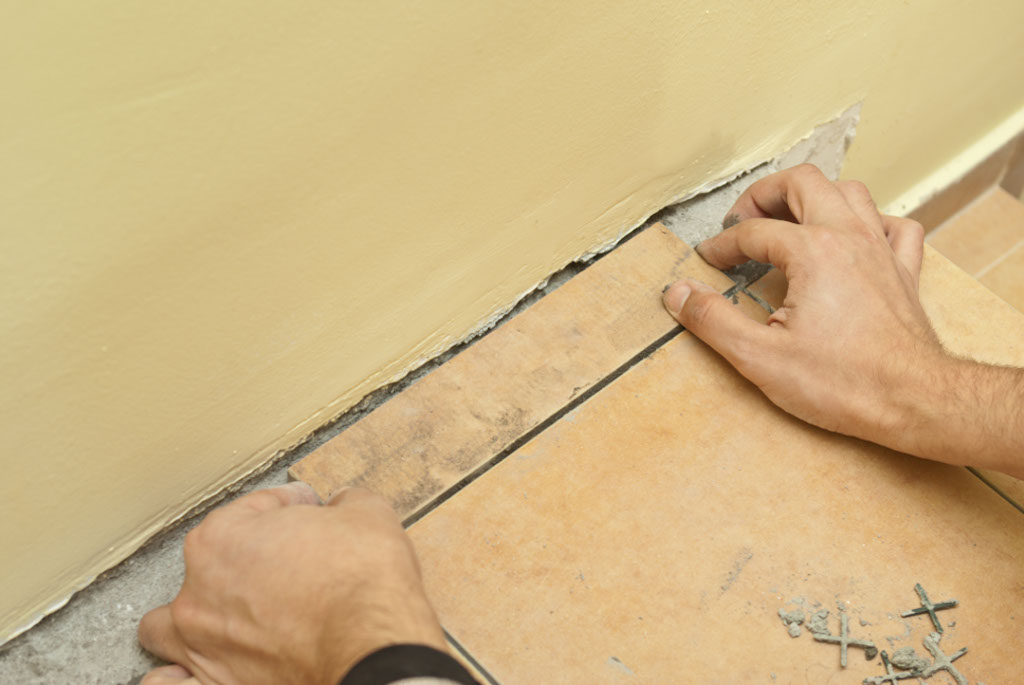
Installing tile around walls
Last but not least, you have to install the strips along the edges, after you have cut them with a wet saw. It is impossible to apply thin-set on the concrete floor, therefore you have to spread it on the back of the tile strips.
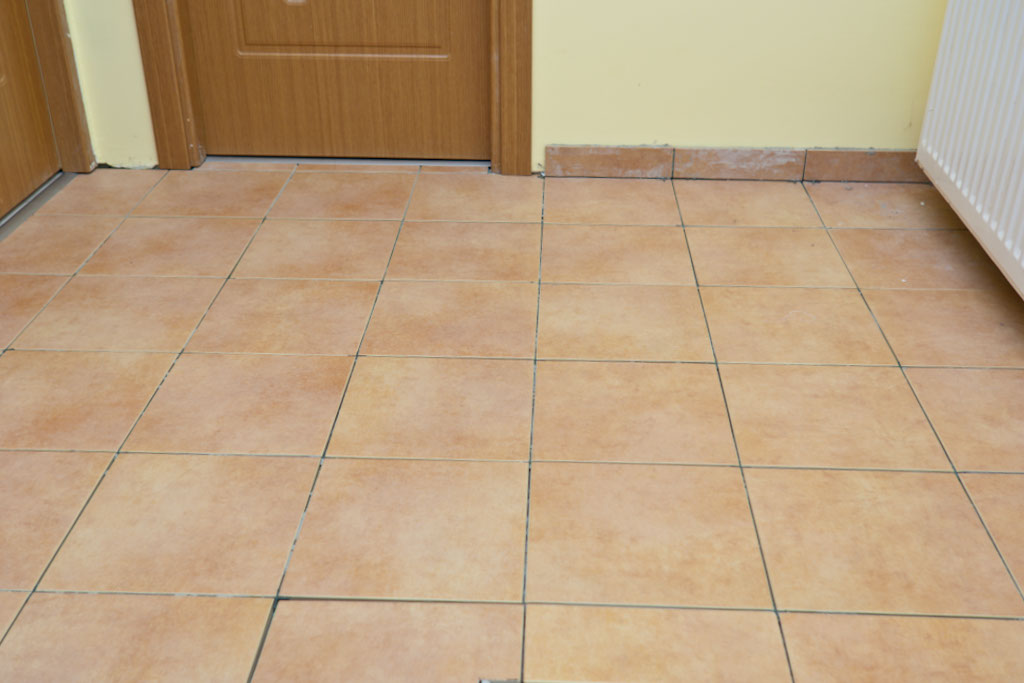
Tile on concrete floor
Clean thoroughly the tile flooring with a semi-dry sponge. Work with great care, otherwise the tiles might move from position. As you can see in the image, the spacers helped us to get even gaps between the tiles and consistent joints all over the surface. After you have installed tile flooring on the whole concrete floor, you have to leave it for a couple of days, until the thin-set dries out. Afterwards, you should grout the floor, to get a neat appearance.
Best tips to tile a concrete floor:
Tiling a concrete floor can create a durable and attractive surface, but getting it right requires some preparation and attention to detail. Here are my best tips to help you tile a concrete floor like a pro:
1. Prep the Concrete: Start by cleaning the floor thoroughly—remove any dirt, grease, or debris. If the concrete is uneven, use a self-leveling compound to smooth it out. Make sure the surface is dry and free of cracks or damage before tiling.
2. Check for Moisture: Concrete is porous and can absorb moisture, which can affect the adhesion of your tiles. Use a moisture meter to check the humidity level. If moisture is an issue, you’ll need to apply a moisture barrier or waterproof membrane before laying tiles.
3. Use a Primer: Applying a primer (also called a bonding agent) helps the tile adhesive stick better to the concrete. This is especially important for smooth or very porous concrete surfaces. The primer creates a rougher surface for better adhesion.
4. Choose the Right Adhesive: Use a thinset mortar designed specifically for concrete and tile. Depending on the size of your tiles and the conditions of the room, you might want to use a modified thinset mortar for better flexibility and bonding strength.
5. Dry Lay the Tiles: Before you start applying adhesive, dry lay your tiles to plan the layout. This helps you visualize where cuts will be needed and allows you to adjust the layout so that any cuts are placed in less noticeable areas.
6. Start from the Center: For the best symmetry and appearance, start tiling from the center of the room and work your way outward. This helps ensure that any cut tiles are around the edges where they’re less noticeable.
7. Use Tile Spacers for Consistent Gaps: To achieve even, professional grout lines, use tile spacers between each tile. This ensures consistent spacing for grout, and it also prevents the tiles from shifting as the adhesive sets.
8. Butter the Back of Large Tiles: For larger tiles (12″x12″ or bigger), “back-buttering” the tiles is essential. Spread a thin layer of adhesive on the back of the tile in addition to the floor. This ensures a strong bond and prevents hollow spots under the tiles.
9. Check for Level: As you go, use a level to make sure the tiles are sitting flat. Uneven tiles (called “lippage”) can create tripping hazards and look unprofessional. Adjust the tiles by tapping them lightly with a rubber mallet if needed.
10. Grout and Seal: Once your tiles are set (usually after 24-48 hours), apply grout between the tiles. After the grout dries, consider applying a **grout sealer** to prevent staining and make cleaning easier, especially in high-traffic areas.
By following these tips, you’ll ensure a smooth, long-lasting tile job on your concrete floor, creating a beautiful, durable surface that will hold up for years!
Thank you for reading our article on how to tile a concrete floor and we recommend you to check out the rest of our projects. Don’t forget to SHARE our articles with your friends, by using the social media widgets. LIKE us to be the first that gets our latest projects and to help us add more free articles.

3 comments
Your step by step instructions clearly made tile work easier even for an amateur.I am very much intrigued,and feel like a professional already.
I am very happy to hear that. What have you tiled? Can you send a few pics with your project?
Great blog! Tiling a concrete floor sounds straightforward—prep the surface, use the right adhesive, and take your time with spacing. The results are so worth it!