This article is about how to cut tiles with a wet saw. Using a wet saw is not hard, provided you understand the basic cutting techniques and you use eye protection. From our experience, we can say that a wet saw is the quickest and the most accurate way to cut your tiles, when having to lay ceramic tiles in your bathroom or kitchen. In addition, if you are a novice or an amateur diy-er, you could buy the right wet saw at a decent price, as to get the job done as a professional. If you use a sharp diamond blade, fill the tray with water (as to cool the blade during the process) and pay attention to our tips and tricks, you should lean the basic cutting techniques of a wet saw.
First of all, you should know that it is possible to cut tiles without a wet saw. Therefore, if you don’t want to use this power tool, you should read our article on how to cut ceramic tiles with a score and snap cutter. Nevertheless, you should understand that a wet saw is the best choice if you look for accurate and quick cuts. In addition, using a wet saw is the right decision if you have to make complex cuts (around drains, outlets, junction boxes, or beveled edges).
Generally speaking, a wet saw consists of a table, an electric motor, a diamond blade with plastic protection, and a tray (the water in the tray cools down the blade). Nevertheless, the more expensive wet saws have a pump which sprays water over the blade, as to get the most accurate cuts. If you are an amateur diy-er and want to use the power tool just for your home projects, then a basic wet saw would fit your needs perfectly.
If you have to cut notches in tiles, you should perform several paralleled cuts on the area you want to remove. Remember that the cuts should be made every 1/4”. Next, use a pair of tile snipers to remove the waste and smooth the edge, by moving it (left to right and right to left) on the wet saw’s table into the diamond blade. The blade of the tool will clean the cut edge, if you work with attention.
Made from this plan
In order to cut tiles with a wet saw, you need the following:
Materials
- Ceramic tiles
- Water (to fill the tray)
Tools
- Eye protection
- Wet saw
- Rags
Tips
- Make sure you place the wet saw on a level surface
- Fill the tray with water, up to the optimum level
- Wear eye protection and safety gloves, while cutting tiles with the wet saw
- Read the manufacturer’s instructions, as to get accustomed with the wet saw
Time
- Several minutes for every cut (it varies according to the complexity of the cut)
Using a wet saw
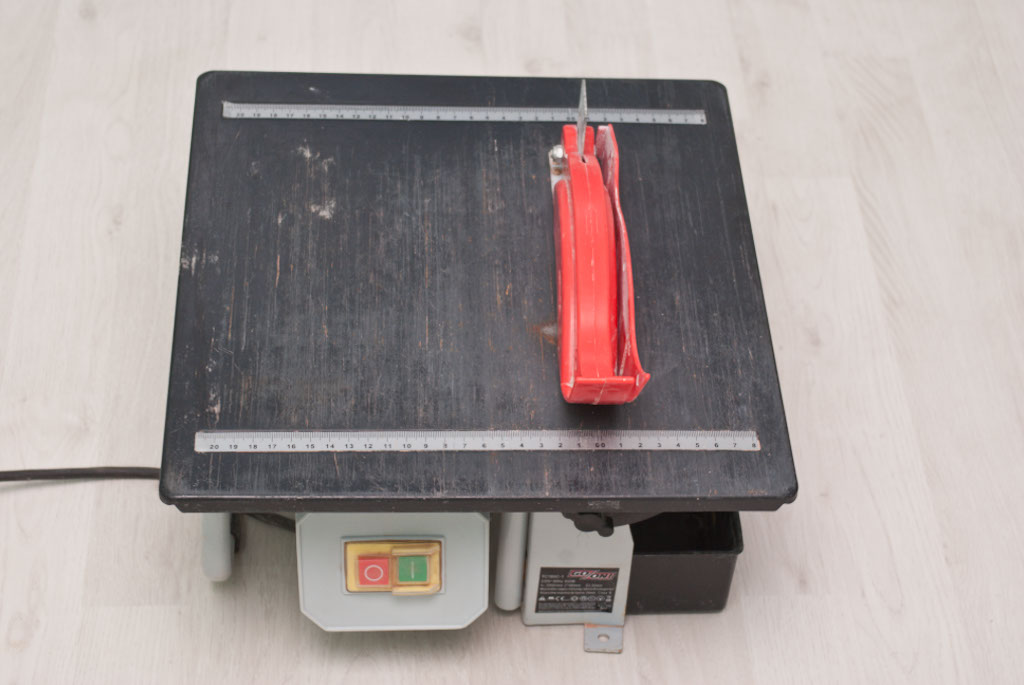
Wet saw
You can buy a good wet saw for small projects (tiling a bathroom or a kitchen) for about 100-200 dollars. Although it is not a professional tool, its a good choice if you look for a way to make accurate cuts, while keeping your costs down.
Make sure you check the blade before using the wet saw, as to make sure it is sharp and in good condition. If you find the slightest issue, you should buy a new diamond blade.
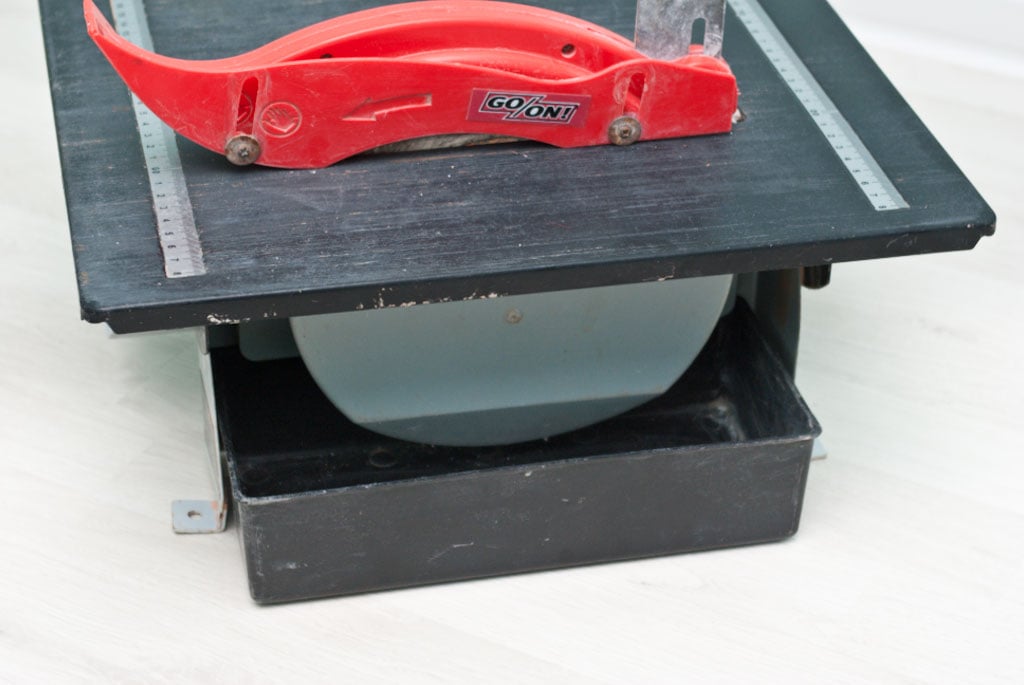
Wet saw water tray
Before making the cuts, you should fill the tray of the wet saw with the optimum amount of water. In this manner, the water will cool down the blade and you will get accurate cuts.
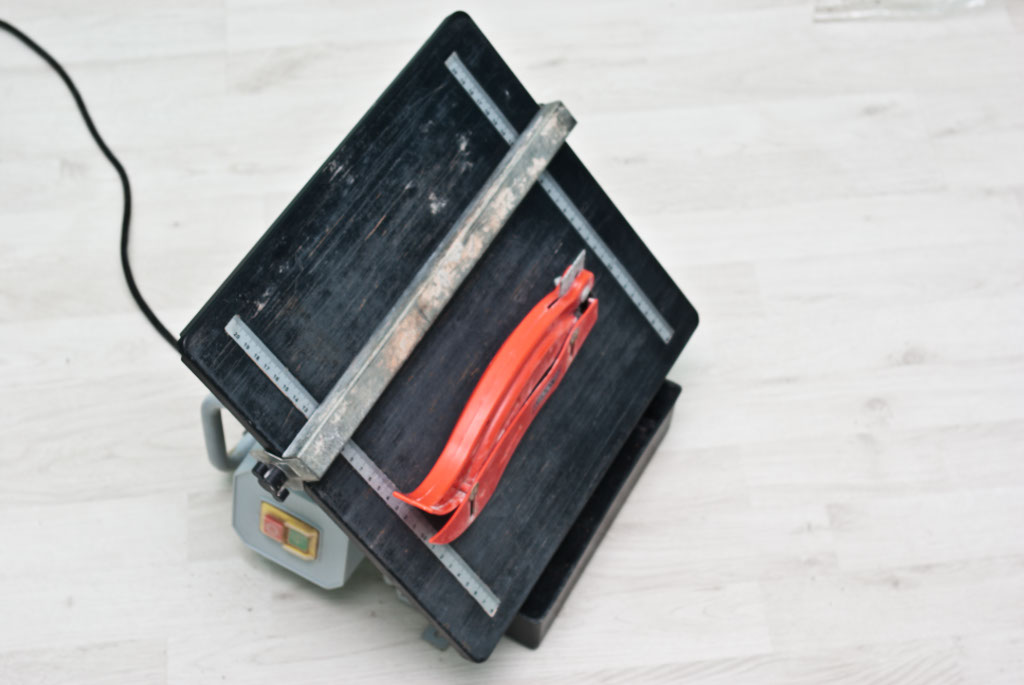
Making angle cuts with a wet saw
A wet saw will help you make bevel cuts. Generally speaking, bevel cuts are used when tiling outside corners (when the gaps between the tiles are too large).
In addition, you can use the wet saw to make bevel cuts for inside corners, if you don’t want to install tile trims. The maximum cut angle is 45º, making the wet saw a very versatile cutting tool.
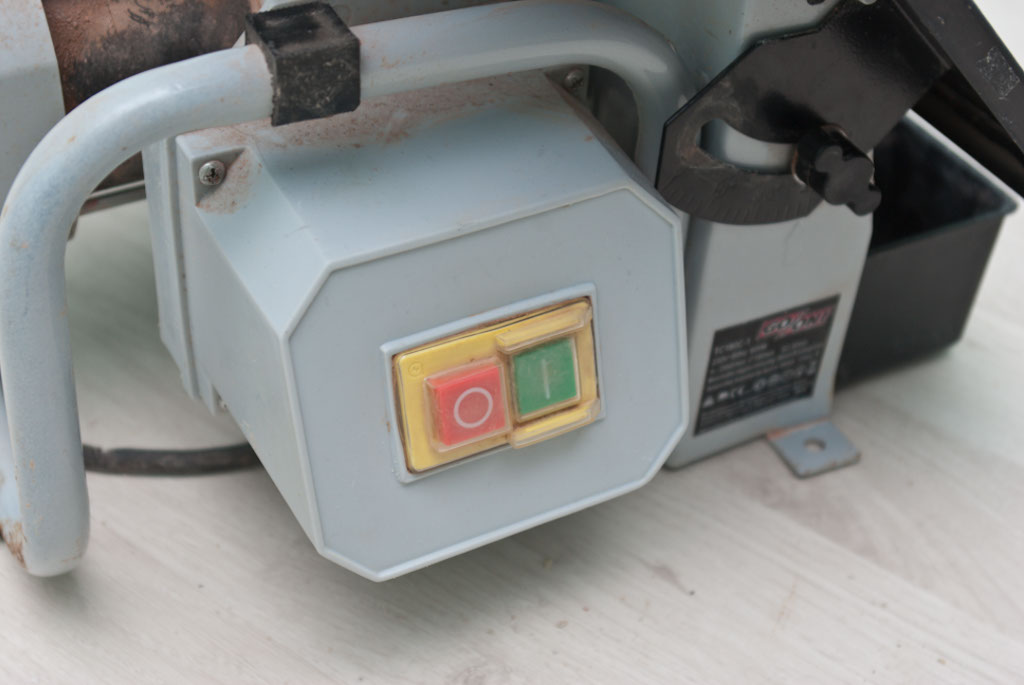
Wet saw start and stop buttons
A regular wet saw has two switches: a start and a stop button. You have to press the green button to start the power tool, and the red button after you have cut the tile. Remember that the blade will still rotate for several minutes after you have pressed the stop button (due to inertia), so make sure you keep your hands away.
As you can see in the image, the electric switches are water-splash protected, as the wet saw uses water to cooll down the blade.
How to cut tiles with a wet saw
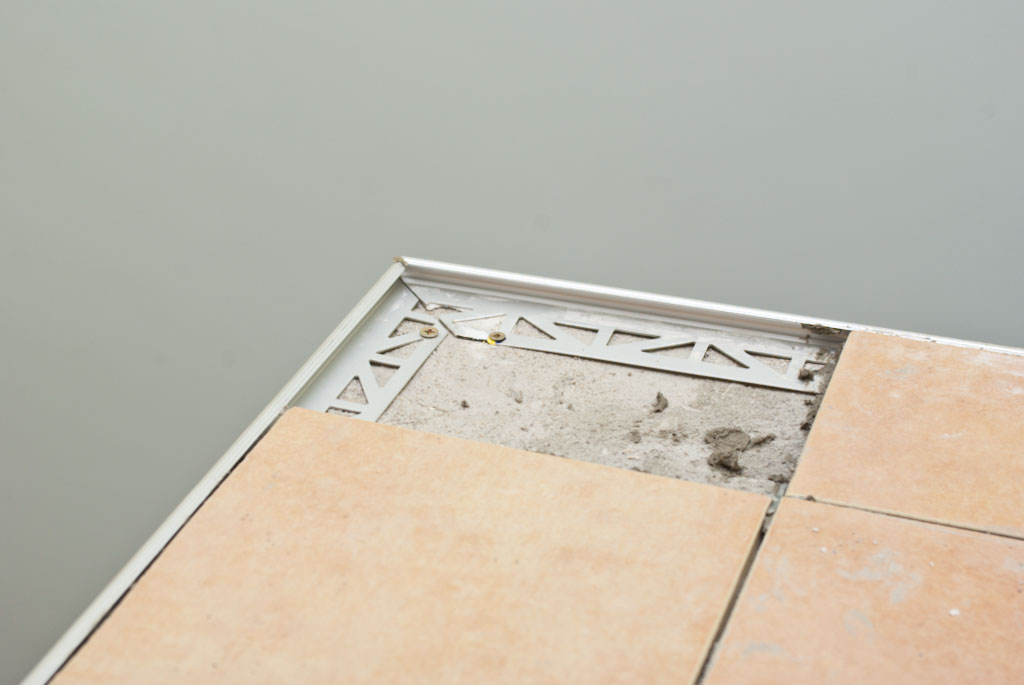
Cutting tile to fit into position
Step 1: If you have to make a complex cut, the best choice is to use a wet saw, as it gets the job done quickly and accurately. On the other hand, you could use a score tile cutter, but it will require more time and effort. Before making the cut, you have to take accurate measurements, therefore use a marker and an L-square (to draw straight cut lines).
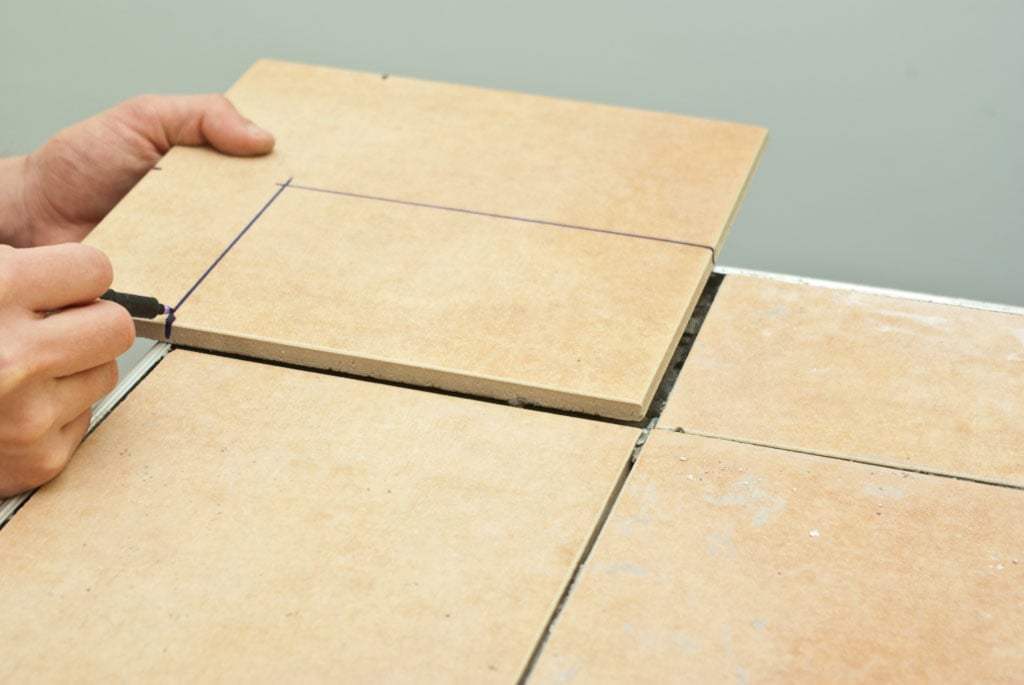
Marking cut line on a tile
Step 2: When drawing the measurements on the ceramic tile, you have to leave enough room around the tile to install the spacers. In addition, if the tile is the last one in a row, make sure you leave space for expansion (1/16 – 1/8”). Taking accurate measurements is almost half of the whole project, therefore work with good judgement.
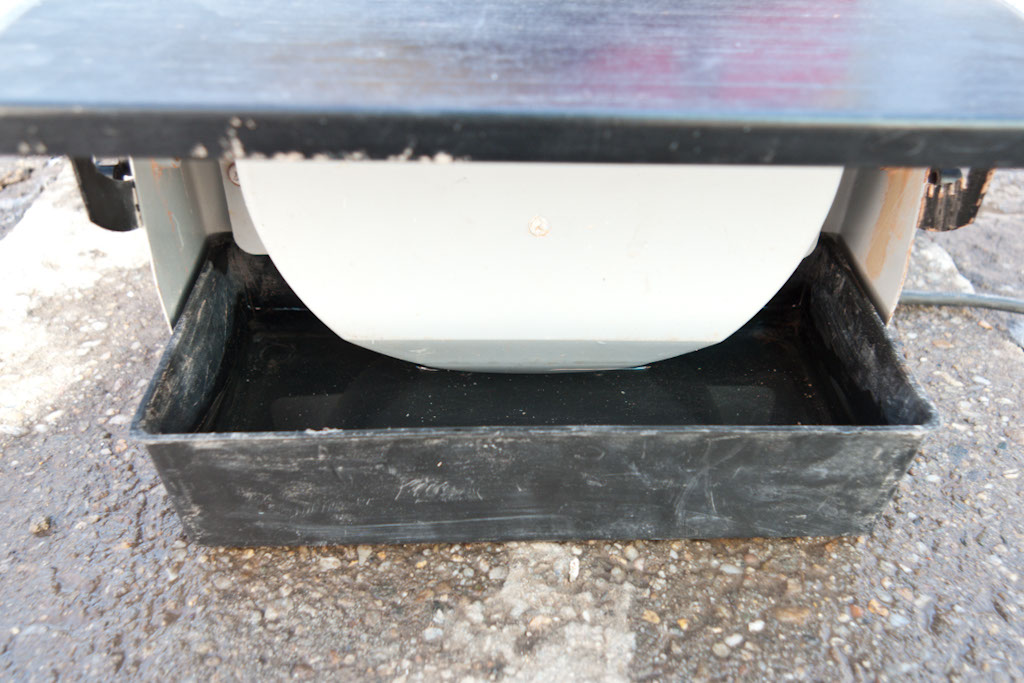
Fill the tray with water
Step 3: Before making the actual cuts with the wet saw, you have to pour water in the tray, just enough to cool down the blade during the procedure.
You should remember that the cooling system differs according to the manufacturer. Nevertheless, in most of the cases the water tray is incorporated in the wet saw. Just slide the table and fill the tray with water. Other manufacturers have design the wet saws with a separate water tray (as you can see in the image).
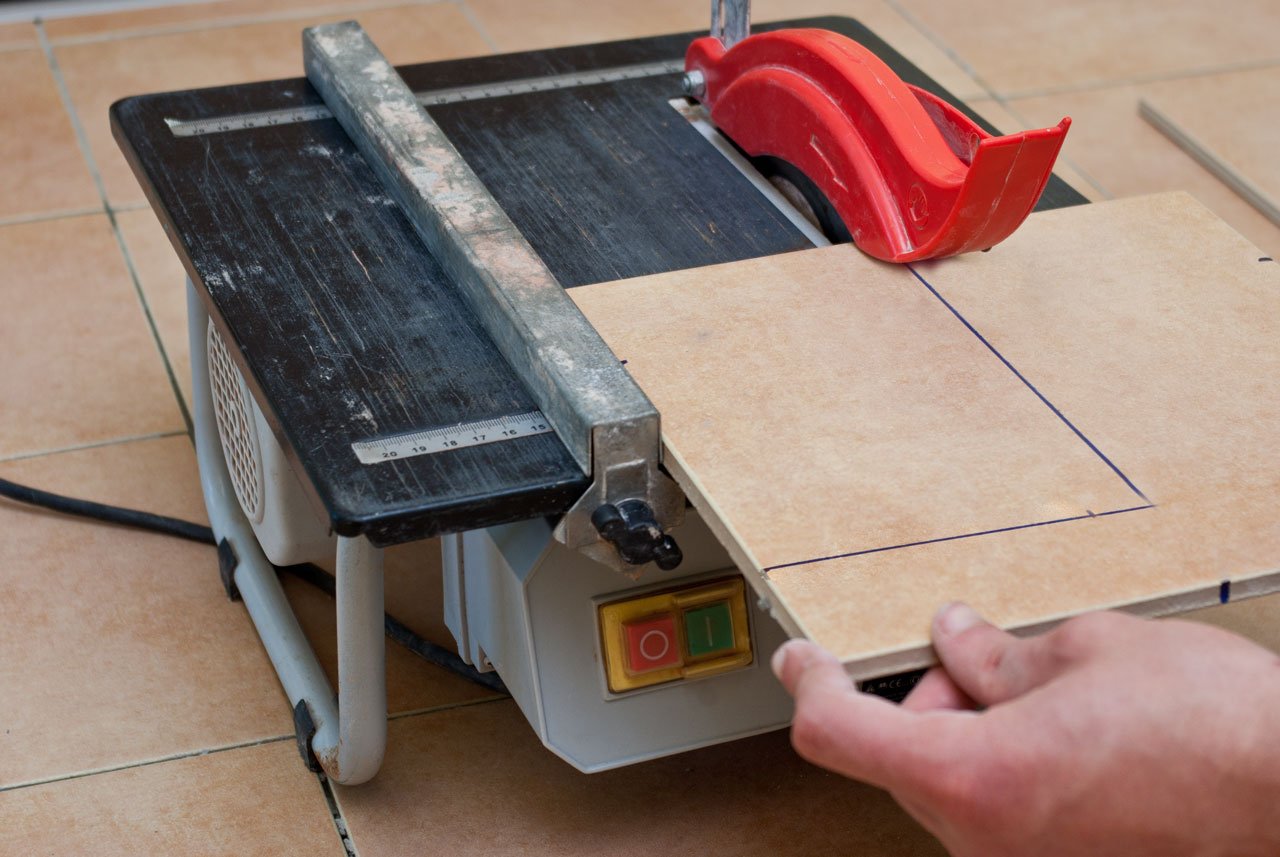
Cutting tiles with a wet saw
Step 4: Align the tile on the table of the wet saw and adjust the fence, as the blade to cut the tile exactly over the line. In addition, make sure you place the tile with the widest part between the blade and the fence. In this manner, you will keep your hand away from the diamond blade.
Step 5: Use a pair of safety gloves to protect your hands and put on eye protection. Next, pull the tile 1” off the blade and start the wet saw by pressing the green button.

The blade goes over the cut line
Last but not least, secure the fence at both ends as to make sure you will make a straight cut. Nevertheless, there are cases in which you cannot use the fence, therefore you have to push gently the tile, as to ensure the blade cuts the tile exactly over the line.
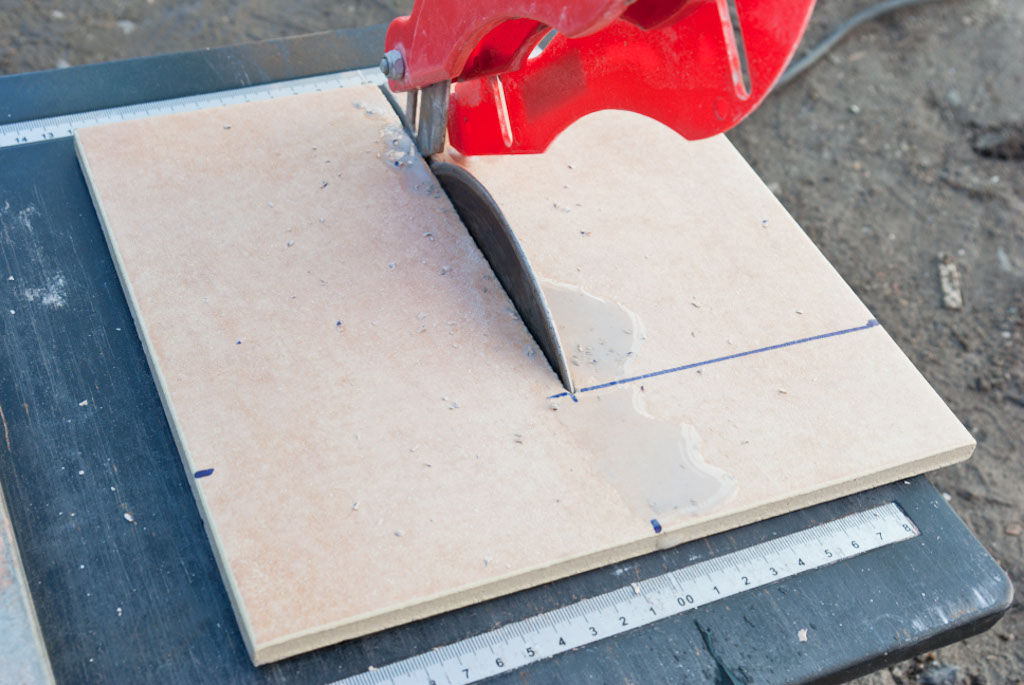
How to cut tile with a wet saw
Step 6: Hold the tile with your both hands and push it gently along the fence into the diamond blade. Remember that during the procedure, the plastic protection should cover the blade. In the image we have lifted the protection to show you how to position the tile on the table.
Step 7: Make sure you keep your hands away from the blade while you are using the wet saw. In addition, do not force the power tool, just let the blade to cut the tile in its own stride.

Cutting tiles with a wet saw
Step 8: Next, turn the tile 90º and make the other cut along the line, in the same manner as before. Check the tray to make sure there is enough water to cool down the blade, before performing the second cut.
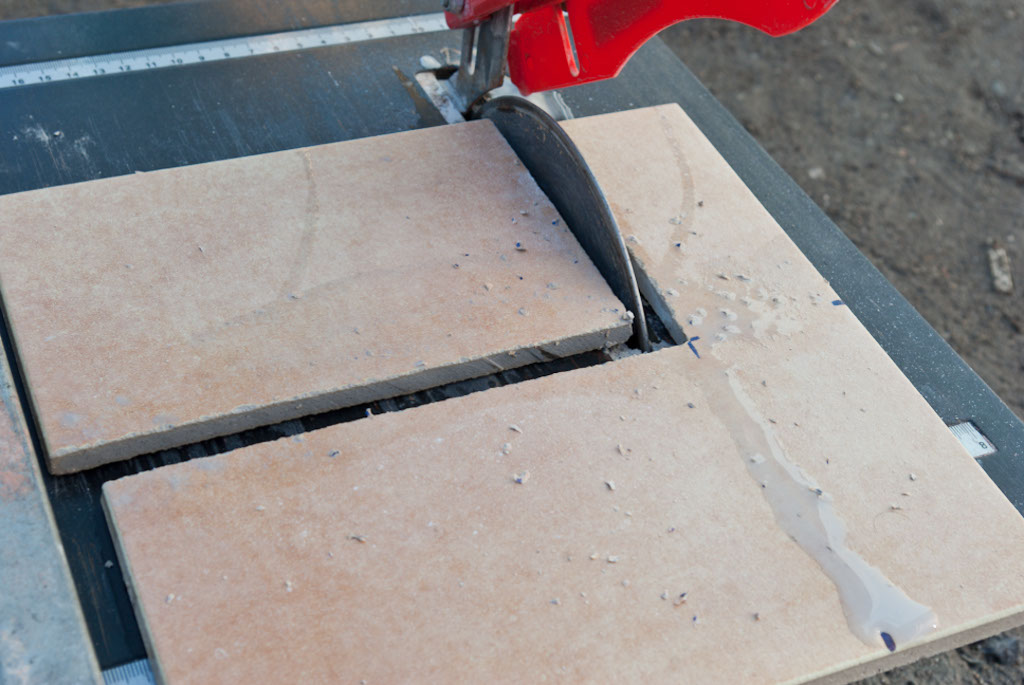
Using a wet saw
Step 9: Wait until the blade stops rotating and take the tile pieces off the table. Next, make sure you unplug the wet saw and thoroughly clean it with a sponge.
Step 10: You can also cut tiles diagonally with a wet saw, if you use the right techniques. Therefore, you should use the triangle attachment to guide the tile along the fence (set the fence as to ensure the blade goes over the cut line). Push firmly the tile towards the blade, keeping your hands away.
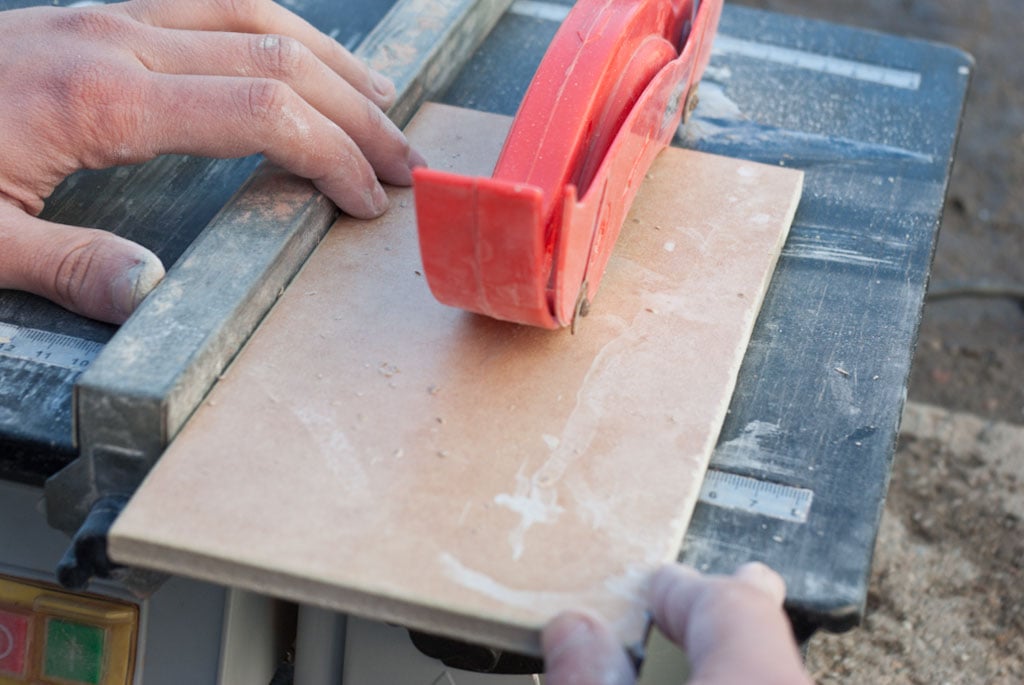
Using a wet saw to cut tiles
Step 11: If the tile is not wide, you should work with great care, as to protect your fingers. We’ve seen many people (even qualified professionals) who don’t pay enough attention to safety considerations and end up injuring themselves.
Step 12: Lock the fence firmly on the table, start the wet saw and cut the tile. Notice the way we keep our hands while pushing the tile towards the blade, as to avoid possible injuries. If you are a novice or don’t want to take any risks, it would be better to hire a professional.
Tips for cuting tiles with a wet saw:
Cutting tiles with a wet saw is one of the most efficient ways to get clean, precise cuts, especially for tough materials like ceramic, porcelain, or natural stone. Here are my absolute best tips for using a wet saw:
1. Mark Your Cut Lines Clearly: Before you start, use a pencil or a wax crayon to mark the cut line on the tile. If the line starts to fade from the water, re-mark it or place masking tape along the cut line to keep it visible.
2. Use a Sharp, Clean Blade: A dull or dirty blade can lead to chipping or slow cuts. Make sure your wet saw is equipped with a diamond-tipped blade, and check it for wear regularly. If the blade looks worn out, replace it to ensure smooth, precise cuts.
3. Keep the Water Flowing: The water in a wet saw cools the blade and reduces dust, so make sure the water tray is filled and the flow is strong before you start cutting. Without proper water flow, the blade can overheat, causing cracks or chips in the tile.
4. Start Slowly: Begin your cut by pushing the tile gently into the blade. Use steady, even pressure and let the blade do the work—forcing the tile through too quickly can lead to rough, uneven cuts.
5. Support the Tile Throughout: Larger tiles can shift while cutting, so support them with both hands to keep them steady. For long cuts, guide the tile along the fence of the saw to ensure accuracy, and never rush the process.
6. Cut Small Sections for Intricate Cuts: For detailed or curved cuts, make multiple smaller cuts around the curve, rather than trying to make a single, sharp turn. This technique, often called “relief cutting,” prevents the tile from snapping or cracking under pressure.
7. Wear Safety Gear: The wet saw is a powerful tool, so be sure to wear safety goggles and gloves to protect yourself from flying debris and sharp tile edges. The water flow can also get messy, so it’s a good idea to wear protective clothing or an apron.
8. Trim Edges with a Tile File: After making your cut, use a tile file to smooth any rough edges or small chips for a polished, professional finish.
By following these tips, you’ll get clean, precise cuts that make your tile project look like it was done by a pro, with minimal waste and frustration!
Wet saw vs. Manual Cutter
Cutting tiles with a wet saw is a completely different experience compared to using a classic tile cutter, and each method has its own advantages depending on the type of cut you need. A **wet saw** uses a diamond-tipped blade and water to cool the blade, making it ideal for tougher materials like ceramic, porcelain, or natural stone. The water also helps reduce dust and prevents the tile from overheating, which can cause cracks. Wet saws are great for making **precise, clean cuts** and are the go-to tool for intricate cuts, curved edges, or working with thicker tiles.
In contrast, a **classic tile cutter** is a manual tool that works by scoring the surface of the tile and then snapping it along the score line. This method is quick and works well for **straight cuts** on standard ceramic or porcelain tiles, but it can be tricky with thicker materials or for detailed cuts like curves or notches. Classic cutters are best for simpler, straight lines, while wet saws are more versatile for complex cuts and tougher materials. Both have their place in tile cutting, but the wet saw is a game-changer when you need precision and durability.
Thank you for reading our article about how to cut tiles with a wet saw and we recommend you to check out the rest of our projects. Don’t forget to SHARE our projects with your friends, by using the social media widgets. LIKE us to be the first that gets our latest updates and to help us create more free tutorials.
