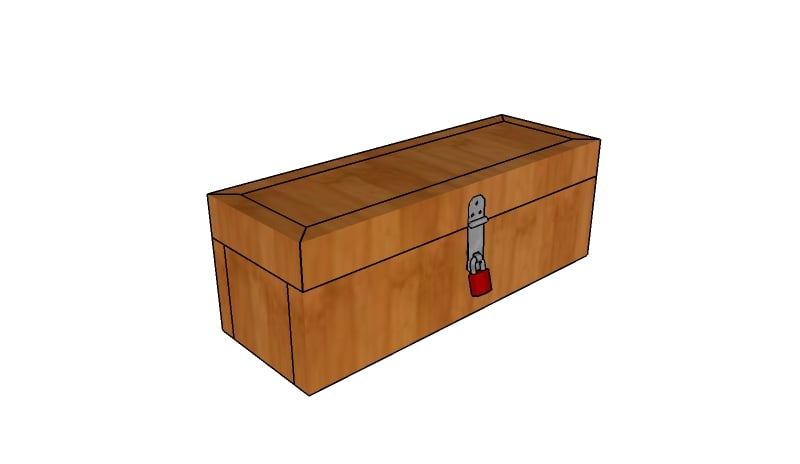
This step by step woodworking project is about how to build a wine box. This project is an evergreen gift idea, as it suits any person and any occasion. This project requires basic materials and tools, so that any person with beginner woodworking skills can pull it through. Make sure you browse through the rest of the projects, as you can find more building inspiration.
We recommend you to invest in the best materials you could afford. Therefore, you should buy weather-resistant lumber, such as pressure-treated lumber, pine or cedar. Always take accurate measurements before adjusting the size of the components at the proper size. Drill pilot holes trough the components before inserting the wood screws, to prevent the wood from splitting.
Made from this plan
Building a wine box
Materials
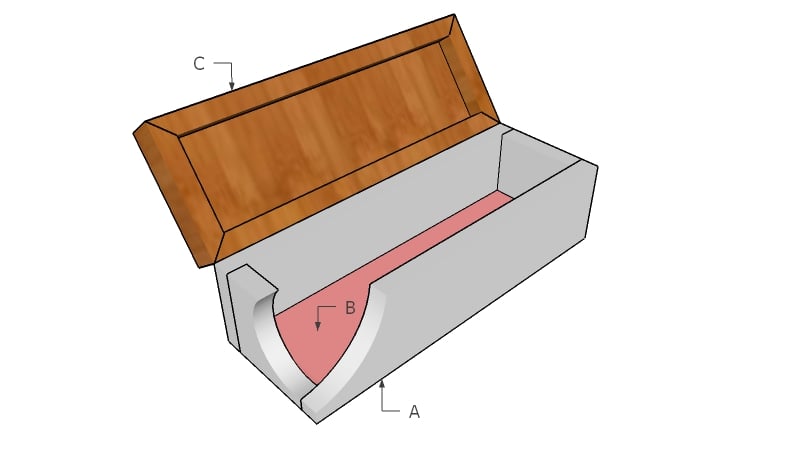
- A – 2 pieces of 1×4 lumber – 3 1/2″ long, 2 pieces – 14 1/4″ long FRAME
- B – 1 piece of 1×4 lumber – 12 3/4″ long BOTTOM
- C – 12 piece of 1×4 lumber – 12 3/4″ long, 2 pieces of 1×2 lumber – 14 1/4″ long, 2 pieces – 5″ long LID
Tools
- Safety gloves, glasses
- Miter saw, jigsaw
- Chalk line, tape measure, spirit level, carpentry pencil
- Drill machinery and drill bits
Tips
- Adjust the size of the box to suit your needs
- Select the type of wood
Time
- One Weekend
How to build a wine box
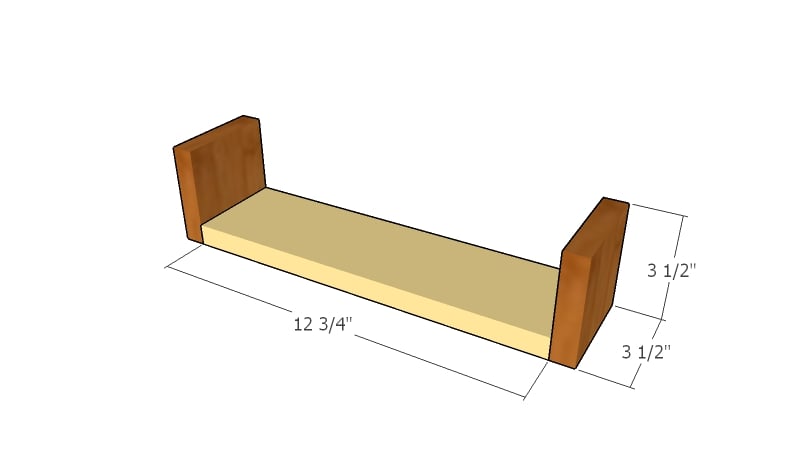
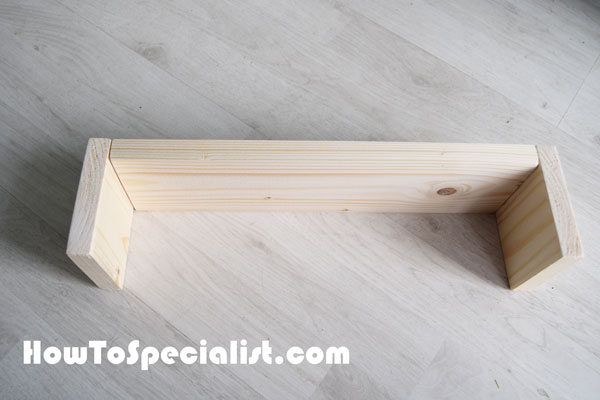
Building the box frame
The first step of the project is to build the frame of the wine box. Use 1×4 lumber.
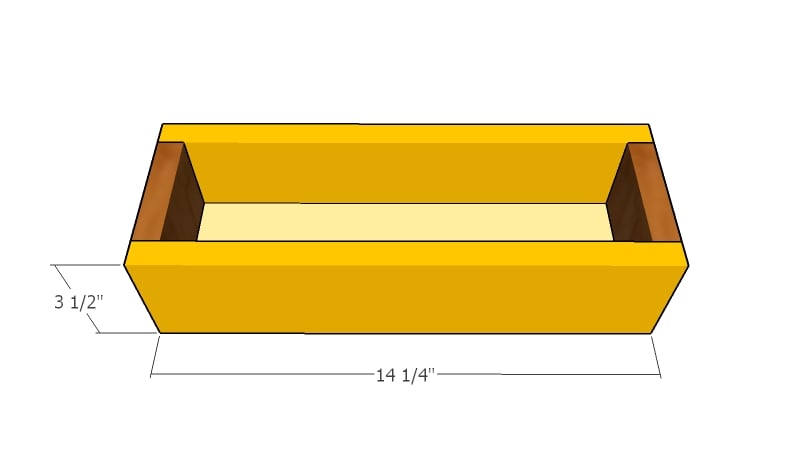
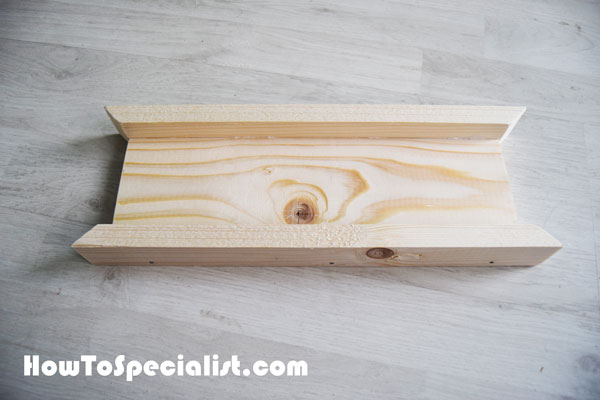
Fitting the faces to the box
Attach the faces to complete the box.
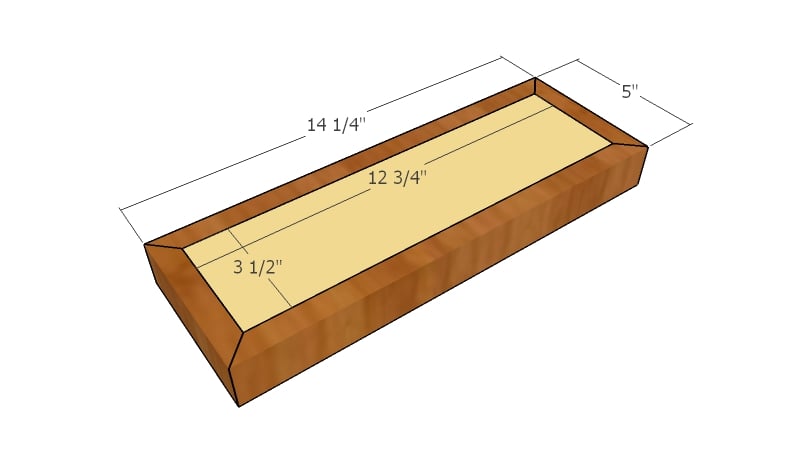
Building the lid
Build the lid from 1×4 and 1x2s. Use brad nails to lock the components together tightly.
Wine Box Plans free
Attach the hinges and the latch to the wine box.
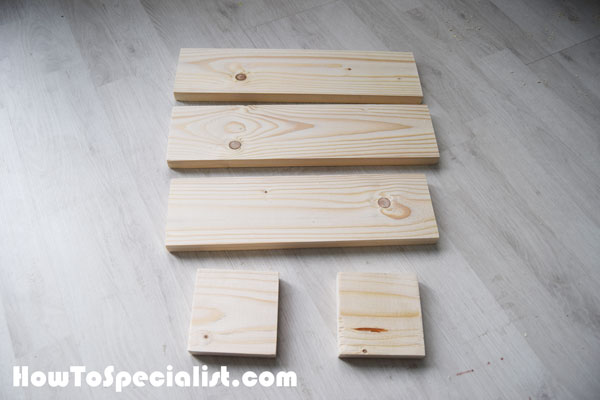
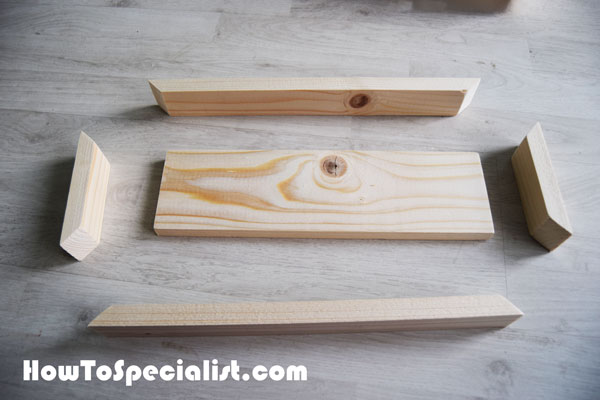
Components for the wine box
First of all, I cut the components for the wine box. I used sandpaper to smooth the cut edges.
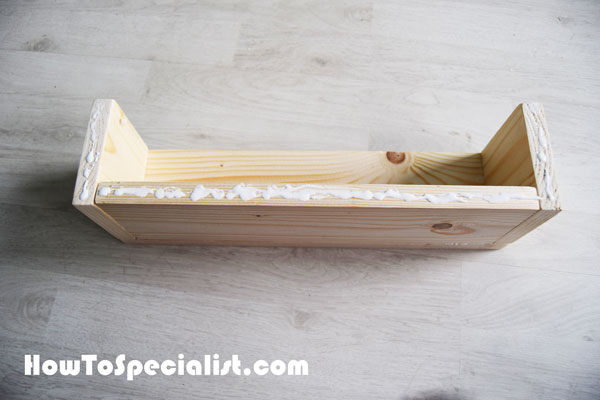
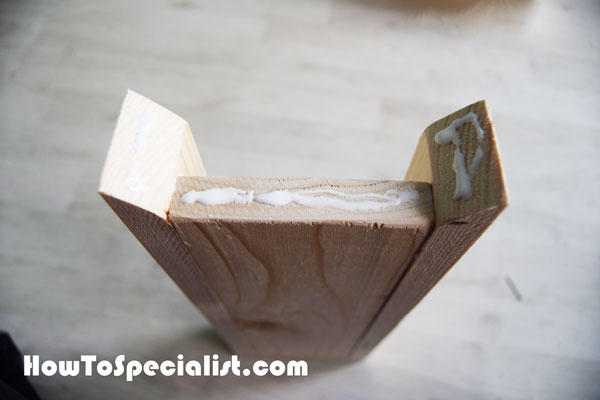
Assembling the box
I assembled the frame of the wine box using 1 1/4″ brad nails and glue. Make sure the edges are aligned and check if the corners are square.
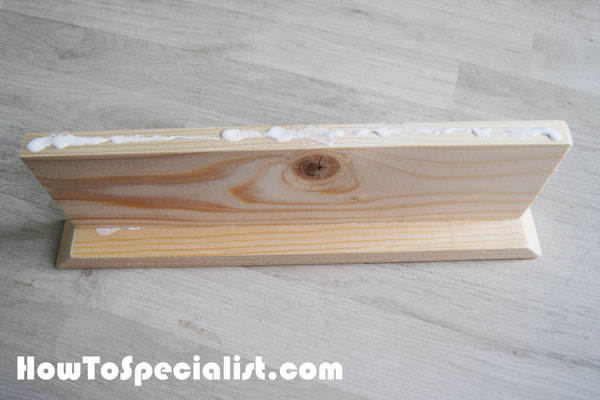
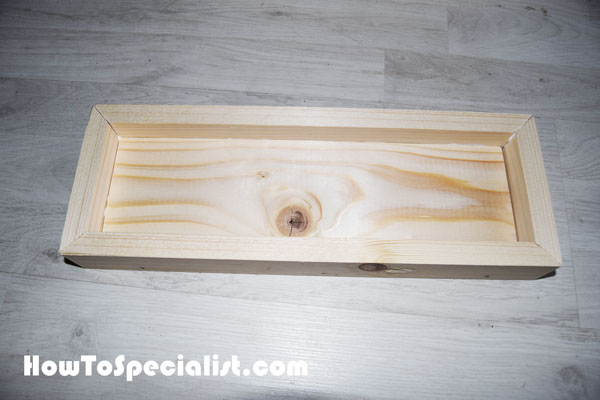
Build the box frame
Continue the project by attaching the faces to the wine box. Apply wood glue to the joints and make sure the edges are flush, before driving the brad nails in.
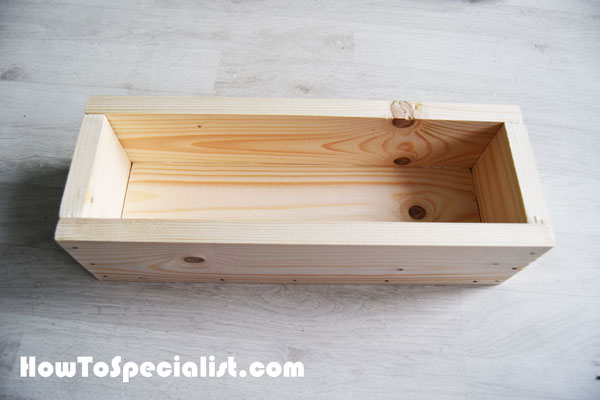
Wine Box
The wine box is starting to take shape now. I used sandpaper to smooth the edges.
Lid components
Next, it’s time to assemble the lid for the wine box. I used 1×4 lumber for the top and 1x2s for the trims. Make 45 degree cuts to both ends of the trims.
Assembling the wine lid
Add glue to the joints and attach the trims to the top. Align the edges with attention and use 1 1/4″ brad nails to lock the trims to the top.
Box Lid
Attach the other trim to the top.
Fitting the side trims to the lid
Add glue to the joints.
Wine box lid
Fit the side trims to the wine box. Align the edges with attention, so that the miter joints are accurate.
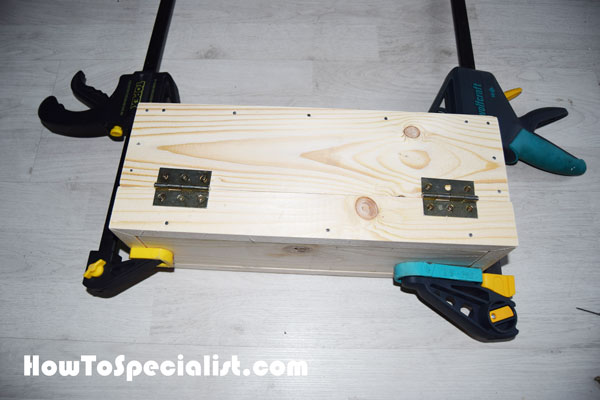
Fitting the hinges
Clamp the lid to the box and make sure the edges are flush. Next, you need to attach the hinges into place. Drill pilot holes and insert the 1/2″ screws.

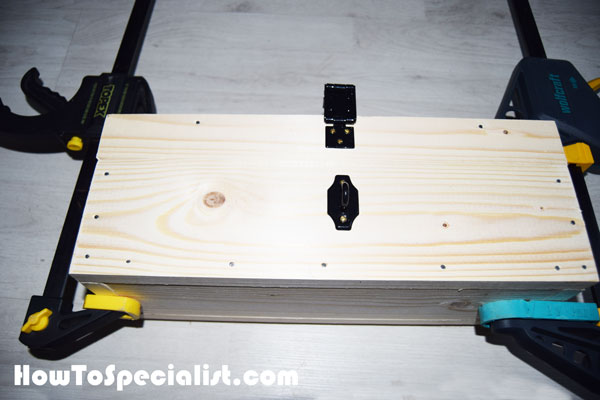
Fitting the latch
One of the last steps of the project is to install the latch to the front of the wine box. Center the latch to the lid and secure it into place with 1/2″ screws.
Latch
Fit the other component of the latch to the frame of the wine box.

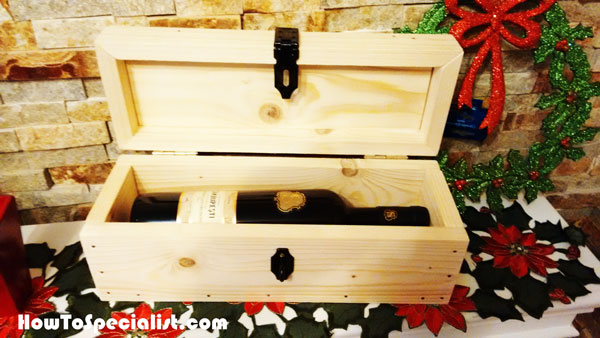
Building a wooden wine box
Although the wine isn’t stained yet, I personally think it looks really rustic.
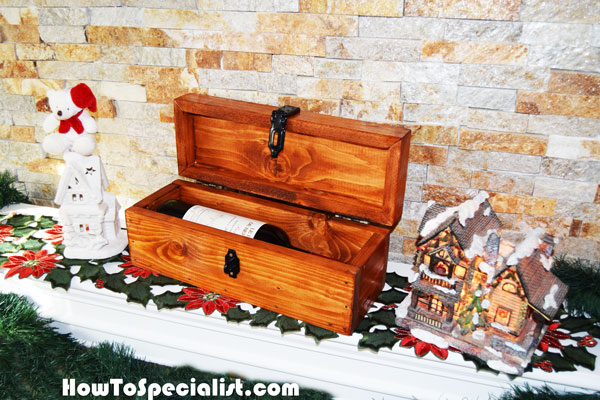
DIY Wine Box
Another shot with the lid open.

DIY Wine Box Plans
I applied chalkboard paint to the hinges to match the color of the latch. Make sure you apply tape around the hinges to avoid spreading paint over the wood surface.
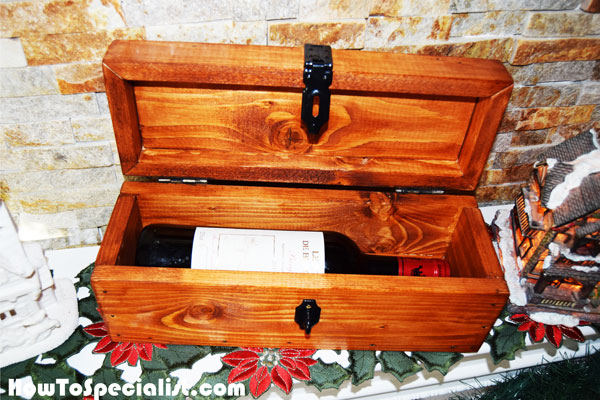
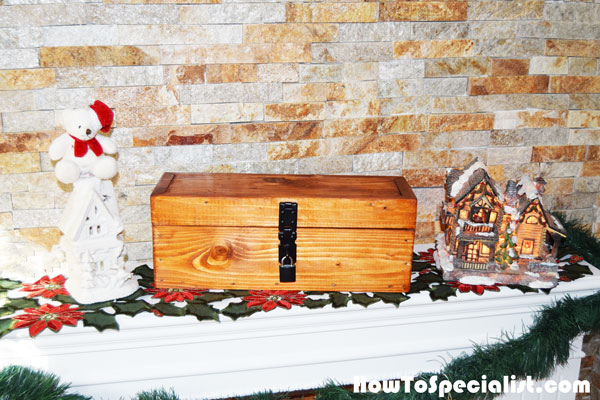
Wedding wine box
I applied a few coats of teak stain over the wooden box. Make sure you apply the stain evenly and don’t spread it over the latch. Leave a few hours before the coats of stain, to get a professional result.
Building a wood wine bottle
Afterwards, I applied a few coats of lacquer over the wooden surface, to seal the finish. Make sure you sand the surface with fine grit sandpaper between the coats. This makes for a rustic wedding gift, and it cost me only 10 dollars to make. You can use more expensive wood, if you aim for an exquisite look.
Wood Wine Box
Thank you for reading our project about diy wooden wine box plans and we recommend you to check out the rest of the projects. Don’t forget to LIKE and SHARE our projects with your friends, by using the social media widgets. SUBSCRIBE to be the first that gets our latest projects.