This article is about how to lay laminate flooring on concrete. The laminate flooring is cheap and comes in a large diversity of colors, thicknesses and finishes, as you can easily find one to fit your needs and tastes perfectly. Moreover, the laminate flooring is easy to maintain and durable, if you clean it regularly with appropriate products. Laying laminate flooring on a concrete subfloor is not difficult if you use the right tools and techniques. From our experience, we can assert that the preparation stage is maybe more important then the actual installation. Therefore, use a large spirit level to see if there are irregularities on the subfloor and pour a thin layer of auto-leveling screed if necessary. In addition, use a large scraper to remove the bumps and other residues, which can create gaps in the laminate flooring over time. This project is not time consuming, so you will be able to finish laying the laminate flooring on concrete in just one day.
Use a scraper to remove the concrete bumps, or any other irregularities in the floor surface, then clean the surface with a vacuum. If this step is overlooked, the laminate flooring may deteriorate in time or creek every time someone walks on that specific area. This step is critical for the lifetime of the laminate flooring, so verify carefully the surface more than once.
The underlay for laminate flooring is available either in rolls or in boards, as well as in different thicknesses. The main role of the underlay is to protect the room against losses of heat, to improve the sub-floor irregularities and to reduce sounds transmitted to the below room.
Estimating the laminate flooring quantity is an essential aspect you should take into consideration before starting your project. If you have to lay laminate boards on a small surface or a room with a complex shape, buy 10% more flooring, as you will get significant waste due to cutting. Nevertheless, if you have to lay laminate flooring on a large surface (a very large room or several room), you should buy only 5 percent more flooring. See more laminate flooring projects HERE.
Made from this plan
In order to install laminate flooring, you need the following:
Materials
- Laminate flooring packs, Underlay for laminate flooring
- Adhesive tape
- Wood glue, spacers 1/3” – 0.8 cm
Tools
- Level, tape measure, chisel, Rubber hammer, hammer
- Jig saw, vacuum cleaner / broom
- Clamps, spacers
Tips
-
- Use a smart setup for precision cutting of the laminate boards
- Install the laminate under the door jamb, not around it
Time
- 6 hours for 100 ft2 /10 m2
Related
Preparing the concrete surface before laying laminate flooring

Acclimatising laminate floor
Usually, the sealed packs must be stored flat on the floor, for at least 48 hours in the room they are to be installed. In addition, the temperature should be at least 18º C / 64º F and the distance between the walls and the packs greater than 20”/50 cm. If the packs are not set level, then they will bend and you won’t be able to use them again.
Use a scraper to remove the bumps on the concrete floor and clean the dust and other residues by using a vacuum.

How to lay underlay for laminate flooring
The underlay is available either in rolls or in boards. In this project we have used 20”/50 cm wide, 3′ 4”/12 m long, 3 mm thick boards, but the rolls are as good. The underlay is used for its excellent thermal insulation properties (it protects the room against losses of heat), because it improves the sub-floor irregularities and reduces sounds transmitted to the below room.
Lay the boards on the floor and seal them together with adhesive tape. You have to unroll 20”/50 cm of adhesive tape and then press it gently with your hand, being attentive to keep it well stretched.
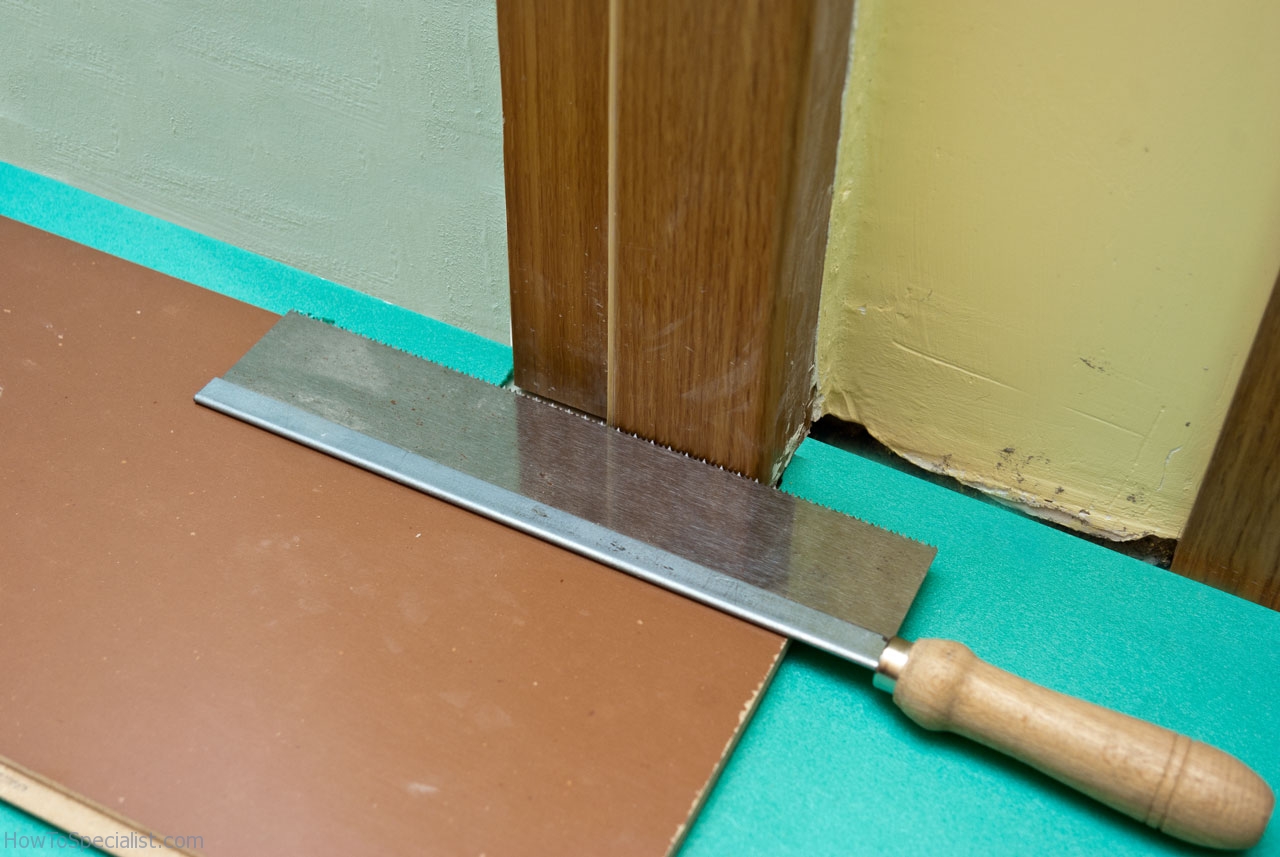
Cutting laminate flooring
Last but not least, you have to cut the door jamb, as to lay the laminate boards under it. In the past years, we have witnessed many contractors which overlook this procedure, but we can assure you that it’s best to fit the laminate flooring under the jambs and not around them.
Place a piece of underlay on the concrete sub-floor, and a laminate board on top. Next, use a back-saw to cut the wooden door jamb, by holding it perfectly level. Work with great care, otherwise you might scratch the jambs.
How to lay laminate flooring on concrete
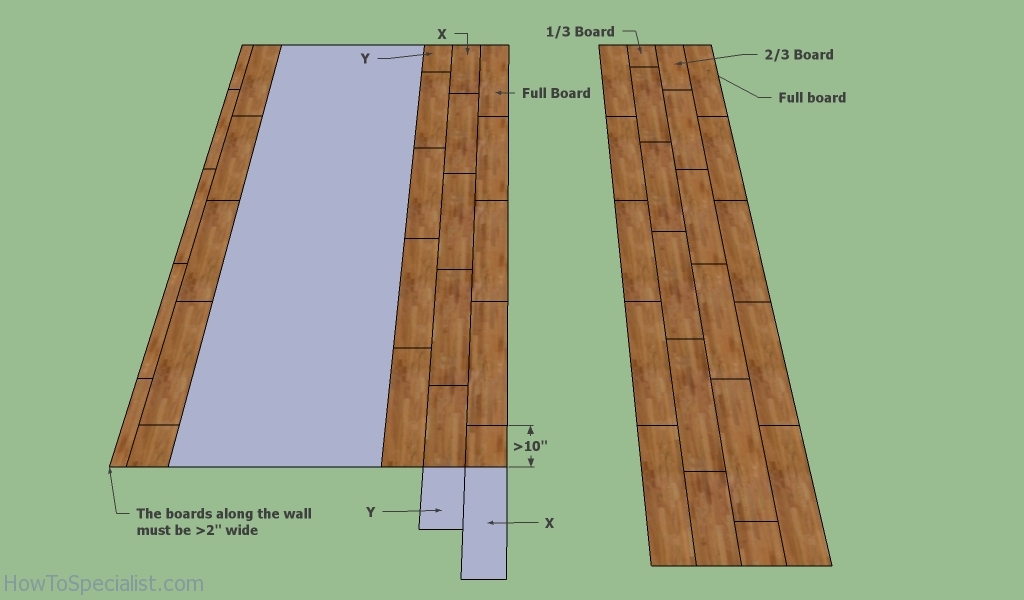
Laminate flooring layout
You could start laying laminate flooring with a full boards, the next row with 2/3 of a laminate board, the third row with 1/3 laminate board and then again with a full board.
Nevertheless, if the dimensions of the room allow you, you could start the second row with the cut waste from the last board installed in the first row. Just make sure you have at least 10” between the laminate joints on consecutive rows.
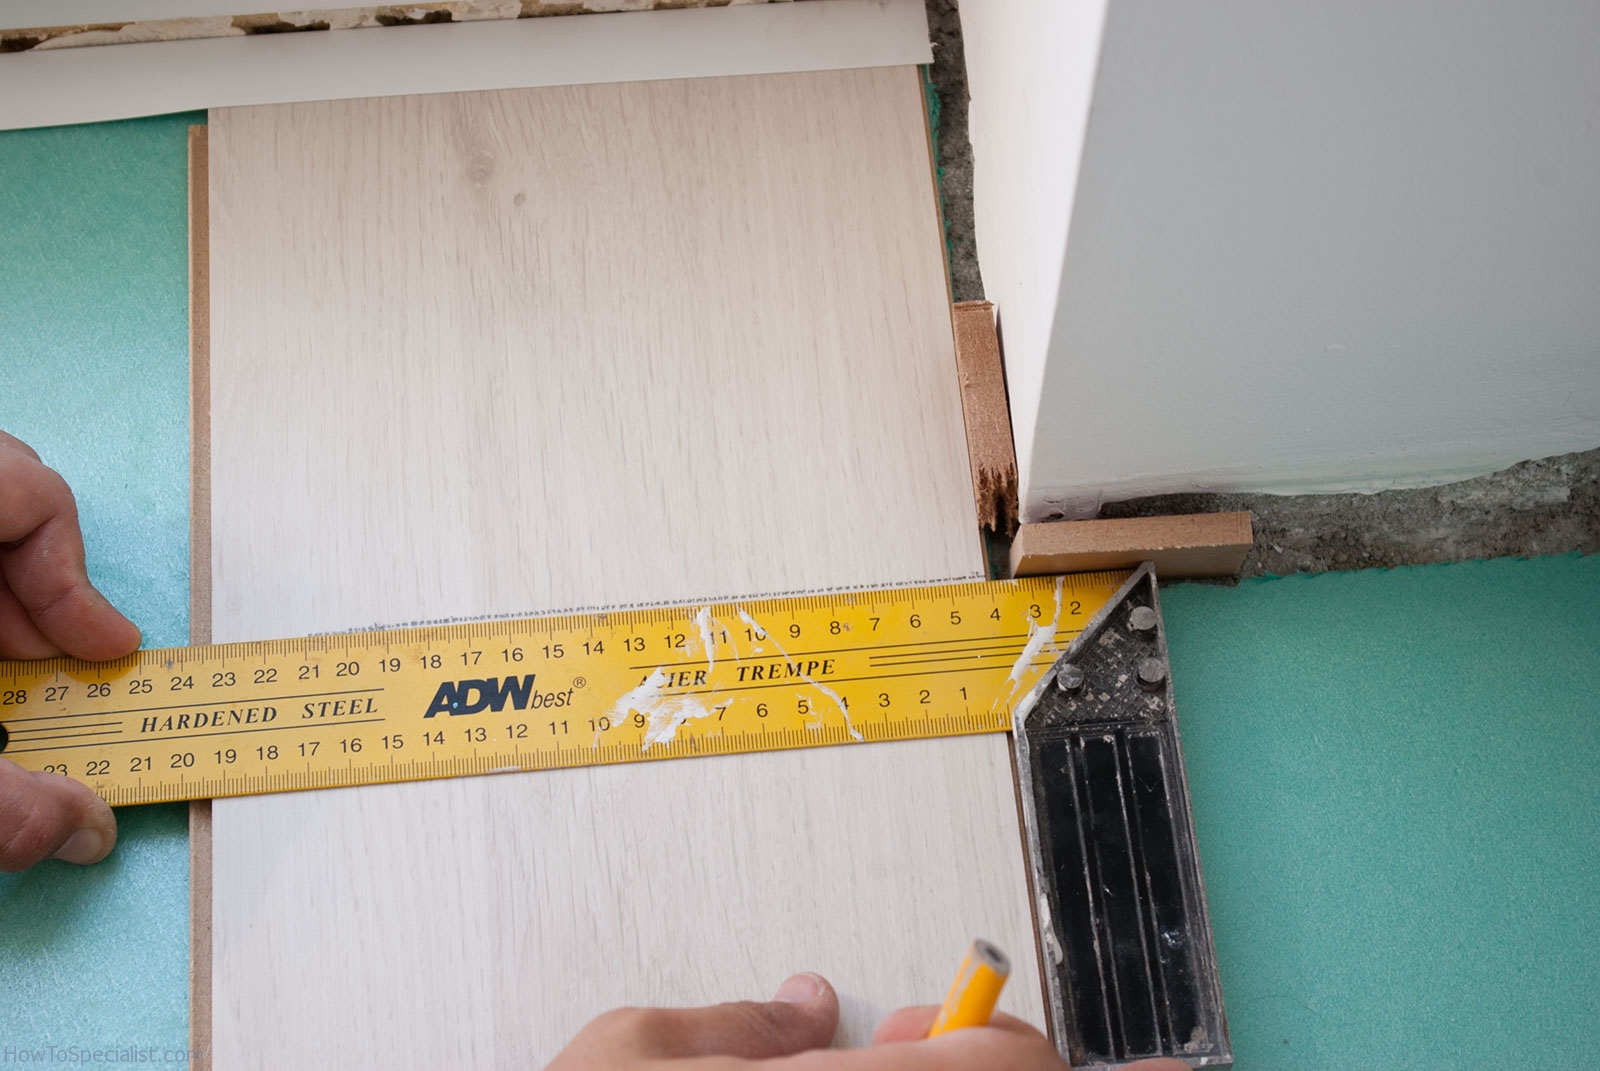
Marking cut line on planks
Install spacers along all walls, when measuring and installing the laminate flooring. After laying the laminate flooring into position, you should draw the cut line on the laminate plank, by using a pencil and using a l-square.
You should pay attention to all this steps, as a little error of measurement or of judgment could compromise the whole process. Taking accurate measurements might take some time, but it’s a small effort compared to wasting laminate boards.

Cut laminate flooring with jig saw
In order to make straight cuts, you have to use two clamps and another laminate plank on top of the the one you want to cut. In this example we use a jigsaw, but the operation can be done also with a sharp hand saw. Remember that the blade of the saw must have the teeth downward oriented, to avoid chipping the planks.
Make sure the blade of the jigsaw is exactly over the drawn line, at both ends. Before making the cut, ensure that the whole set up is firmly locked either by clamps or with the help of a friend.
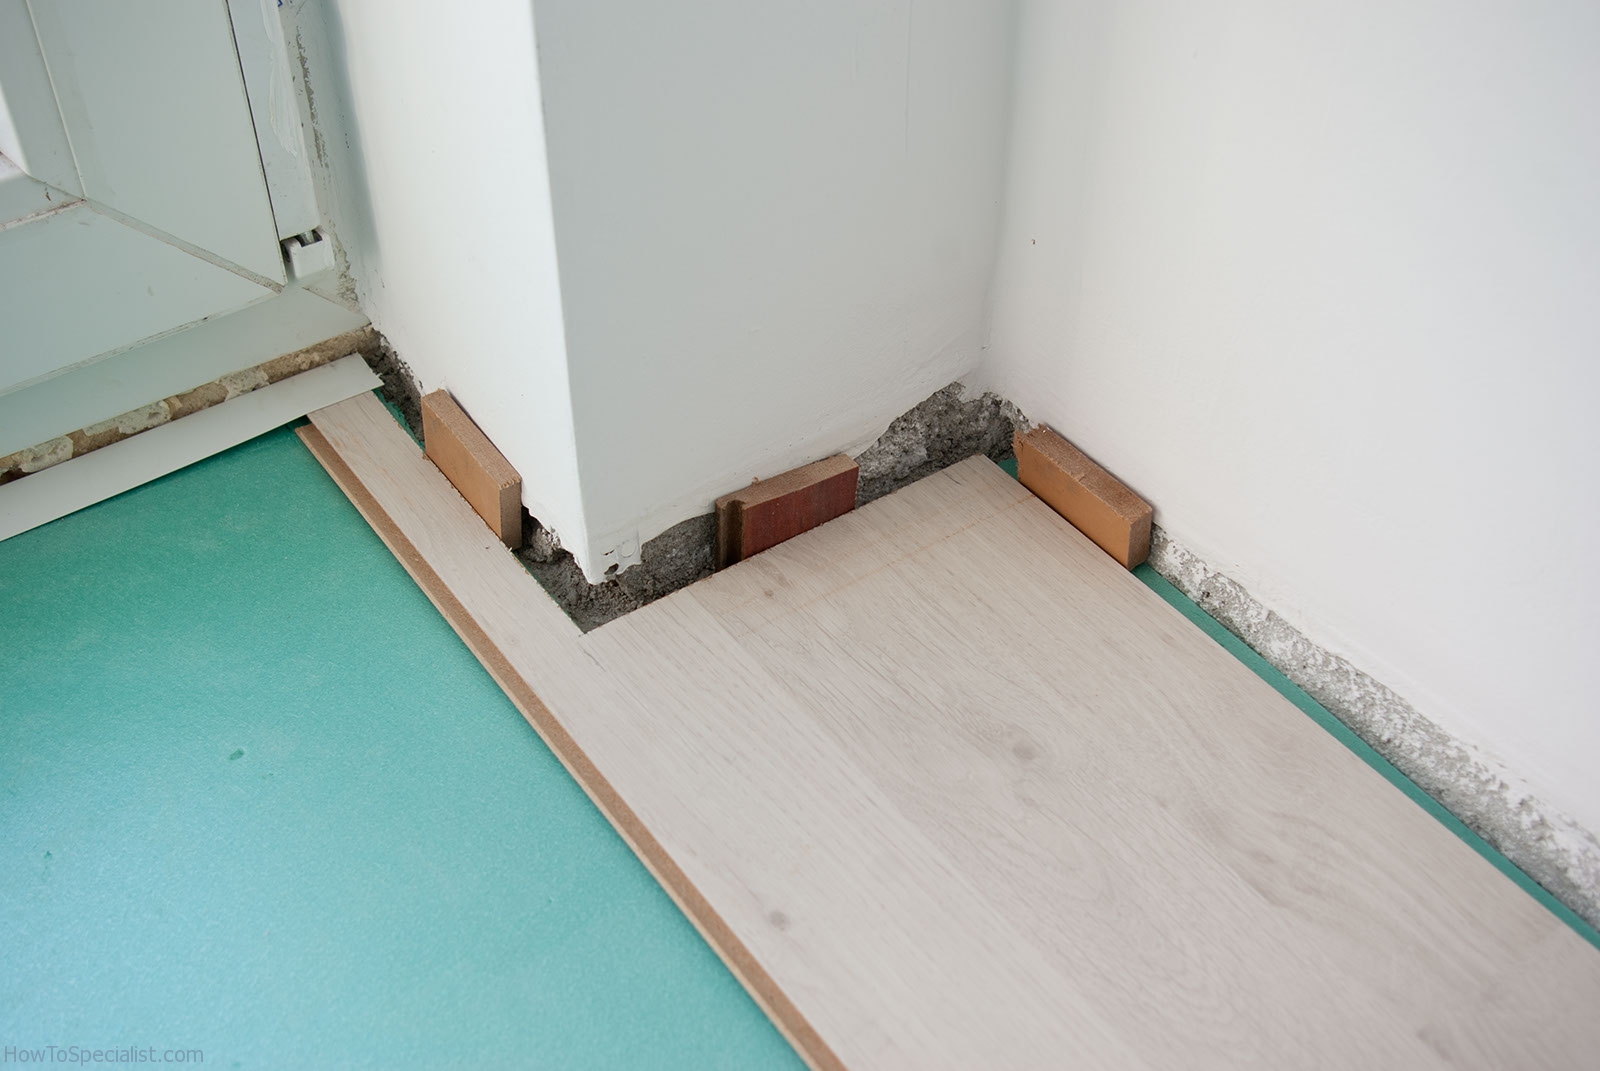
How to lay laminate flooring around corner
Continue the process of laying the laminate flooring by installing the plank into the position. Make sure you place spacers along all walls. Verify if the gap between the plank and the wall is appropriate. If the space is greater than 1/3”, the molding cannot mask the gap and the laminate floor would look unprofessional.
Note that you should start the first row with a full board. This aspect is important, as in this way the boards will be properly locked together and you will waste fewer materials.

How to lay laminate planks
Make sure that all grooves are clean before laying the boards, otherwise the floor would have irregularities on the surface. In this project we have used double click laminate flooring, but on the market you may also find other types of locking systems.
In this picture you can see how to connect the boards together. Do not apply too much force, as you risk damaging the grooves, just try to make the procedure progressively. Make sure there is no gap between laminate boards.

Connecting laminate flooring rows
When connecting the rows together, you should lift them at about 45º. Next, connect them and lay the row on the floor. Last but not least, in order to secure the joints, tap them with a mallet and another piece of laminate.
Make sure there is no space between the rows by taking a close look. In addition, make sure the rows are perfectly straight. If you notice any issue, there might be two causes: on one hand you could have installed them wrongly, or the laminate planks have of poor quality.

Drawing cut line on laminate boards
Use an L-square and a pencil to draw the cut line on the laminate boards. In order to make accurate measurements, install a spacer along the wall and turn the the laminate boards with the tongue towards the wall.
Laying laminate flooring along the wall: the last row

How to lay laminate flooring along wall
In order to make a proper cut, you need to take accurate measures. The first step is to turn the laminate board 180º, with the tongue towards the wall. Next, use a pencil to make marks at both ends of the board.
Pay attention to the fact that when drawing the cut line, you should also place the spacers along the wall. If you overlook this aspect, you the laminate board won’t fit into location. The planks then to change their size over time, so you need the expansion gaps.

Cutting laminate flooring
The next step is to use the cutting setup, as to obtain a proper, straight cut. Consequently, you should use two C-clamps and another straight laminate board and lock them together, as in the image.
Before making the cut with the jigsaw, we made sure that the whole setup was firmly locked into position. Afterwards, we carefully cut the board in a beautiful straight line. We repeated the process for all laminate boards, and then we connected them with the rest of the flooring.
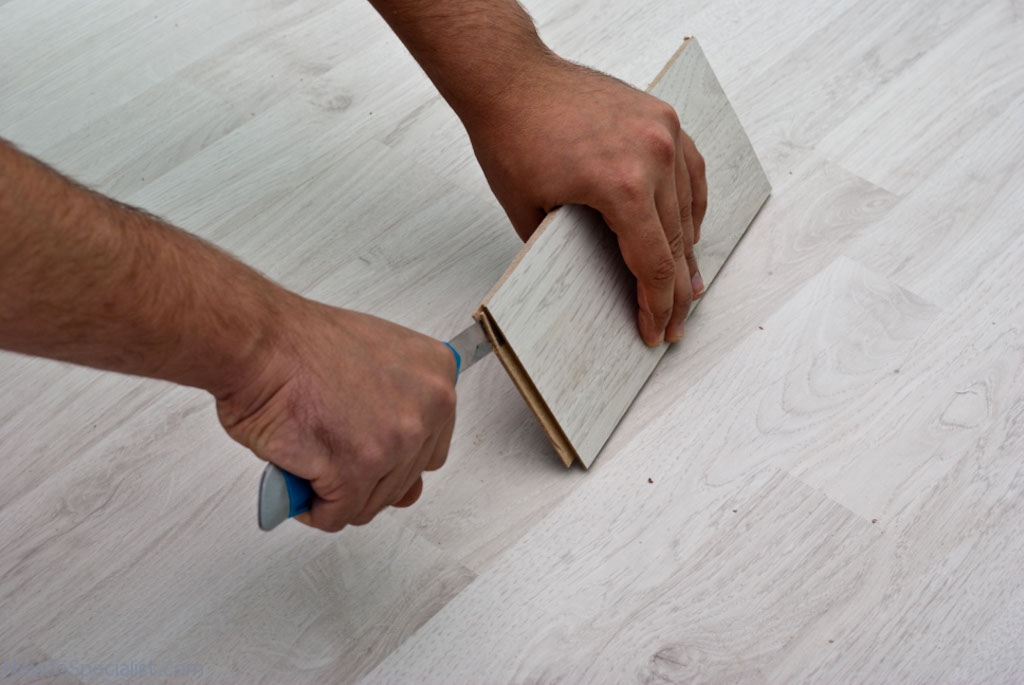
Cutting laminate planks groove
In order to complete the project in a professional manner, all you have to do is to install the missing pieces of laminate, under the door jambs. Follow the instructions and use proper tools.
The technique is to cut the groove of the laminate plank using a cutter. Before this procedure, we had cut the laminate plank at the right dimensions, as to fit into place. This is the proper technique to connect the board under the door jamb, as there is no space for the usual method.

How to lay laminate flooring under door jamb
In order to seal the two boards of laminate flooring, we used a quality wood glue. Then, we connected the boards by using a mallet (hit the laminate board with a rubber hammer). Work with attention and with great care, until you close the gaps and you lock the plank tightly.
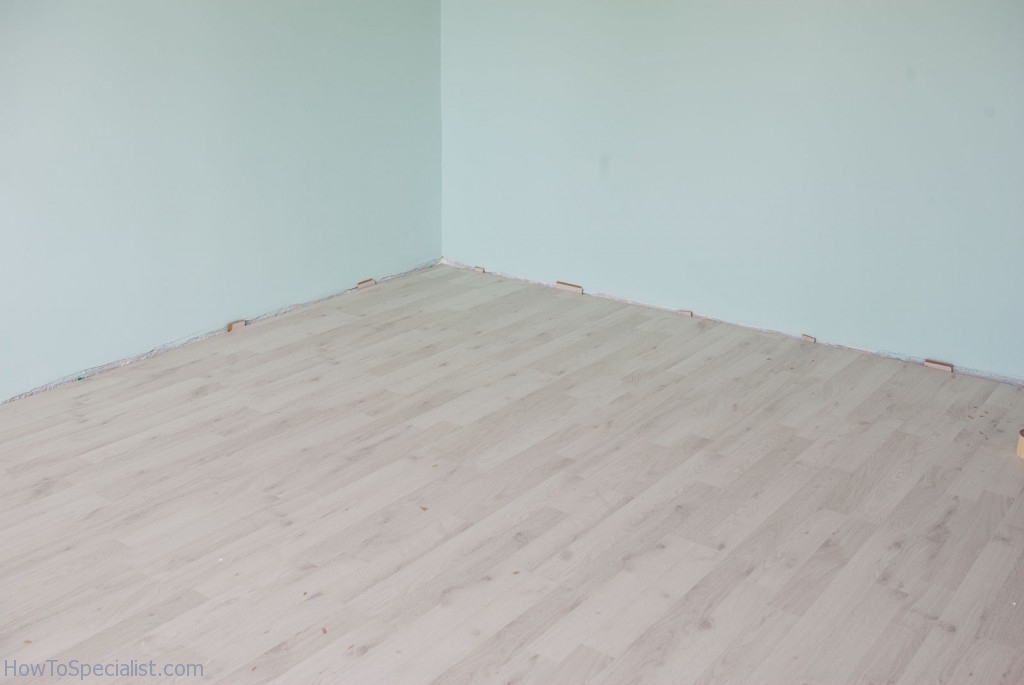
How to lay laminate flooring on concrete
Lay laminate flooring on the rest of the concrete floor, in the same manner described above. Work with patience and make sure you don’t leave any gaps between the laminate planks.
My best tips to install laminate flooring on concrete:
Installing laminate flooring on concrete can be a straightforward process with the right approach. Here are my best tips to ensure a smooth, long-lasting installation:
1. Prepare the Concrete Surface: Make sure your concrete floor is clean, dry, and level. Remove any debris, dirt, or old adhesive, and if there are uneven areas, use a self-leveling compound to smooth them out. Laminate flooring requires a flat surface for proper installation and longevity.
2. Check for Moisture: Concrete can absorb moisture, which can damage laminate flooring. Use a moisture meter to check the levels. If moisture is an issue, apply a moisture barrier or vapor barrier (like plastic sheeting) before installing the underlayment to protect the laminate from potential water damage.
3. Install Underlayment: Even on concrete, laminate flooring requires an underlayment to provide cushioning, sound absorption, and extra protection from moisture. Use an underlayment specifically designed for laminate floors, and make sure to overlap the seams by a few inches and tape them down.
4. Leave an Expansion Gap: Laminate flooring expands and contracts with changes in temperature and humidity. Leave a 1/4 inch expansion gap around the perimeter of the room and at any fixed objects like columns or pipes. The gap will be covered by baseboards or trim once the flooring is installed.
5. Use Spacers to Maintain Gaps: While installing the laminate planks, use spacers along the walls to maintain consistent expansion gaps. This prevents the floor from warping or buckling over time.
6. Acclimate the Laminate: Let the laminate planks acclimate to the room’s temperature and humidity for at least 48 hours before installation. This helps prevent the laminate from expanding or contracting after installation.
7. Work from Left to Right: When laying the laminate planks, start in a left corner and work your way to the right, locking each plank together. Stagger the joints by about 12 inches to give the floor a more natural look and improve stability.
8. Cut the Last Row Carefully: Measure the space for the last row carefully and cut the planks lengthwise to fit, making sure to leave the expansion gap. You can use a pull bar to snugly fit the last row into place.
9. Seal Around Wet Areas: In areas prone to moisture, like kitchens or near entryways, consider sealing the expansion gaps with silicone caulk to prevent water from seeping underneath the laminate and damaging the planks.
By following these tips, you’ll ensure a durable, beautiful laminate floor installation on your concrete surface that will last for years!
Thank you for reading our article on how to lay laminate flooring on concrete and we recommend you to check out the rest of our projects. Don’t forget to Like our articles and to share them with your friends, by using the social media widgets.

2 comments
I read in another article the requirement to level the concrete floor. You have no mention of this otherr than to remove any high points in the concrete floor.
Should you use a leveller on the floor if the variation is greater than 2 mm?
Yes.