This step by step diy article is about how to install a shower base. Installing the a shower base is a common project, but most homeowner can get the job done by themselves, if the right materials, tools and plumbing techniques are used. Although it is not a very complex project, you still have to pay attention to several aspects, such as: leveling the base surface, installing the drain in the slab and making the connections.
Make sure you position the drain in the slab properly, as the shower base opening has to fit exactly over it. If for various reasons the floor drain is not aligned properly, you can still get the job done, but it will be a time consuming project. In addition, you will need to use several adapter and a long flexible hose. Remember that you have to connect the components properly, otherwise the joints might leak.
In most of the cases, the shower pan has a rim, so you should secure it to the wall or to the studs. After making all the plumbing connections, you should align the shower base into place and mark the holes. Use a drill machinery to drill the pilot holes, before inserting the galvanized screws into place. Work with great care and attention, if you want to obtain a professional result. See all my Premium Plans in the Shop.
Made from this plan
In order to install a shower base, you need the following:
Materials
- Shower pan, Silicone
- Flexible hose, Elbow pipe
Tools
- Safety gloves, glasses, Miter saw, jigsaw
- Chalk line, tape measure, spirit level, carpentry pencil
- Drill machinery and drill bits, French key, calking gun
Tips
- Make sure the floor is perfectly level
- Calk the joints between the drain components
Time
- One day
Related
Installing a shower base
Generally speaking, there are many types of products to choose from. On one hand, there are showers that come with the base and the glass enclosure already assembled. Although they are easy to install, they are not popular due to their size (they don’t fit trough regular door). Multi-piece products are common, so pay attention to our article, in order to learn the main techniques.
How to install a shower base
First of all, you should get all the tools and materials you are going to use in this projects. Therefore, you need a calking gun, a french key, a spirit level and silicone. From our experience, we recommend you to use only quality materials, otherwise you will have to make small repairs every few weeks.
We will use the silicone to seal the joint between the drainage components, as well as to fill the gap between the wall and the shower base.

Drain hose and elbow pipe
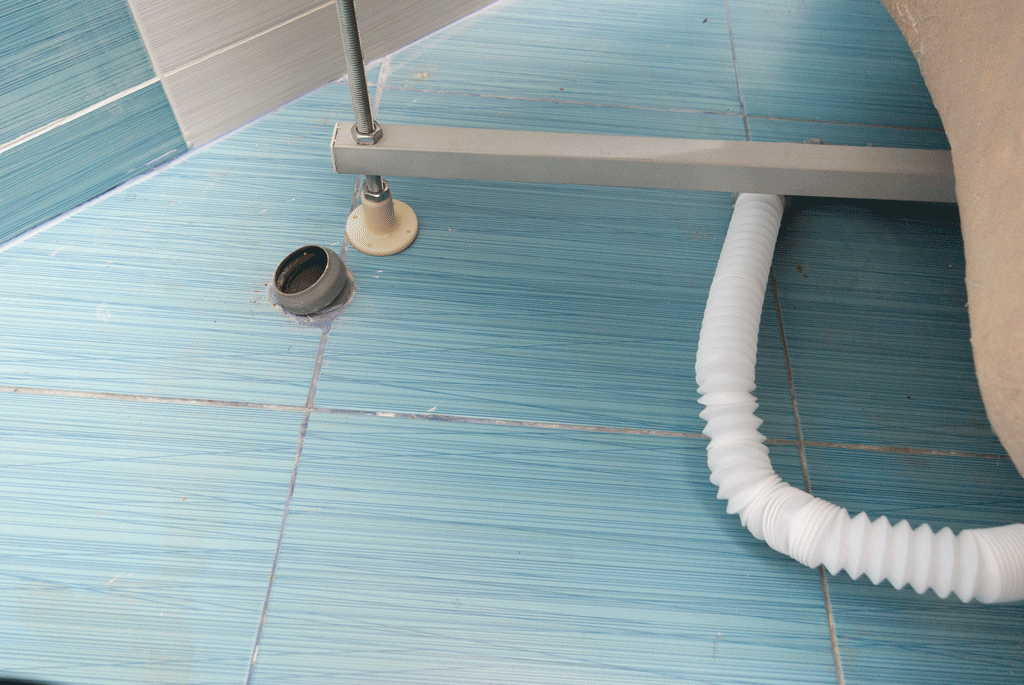
Usually, when installing a shower base, the opening should fit exactly over the drain in the floor. In our case, the bathroom has been tiled so the drain was already installed in concrete. Nevertheless, in home improvement there is always a solution even for the most complex issue, so we bought a flexible hose and an elbow pipe.
Using these components we will connect the shower drain to the drain in the flooring. It might take a little more time, but eventually none will feel any difference.

Drain pipe
Check the surface to make sure it is perfectly level, using a hand level. If you want to fit the shower base directly over the concrete floor, without installing tiles, you should also make sure the surface is perfectly level and even.
If the area isn’t, w recommend you to pour layer of self-leveling compound or mortar. Let the materials to dry out properly, before fitting the shower pan into place. Meanwhile, you should read the shower manufacturer’s instructions with great care and get familiar with the installation techniques.

Calking the hose to the pipe elbow
The next step of the project is to fit the flexible hose to the elbow pipe and to seal the joint with silicone. Make sure you seal the joint, otherwise the joint will leak severely. Let the silicone to dry out properly, before connecting the hose to the shower base.

Installing a shower base
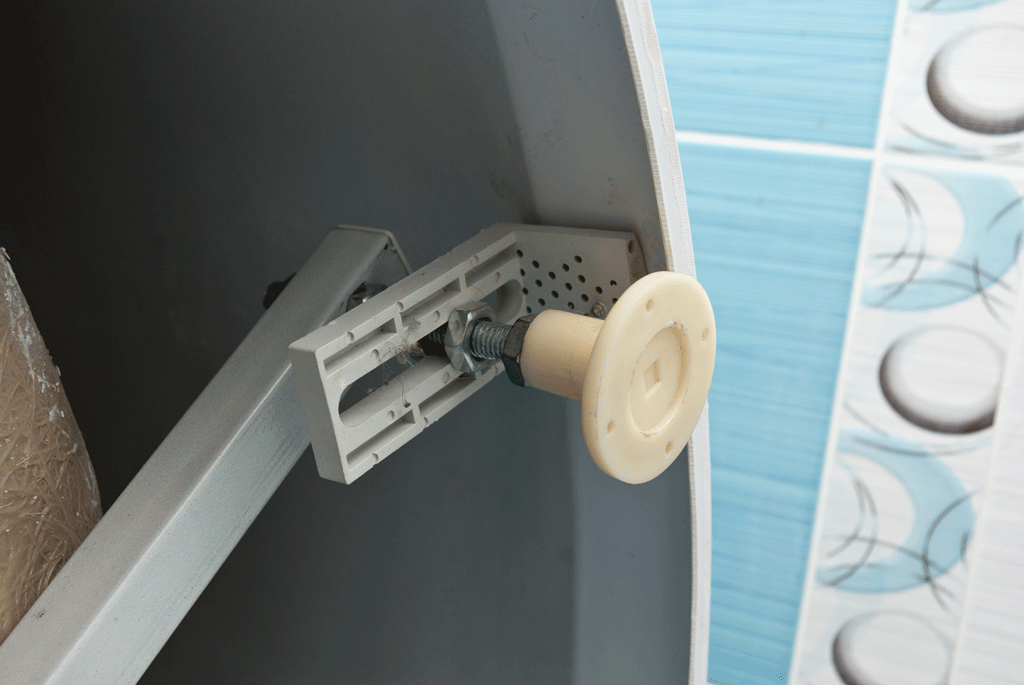
The next step of the project is to take a quick look to the shower pan. In our case, we had to install a tall shower base, but the installation techniques are the same for any kind of pan. As you can see in the image, the base has several adjustable legs, as to fit it into place properly.
On the other hand, you should also notice the drain body. Taking into account the drain opening does not fit exactly over the drain in the floor, the drain body has the exit on one side. Work with great attention, if you want to get a professional result.

Fitting the hose to the drain
Afterwards, fit the flexible hose to the drain body and seal the connection with silicone. If you want to adjust the direction of the drain body, you should use a key.
Let the silicone to dry out for several minutes, before installing the other end of the hose into the floor drain.

Fitting the hose to the drain
Fit the other end of the hose (the elbow pipe) into the flooring drain, making sure the connection is sealed properly. Press the elbow pipe firmly into the drain.

P – Trap
Make sure you install a P-trap or make one using the flexible hose.

Shower base legs
As we have already said, the shower base comes with adjustable legs. In order to make the pan perfectly level, you need to adjust the legs with an appropriate key.

Leveling the shower base
Level the shower base on all edges, using a spirit level. Adjust the legs of the shower, by using an appropriate key, if necessary. Repeat the process until the shower pan sits properly and it is perfectly level.

How to install a shower base
After adjusting the height of the base, you should examine if it is perfectly level. In addition, there should not be any kind of gaps between the shower pan and the walls. We will show you how to calk the joints, in the other parts of the project.
Thank you for reading our article about how to install a shower base and we recommend you to check out the rest of the diy projects. Don’t forget to LIKE and SHARE our projects with your friends, using the social media widgets, if you have found this project useful.
<< Previous | Next >>


2 comments
why is shower base so high…isn’t that an awkward step way to enter the shower..
This is a tall shower base. It has its pros and cons. It is a matter of needs and taste.