This step by step woodworking project is about 8×8 greenhouse roof, door and vents plans. This is PART 2 of the greenhouse, where I show you how to build the doors and the vents for the greenhouse. This greenhouse has two large doors for an easy access to the interior and four vents, so you can cool down the air.
Make sure you select a proper location for the greenhouse as the plants need to receive a lot of natural light, even in the winter days. Moreover, you have to make sure you comply with the local building codes, if any. In addition, you can adjust the size of the greenhouse to suit your needs. The stakes will hold the frame of the greenhouse into place, if you live in an area with strong winds. See all my Premium Plans in the Shop.
Made from this plan
8×8 Greenhouse Roof, Vents and Door Plans
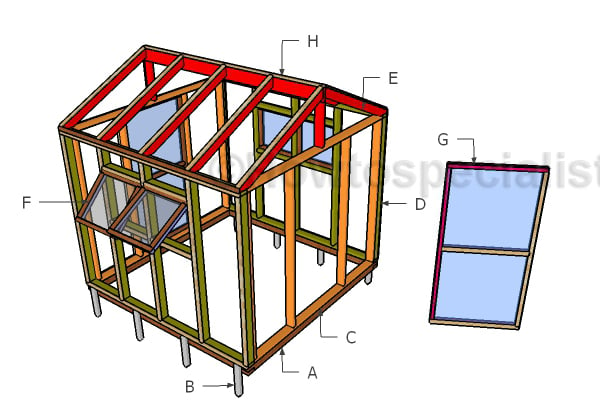
Building a 8×8 greenhouse
Materials
- E – 2 pieces of 2×4 lumber – 18″ long, 10 pieces – 53 3/4″ long, 1 piece of 2×6 lumber – 96″ long RAFTERS
- F – 2 pieces of 2×2 lumber – 22 1/2″ long, 2 pieces – 19 1/2″ long, 2 pieces of 1×2 lumber – 22 1/2″ long, 2 pieces – 19 1/2″ long 4xVENT
- G – 2 pieces of 2×2 lumber – 36″ long, 2 pieces – 69″ long, 1 piece – 33″ long, 2 pieces of 1×2 lumber – 36″ long, 2 pieces – 69″ long, 1 piece – 33″ long 2xDOOR
- H – 18 pieces of 1×2 lumber – 72″, 9 pieces – 96″ long, 10 pieces – 52 1/4″ long TRIMS
- 2 1/2″ screws, 3 1/2″ screws
- vent opener
- hinges, latch
- 10 pieces of 2×4 lumber – 6′
- 10 pieces of 2×2 lumber – 8′
- 46 pieces of 1×2 lumber – 8′
Tools
- Safety gloves, glasses
- Miter saw, jigsaw
- Chalk line, tape measure, spirit level, carpentry pencil
- Drill machinery and drill bits
Time
- One Week
Building a greenhouse roof
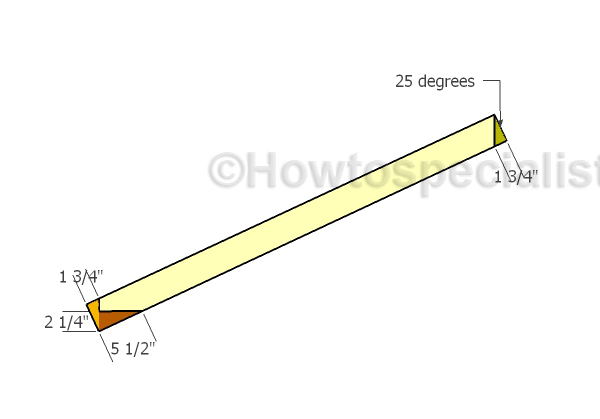
Building the rafters
Building the roof for the greenhouse is a straight forward job, if you follow my plans. Use 2×4 lumber for the rafter. Mark the cut lines to the rafters and get the job done with a circular saw. Smooth the edges with sandpaper.
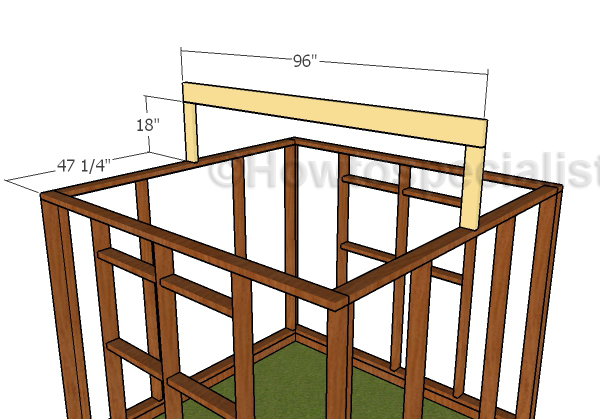
Building the ridge
Fit the ridge beam to the greenhouse, as shown in the plans. Use 2×4 lumber for the supports and 2×6 lumber for the actual ridge. Drill pocket holes at both ends of the supports and insert 2 1/2″ screws to lock them into place tightly.
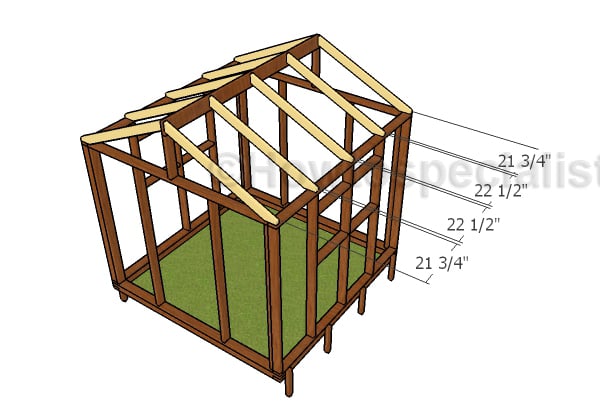
Fitting the rafters
Continue the project by attaching the rafters to the top of the greenhouse. Drill pilot holes and insert 2 1/2″ screws to secure the rafters into place tightly. Place the rafters every 24″ on center for a neat result.
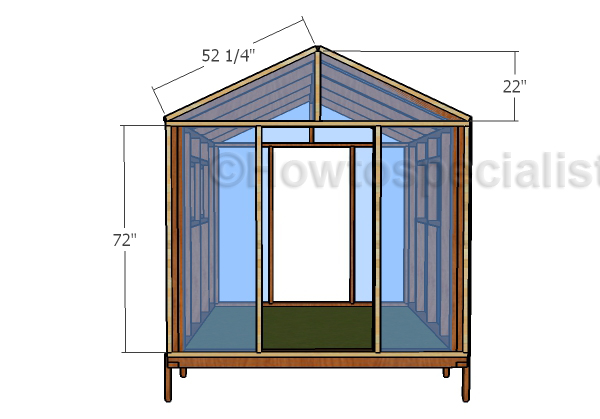
Front and back trims
Staple greenhouse film to the exterior of the greenhouse. Use 1×2 trims to lock the film into place tightly. Use 1 1/4″ screws to secure the trims.
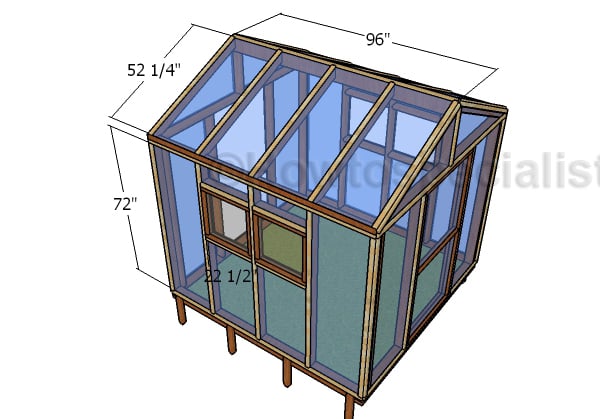
Fitting the side and roof trims
Use 1×2 trims to the secure the greenhouse plastic to the sides and to the top of the structure, as well.
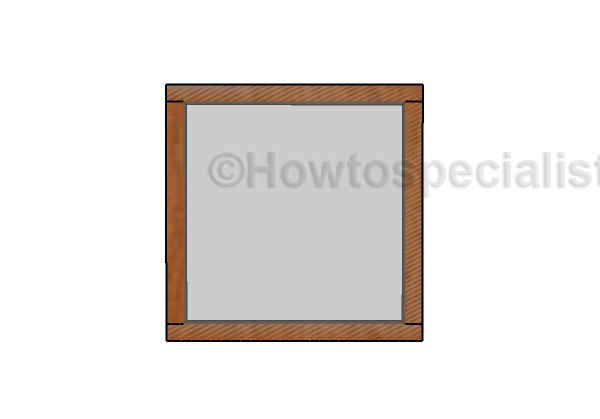
Vent plastic
Use 2×2 lumber for the frame of the vents. Drill pocket holes at both ends of the vertical supports and insert 2 1/2″ screws to lock everything tightly.
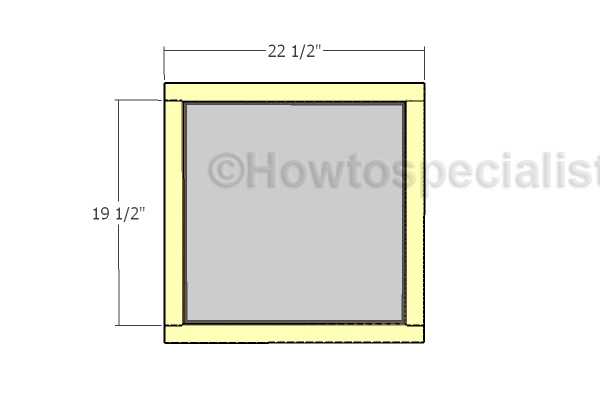
Vent trims
Fit the 1×2 trims to the vents.
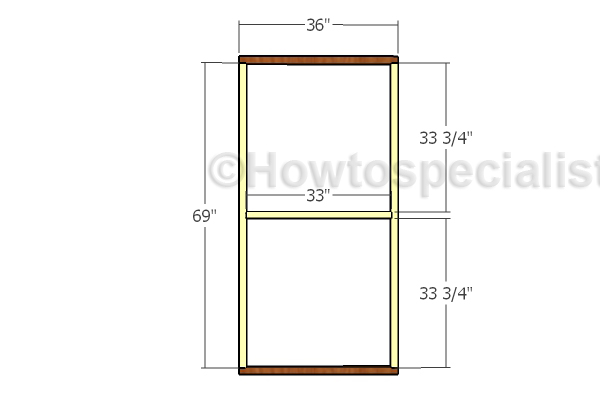
Building a greenhouse door
Build the door for the greenhouse from 2×2 lumber. Drill pocket holes at both ends of the yellow components and insert 2 1/2″ screws to lock the frame of the door tightly.
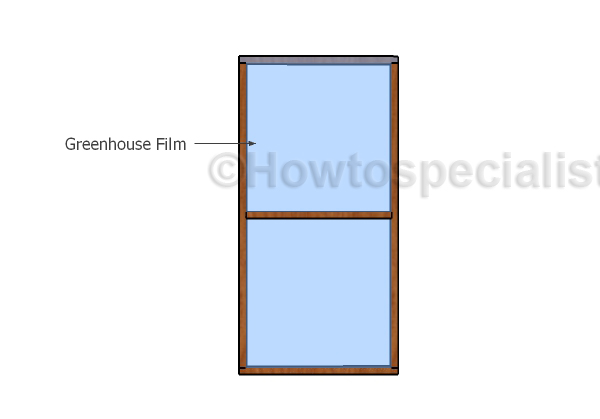
Door film
Attach the plastic to the doors.
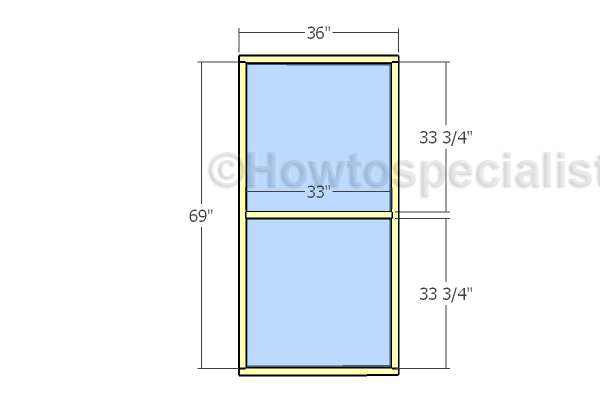
Door Trims
Fit the 1×2 trims to the door frame.
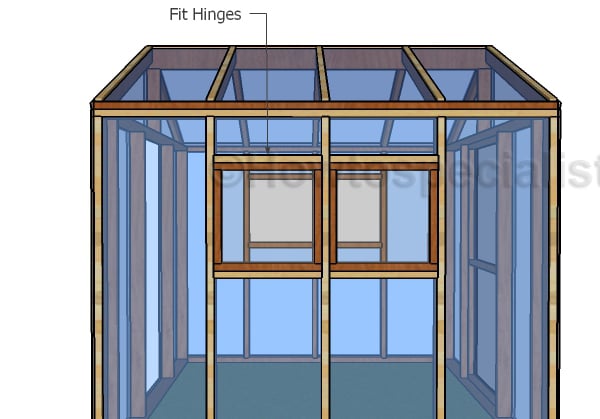
Fitting the side vents
Fit the vents to the openings that are placed on both sides of the greenhouse. Use hinges to lock the vents into place tightly.
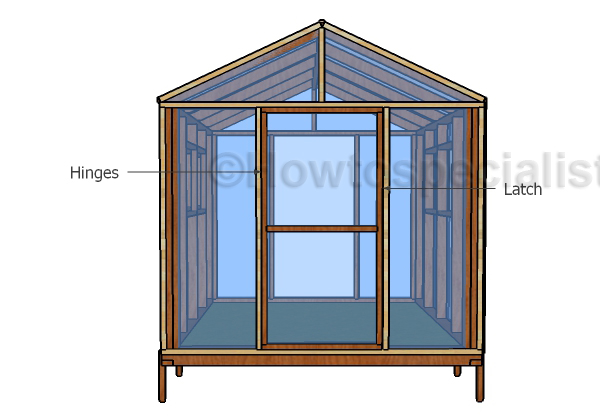
Fitting the greenhouse doors
Fit the doors to the opening and then lock them them to the frame with hinges. Add a latch so you can secure the door.
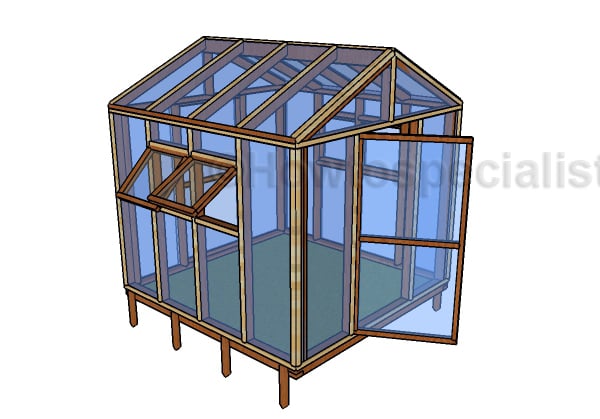
8×8 Greenhouse Plans
This 8×8 greenhouse has a truly beautiful design that can match the style of any property. If you are determined to grow your own vegetables and even flowers, this small greenhouse is cheap enough to build as a start.
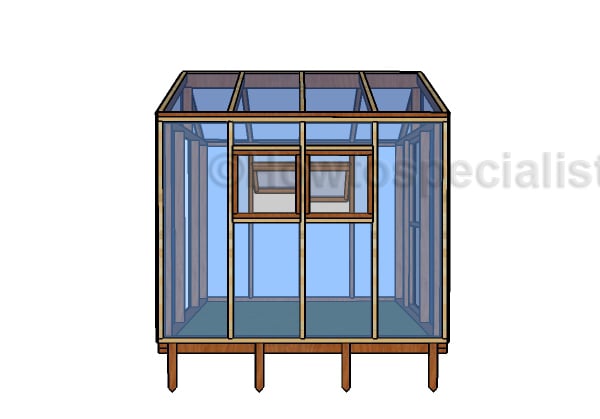
8×8 Greenhouse Plans – Side view
Remember that you can automate the vents for the greenhouse, so you don’t have to air it manually. Using a thermostat and an automatic vent opener you won’t have to worry during the hot days.
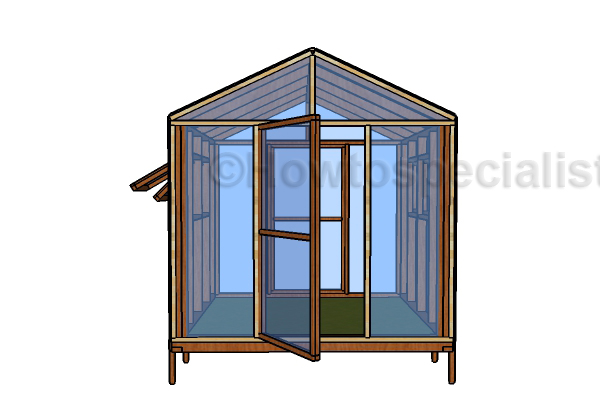
8×8 Greenhouse Plans – Front view
Last but not least, we recommend you to take care of the finishing touches. In order to get a professional result, fill the holes and the gaps with wood filler and let it dry out for a few hours. Check out PART 1 of the project, so you learn how to build the frame of the greenhouse.
Thank you for reading our project about 8×8 greenhouse roof plans and we recommend you to check out the rest of the projects. Don’t forget to LIKE and SHARE our projects with your friends, by using the social media widgets.
<< Previous | Next >>
