Today, I’ve got an exciting free project plans for you—a movable garden stand that holds six 5-gallon buckets. This is a fantastic way to create an affordable and versatile garden in any backyard, no matter the size. With this stand, you can easily move your plants to catch the best sunlight or bring them indoors during bad weather. It’s a perfect solution for those looking to start gardening without breaking the bank or committing to a permanent garden setup. So, grab your tools and let’s get started on this budget-friendly, backyard-friendly garden stand!
If you’re looking to build this 6-bucket garden stand, you’re in for a treat—it’s a super affordable and quick project. You can expect to spend around $50 to $75 on materials, depending on what you have on hand and the quality you choose. As for time, set aside just a few hours to complete this build. It’s a perfect weekend project that will have you gardening in no time! See my other DIY projects HERE.
We recommend you to invest in the best materials you could afford. Therefore, you should buy weather-resistant lumber, such as pine or cedar. Always take accurate measurements before adjusting the size of the components at the proper size. Drill pilot holes trough the components before inserting the wood screws, to prevent the wood from splitting. My plans come with a full cut / shopping list and they are PDF Download and Print friendly. See all my Premium Plans HERE.
Made from this plan
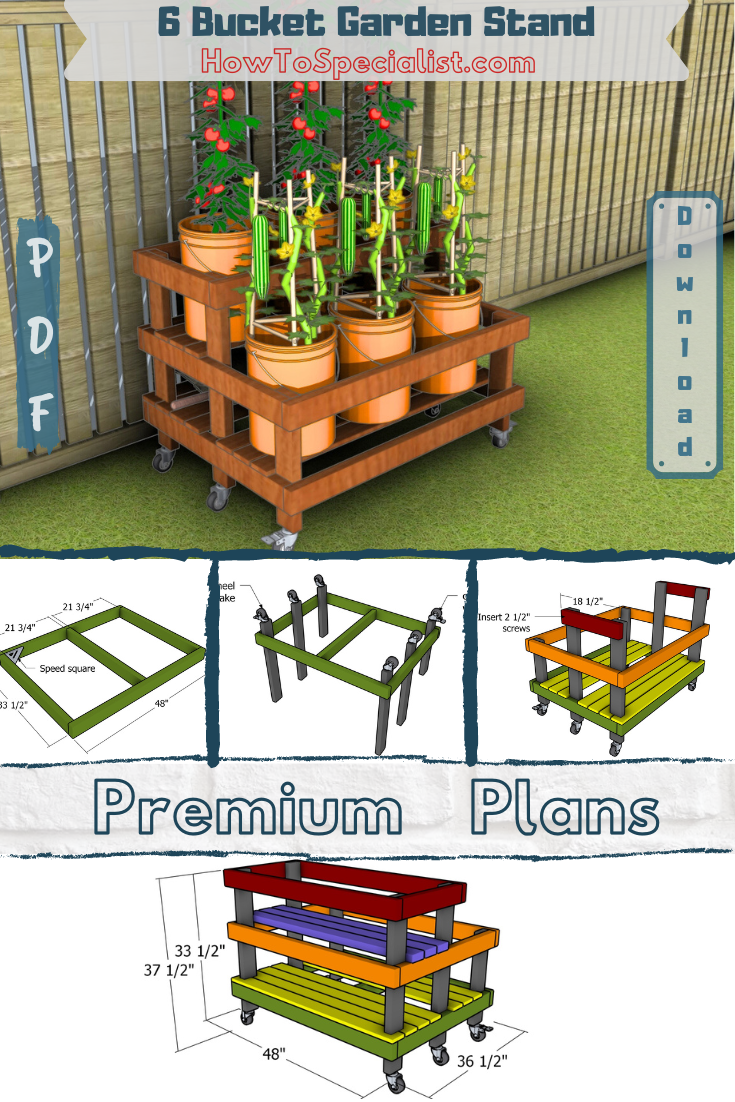
6 Bucket Garden Stand – Free Plans
Building-a-bucket-garden-stand
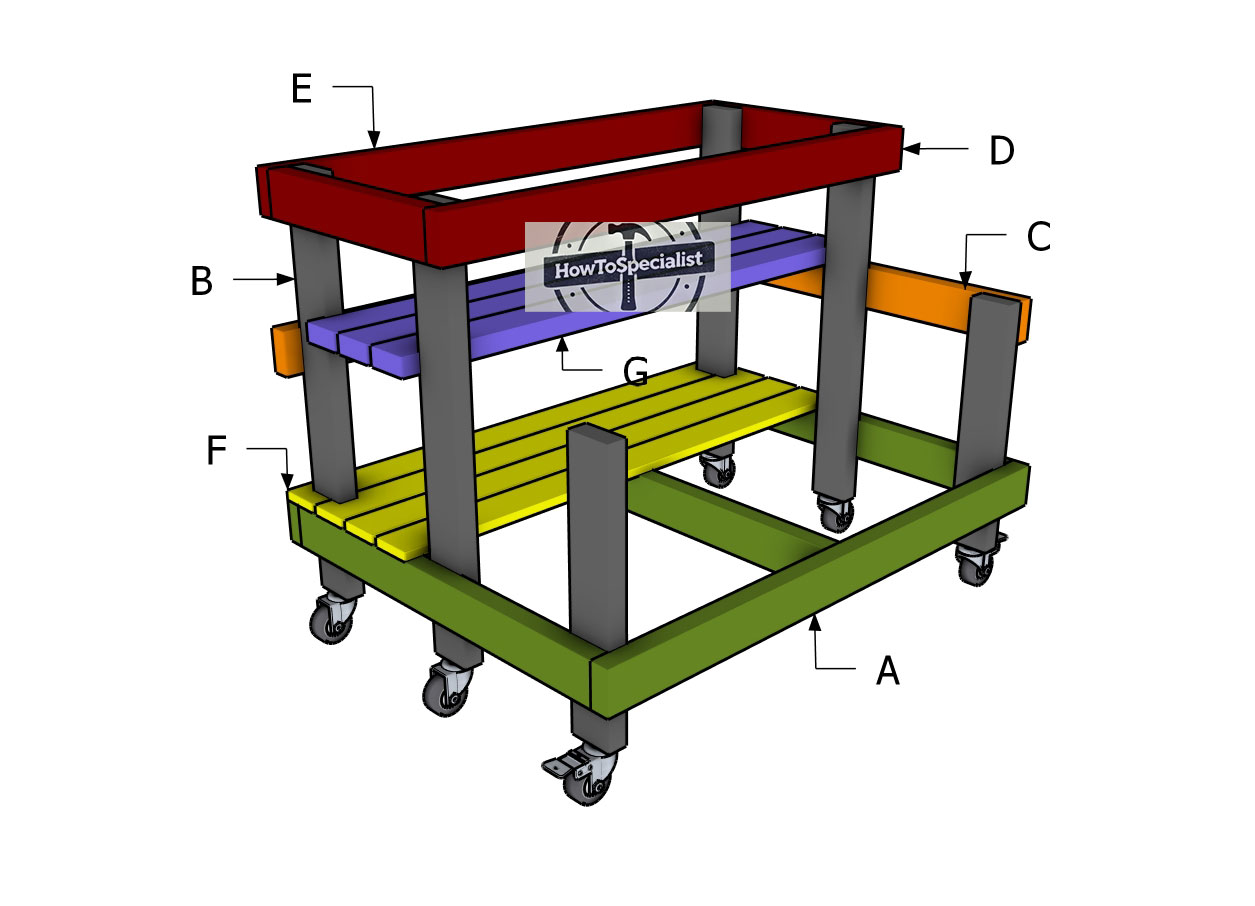
Materials
A – BOTTOM FRAME – 2×4 lumber 48″ – 2 pieces
A – BOTTOM FRAME – 2×4 lumber 33 1/2″ – 3 pieces
B – LEGS – 2×4 lumber 33 1/2″ – 4 pieces
B – LEGS – 2×4 lumber 21 1/2″ – 2 pieces
C – SECOND FRAME – 2×4 lumber 33 1/2″ – 2 pieces
C – SECOND FRAME – 2×4 lumber 48″ – 2 pieces
D – TOP FRAME – 2×4 lumber 48″ – 2 pieces
D – TOP FRAME – 2×4 lumber 33 1/2″ – 2 pieces
E – TOP FRAME – 2×4 lumber 48″ – 2 pieces
E – TOP FRAME – 2×4 lumber 18 1/2″ – 2 pieces
F – TOP FRAME – 1×4 lumber 48″ – 7 pieces
G – TOP SHELF – 2×4 lumber 48″ – 3 pieces
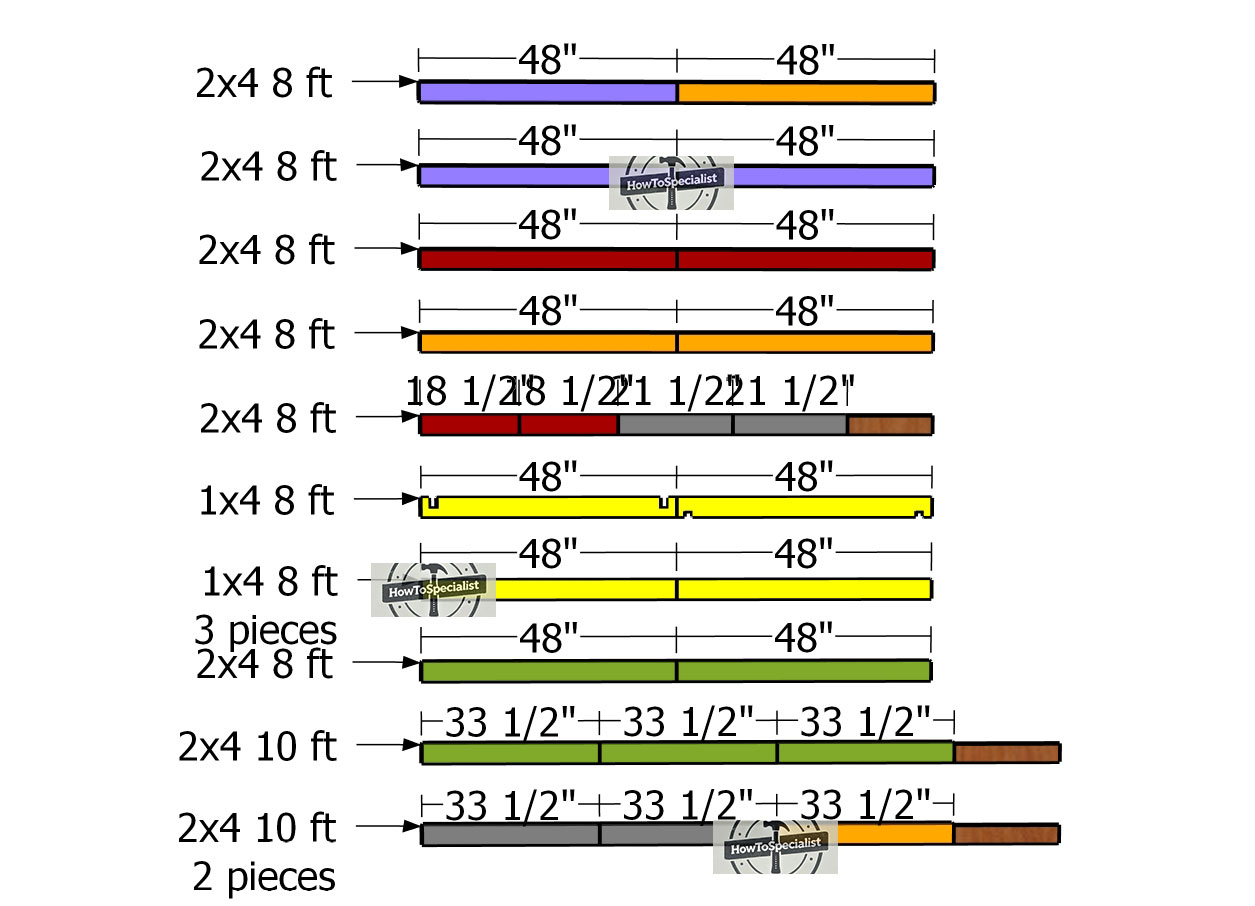
- 2×4 lumber 10 ft – 3 pieces
- 2×4 lumber 8 ft – 6 pieces
- 1×4 lumber 8 ft – 4 pieces
- 6 caster wheels – 4″ (2 with brakes)
- 3 1/2″ screws – 30 pieces
- 2 1/2″ screws – 60 pieces
- 1 5/8″ screws – 30 pieces
- 5 gallon bucket – 6 pieces
Tools
- Circular saw
- Drill machinery, drill bits
- Safety gloves, glasses
- Chalk line, tape measure, spirit level, carpentry pencil
Time
- One weekend
Cut Layout Diagram
Pin for later!
5 Gallon Bucket Stand – Building the frame
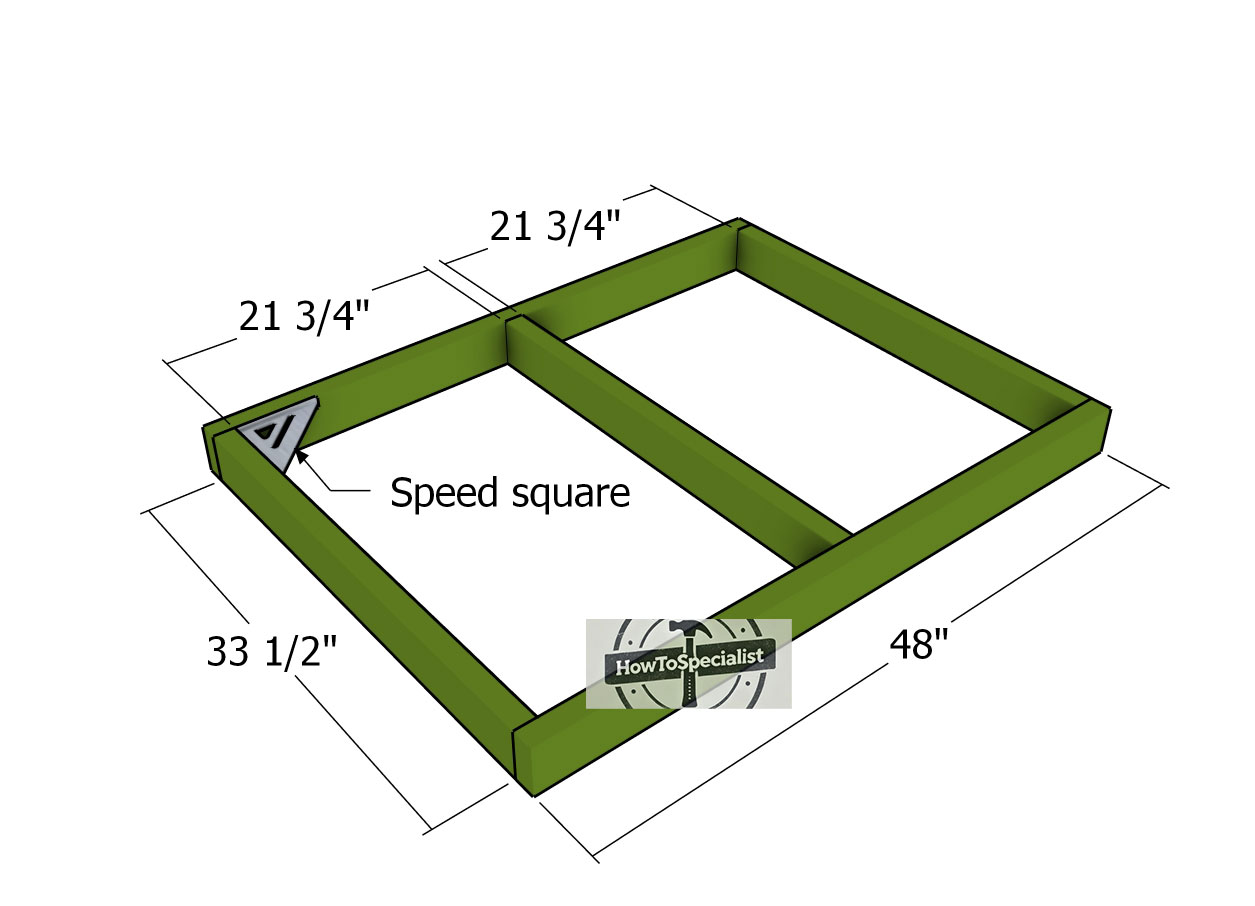
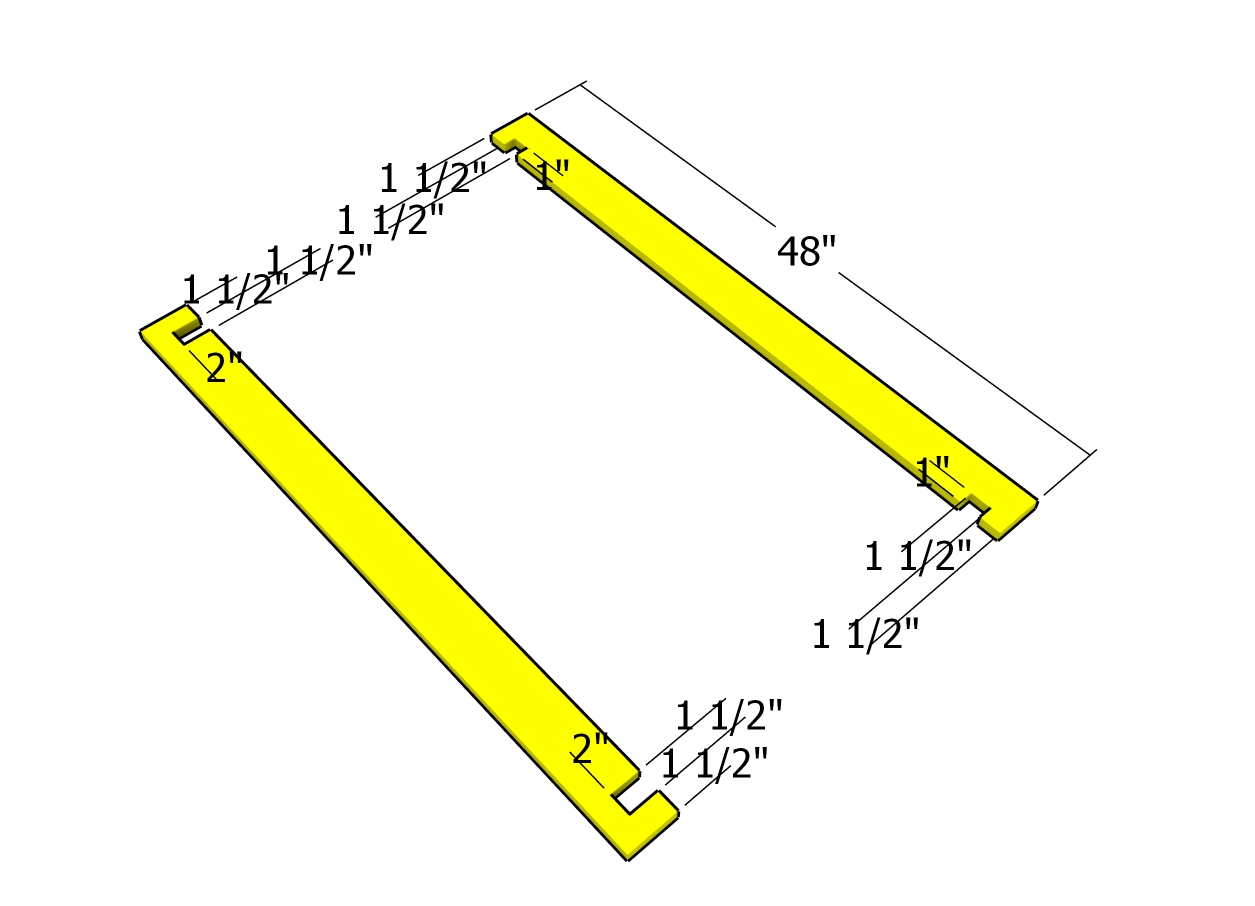
Building-the-floor-frame
The first step in this project is to build the main frame for the bucket garden stand. Start by using 2×4 lumber and cut the pieces according to the diagram. Lay everything out on a level surface, making sure the edges are perfectly flush. Use a speed square to ensure all corners are right-angled, then drill pilot holes and insert 3 1/2″ screws through the 48″ boards into the perpendicular pieces, using 2 screws for each joint.
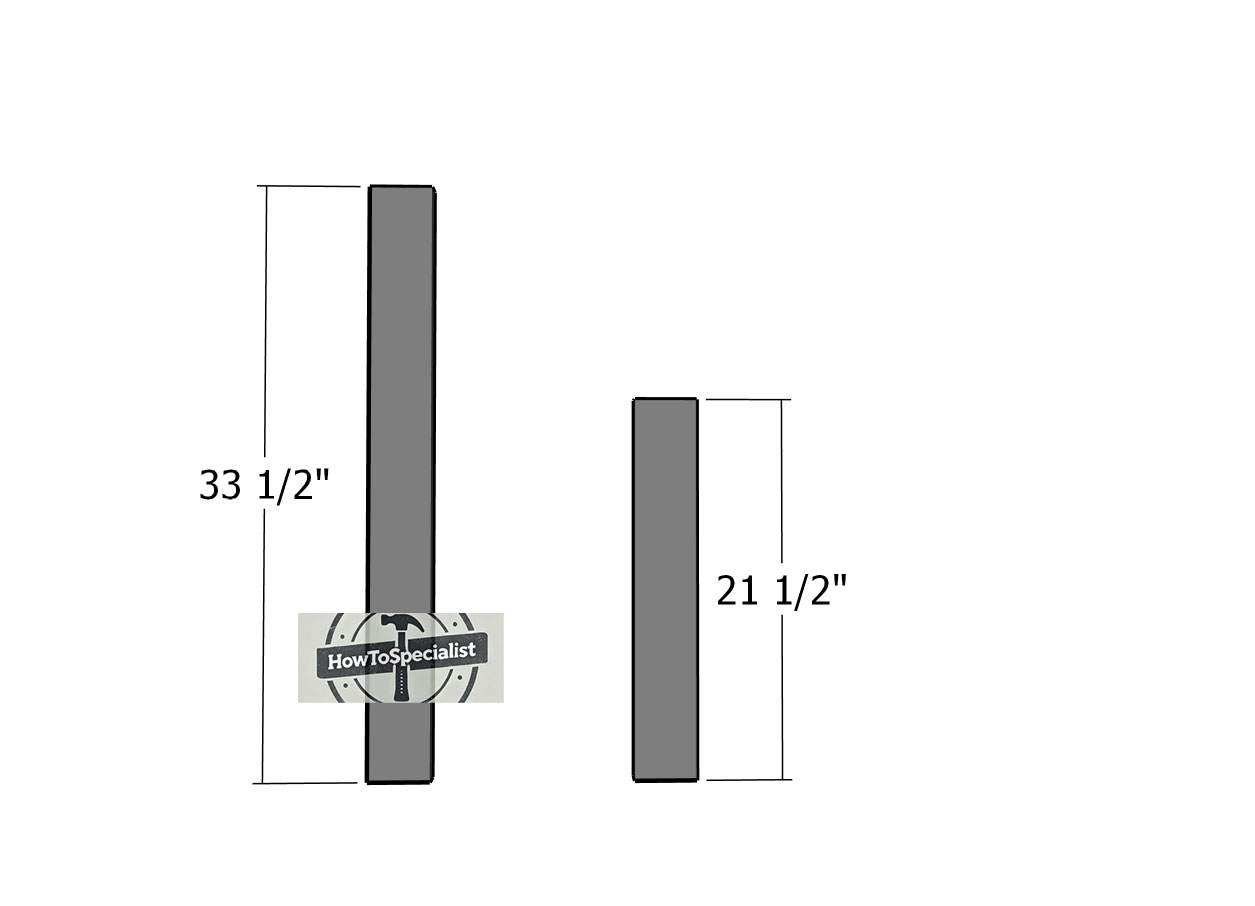
Legs
Next, we’ll work on the legs of the stand using 2×4 lumber. You’ll need to cut 4 pieces at 33 1/2″ and 2 pieces at 21 1/2″.
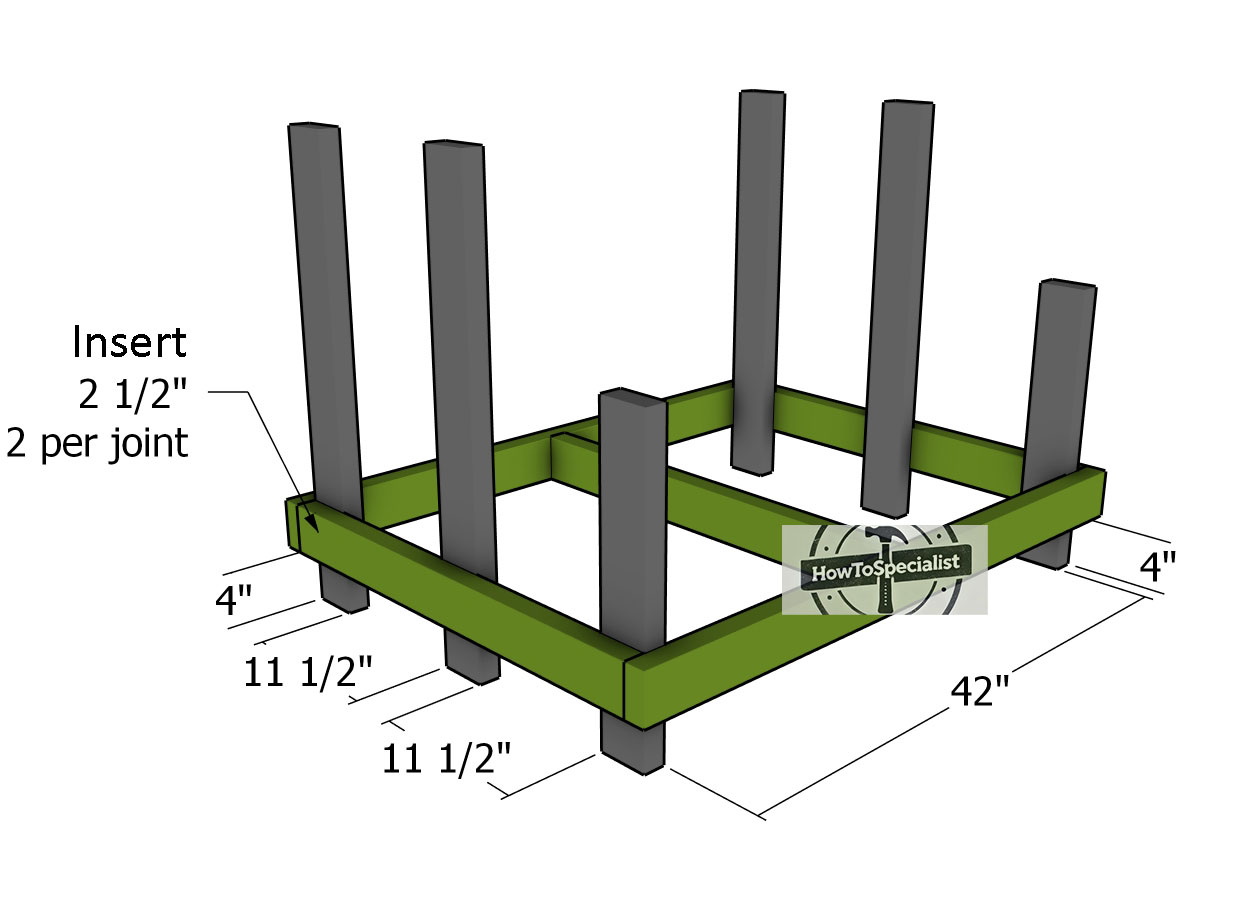
Attaching-the-legs
Next up, let’s attach the legs to the bottom frame. Align the edges to ensure you have a 4″ clearance on all sides. Clamp the legs to the frame and check that they are plumb. Drill pilot holes and secure them with 2 1/2″ screws, using 2 screws for each joint to lock them into place.
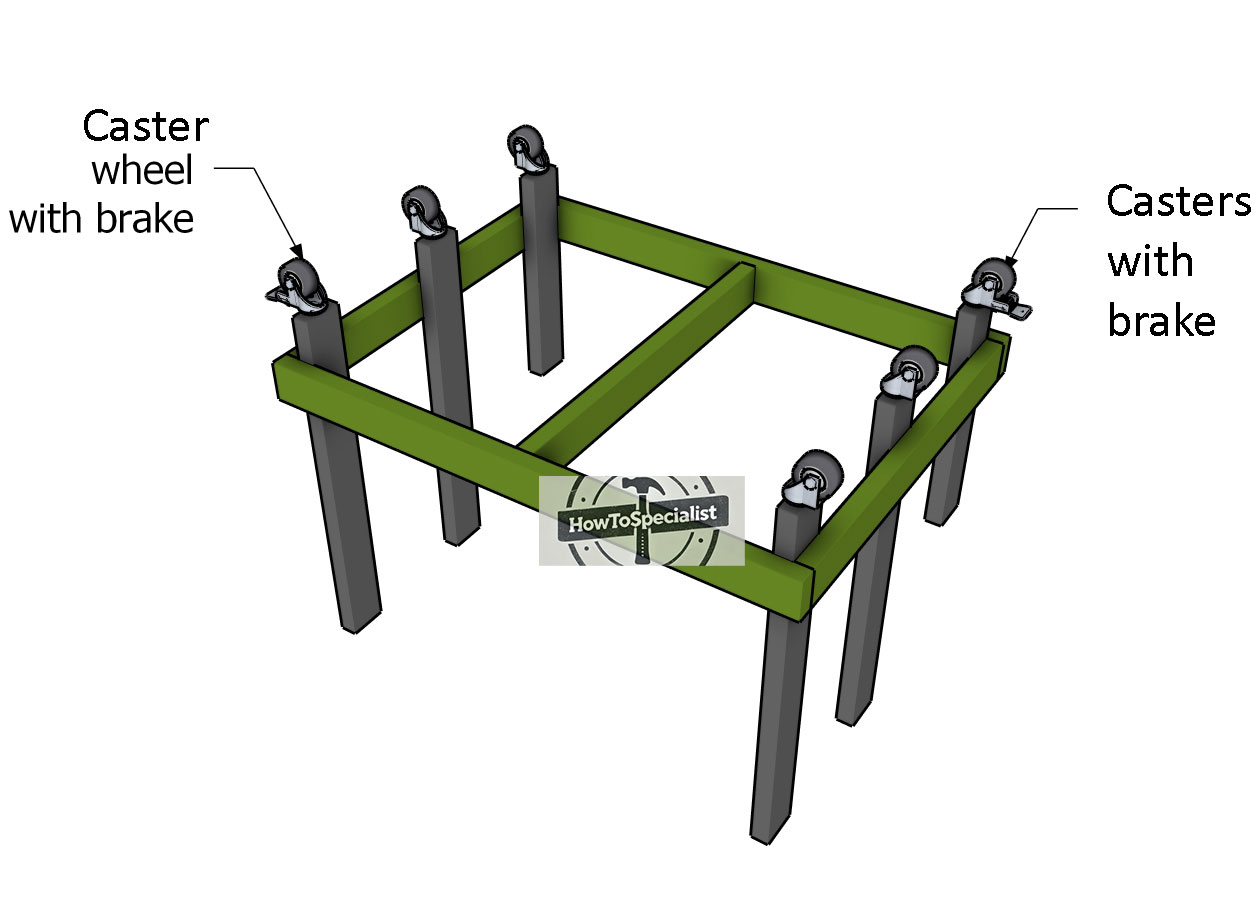
Fitting-the-casters
Now, let’s attach the caster wheels to the legs. Secure the casters tightly using screws. Make sure to add at least 2 casters with brakes so you can lock the stand into place when needed.
Fitting-the-back-shelf
Next, we’ll attach the 1×4 slats to create the bottom shelf. This shelf is designed for the back of the stand, providing extra storage space for garden tools or soil bags. Making the most of every inch, this shelf is a handy addition to keep your gardening essentials organized and within reach.
Boards cut detail
Next, let’s make the notches as shown in the diagram for the boards that go around the vertical legs. You can use a jigsaw to cut out the notches, or alternatively, use a circular saw to make parallel cuts inside the marked areas and then remove the excess with a hammer and chisel.
Attach the boards in place, making sure the edges are flush. Secure them to the bottom frame with 1 5/8″ screws after drilling pilot holes.
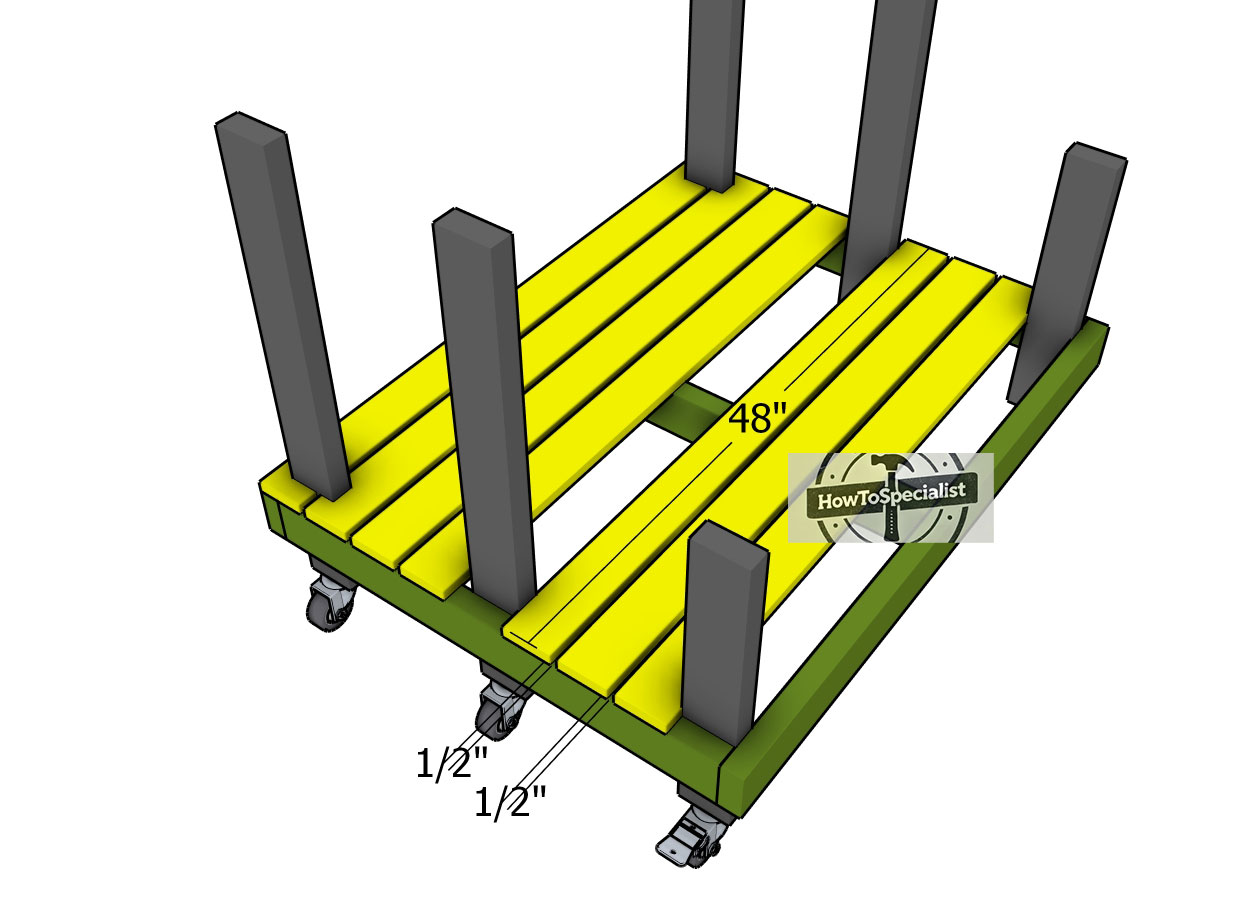
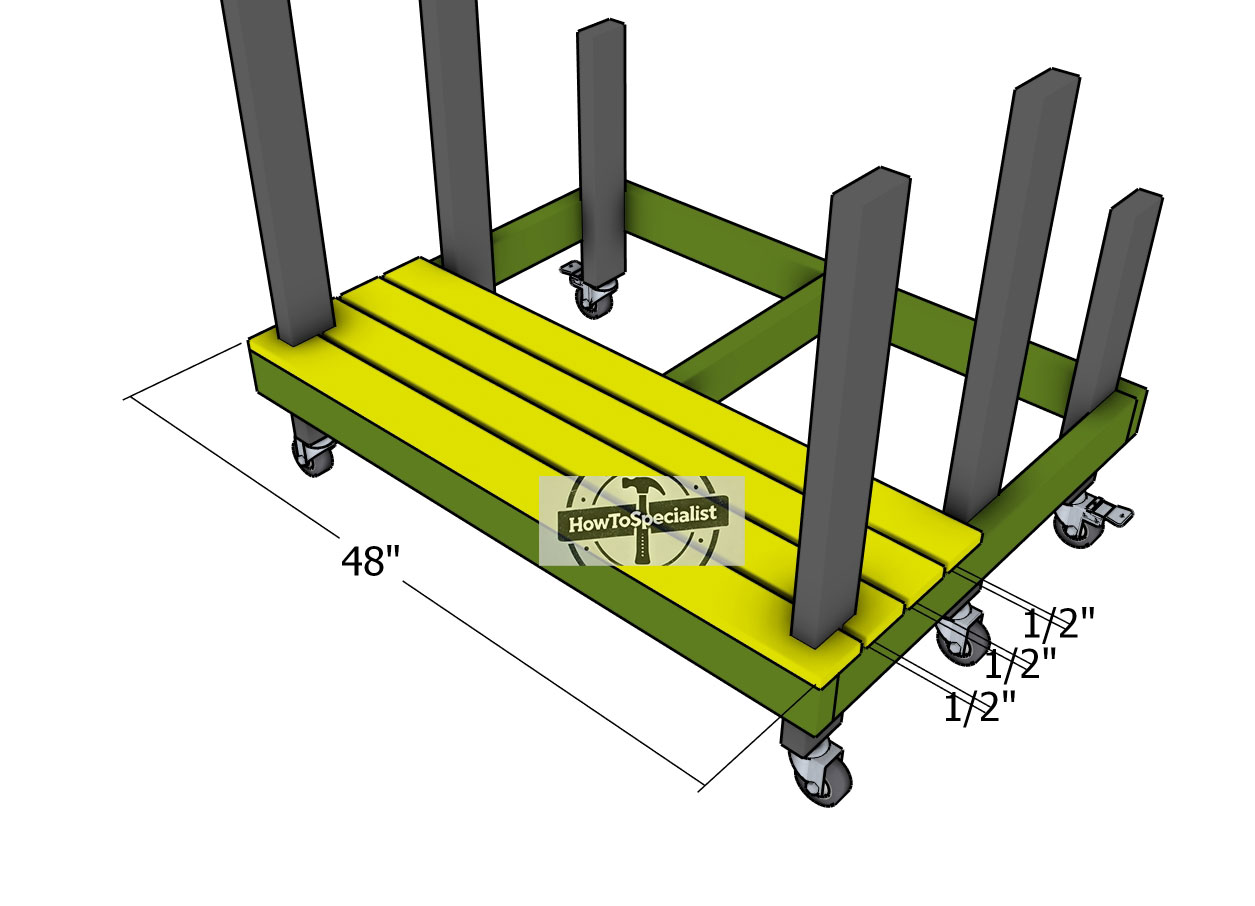
Front-shelf
Next, attach the 1×4 boards to the front of the stand. Place 1/2″ spacers between the boards to ensure even gaps. Use 1 5/8″ screws, with 2 screws for each joint, to secure the boards. This front shelf will provide sturdy support for the 5-gallon buckets.
Building the Second Shelf
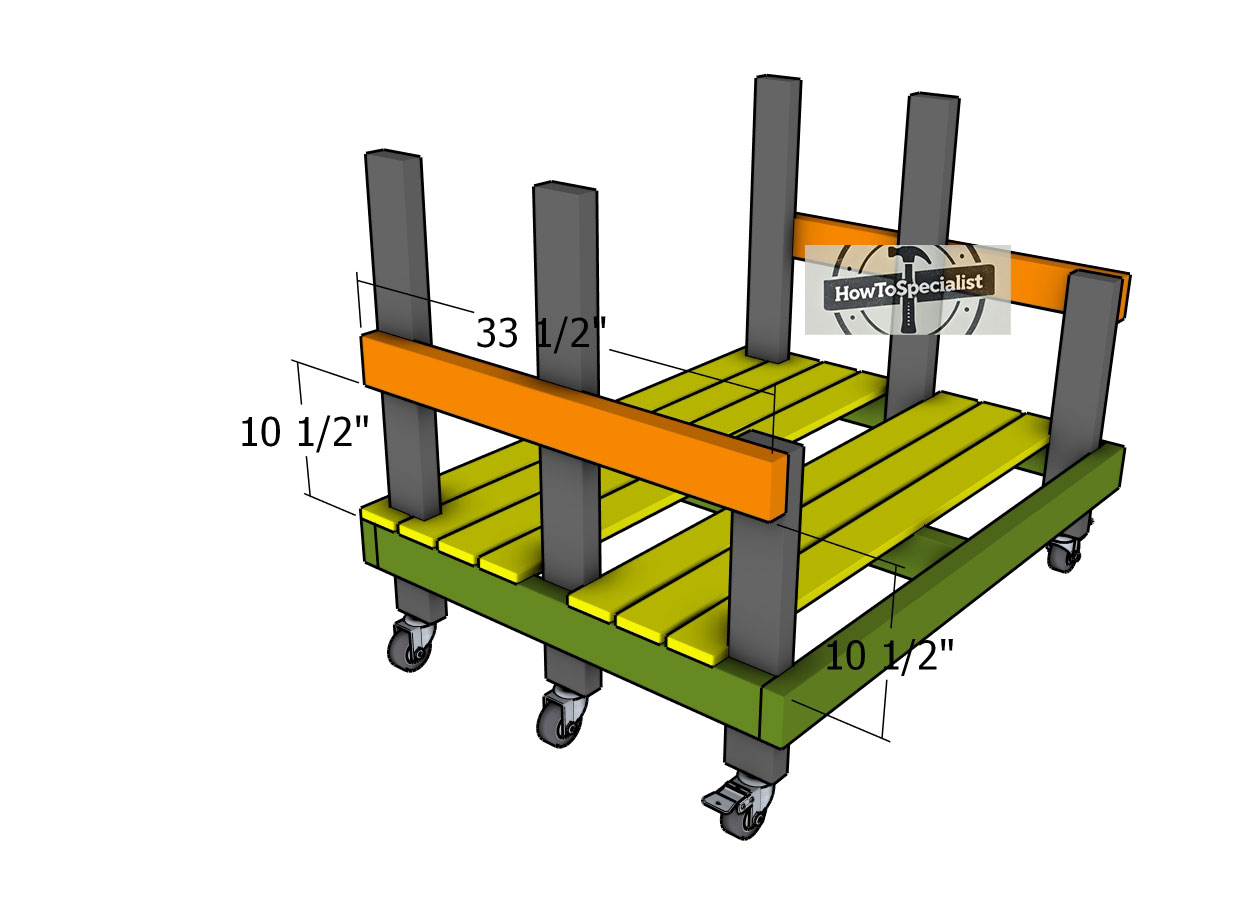
Middle-side-frame
Attach the 2×4 supports to the sides of the stand. Align the supports at both ends, and use a spirit level to ensure they are perfectly horizontal. Drill pilot holes and secure them to the legs with 2 1/2″ screws, using 2 screws for each joint. This will provide solid support and stability for your stand.
Middle-frame
Next, secure the 2×4 supports to the front and back of the garden stand. Drill pilot holes and use 3 1/2″ screws to lock them into place. This will ensure the stand is sturdy and well-supported from all sides.
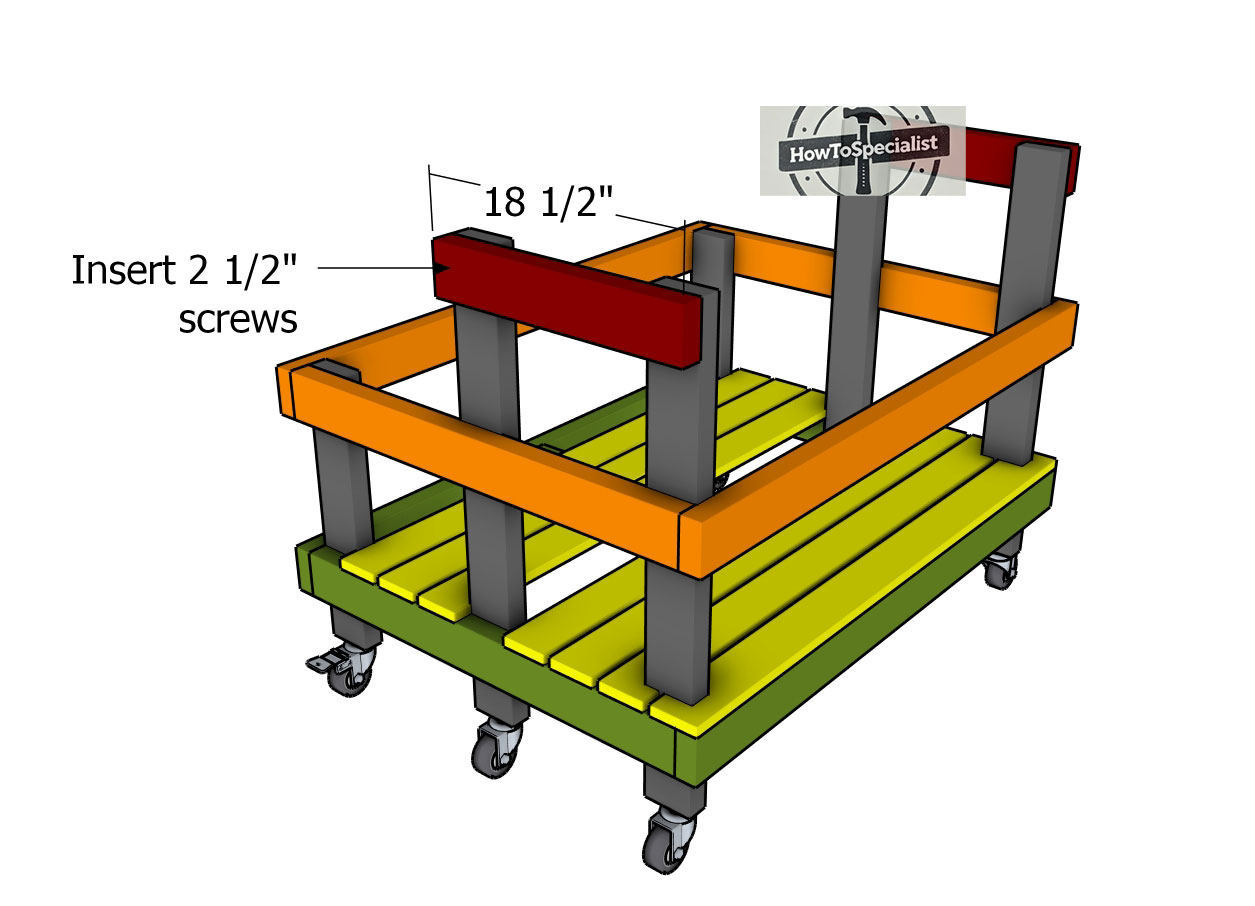
Top-side-frame
Continue by framing the top structure. Use 2×4 lumber and lock them into place with 2 1/2″ screws.
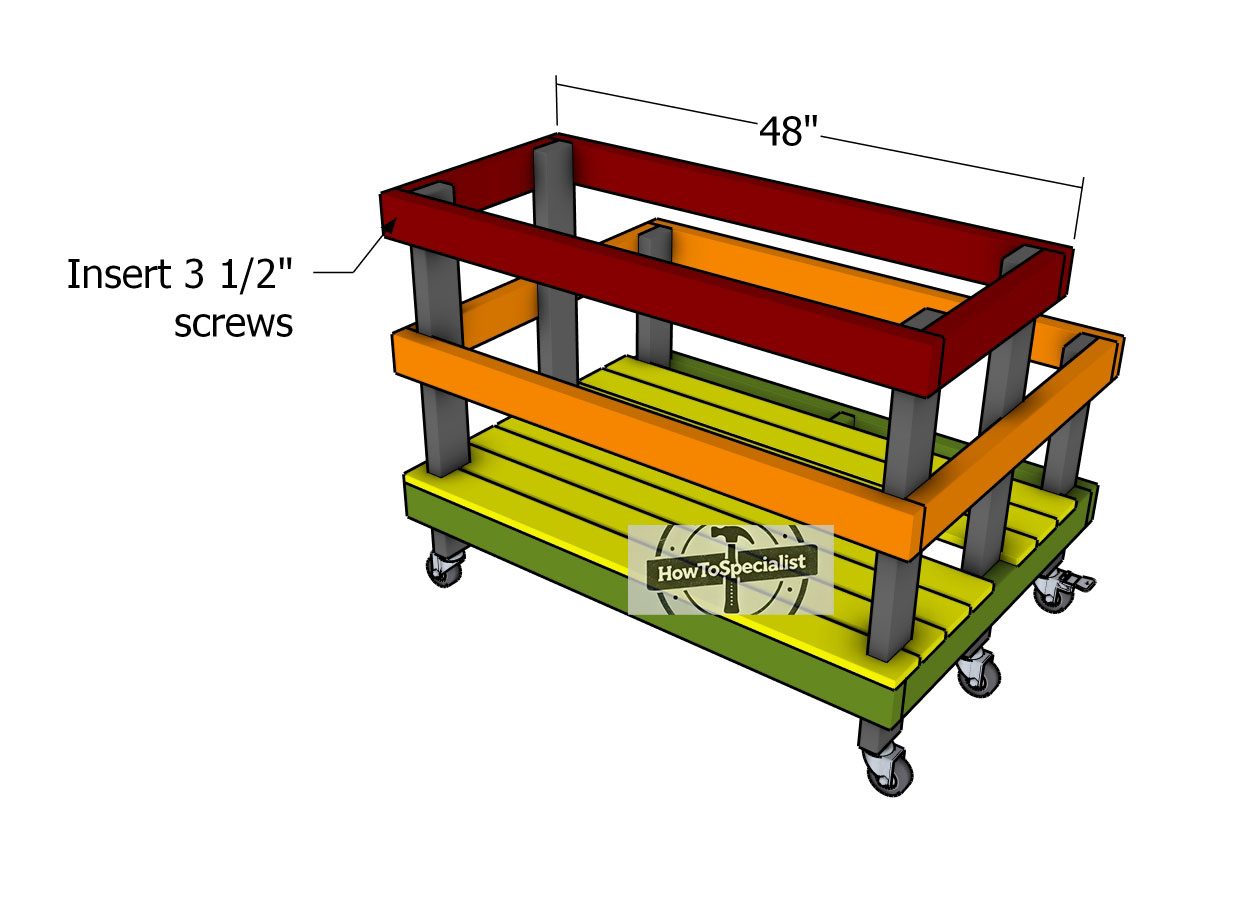
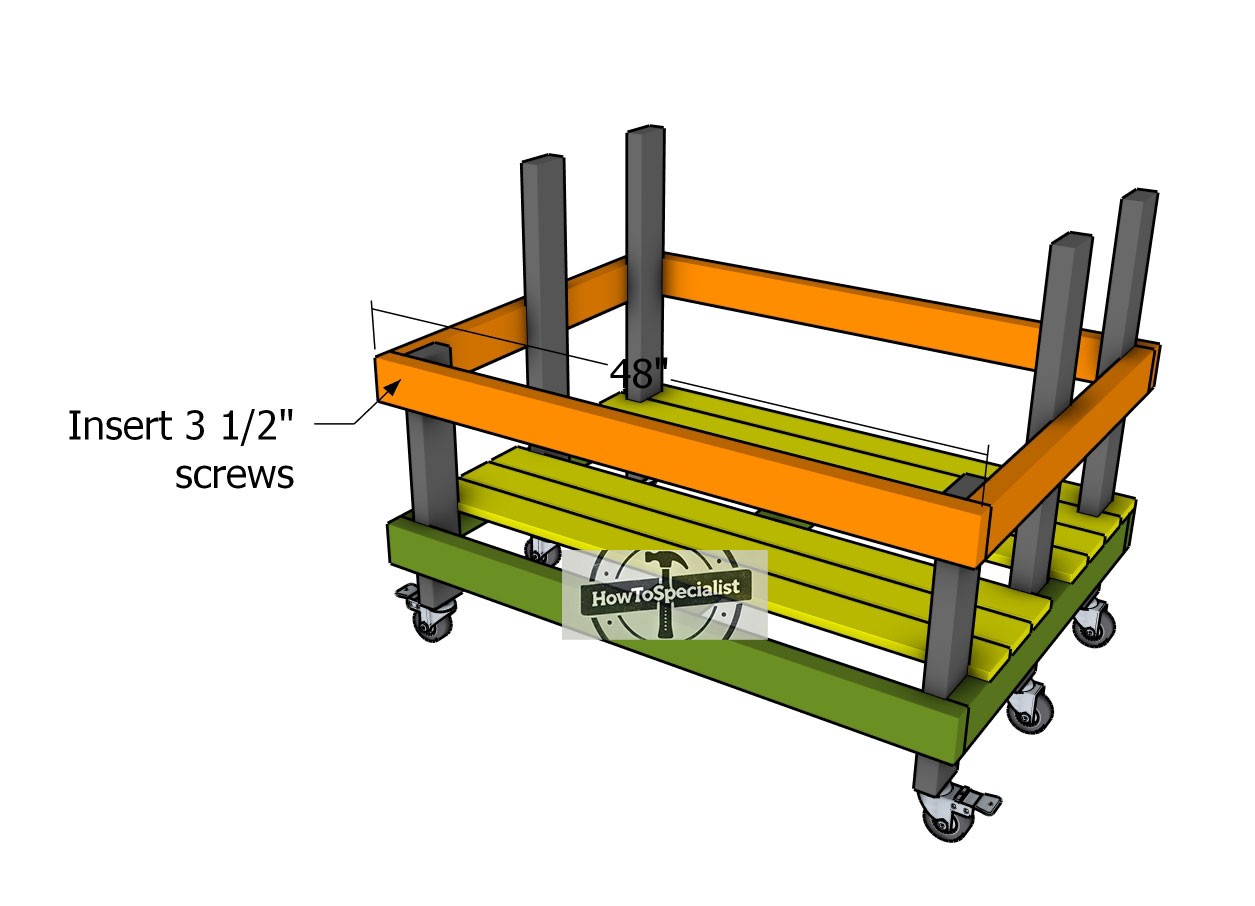
Fitting-the-top-frame
Now, secure the 2×4 boards to the front and back of the garden stand. Drill pilot holes and use 3 1/2″ screws to firmly lock them into place. This step will add essential support and stability to your garden stand.
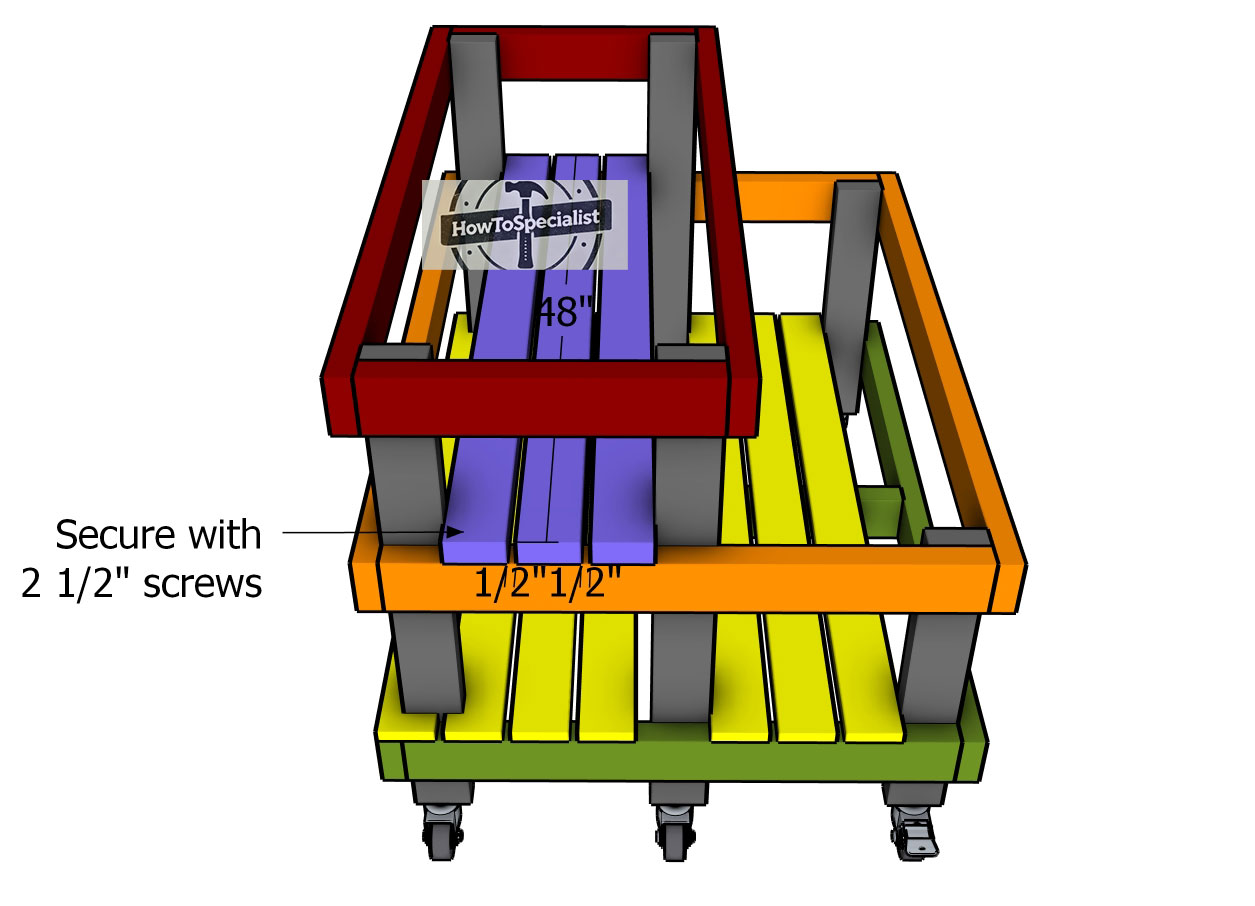
Top-shelf-boards
Fit the 2×4 boards to the top shelf, using 1/2″ spacers between them to create even gaps. Secure the boards to the support frame with 2 1/2″ screws. This will ensure a sturdy and evenly spaced top shelf for your garden stand.
Finishing Touches
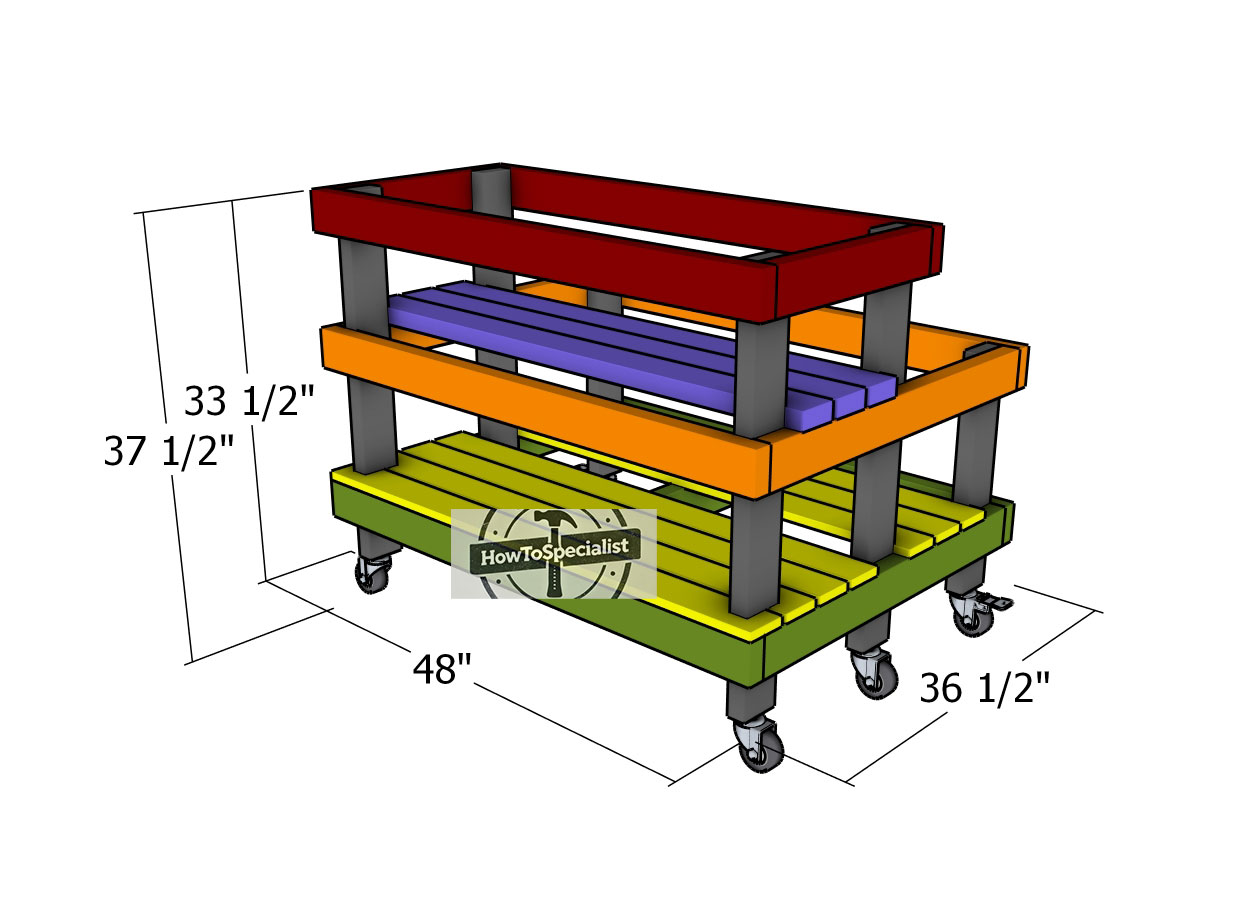
6-bucket-garden-stand—dimensions
For the finishing touches, sand down all rough edges and surfaces to ensure a smooth finish. Apply a coat of exterior wood stain or paint to protect the wood and enhance its appearance. Finally, add some decorative touches like hooks for tools or a colorful plant display to personalize your garden stand and make it truly your own.

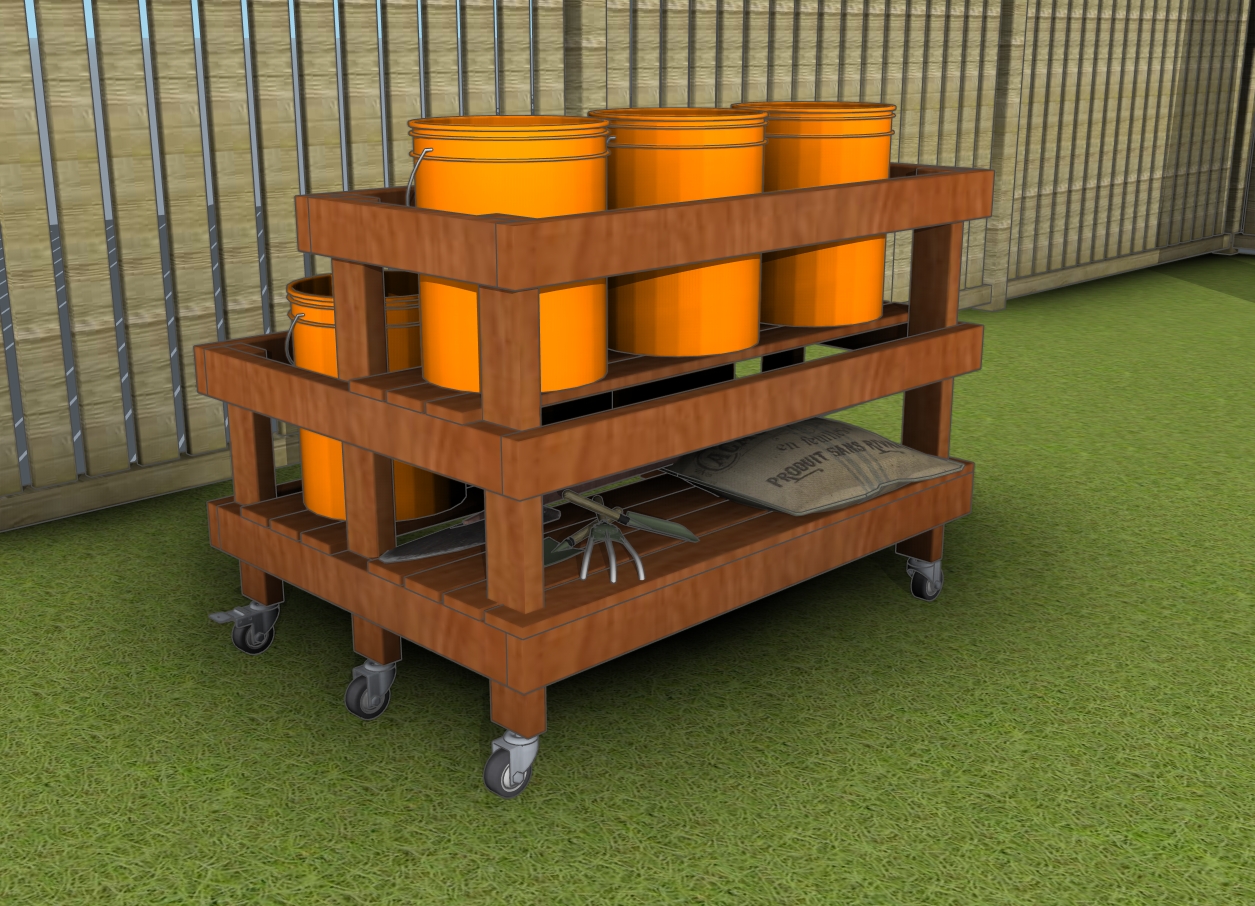
6 bucket garden stand plans
Now it’s time to slide in the 5-gallon buckets and get growing! Simply place the buckets into the designated spaces on the stand, ensuring they fit snugly and securely. Fill them with soil, plant your favorite vegetables, and watch your garden thrive in this convenient and stylish setup.
Bucket garden stand plans – back view
This project offers four great benefits. First, it’s cost-effective, allowing you to create a functional garden stand without breaking the bank. Second, the stand is movable, making it easy to position for optimal sunlight and access.
Third, it maximizes your gardening space, perfect for small backyards or patios. Finally, the design keeps your garden organized and tidy, making it easier to manage and maintain your plants.
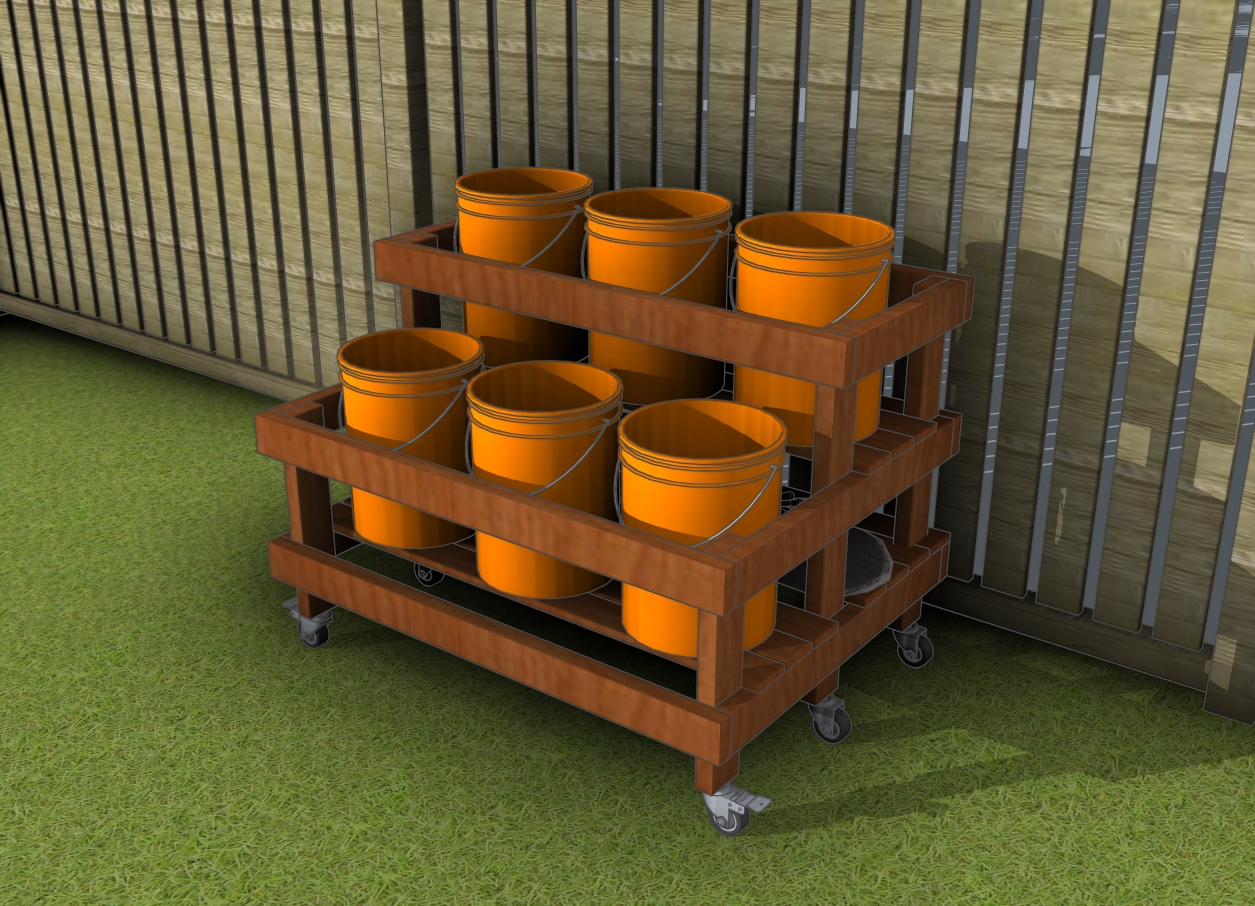
5 gallon bucket garden stand – 6 buckets
The main idea behind this project is to create a versatile and portable gardening solution that’s perfect for any backyard. Building this garden stand allows you to grow vegetables without needing a large plot of soil or a dedicated greenhouse.
It’s especially useful for small spaces, as it keeps your garden organized and off the ground, making it easier to manage and protect from pests. Plus, with its movable design, you can easily reposition the stand to catch the best sunlight or bring it indoors during harsh weather, giving you more control over your growing conditions.
I can’t wait to see how you make it your own – don’t forget to share your finished projects with me!
Thanks for checking out my 5 gallon bucket garden stand plans! Be sure to explore my other projects for more fantastic ideas. Don’t forget to hit the LIKE button and SHARE with your friends using the social media links below.