Building your own console table is a fun and rewarding DIY project that can add both style and functionality to your space. In this post, I’ll walk you through the step-by-step process of constructing a sturdy and modern console table using basic materials like 2×4 and 1×4 lumber. Whether you’re a seasoned builder or just starting out, these easy-to-follow instructions will help you create a piece that fits perfectly in your home. Let’s dive in and get started on crafting your custom table!
This console table project can be completed in 4-6 hours, depending on your skill level and the tools you have on hand. In terms of cost, expect to spend between $50 and $100, with the price of lumber being the main factor. Basic materials such as 2x4s, 1x4s, screws, nails, and wood glue are affordable, while optional finishes like stain or paint can add to the total. Overall, it’s a budget-friendly project that delivers a functional and stylish piece for your home. See my other DIY projects HERE.
We recommend you to invest in the best materials you could afford. Therefore, you should buy weather-resistant lumber, such as pine or cedar. Always take accurate measurements before adjusting the size of the components at the proper size. Drill pilot holes trough the components before inserting the wood screws, to prevent the wood from splitting. My plans come with a full cut / shopping list and they are PDF Download and Print friendly. See all my Premium Plans HERE.
Made from this plan
Pin for Later!
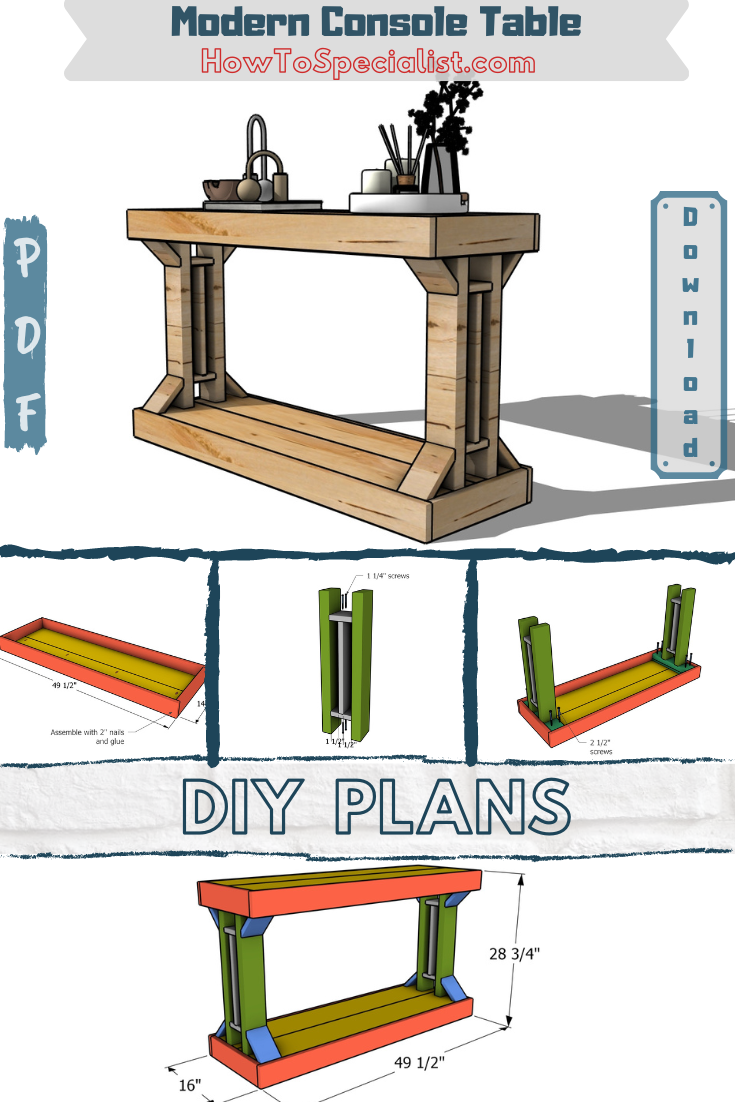
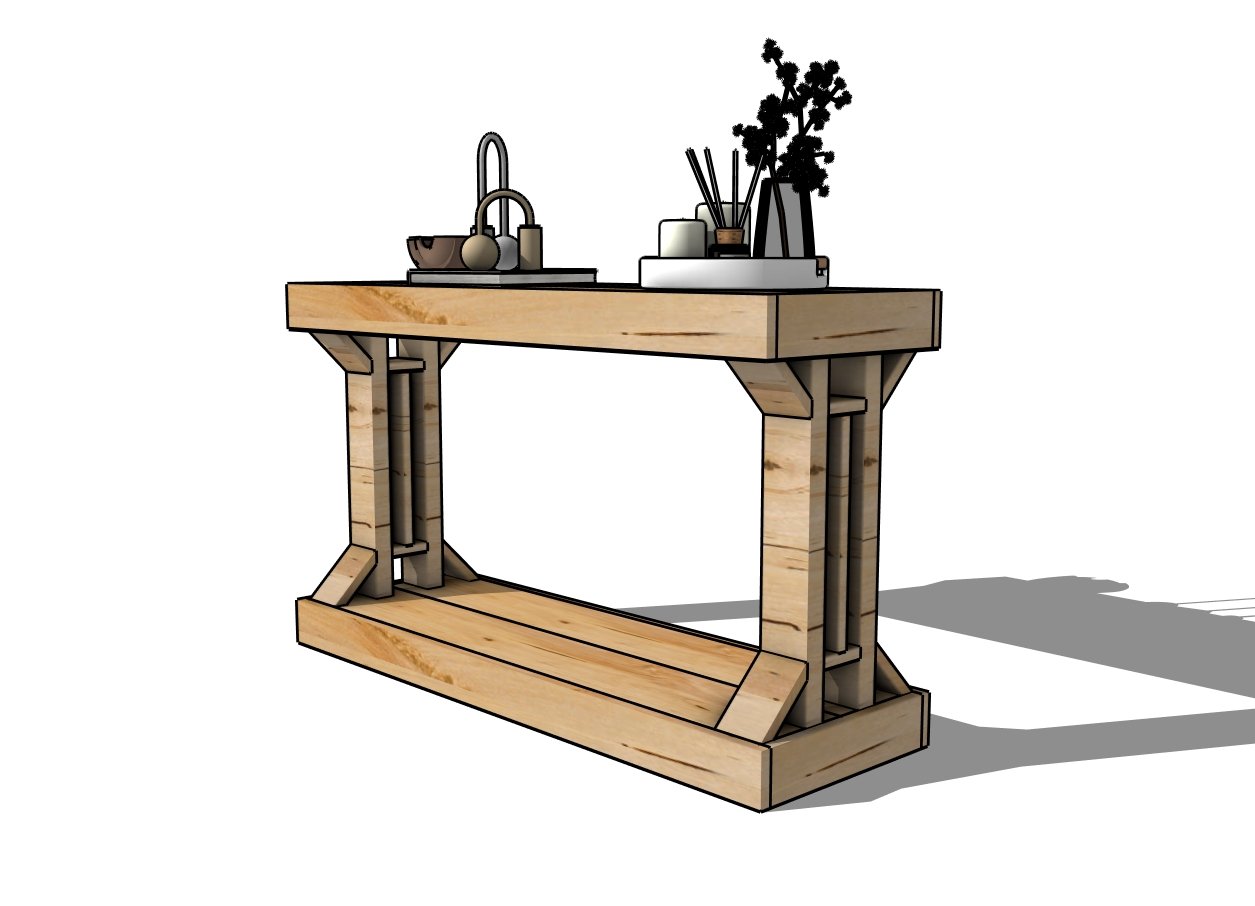
Modern Console Table – Free Plans
Building-a-modern-console-table
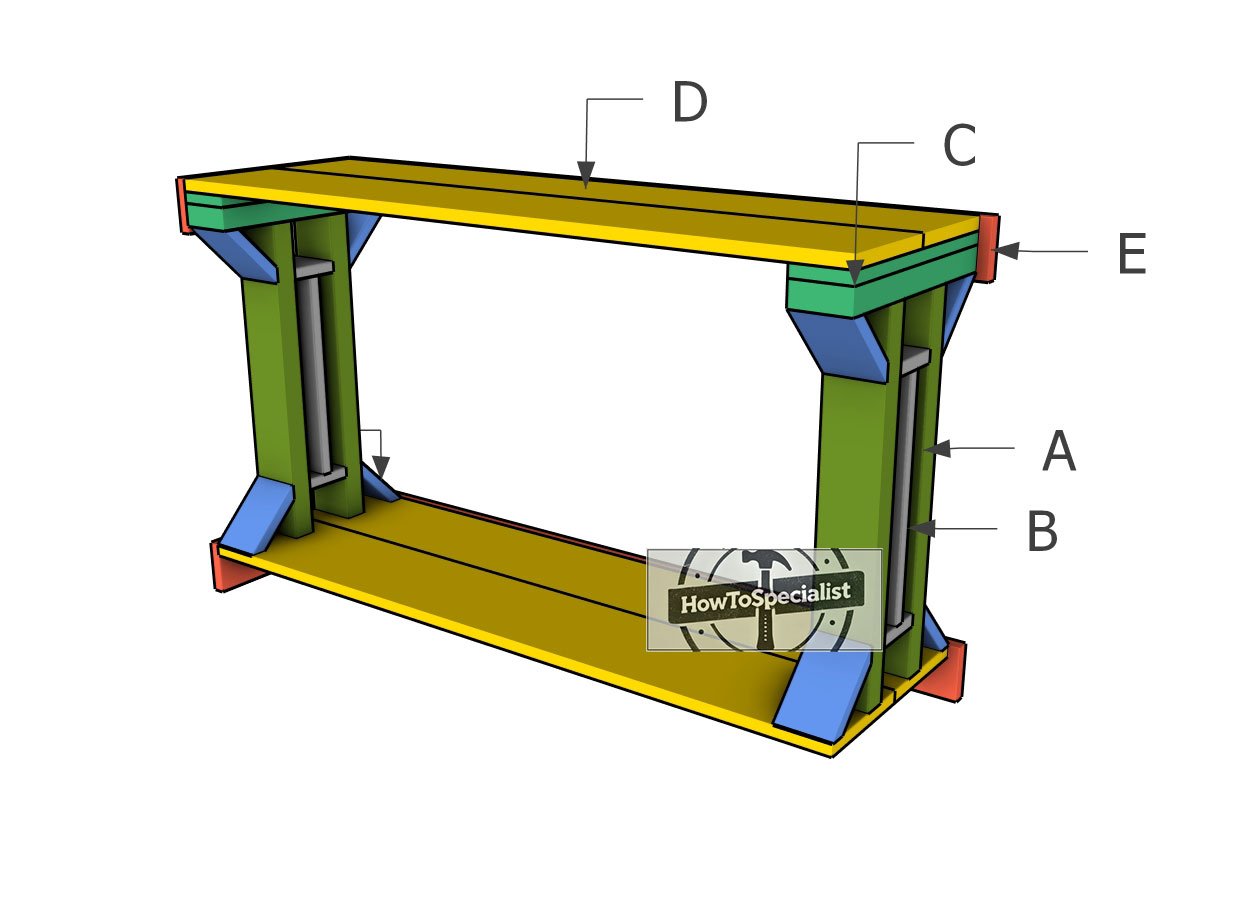
Materials
A – LEGS – 2×4 lumber 22 1/4″ – 4 pieces
B – TRIMS – 1×4 lumber 3 1/2″ – 4 pieces
B – TRIMS – 1×4 lumber 14 1/4″ – 2 pieces
C – SUPPORTS – 2×4 lumber 14 1/2″ – 2 pieces
C – SUPPORTS – 1×4 lumber 14 1/2″ – 2 pieces
D – TABLETOP – 1×8 lumber 48″ – 4 pieces
E – TRIMS – 1×4 lumber 49 1/2″ – 4 pieces
E – TRIMS – 1×4 lumber 14 1/2″ – 4 pieces
F – BRACES – 1×4 lumber 5 3/4″ – 8 pieces
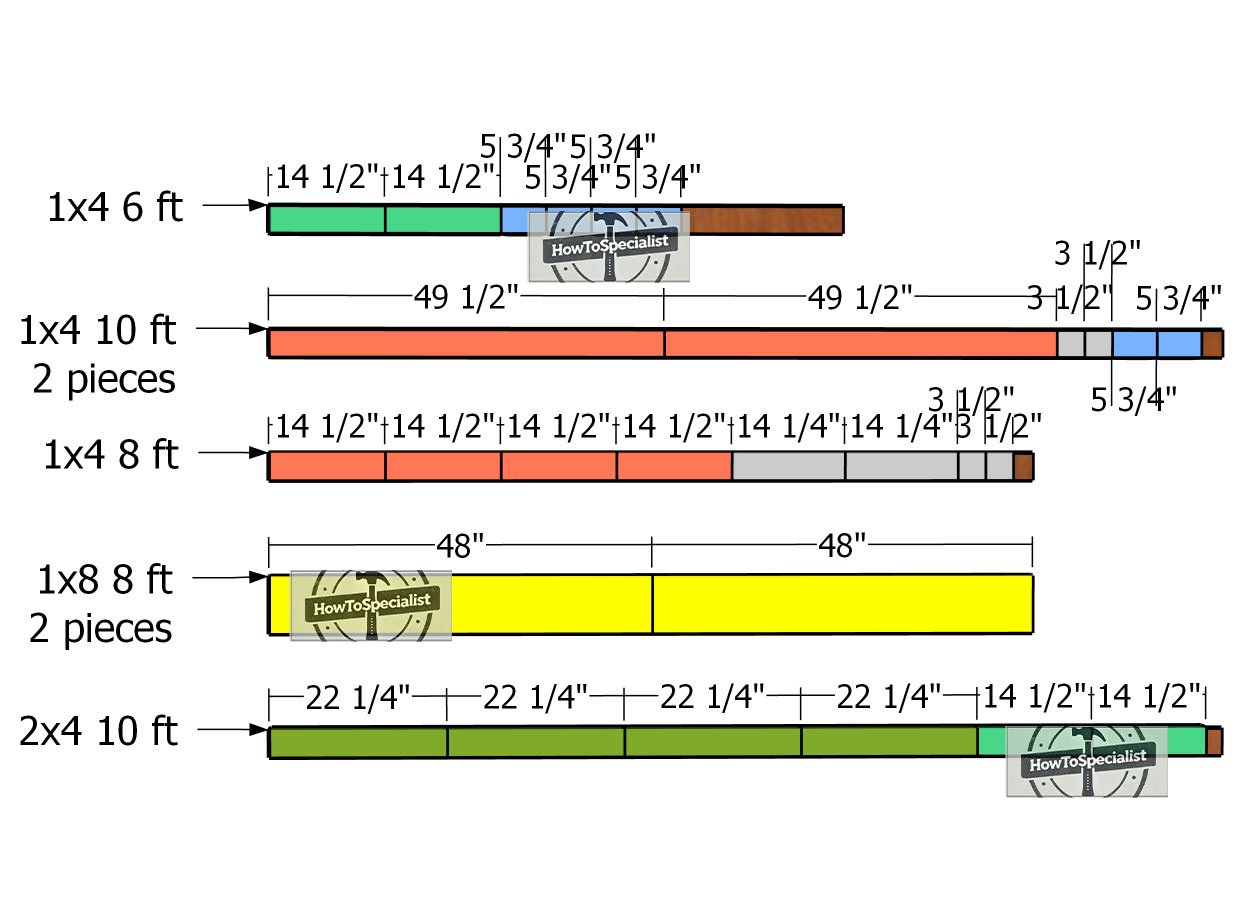
- 1×4 lumber 6 ft – 1 piece
- 1×4 lumber 8 ft – 1 piece
- 1×4 lumber 10 ft – 2 pieces
- 1×8 lumber 8 ft – 2 pieces
- 2×4 lumber 10 ft – 1 piece
- 2 1/2″ screws – 50 pieces
- 1 1/4″ screws – 50 pieces
- 2″ finish nails – 50 pieces
- Stain / paint – 1 can
- Glue – 1 bottle
Tools
- Miter saw
- Drill machinery, drill bits
- Safety gloves, glasses
- Chalk line, tape measure, spirit level, carpentry pencil
Time
- One week
Related
Cut layout diagram
Cut-list—console-table
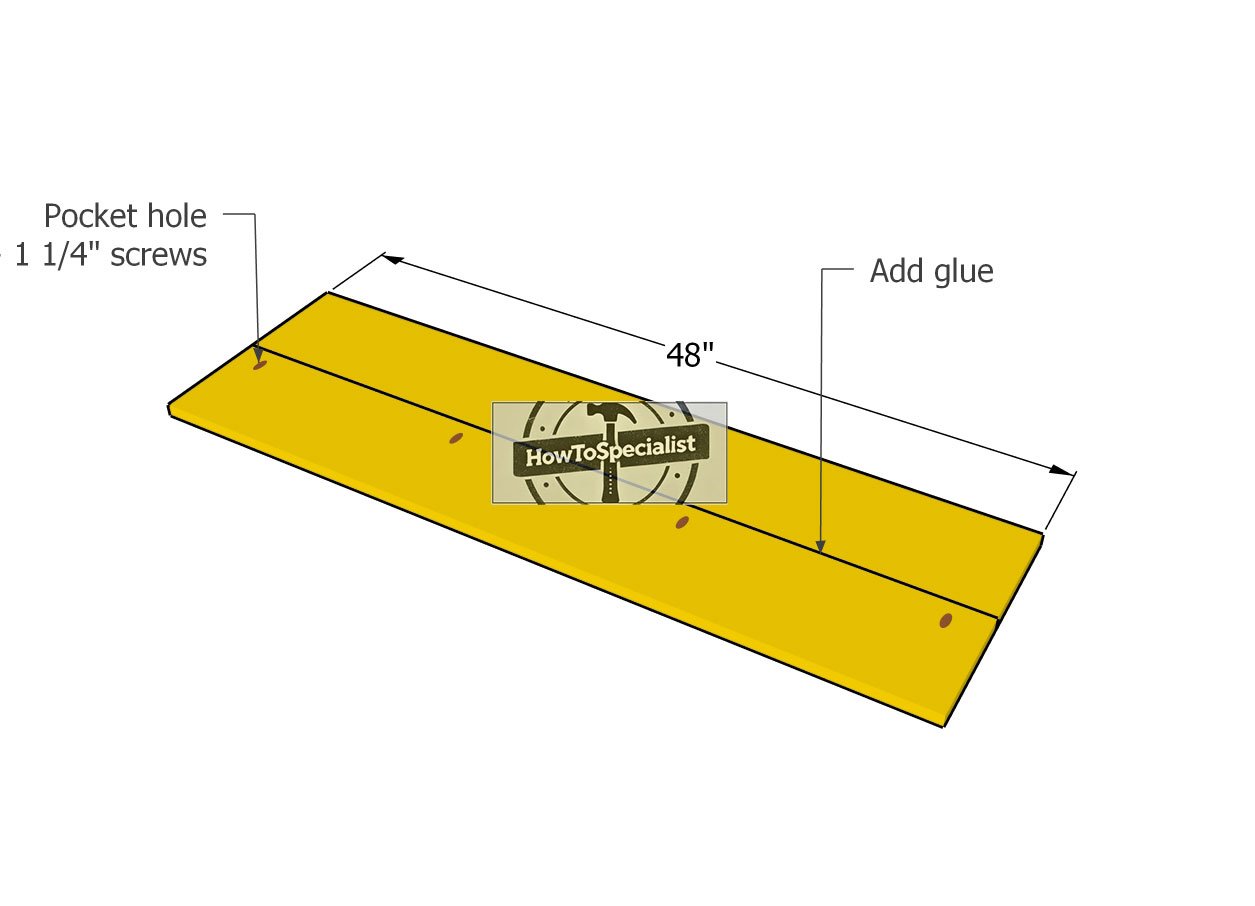
Step 1: Building the tops
Tabletop-assembly
The first step in this project is to build the tabletop and base for the console table. Cut the 1×8 boards to a length of 48 inches and drill pocket holes along one edge, as shown in the diagram.
Lay the boards on a level surface, ensuring the edges are aligned flush. Apply wood glue to the joints for added strength, then secure the boards together using 1 1/4″ screws. This will form a solid, stable base and tabletop for your console table.
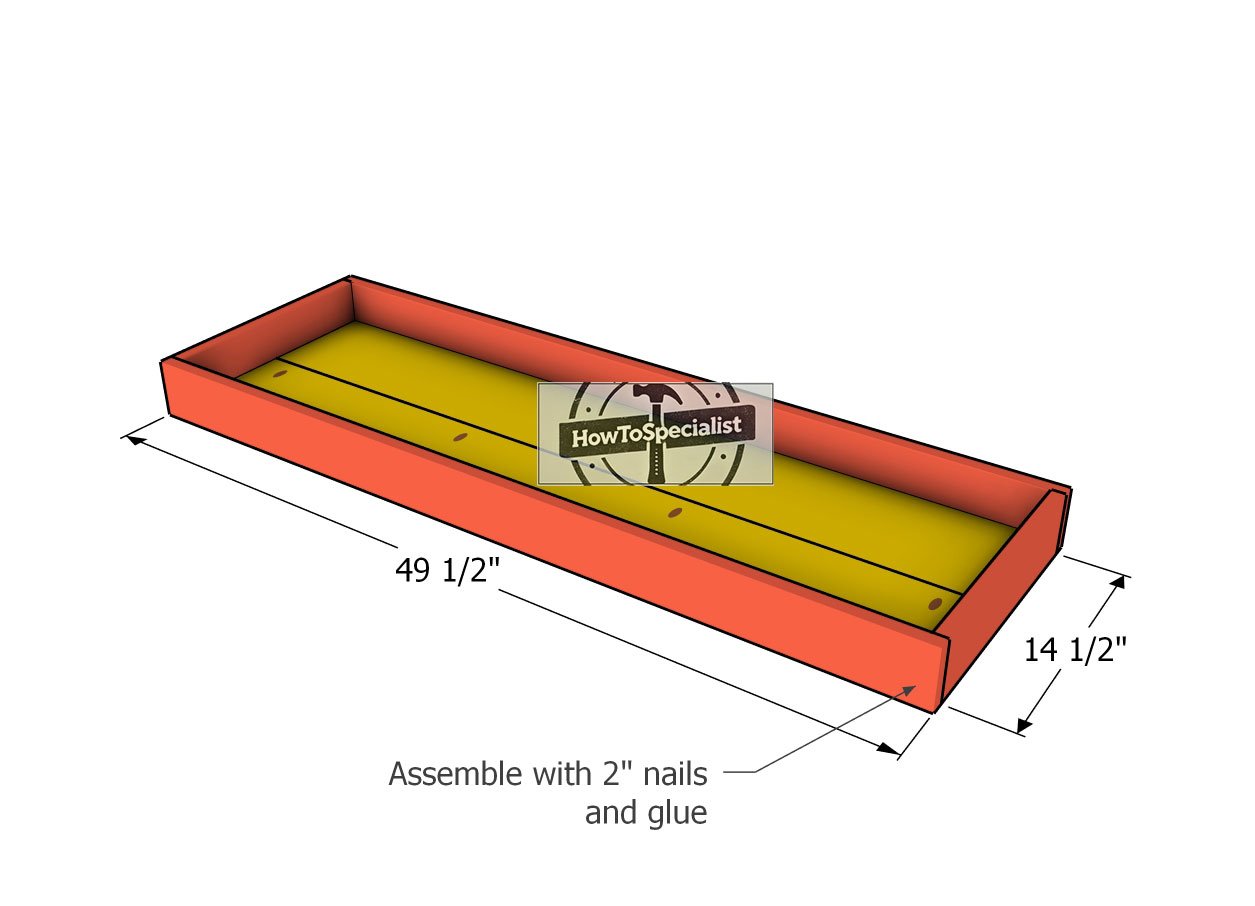
Attaching-the-shelf-trims
Attach the 1×4 trim pieces around the edges of the boards to give the console table a clean and finished look. Use wood glue for a strong bond and secure the trims in place with 2″ finish nails.
Make sure to press the components tightly together, leaving no gaps between the trims and the tabletop for a seamless finish. This step will not only enhance the structure’s durability but also add a polished touch to the overall design.
Step 2: Building the uprights
Assembling-the-side-frames
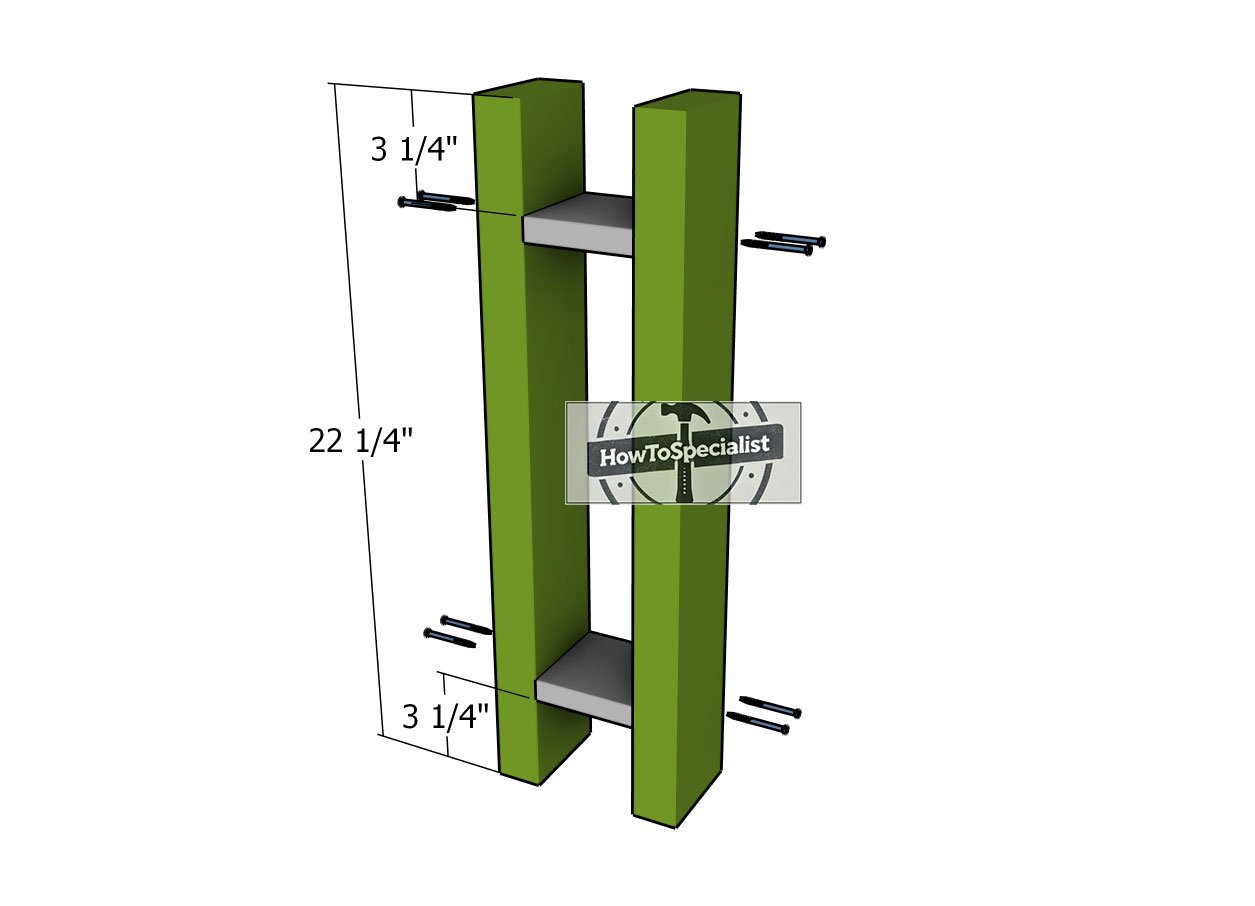
Now it’s time to assemble the uprights for the console table. For this, we’ll use 2x4s for the legs and 1x4s for the trim. Drill pilot holes through the sides of the 2×4 legs and secure the trims by inserting 2 1/2″ screws.
Make sure the corners are perfectly square, and apply glue to the joints for added strength. This step ensures the legs are sturdy and well-aligned, providing a solid foundation for the table.
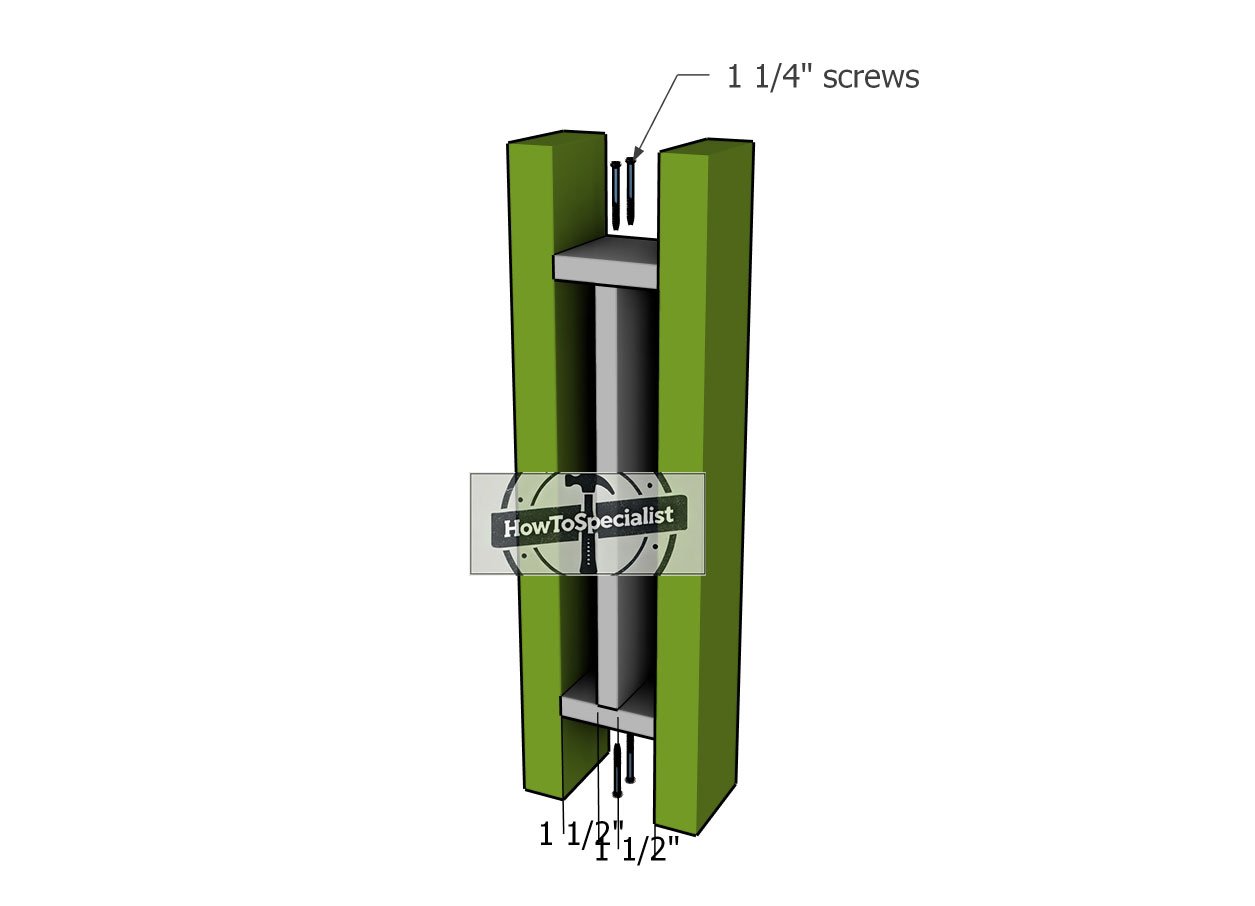
Middle-trims
Fit a 1×4 board between the trims, as shown in the diagram, to complete the structure. Drill pilot holes and insert 1 1/4″ screws to securely fasten it in place. These side trims not only add stability but also give the table a sleek, modern look, elevating the overall design and ensuring a professional finish.
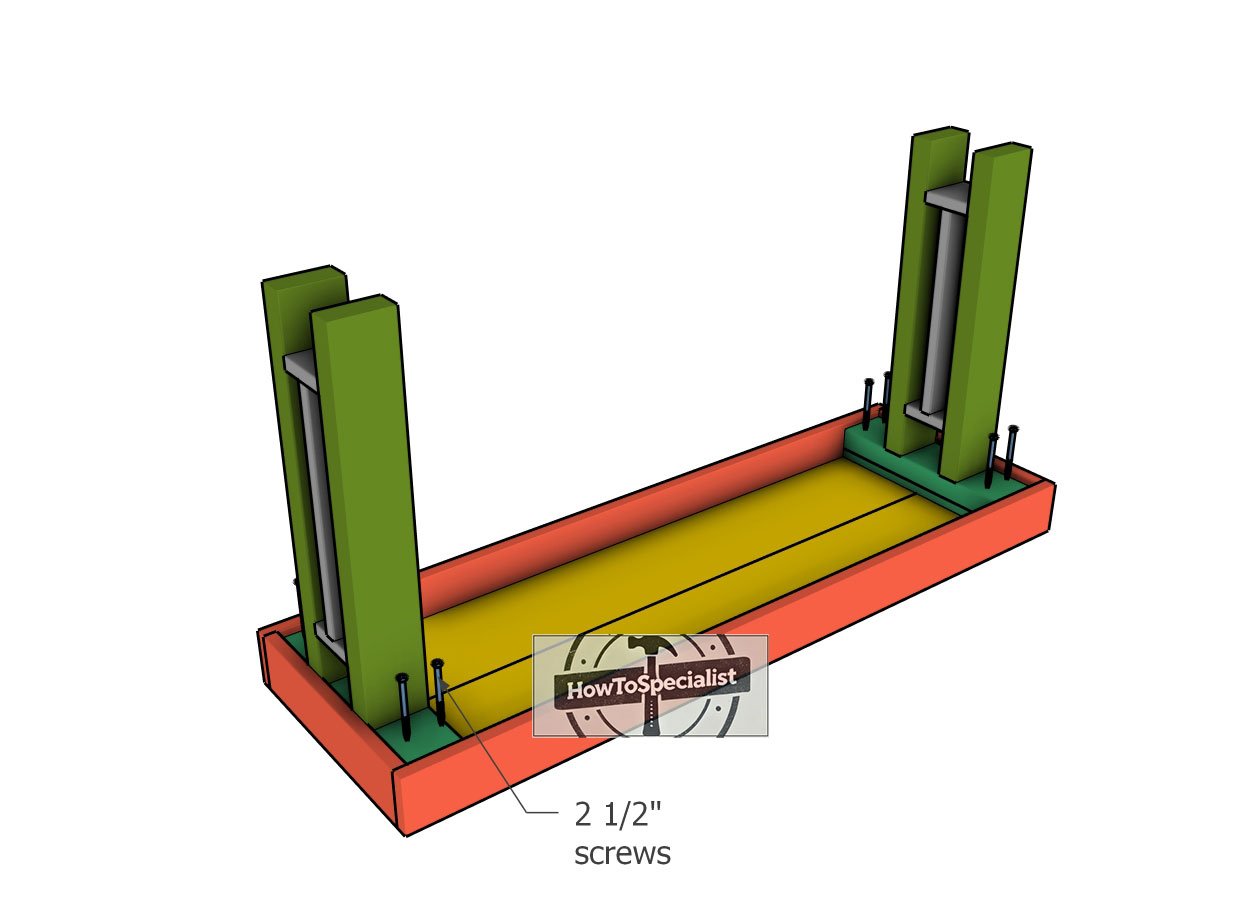
Assembling-the-sides
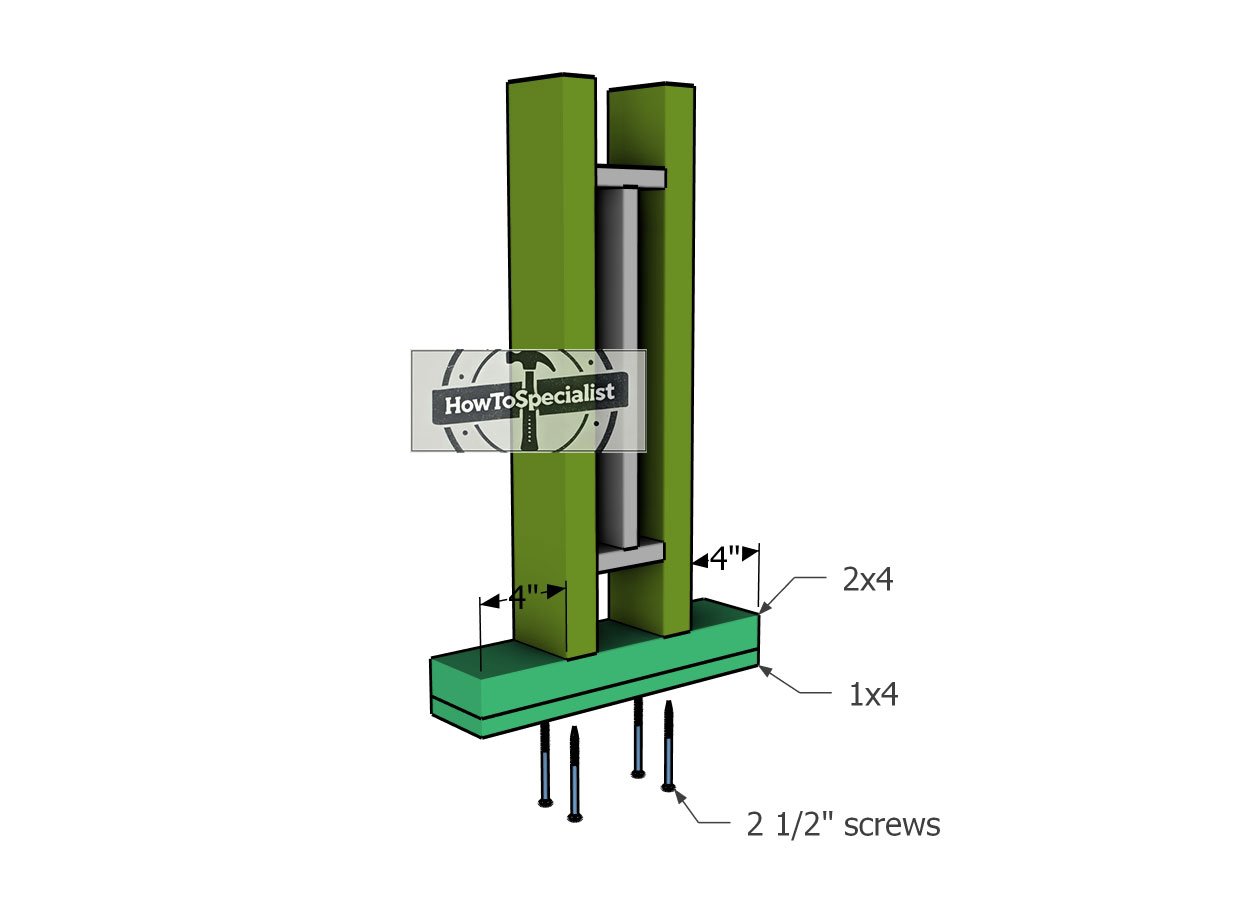
Attach the 1×4 and 2×4 boards to the top of the uprights, making sure to center them as shown in the diagram. These boards will serve as the supports to secure the uprights to the tabletop.
Once positioned, use 2 1/2″ screws to firmly fasten the boards on top of the legs. This step will provide the necessary stability for connecting the uprights to the tabletop and ensure the entire structure is solid and durable.
Assembling the table
Fitting-the-tabletop
Lay the tabletop flat on a level surface to ensure accuracy. Next, position the legs and secure them in place using 2 1/2″ screws. This step will firmly connect the legs to the tabletop, ensuring the structure is stable and ready for use.
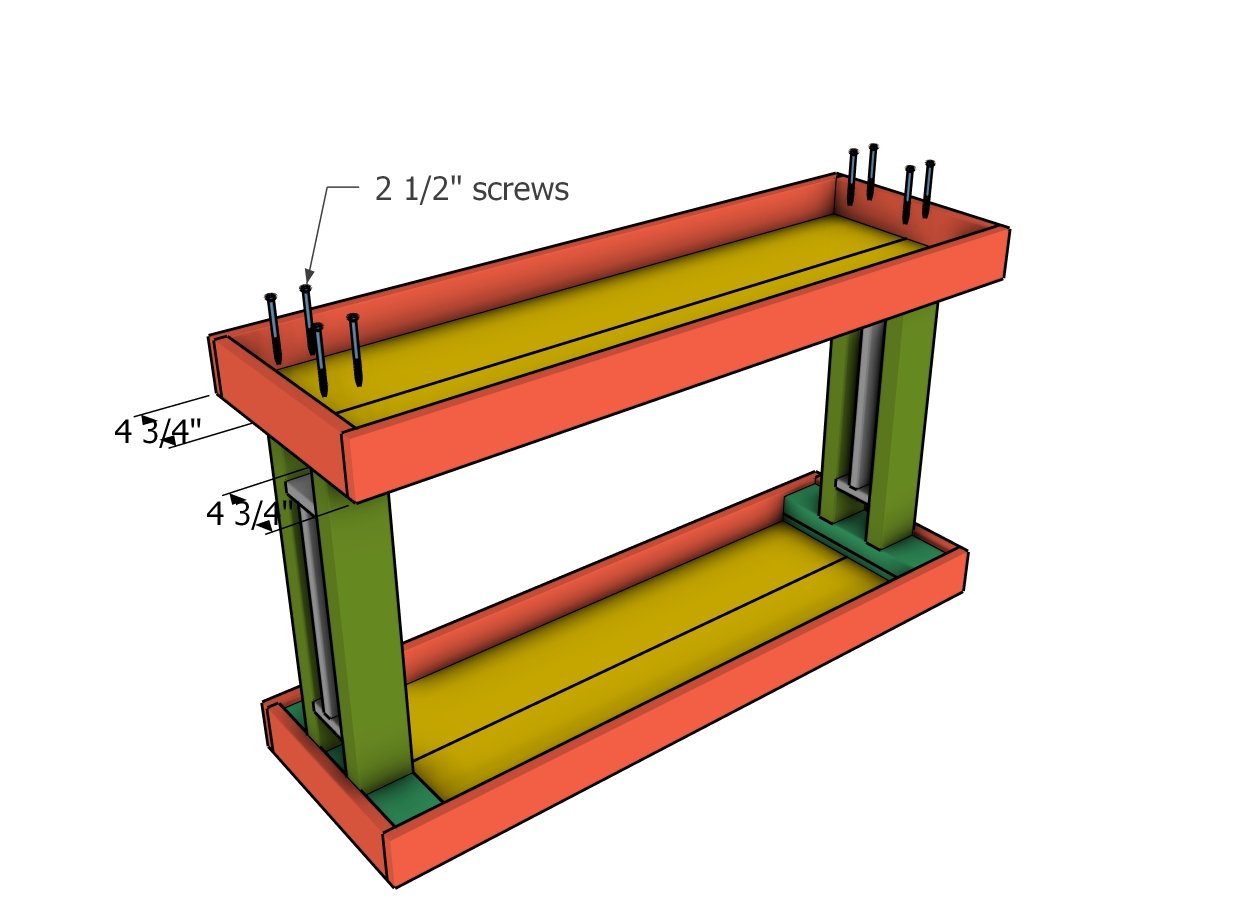
Attaching the base component
Now, flip the table upside down to install the base. Center the base properly, ensuring it’s aligned with the tabletop. Drill pilot holes through the base into the frame, and then use 2 1/2″ screws to lock it into place securely. This step adds extra stability to the structure and finishes the assembly process for the console table.
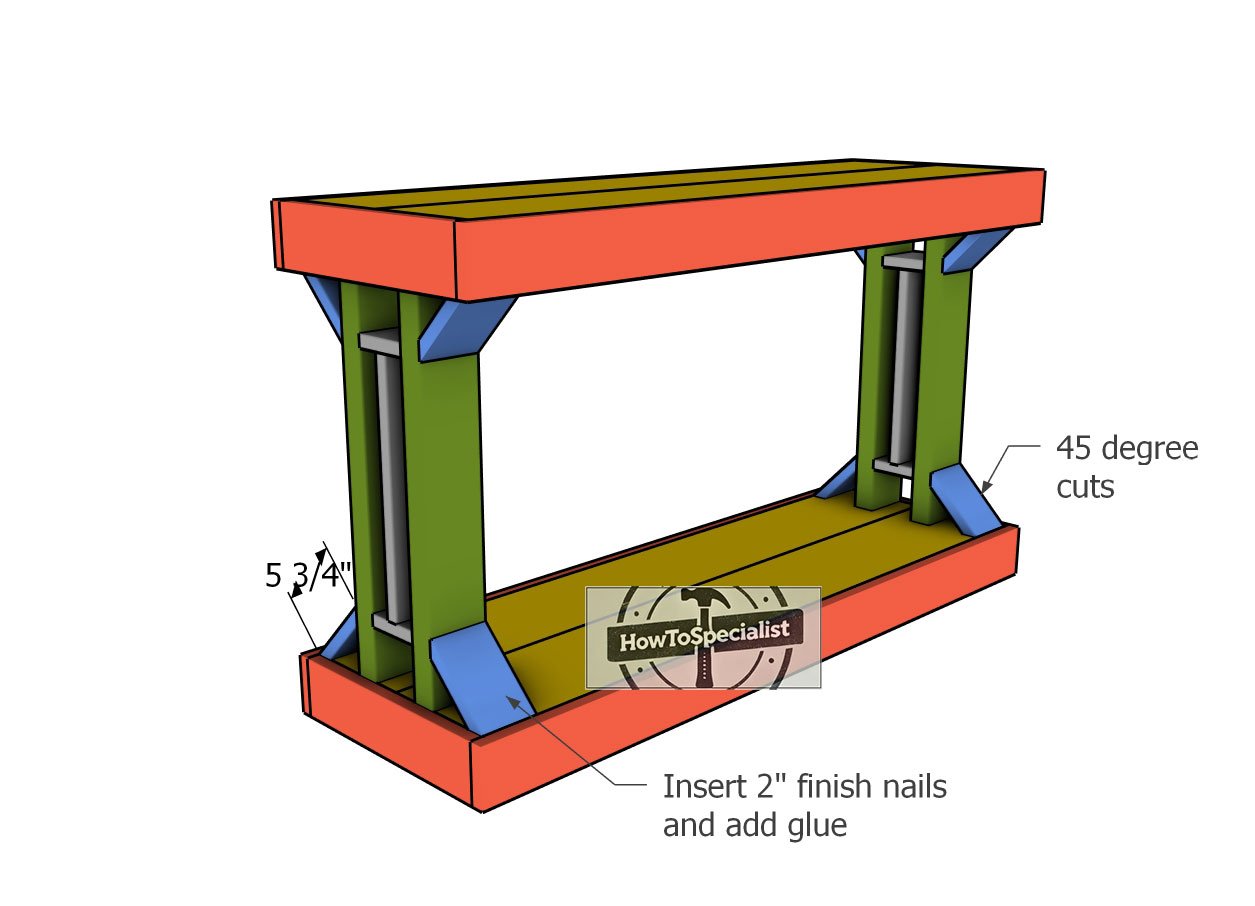
Fitting-the-diagonal-braces
Use 1×4 lumber to craft the decorative braces. Cut both ends of the braces at a 45-degree angle to fit them snugly in place. Once positioned, secure the braces using 2″ nails to ensure they’re locked tightly.
For added strength, apply wood glue to the joints before nailing them in place. This step not only reinforces the structure but also adds a decorative element to your console table, enhancing both its appearance and stability.
Finishing touches
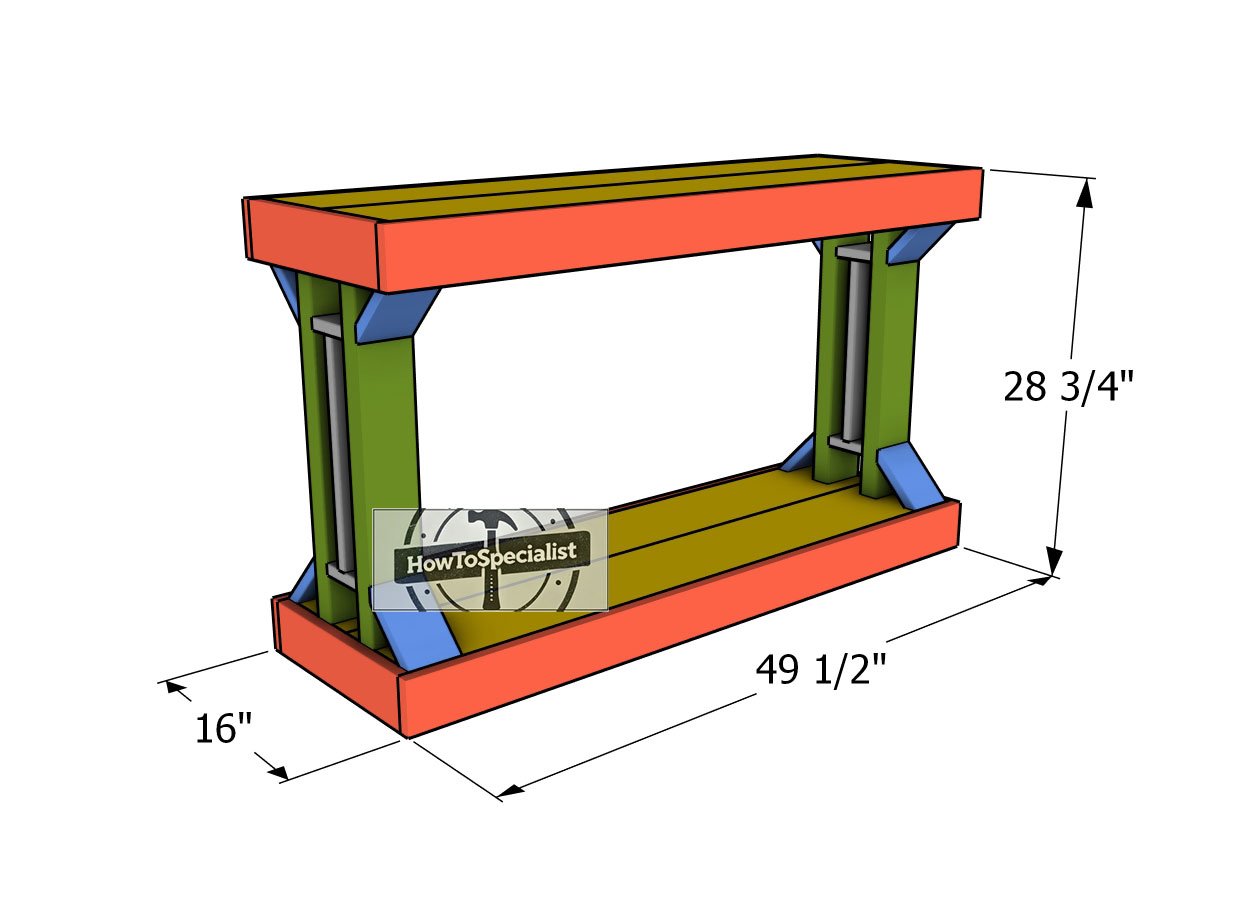
Modern-console-table—dimensions
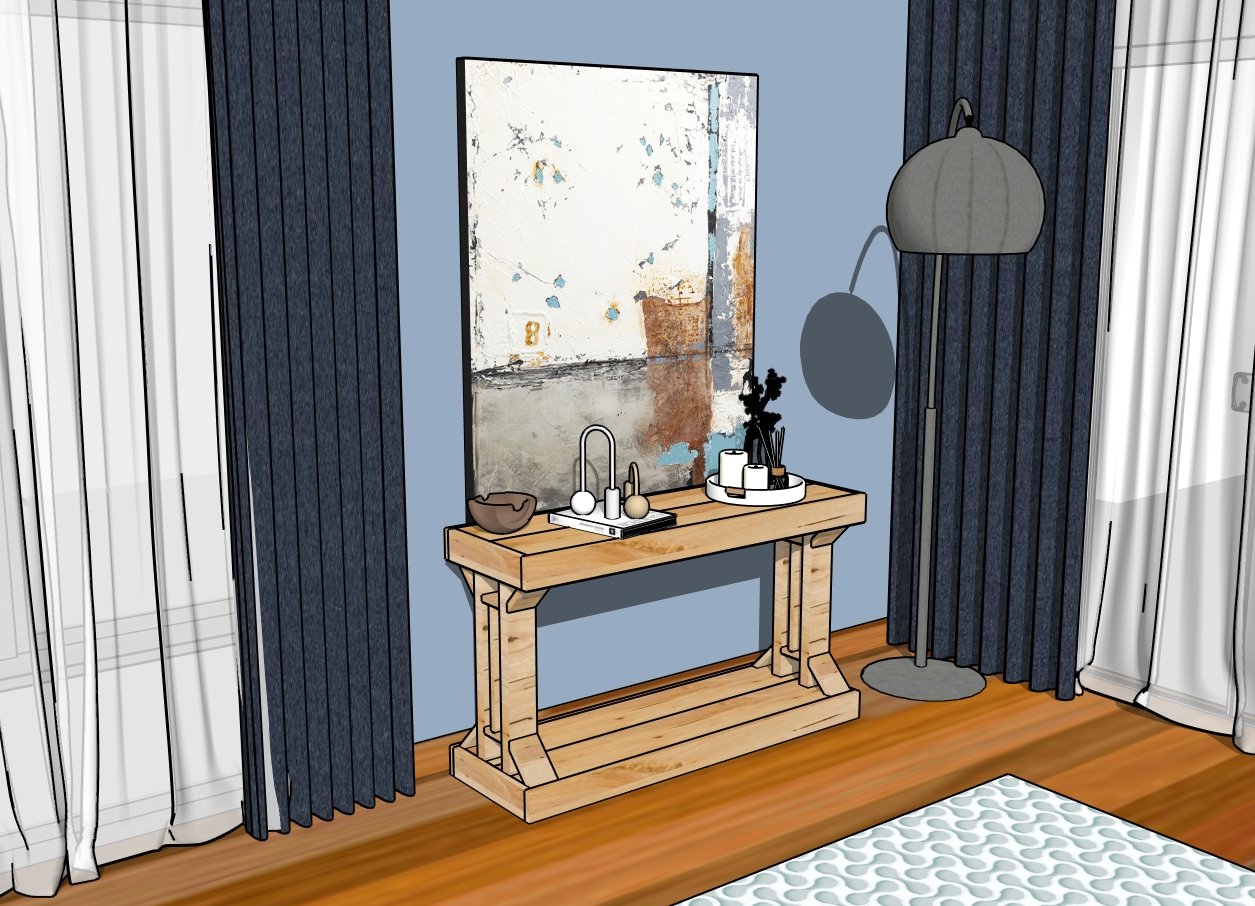
Building your own wooden console table brings numerous benefits, both practical and aesthetic. A handmade wood console table adds warmth and character to any room, making it a stylish focal point.
It’s versatile enough to fit various spaces like entryways, living rooms, or hallways, providing both function and storage while showcasing your craftsmanship. The ability to customize its size, finish, and design makes it uniquely yours, elevating your home’s decor.
Rustic console table – free plans
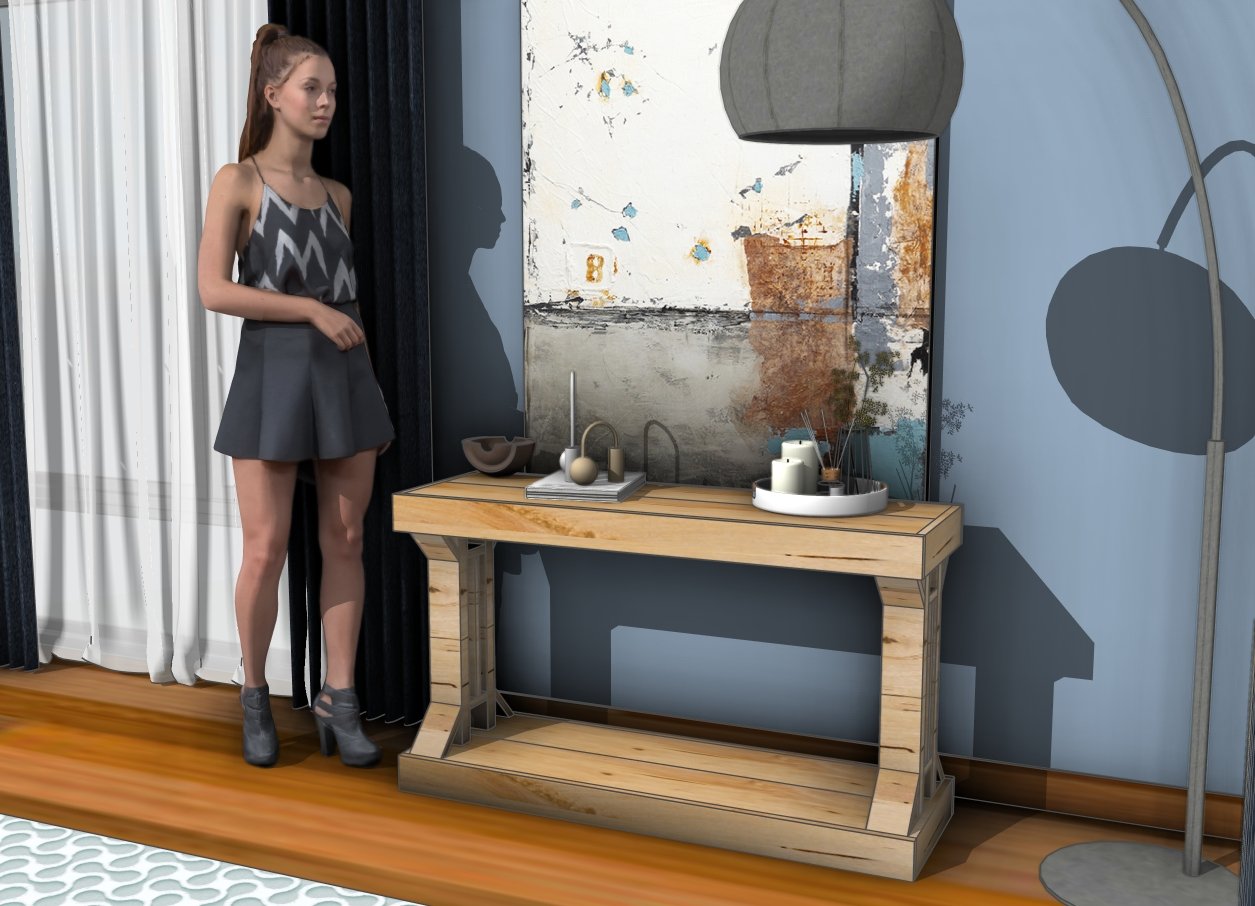
Beyond aesthetics, a solid wood console table adds lasting value to your home. Unlike mass-produced furniture, a well-crafted piece built with quality materials ensures durability for years to come. Whether it’s holding decor items, organizing essentials, or serving as a statement piece, a custom wood console table blends beauty with utility.
Plus, building it yourself not only saves costs but adds a sense of pride and accomplishment in creating something personalized and functional for your living space.
Modern console table plans
For the finishing touches, applying a wood stain or paint will not only protect your console table but also enhance its appearance and match your home’s style. Consider adding decorative hardware, such as unique knobs or handles, to give it a personalized touch. Lastly, a smooth sanding and sealing coat will ensure durability, creating a polished, professional look that highlights the natural beauty of the wood.
DIY Console table plans
How to build a modern console table
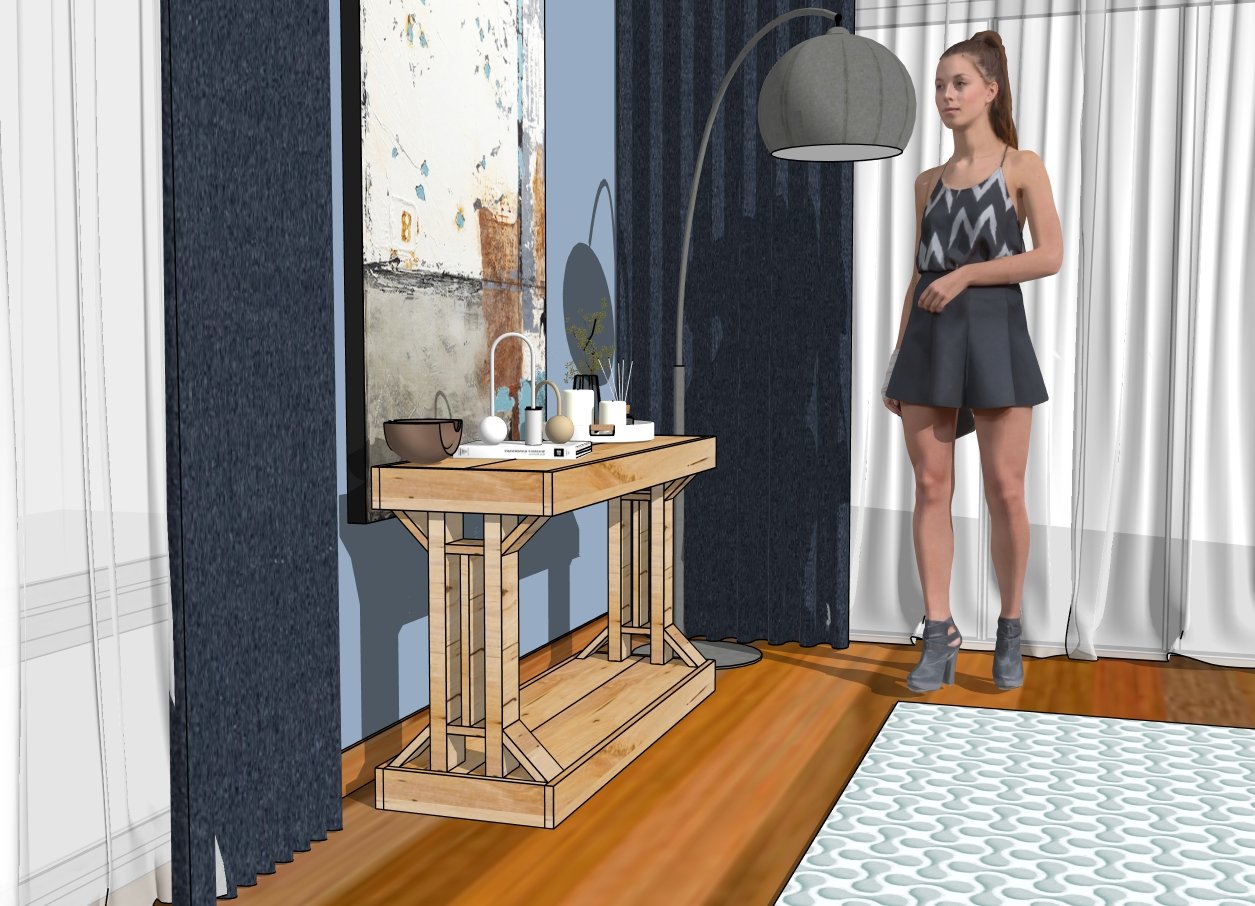
With your new console table complete, you’ve added both style and functionality to your space. Whether it’s used as a display piece or practical storage, this custom-built table brings a personal touch to your home. The beauty of DIY projects like this is that you can adjust the design to fit your needs and preferences.
ow that you’ve mastered this project, you can take pride in a job well done, knowing you’ve crafted a durable and stylish piece that will last for years.

Thanks for checking out my modern console table plans! Be sure to explore my other projects for more fantastic ideas. Don’t forget to hit the LIKE button and SHARE with your friends using the social media links below.