Are you tired of clutter piling up and struggling to find a practical storage solution for your totes and essentials? This DIY tote storage rack plan is the perfect weekend project to bring order to your space while showcasing your woodworking skills. Built with sturdy 2×4 lumber and plywood or OSB, this rack is designed to hold multiple storage totes, keeping everything from tools to seasonal decorations neatly organized and easy to access. Best of all, it’s fully customizable, adjust the shelf spacing, add a splash of color, or leave the natural wood grain exposed for a rustic touch that complements your style.
This project is budget-friendly and manageable for most DIY enthusiasts. You can expect to spend about $100–$150 on materials, depending on local prices for lumber, screws, and finish. With basic tools like a circular saw, drill, and miter saw, you can complete the entire build in roughly 6–8 hours, making it a perfect one-day or weekend project. Whether you’re a beginner looking to tackle your first woodworking build or a seasoned pro in need of functional storage, this tote rack combines durability, versatility, and style into one satisfying project.
We recommend you to invest in the best materials you could afford. Therefore, you should buy weather-resistant lumber, such as pine or cedar. Always take accurate measurements before adjusting the size of the components at the proper size. Drill pilot holes trough the components before inserting the wood screws, to prevent the wood from splitting. My plans come with a full cut / shopping list and they are PDF Download and Print friendly. See all my Premium Plans HERE.
Made from this plan
Pin it for Later!
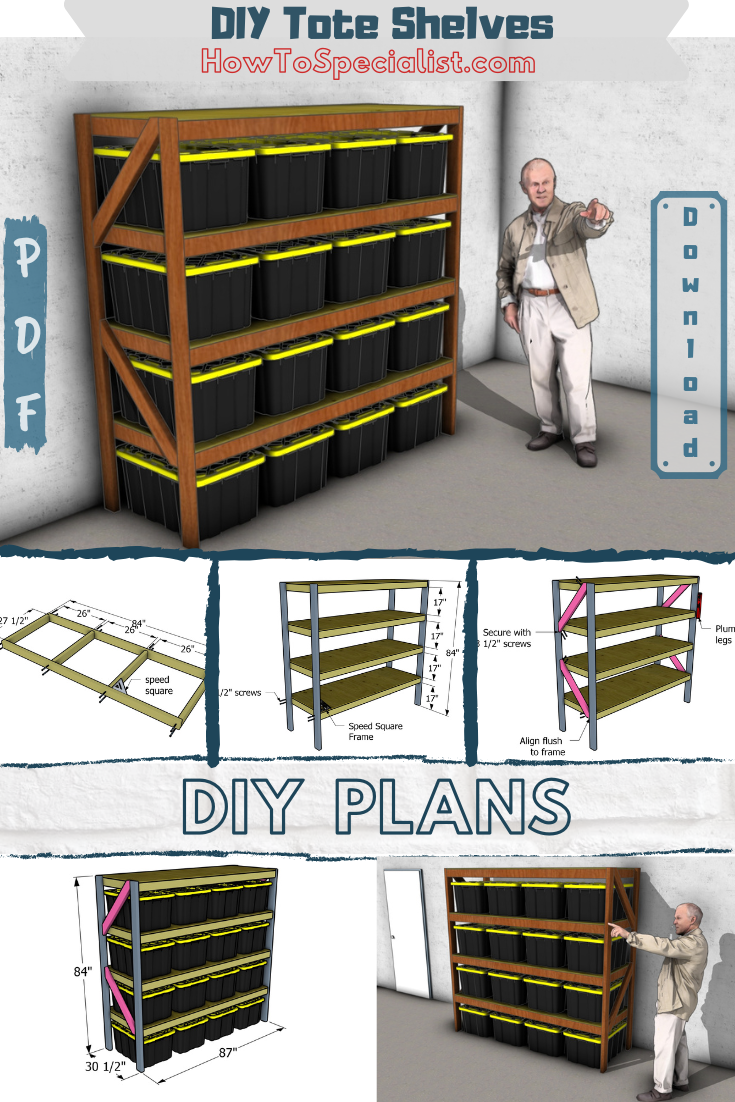
How to Make 27-gallon Storage Tote Shelves – Free DIY Plans
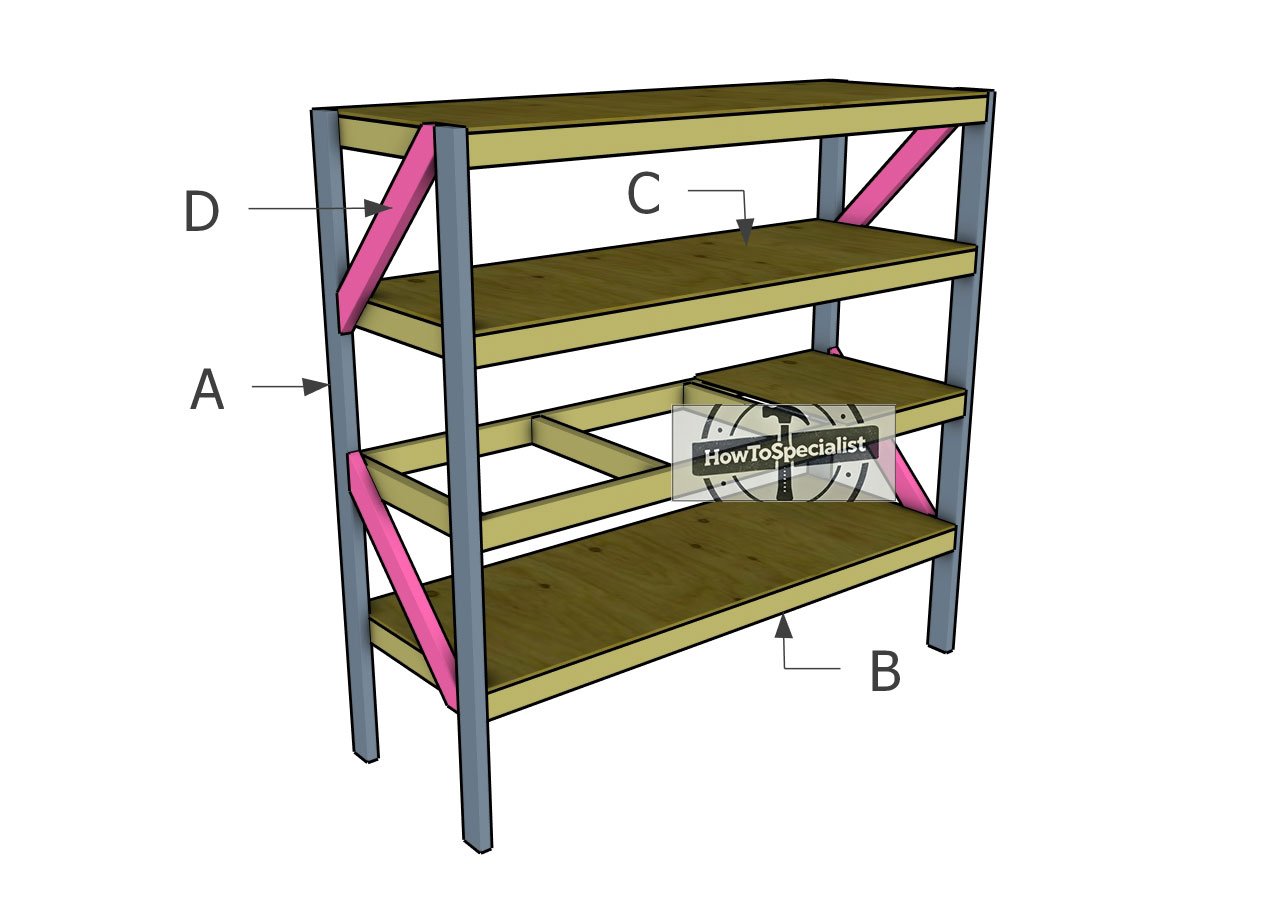
Building-a-tote-shelf
Materials
A – LEGS – 2×4 lumber 84″ – 4 pieces
B – FRAME – 2×4 lumber 84″ – 8 pieces
B – UPRIGHTS – 2×4 lumber 27 1/2″ – 16 pieces
C – SHELVES – 1/2″ plywood 30 1/2″x84″ – 4 pieces
D – BRACES – 2×4 lumber 35″ – 4 pieces
- 2×4 lumber 8 ft – 12 pieces
- 2×4 lumber 10 ft – 4 pieces
- 2×4 lumber 12 ft – 1 piece
- 1/2″ plywood 4’x8′ – 4 pieces
- 1 5/8″ screws – 100 pieces
- 3 1/2″ screws – 200 pieces
- stain / paint – 1 can
- Glue – 1 piece
- Wood putty – 1 can
- 27 gallon toe – 16 pieces
Tools
- Miter saw, Circular saw, Pocket hole jig
- Drill machinery, Drill bits, Jigsaw
- Safety gloves, Glasses, Speed square
- Chalk line, tape measure, spirit level, carpentry pencil
Time
- One weekend
Related
Cut Layout Diagram!
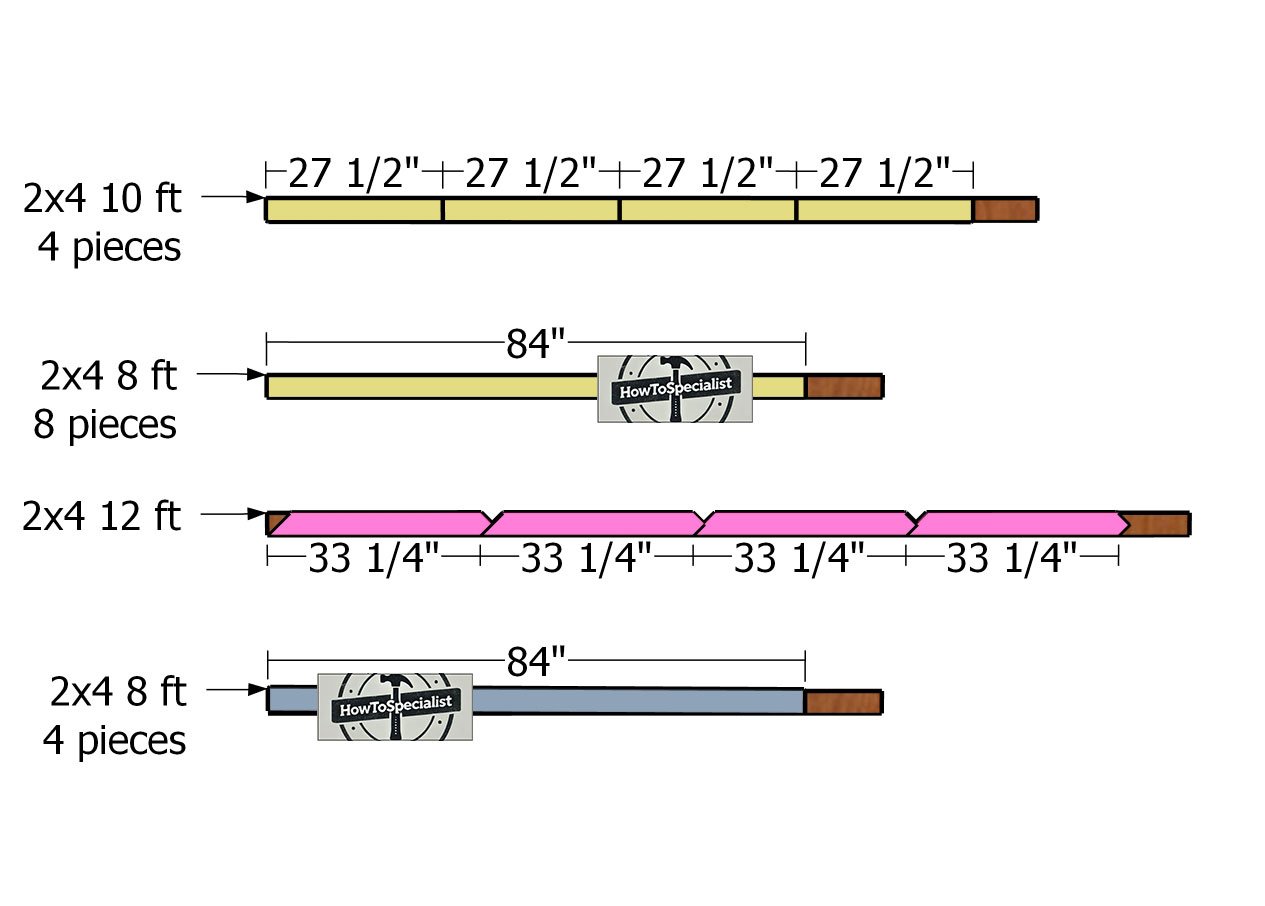
Cut-list
Step 1: Building the main frame
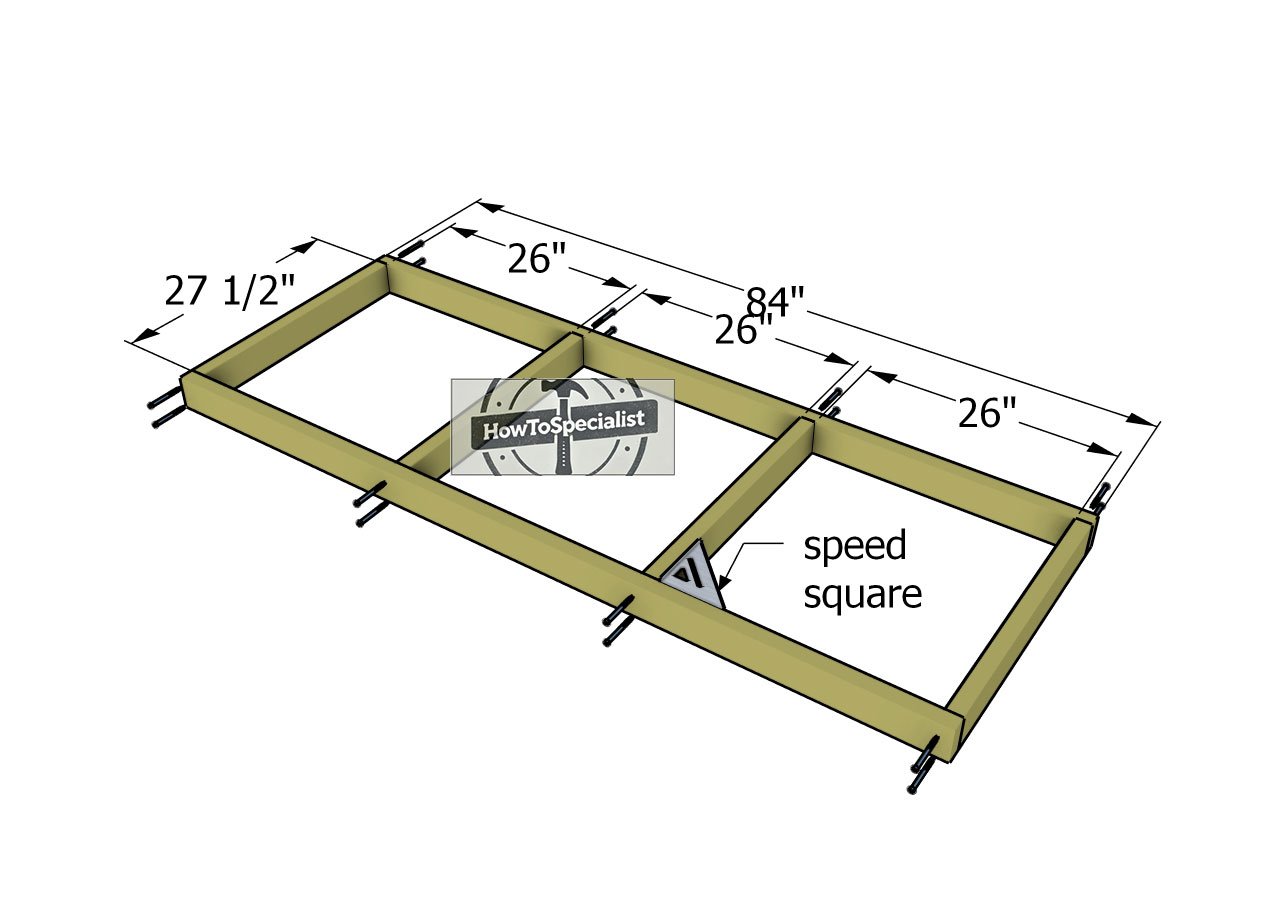
Assembling-the-frames
The first step of assembling the storage shelves unit is to construct the frames. Start by cutting the 2×4 lumber to the specified dimensions shown in the diagram, ensuring accuracy for a perfect fit. Lay the pieces flat on a level surface, aligning the edges flush for uniformity. Use a speed square to check that the corners are square before proceeding.
Drill pilot holes through the 84″ components to prevent splitting, then drive 3 1/2″ screws into the perpendicular pieces to secure the frame. Repeat this process for all frames, verifying alignment and angles as you go for a sturdy and precise foundation.
Fitting-the-shelf-panel
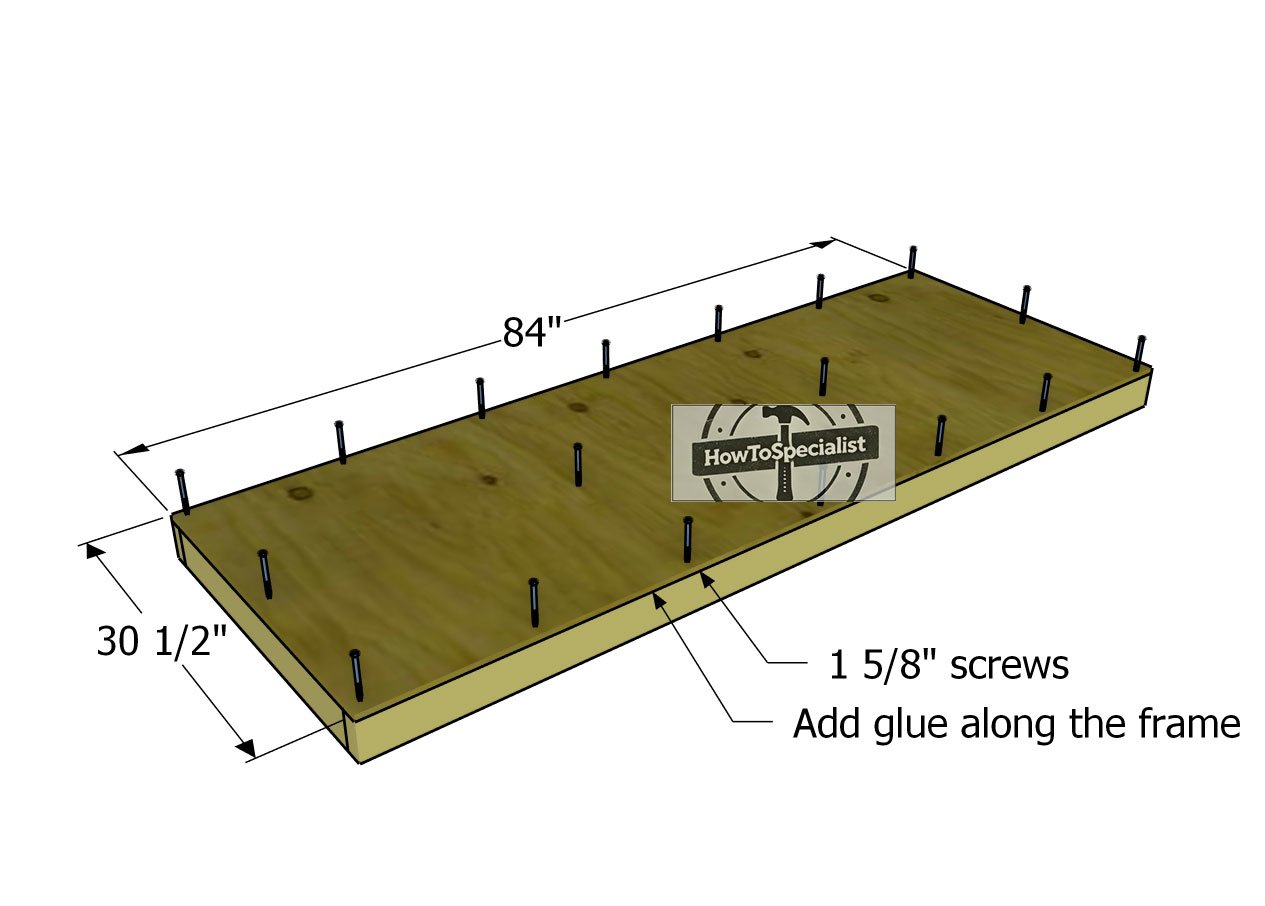
Once the frames are assembled, cut the shelves from 1/2″ plywood or OSB to fit the dimensions shown in the plans. Use a straightedge to mark the cut lines clearly and make straight cuts with a circular saw for clean edges. Place each panel onto the corresponding frame, ensuring the edges are aligned flush for a seamless fit.
Drill pilot holes through the panels every 8-10 inches along the framing to prevent splitting, then secure them using 1 5/8″ screws. For added durability, consider applying construction adhesive along the framing before attaching the panels. This step enhances the bond between the plywood and the frame, making the structure sturdier and more resistant to wear over time.
Attaching-the-legs
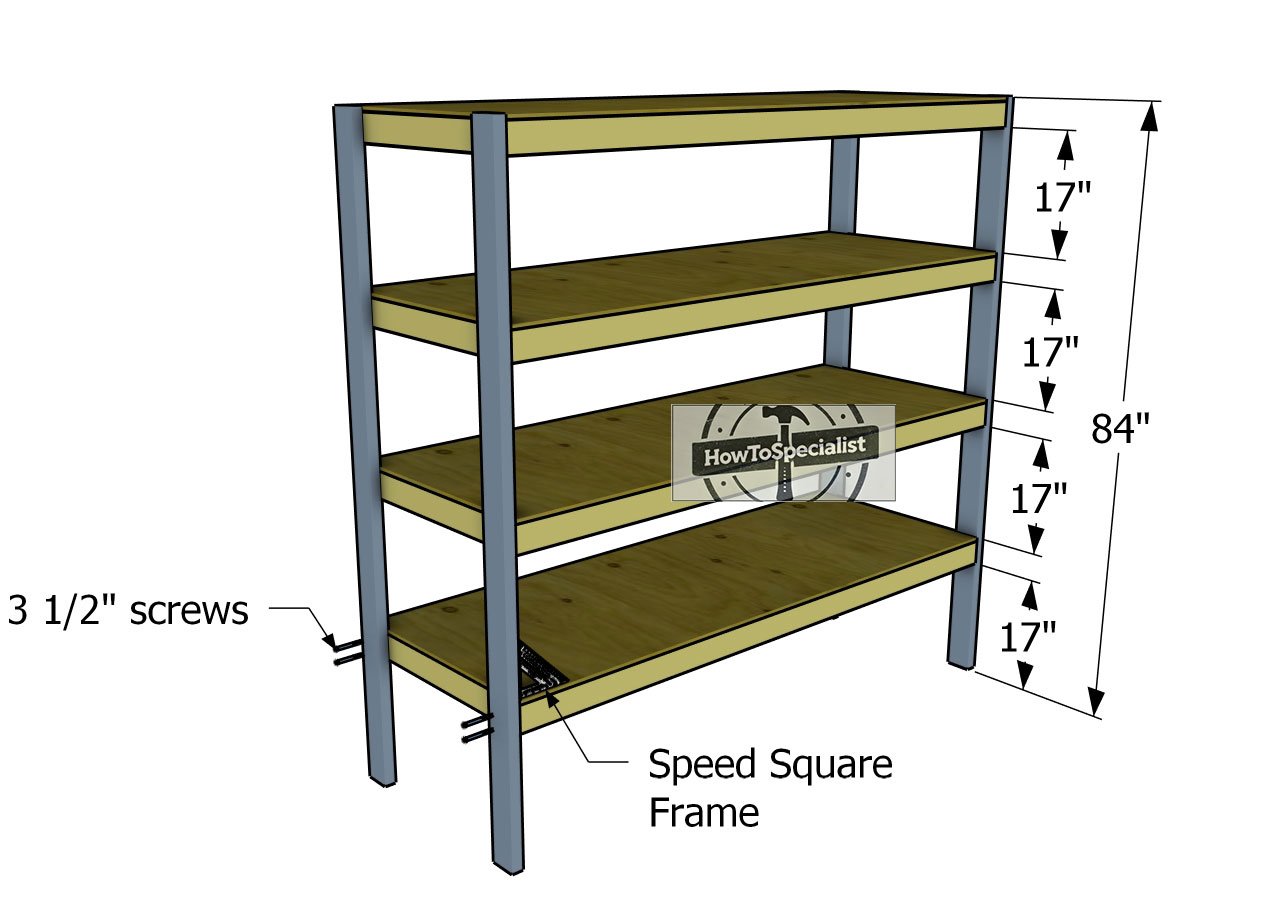
With the four shelves assembled, it’s time to attach the 2×4 legs to the sides, as shown in the diagram. Position the legs so they sit flush with the corners of the shelves, ensuring the structure will be stable and square. In this design, the shelves are spaced 17″ apart, providing ample room for most standard storage totes.
However, before proceeding, measure your storage totes to confirm they’ll fit comfortably, and adjust the spacing between shelves if needed. Secure the legs to the shelves by drilling pilot holes through the frame into the legs, then insert 3 1/2″ screws to hold everything in place. Check that the structure remains square as you work to ensure a professional and sturdy finish.
Step 2: Fitting the braces
Side-braces
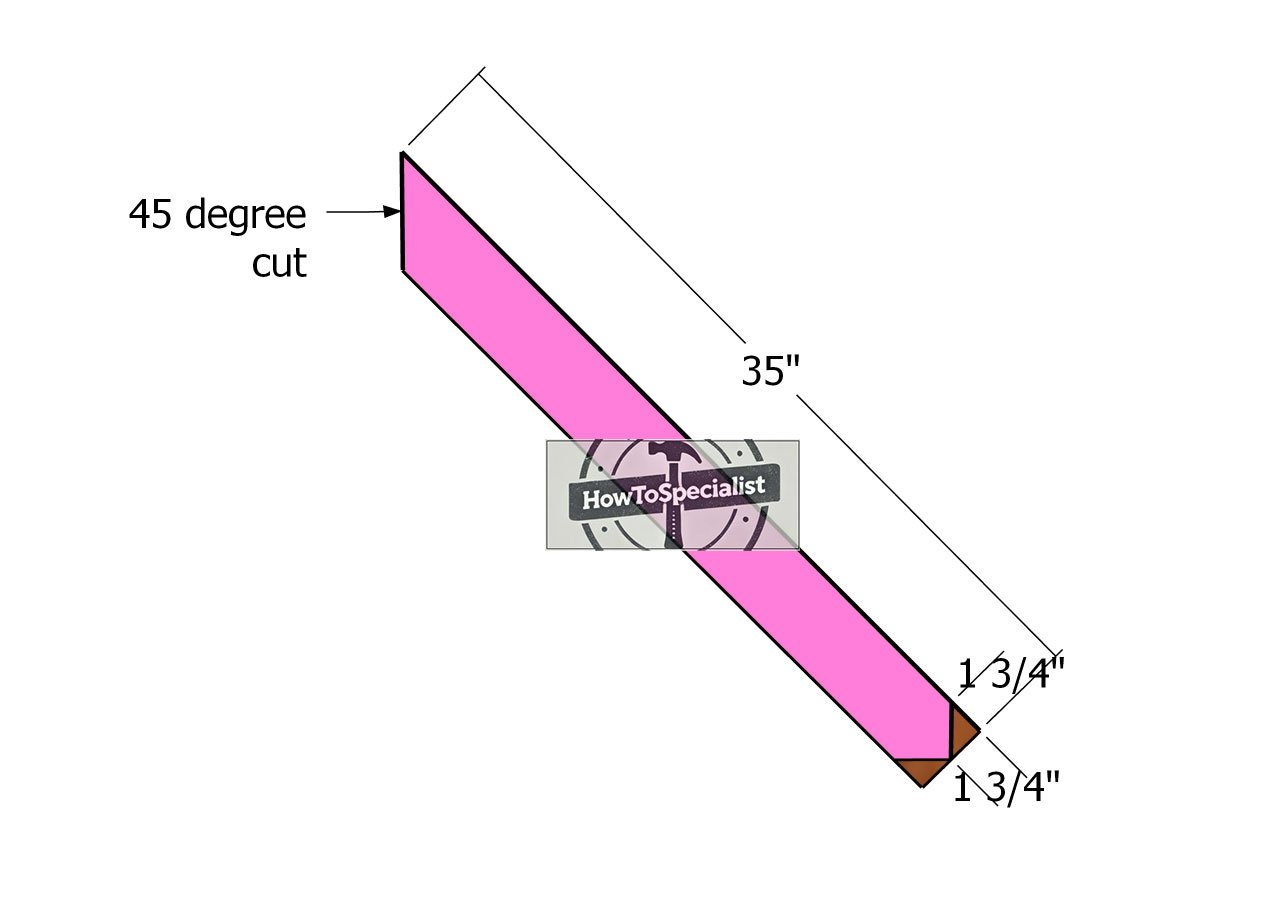
To add side braces for extra stability, use sturdy 2×4 lumber, ensuring the structure is both reliable and durable. Cut the braces with a miter saw, setting the angle to 45 degrees as specified in the diagram for clean, precise cuts. These angled ends will allow the braces to fit snugly between the shelves and legs, enhancing both the structural integrity and aesthetic appeal of your storage rack.
Position the braces so they are evenly spaced, and drill pilot holes at each end to prevent splitting. Secure the braces with 3 1/2″ screws, double-checking alignment as you work to ensure a professional finish that seamlessly integrates into the design. Taking your time with these cuts and attachments will result in a polished and rock-solid storage solution.
Fitting-the-side-braces
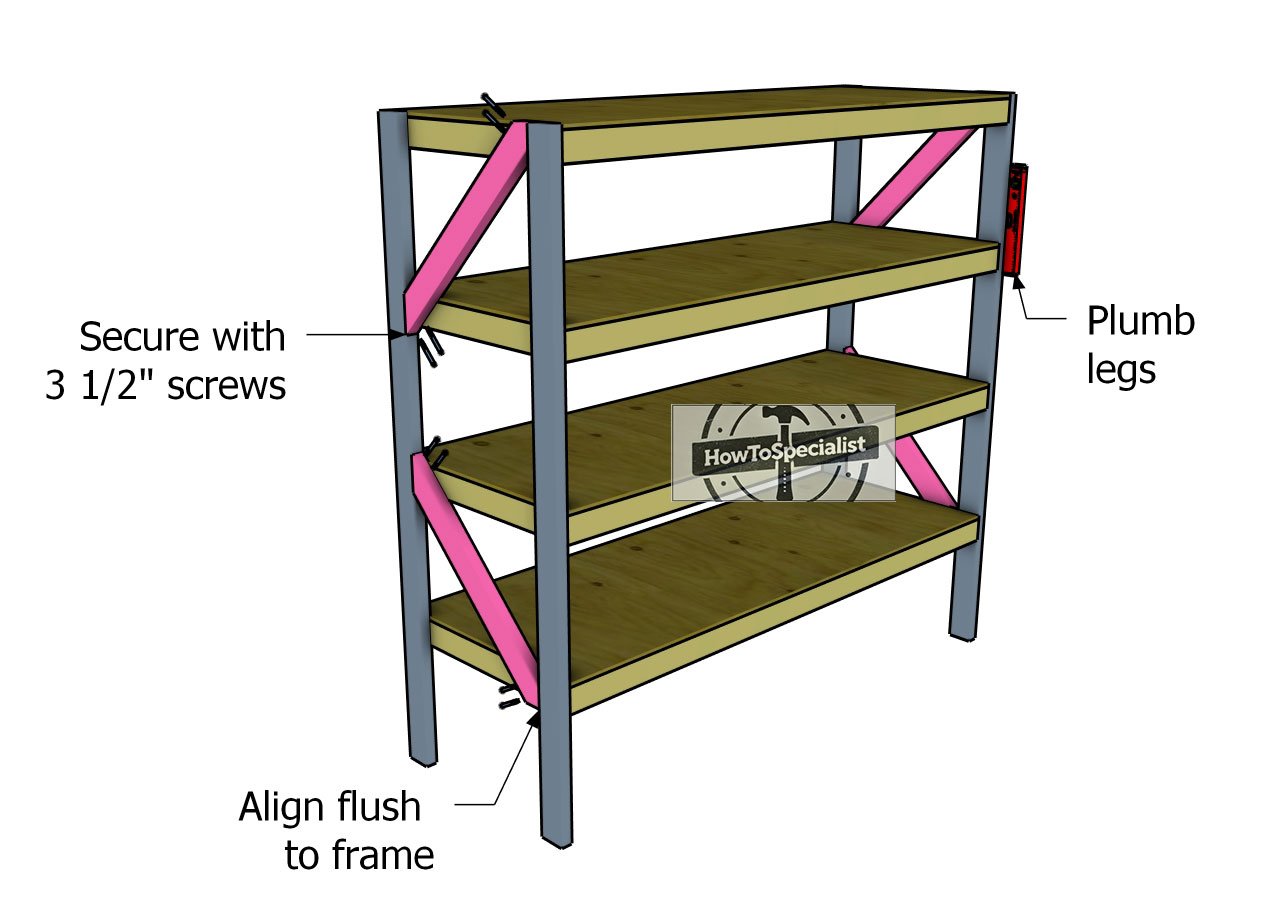
Attach the 2×4 side braces to the storage rack as shown in the diagram, ensuring proper placement for optimal support. Before securing the braces, check that the uprights are perfectly plumb using a level—this step is crucial for maintaining the structure’s stability and alignment. Once everything is in position, drill pilot holes at each joint to prevent splitting and then fasten the braces with 3 1/2″ screws. These side braces not only reinforce the overall strength of the storage rack but also improve its durability, making it capable of handling heavier loads with ease. Take your time to ensure a snug and secure fit for a professional and long-lasting result.
Step 3: Finishing touches
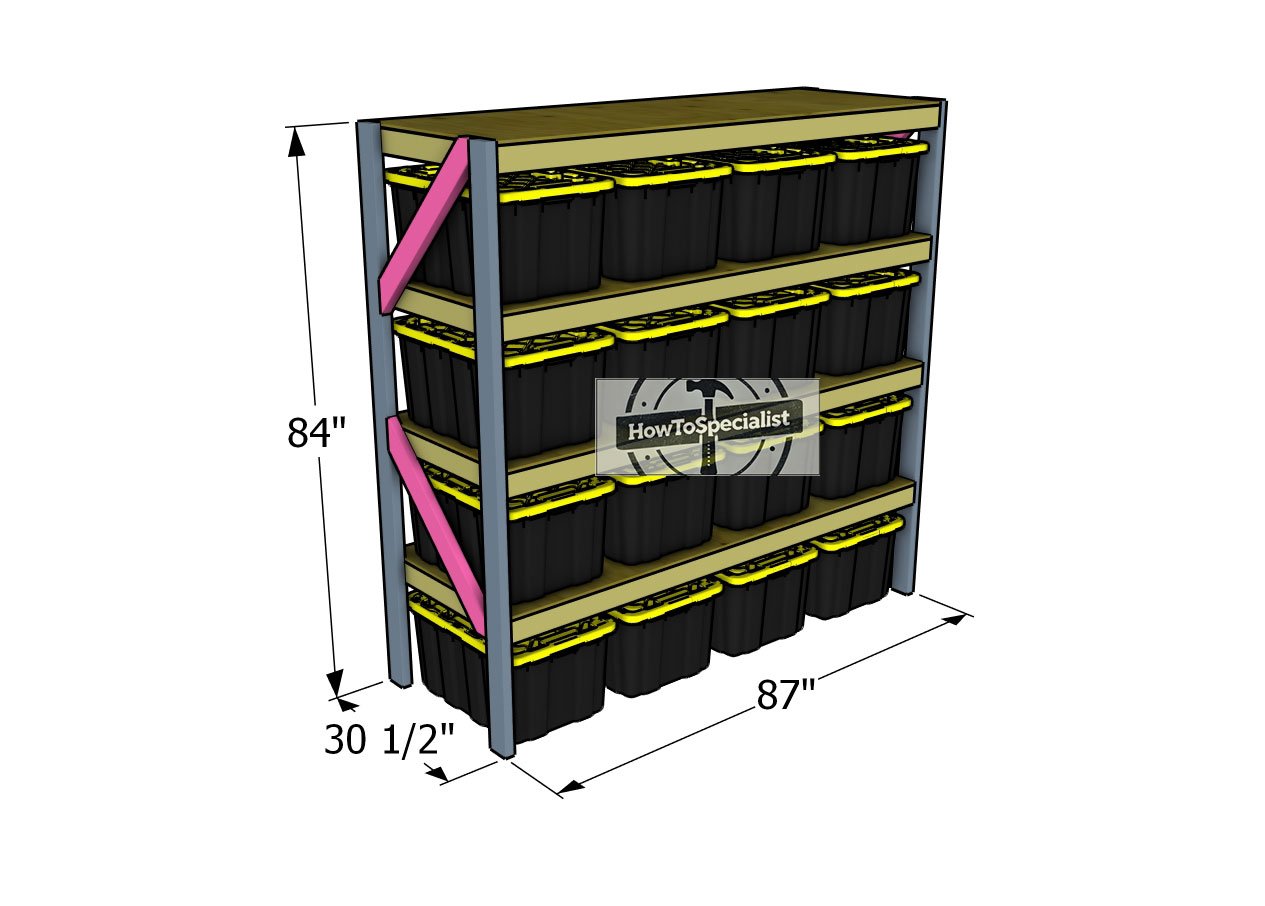
Tote-shelves-plans—dimensions
Now comes the exciting part: adding color and protection to your storage rack! Whether you prefer to highlight the natural wood grain with a stain or inject some personality with a bold paint color, this step allows you to customize the rack to fit your style and space. Use a brush, roller, or cloth to apply your chosen finish, following the product instructions for best results.
Work in thin, even coats to prevent drips and ensure smooth coverage, taking care to reach all edges and corners. Allow each coat to dry completely before applying the next—this is crucial for achieving a durable and polished finish. Typically, two to three coats will provide the protection and aesthetic appeal you’re aiming for, leaving your storage rack ready to shine in any setting.
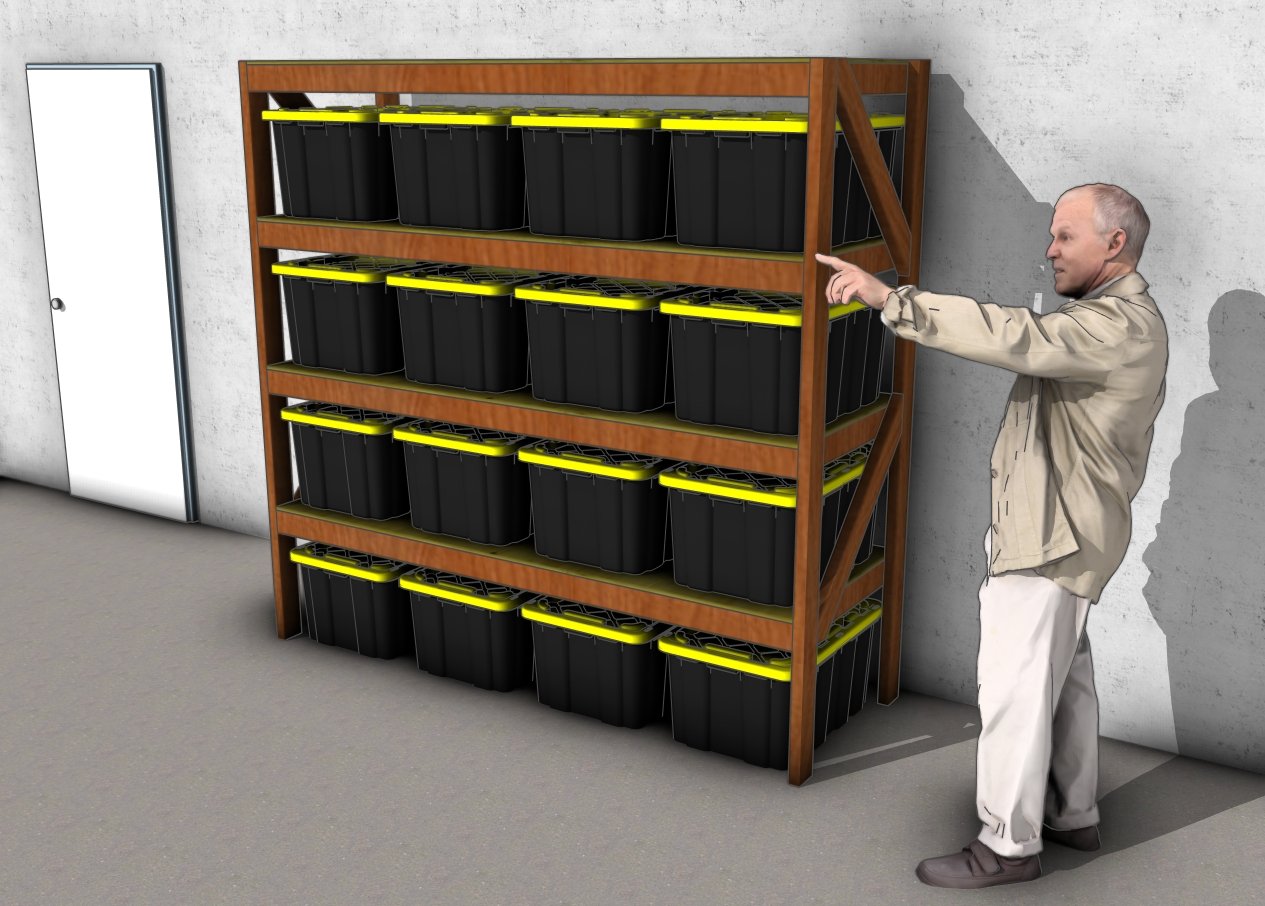
How to make storage shelves for 27 gallon totes
If you opt for a stain, consider applying a clear polyurethane topcoat once the stain has dried to protect the surface from wear and tear while enhancing the wood’s natural beauty. For painted finishes, a clear acrylic sealer is an excellent choice to lock in the color, add a subtle sheen, and extend the life of your project.
Apply the sealer with a brush or roller, using thin, even coats to avoid drips and uneven texture. Allow each coat to dry completely before adding the next for maximum durability. This finishing touch not only elevates the look of your storage rack but also ensures it withstands years of use while maintaining its style and charm!
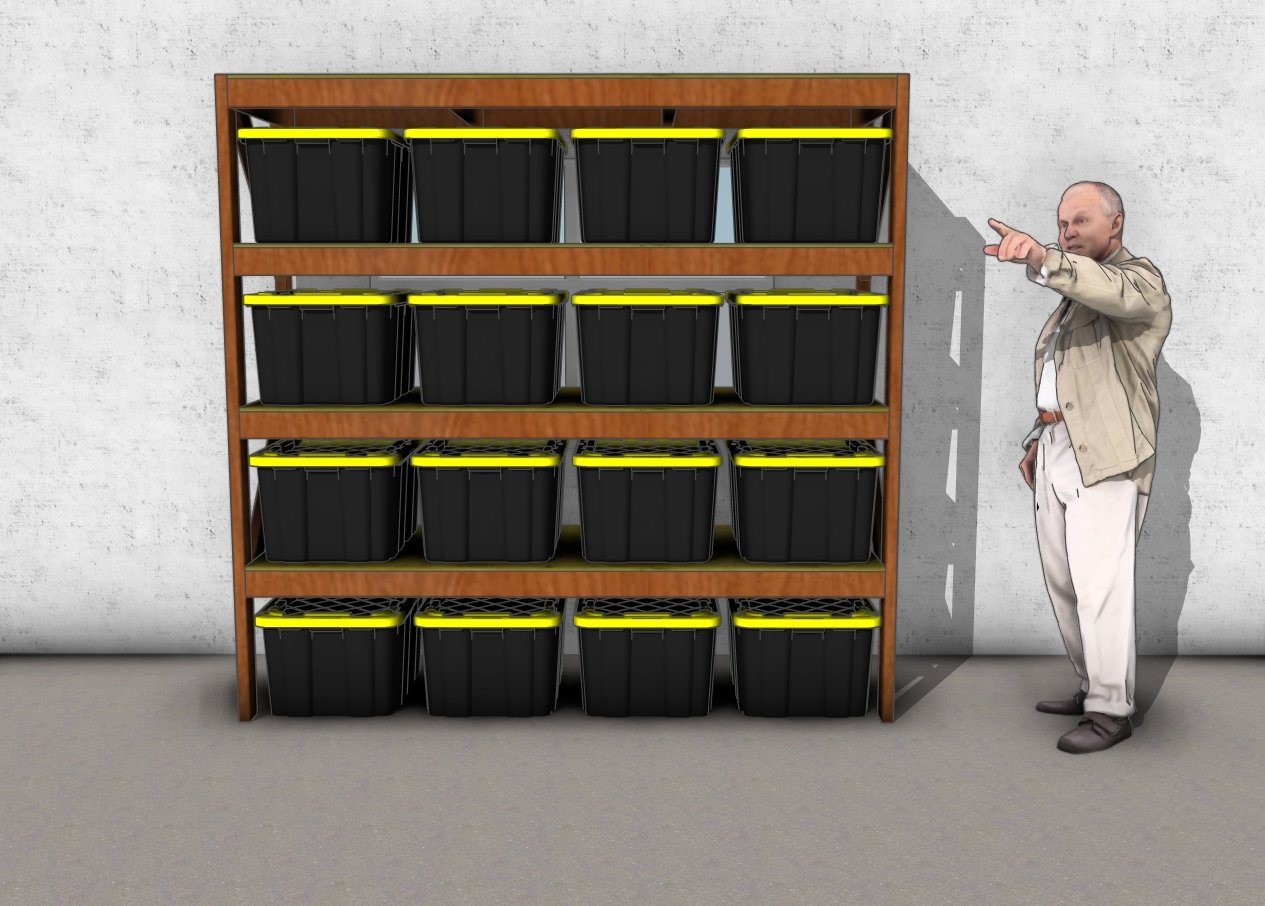
27 gallon tote shelves plans diy
With the final coat of stain or paint dry, your tote storage rack is officially complete and ready to shine! Take a moment to step back and admire your craftsmanship—a sturdy, stylish, and highly functional solution to conquer clutter and bring order to your space.
Whether it’s holding tools, seasonal decorations, or everyday essentials, this rack is built to last and designed to simplify your life. You’ve created a durable storage system that’s not only practical but also a reflection of your hard work and personal style. Enjoy the satisfaction of a job well done!

Tote storage shelves plans
Thanks for checking out my how to make tote storage shelves! Be sure to explore my other projects for more fantastic ideas. Don’t forget to hit the LIKE button and SHARE with your friends using the social media links below.

