This step by step project is about how to build garage cabinets. If you need basic wooden cabinets to organize properly your tools, you should pay attention to these plans and instructions. Always start the project with the preliminary steps. Therefore, we recommend you to assess you needs and design the cabinet as to fit both the space and the budget. Anyone with basic carpentry skills can get the job done in just an afternoon.
You can use different materials for this project, such as 3/4” plywood or solid wood boards. It all depends on your tastes and budget, so you should analyze a little before taking a decision. When buying the lumber, check if the components are in a good condition. Therefore, the boards shouldn’t have visible flaw (chips, dents, cracks) and have to be perfectly straight.
Fill the holes and the head of the screws with wood putty and let it dry out for several hours, before smoothing the surface with sand paper.In addition, you could also use a router and a 1/4” bit to round the visible edges of the trims. Apply several coats of paint or stain to the garage cabinet, to both enhance its look and to protect the components against decay or rot. See all my Premium Plans in the Shop.
Made from this plan
In order to build garage cabinets, you need to use the following:
Materials
- A – 2 pieces of 1×12 lumber – 36”, 1 piece – 54” long, 1 piece – 52 1/2” long FRAME
- B – 2 pieces of 1×12 lumber – 22 3/4”, 1 piece – 52 1/2” long SHELVES
- C – 1 pieces of 1×2 lumber – 54”, 1 piece – 51” long, 2 pieces – 22” long, 2 pieces – 32 3/4″ long, 1 piece of 1×3 lumber – 54″ long FRAME
- D – 3 pieces of 1/2” plywood – 15 3/4″ x 21 1/2” DOOR
- D – 6 pieces of 1×2 – 15 3/4” long, 6 pieces – 21 1/2” long DOOR TRIMS
- E – 1 pieces of 1/2” plywood – 36 3/4″ x 56” BACK
- 2 pieces of 1×12 lumber – 8 ft
- 1 piece of 1×12 lumber – 10 ft
- 1 piece of 1/2″ plywood – 4’x8′
- 5 pieces of 1×2 lumber – 8 ft
- 1 piece of 1×3 lumber – 6 ft
- drawer pull
- 2 1/2″ screws
- 1 1/4″ screws
- glue, stain
- wood filler
Tools
- Safety gloves, glasses
- Miter saw, jigsaw
- Chalk line, tape measure, spirit level, carpentry pencil
- Drill machinery and drill bits
Tips
- Pre-drill holes in the wooden components, before driving in the screws
- Apply several coats of wood stain to the wooden components
- Adjust the size of the headboard, according to your needs and tastes
Time
- One Day
Related
Building garage cabinets
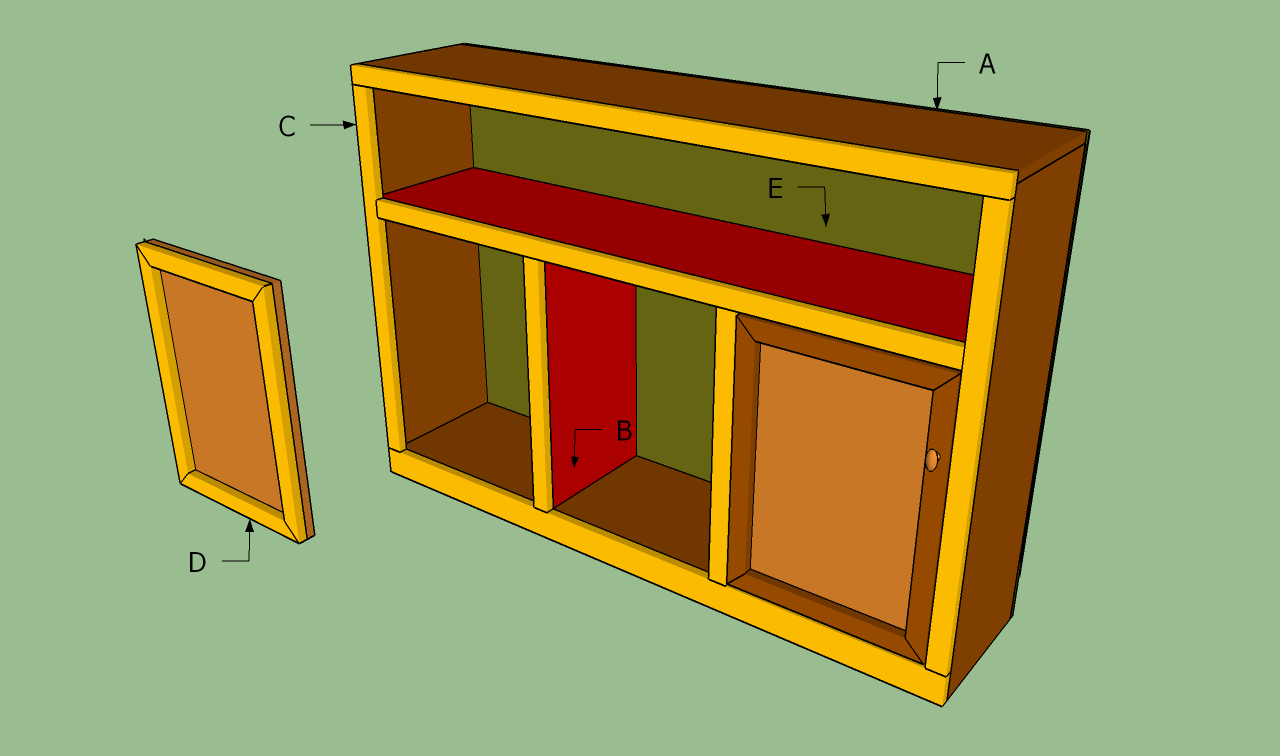
Building garage cabinets
Building wooden cabinets for your garage is easy, if you use proper plans and appropriate tools. Adjust the size of the cabinets to your needs, but use the same techniques to get the job done like a professional.
How to build garage cabinets

Building the frame of the cabinets
The first step of the project is to build the frame of the cabinets. As you can easily see in the image, you need to build the frame with 1×12 lumber. In addition, we recommend you to drill pocket holes at both ends of the side components and drive in 1 1/4” screws to lock the top into place.
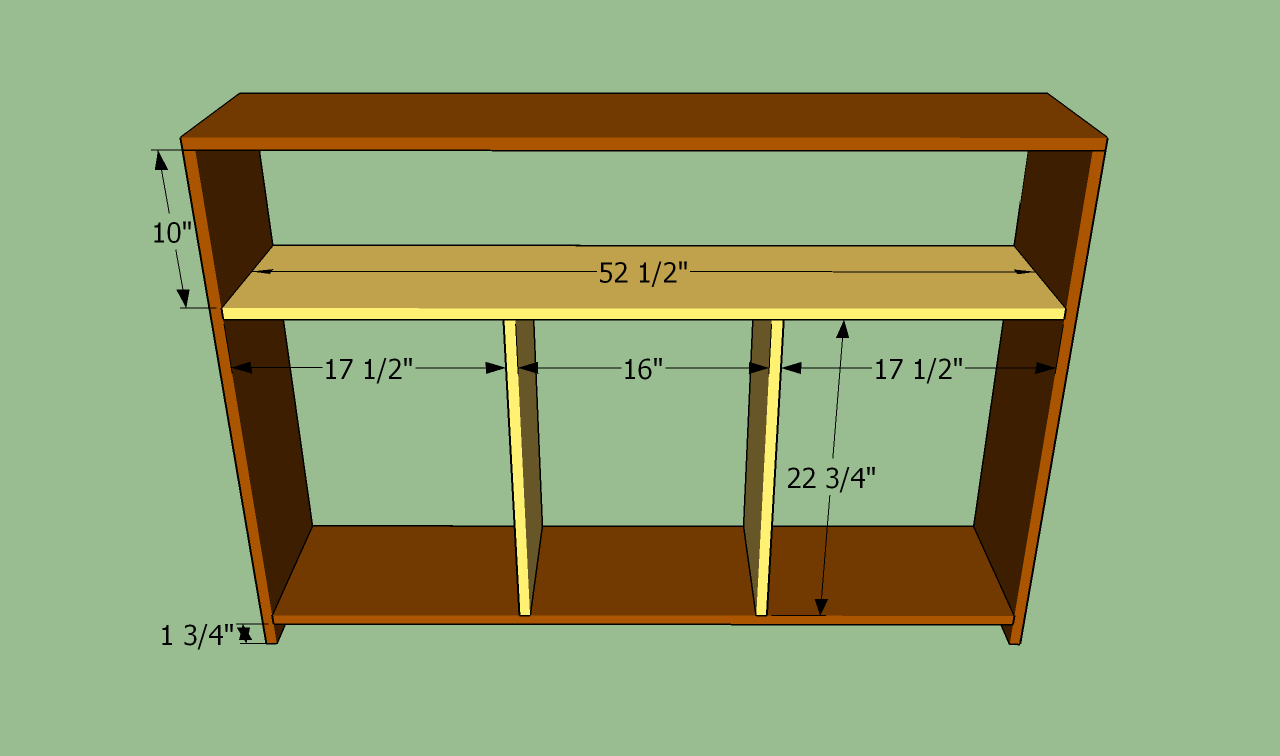
Installing the shelf
Continue the project by fitting the interior components, as in the plans. Drill pocket holes at both ends of the middle shelf. Use a spirit level to align the wooden boards, before driving in the screws into place.
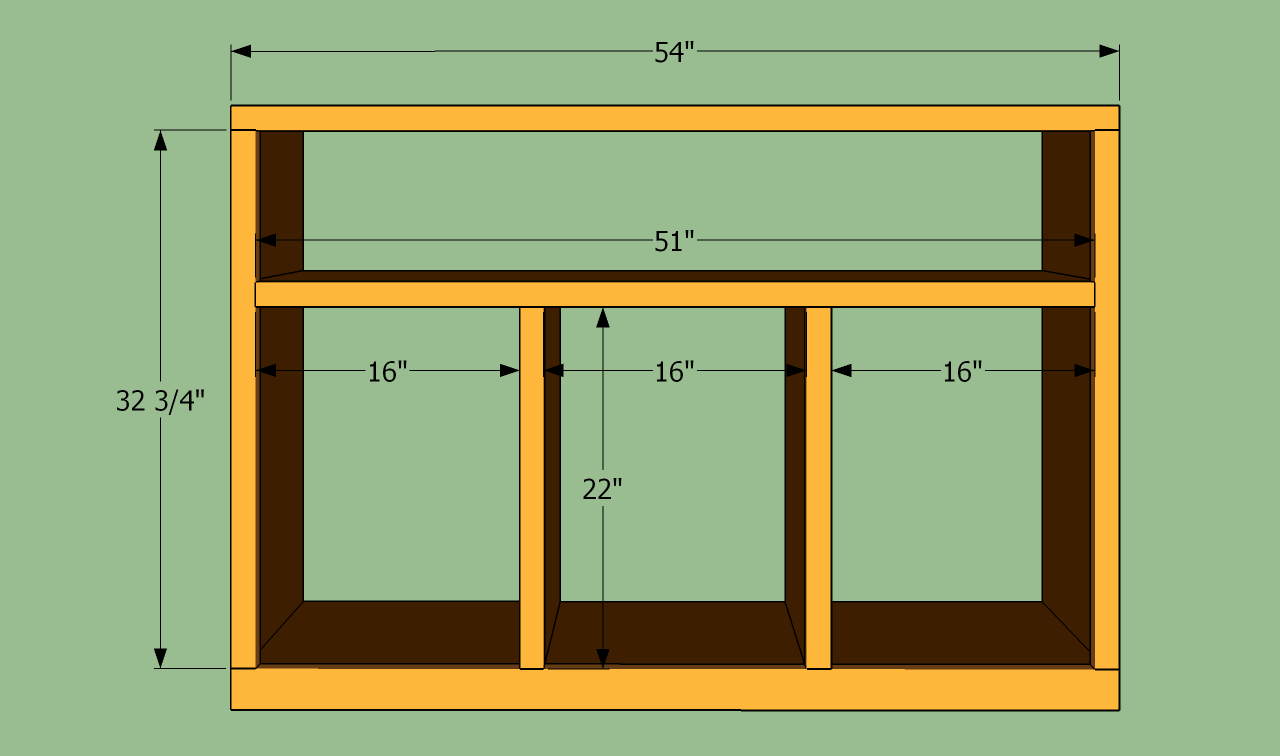
Attaching the trims
Add 1×2 trims to the front face of the cabinet, in order to enhance its look. Cut the trims at the right size with a circular saw and smooth the cuts edges with fine-grit sandpaper. Attach the trims int place and lock them into place with finishing nails and wood glue.
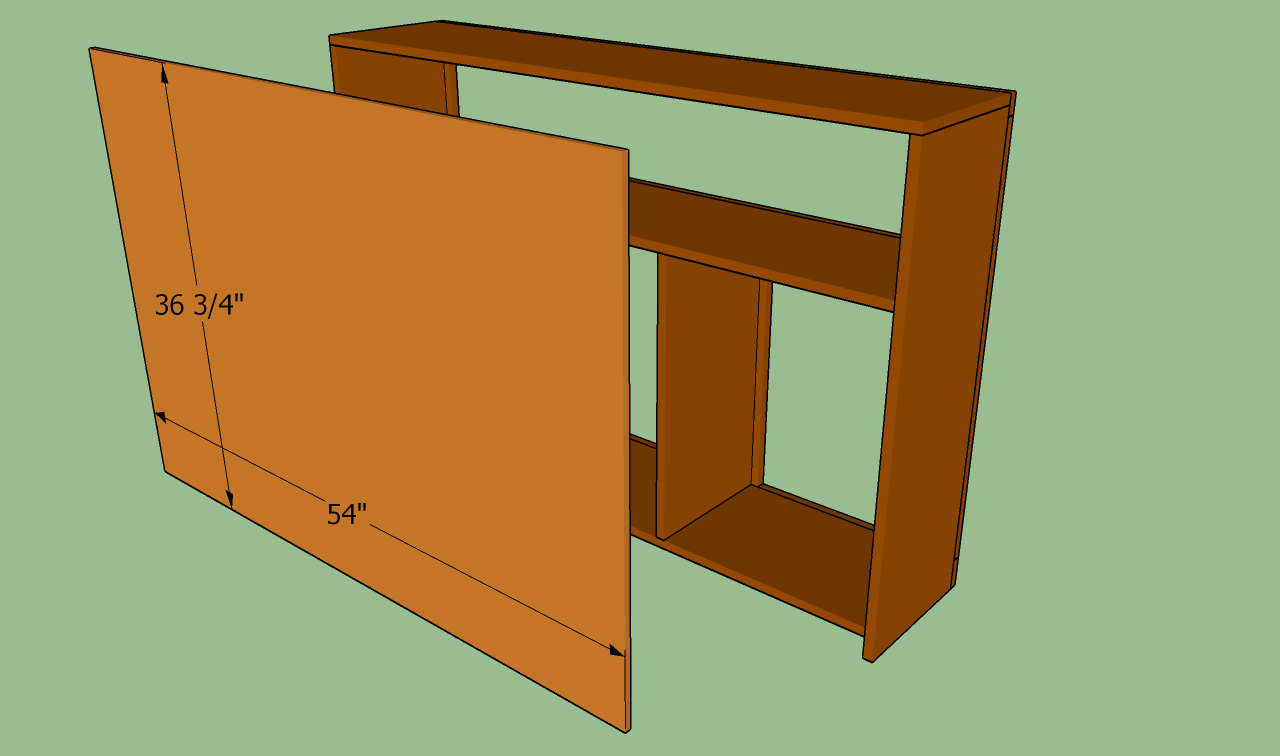
Attaching the back wall
The cabinets need a back, so we will use 1/2” plywood to get the job done as professional. Use a circular saw with fine blade to cut the plywood sheet at the right size.
Fit the sheet to the back of the cabinet, make sure the edges are flush with the wooden components and lock it into place with 1 1/4” nails. Adding the back plywood sheet would increase the rigidity of the wooden cabinet.

Building the cabinet door
Building the wooden doors of the cabinets can be done in several ways, so you should select the design that fits your needs perfectly. One of the easiest techniques is to cut a piece of 1/2” plywood and to attach 1×3” trims (use glue and 1 1/4” screws).
Secure the doors into place with hinges and add a door handle. Make sure you align the door properly and plumb it with a spirit level.
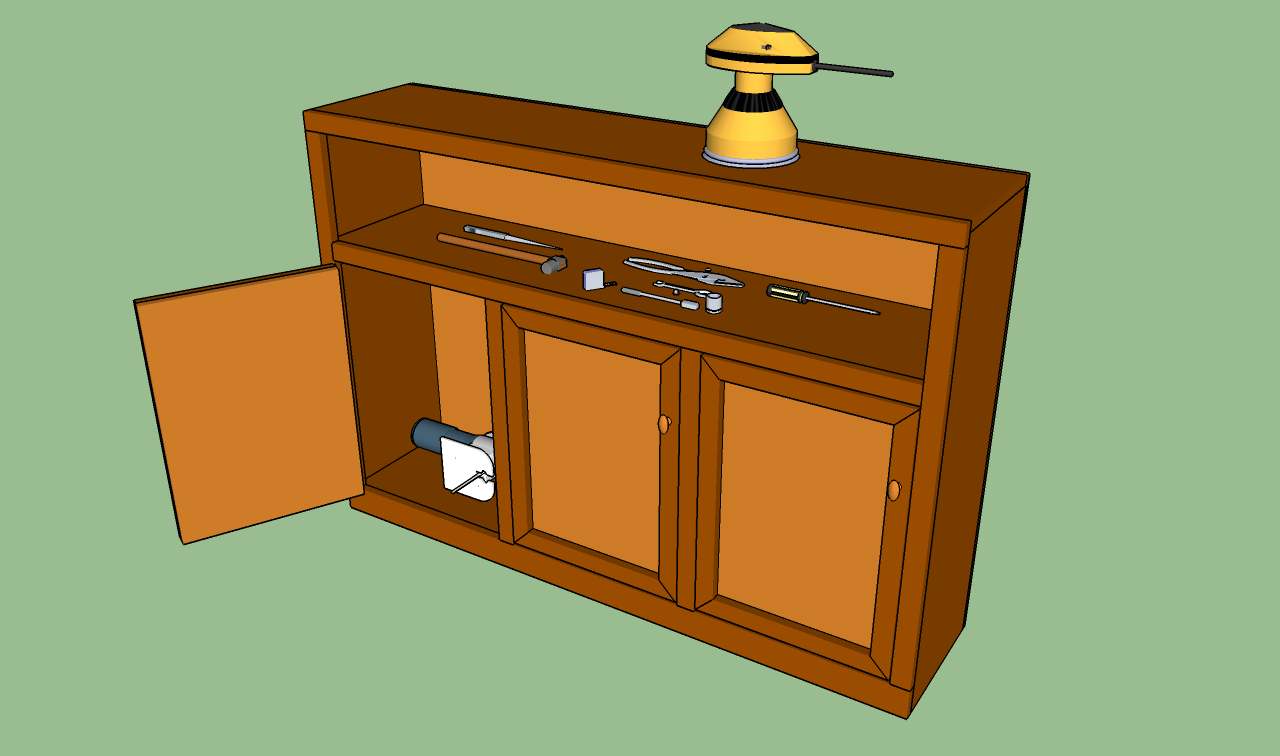
How to build garage cabinets
Last but not least, you have to take care of the finishing touches. Therefore, fill the holes with wood filler and let it dry out for several hours. Use a random sander to even out the surfaces and clean the residues.
Thank you for reading our project about how to build a garage cabinets and we recommend you to check out the rest of the projects. Don’t forget to share our projects with your friends, by using the social media widgets.
