This step by step project is about how to build a spice rack. Building a small shelf for your jars with spices is a simple woodworking project, that can be done by anyone with basic woodworking carpentry skills. Therefore are many designs you could choose from, so we strongly recommend you to study the alternatives before taking a decision regarding to your project.
First of all, we strongly recommend you to choose the lumber with great attention. Therefore, choose lumber that has a beautiful natural finish, such as pine, cedar or redwood. Although this is not a complex woodworking project, you still have to pay attention to the condition of the lumber. Remember that the slats should be in a good condition (no twists, decay or knots) and perfectly straight.
Assembling the components together is straight forward job, if the right techniques are used. Therefore, you could either drill pilot holes and insert finishing nails or use a pocket hole system. Irrespective of the case, don’t forget to add glue to the components, in order to enhance the rigidity of the joints. Last nut not least, sand the wooden components along the wood grain, in order to get a proper finish. See all my Premium Plans in the Shop.
Made from this plan
In order to build a spice rack, you need to use the following:
Materials
- A – 2 pieces of 1×3 lumber – 6″ long, 1 pieces – 28 1/2″ long FRAME
- B – 4 piece of 1×2 lumber (1/4″ thick) – 30” long SLATS
- C – 1 pieces of 1×3 – 3 1/2″ long CENTER PIECE
- 1 piece of 1×3 lumber – 4 ft
- 1 piece of 1×2 lumber – 10 ft
- 2 1/2″ screws
- 1 1/4″ screws
- glue, stain
- wood filler
Tools
- Safety gloves, glasses
- Miter saw, jigsaw
- Chalk line, tape measure, spirit level, carpentry pencil
- Drill machinery and drill bits
Tips
- Apply several coats of wood stain to the wooden components
- Adjust the size of the shelves, according to your needs and tastes
Time
- One Day
Related
Building a spice rack
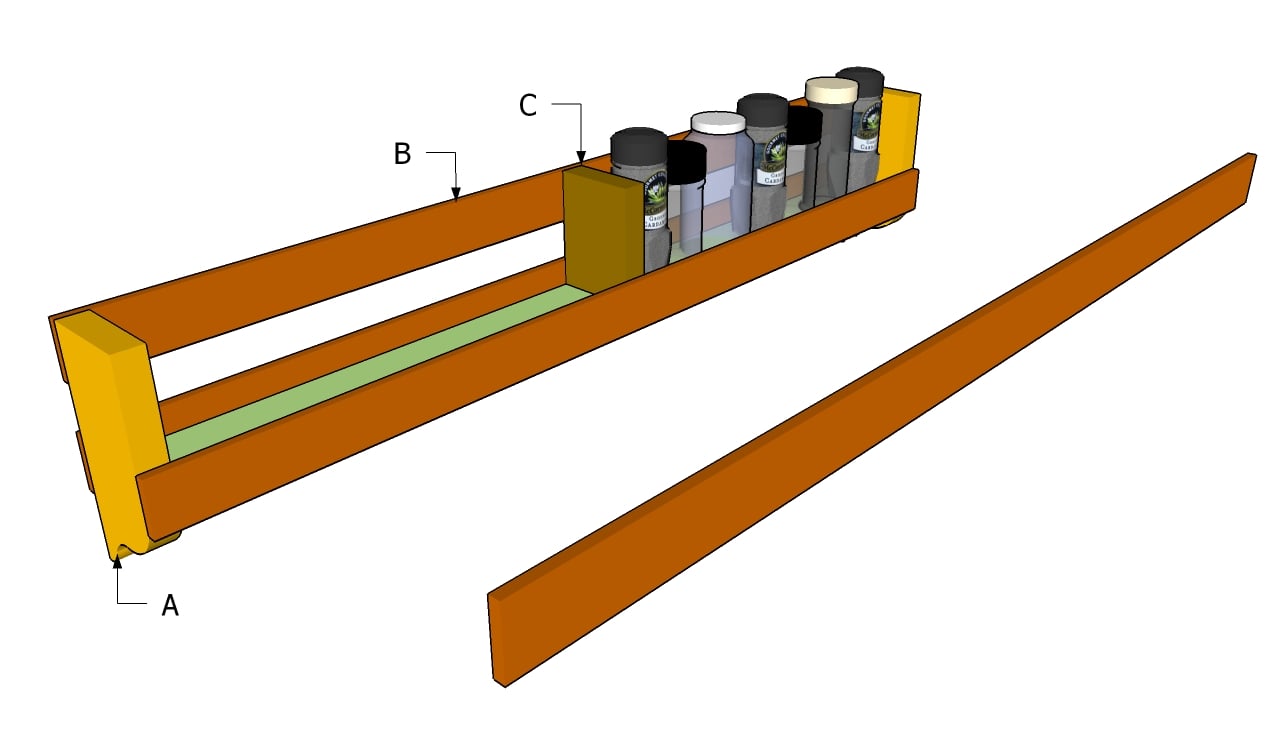
Building a spice rack
Building a rack for your spice jars or containers is a great project for any kitchen, as it will help you organize it better and use the space efficiently. The best part of these plans is that you can adjust them according to your needs.
How to build a spice rack

End components plans
The first step of the project is to build the ends of the spice rack. As you can easily see in the image, you should use 1×3 lumber and a carpentry pencil to mark the cut lines. Although it is not compulsory, you could make the ends of the supports decorative.
In this manner, your rack would look nice and add character to your kitchen. Draw the lines with a compass and make the cuts with a jigsaw.
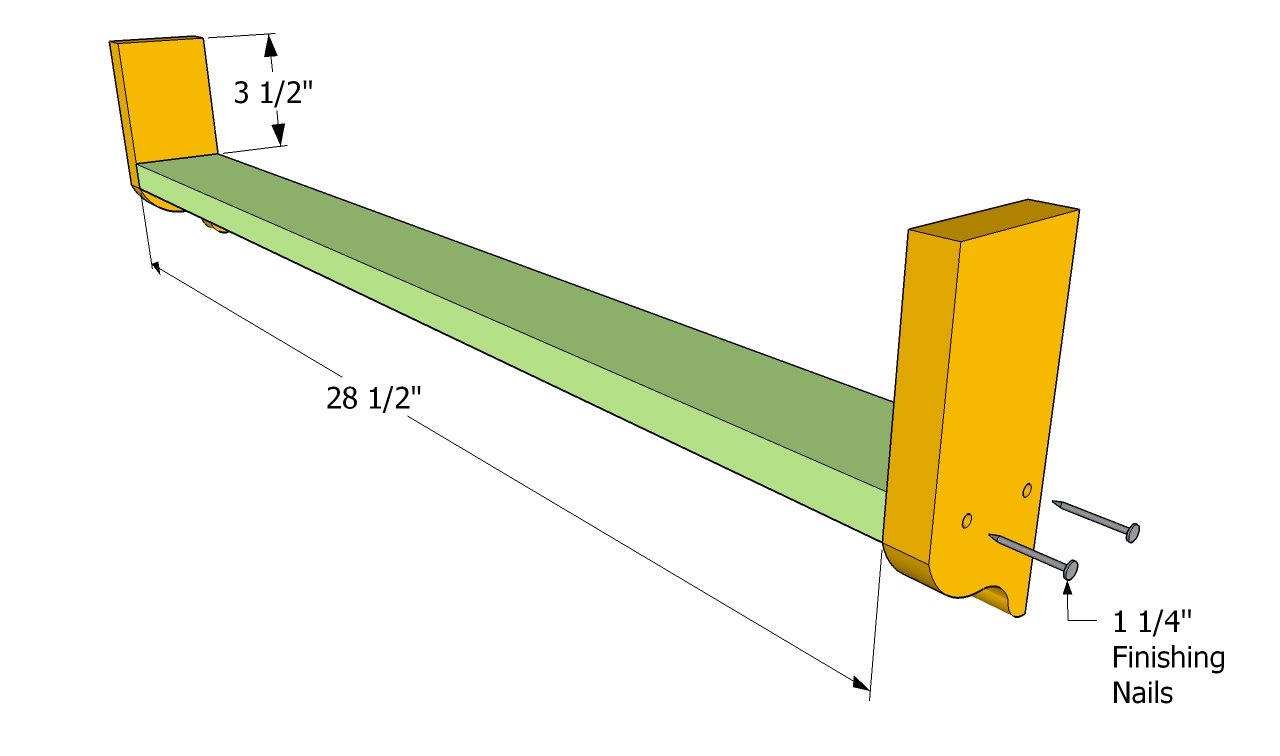
Attaching the bottom
Next, you need to install the bottom of the spice rack. Taking into account it has to support several jars, you should use 1×3” slats (3/4″ thick). In addition, thee are several methods you could use to attach it to the ends.
On one hand, you could drill pilot holes trough the ends, add glue and insert 1 1/4” finishing nails. Nevertheless, you could drill pocket holes and insert 1 1/4” screws, as well.
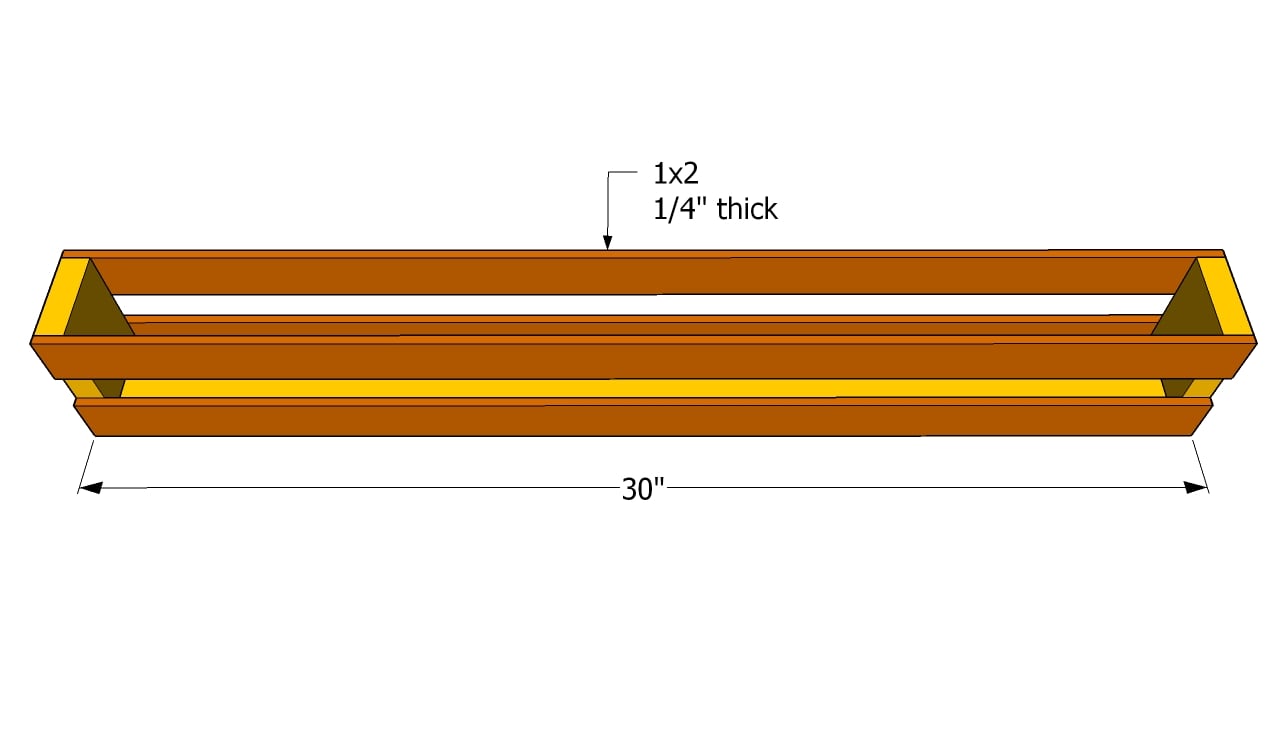
Installing the front and back slats
Continue the woodworking project by installing the font and back slats. As you can easy notice in the image, you should use 1×2 slats (1/4″ thick). Drill pilot holes and add glue before driving in the 1/2” finishing nails.
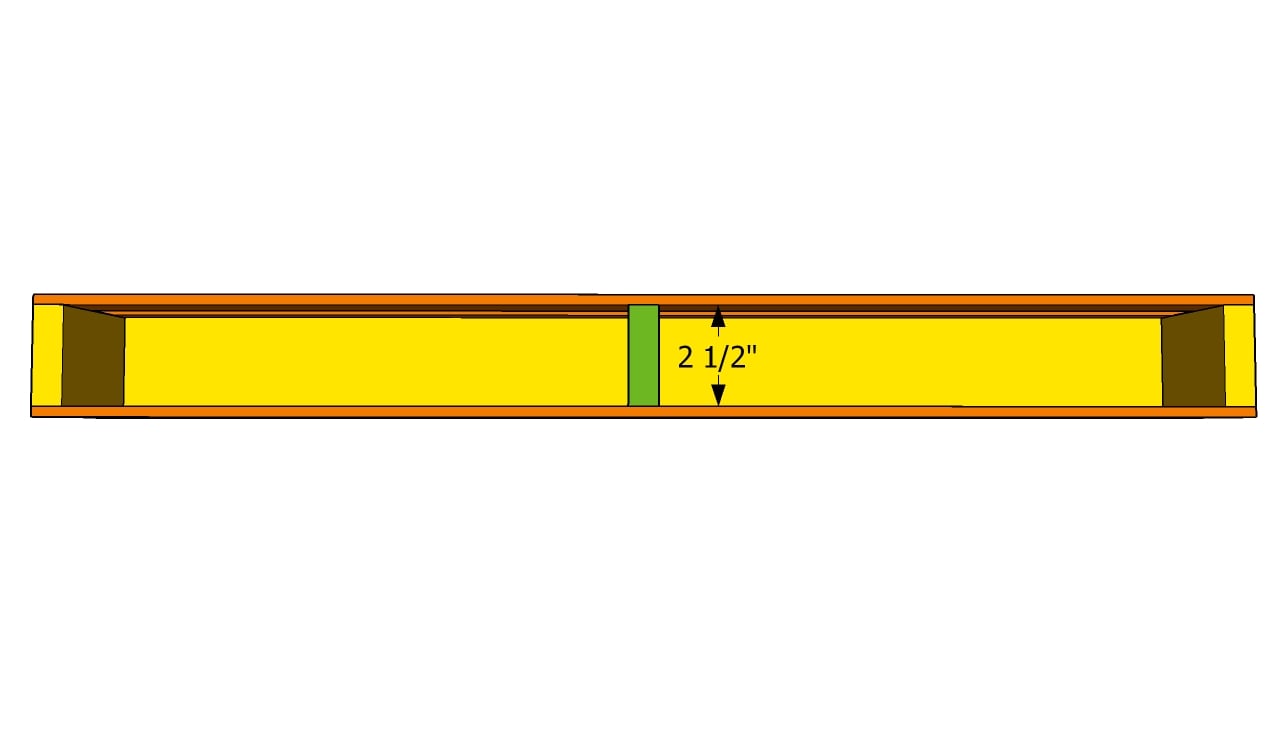
Fitting the center piece
After attaching the small slats, you should remove the excess glue with a dry cloth. Next, you should consider fitting a small piece of 1×3 lumber (3 1/2” long) between the front and back faces of the rack, as to provide support to the frame.
Drive finishing nails trough the front and back slats and add a good wood glue to the edges of the components, in order to lock it into place properly.
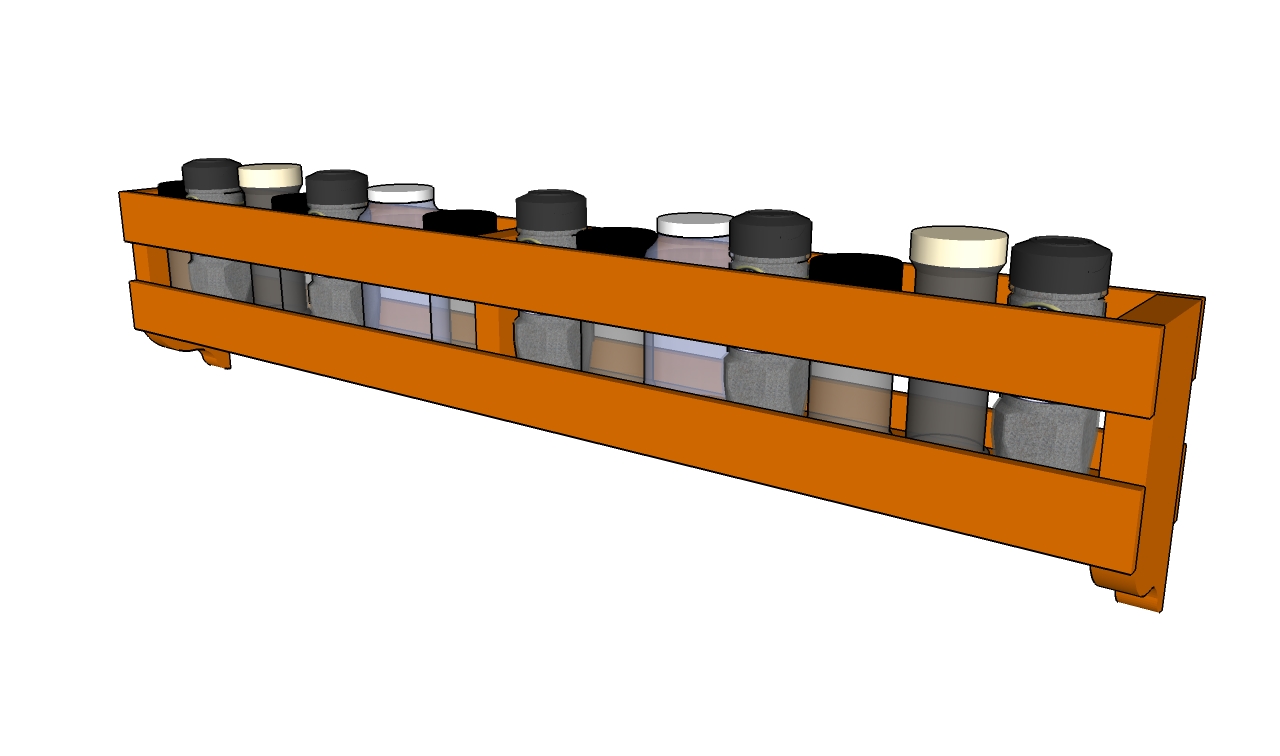
How to build a spice rack
Last but not least, you should take care of the finishing touches. Therefore, if you want to get the job done as a professional, you need to fill the holes with wood filler and sand the surface, after the compound dries out. Apply a few coats of stain to protect the wood from decay.
Thank you for reading our project about how to build a vanity and we recommend you to check out the rest of the projects. Don’t forget to share our projects with your friends, by using the social media widgets.
