This step by step woodworking project is about how to build a simple plant stand. I designed this plant stand so it can be moved easily and it doesn’t require a lot of materials, tools or effort. If you need a multi purpose basic bench that can be used as a plant stand or as a small entry bench, you should take a look over the instructions.
We recommend you to invest in the best materials you could afford. Therefore, you should buy weather-resistant lumber, such as pine or cedar. Always take accurate measurements before adjusting the size of the components at the proper size. Drill pilot holes trough the components before inserting the wood screws, to prevent the wood from splitting. See all my Premium Plans in the Shop.
Made from this plan

Materials
- A – 2 pieces of 1×8 lumber – 24 1/2″ long SIDES
- B – 2 pieces of 1×1 lumber – 7 1/4″ long, 4 pieces of 1×2 lumber – 18 1/2″ long SHELF
- C – 2 pieces of 1×3 lumber – 24″ long TRIMS
- D – 1 piece of 1×8 lumber – 24″ long TOP
- 1 piece of 1×8 lumber – 8′
- 1 piece of 1×2 lumber – 8′
- 1 pieces of 1×3 lumber – 6′
- 1 1/2″ brad nails
- stain, glue
Tools
- Safety gloves, glasses
- Miter saw, jigsaw
- Chalk line, tape measure, spirit level, carpentry pencil
- Drill machinery and drill bits
Tips
- Adjust the size of the project to suit your needs
Time
- One Day
Basic Plant Stand Plans
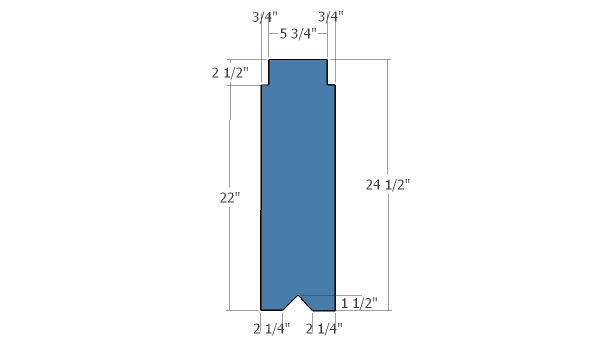
Start the project by making the sides for the simple plant stand. Mark the cut lines on the 1×8 lumber and get the job done with a saw. Make sure the blade goes exactly over the cut lines and smooth the edges with sandpaper.
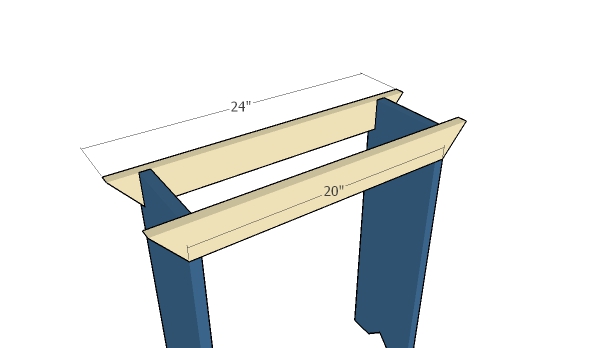
Continue the project by attaching the 1×3 side supports to the vertical supports. Align the edges with attention and add glue to the edges. Drill pilot holes through the supports and insert 1 1/4″ screws into the legs, after making sure the corners are square.
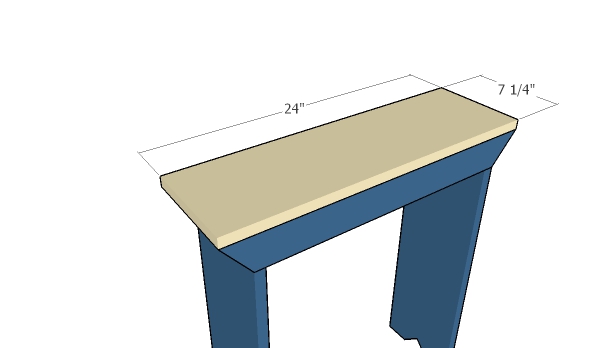
The next step of the project is to attach the 1×8 top to the structure. Align the edges with attention and add glue to the joints. Insert a few 1 1/2″ brad nails through the top to secure it into place tightly.
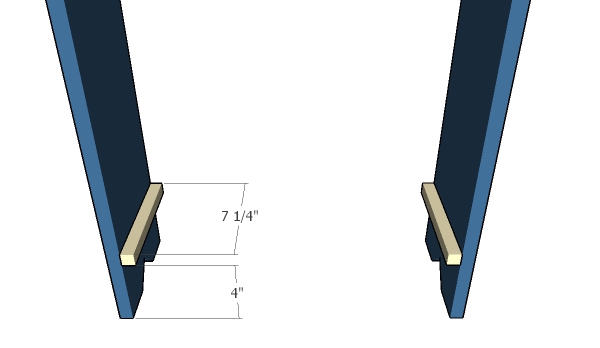
Fit 1×1 cleats to the legs using 1 1/2″ brad nails and glue. Use a spirit level to make sure the cleats are horizontal. In addition, clamp the cleats to the legs for a few hours, so the glue can dry out properly.
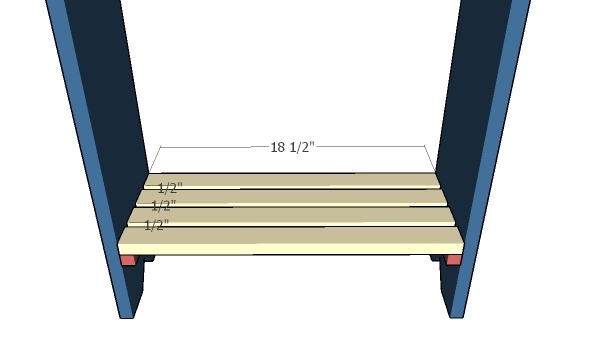
Fit the 1×2 slats to the cleats, making sure you place them equally spaced. Place a piece of 1/2″ plywood so you crate even gaps between the slats. Use 1 1/2″ brad nails to secure the slats into place tightly.
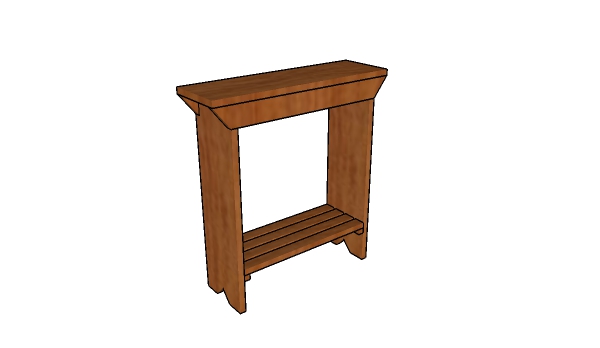
The last step of the project is to take care of the finishing touches. Fill the holes with wood putty and smooth the surface with 120-220 grit sandpaper. Apply a few coats of exterior paint over the components to enhance the look of the project and protect the wood against the elements.
How to build a simple plant stand
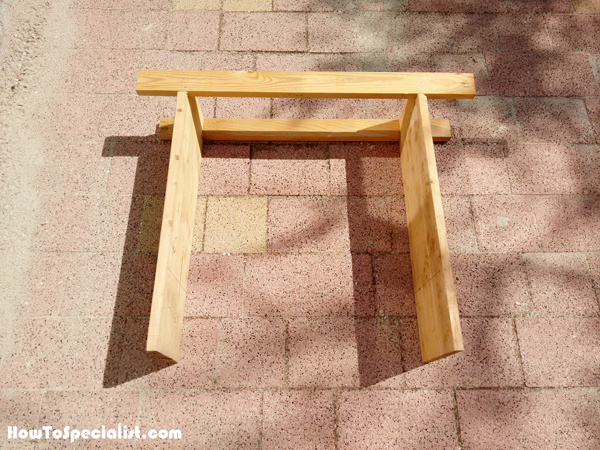
As you can easily see in the images, I used recycled lumber for this project. This is one of the reasons I actually built this plant stand, as it was the right choice for the materials I already had. I started the project by assembling the frame of the stand. I used just hand tools for this project, so some joints might look imperfect.
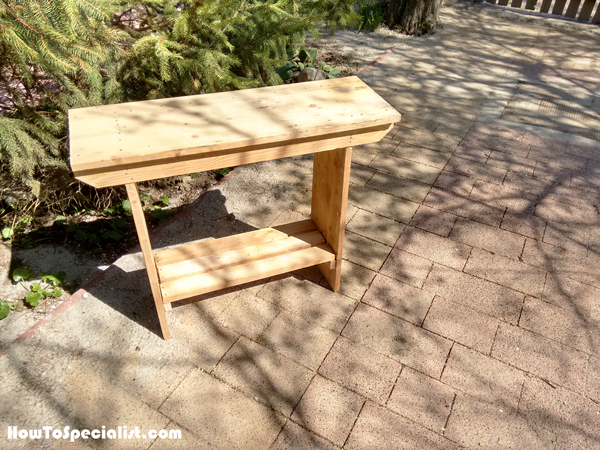
Afterwards, I attached the top and the lower shelf to the frame of the plants stand. It was a straight forward project so there aren’t too many things to be told about the building process. I added waterproof glue to the joints and then smoothed the surface with 120-220 grit sandpaper. Extremely easy project that can be used as a plant stand or as a small side table.
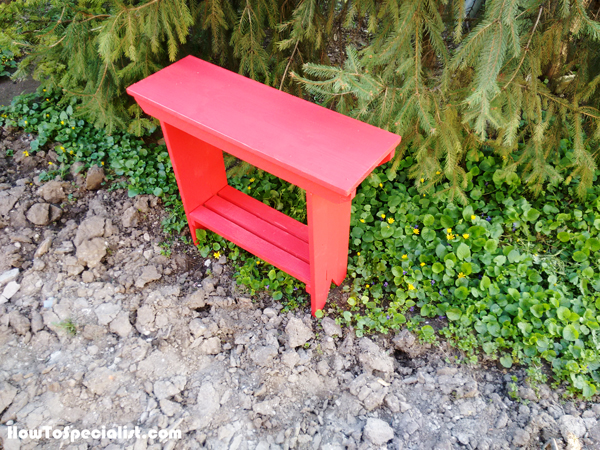
This was an unplanned project so I hadn’t spend a lot of time designing the plant stand. You might see this project as a basic one and I am here to say this is what it was supposed to be from the very beginning. I am pleased with the end result and after using it for a few months I can testify it is sturdy and super useful. If you like my project, don’t forget to SHARE it on Facebook and Pinterest.
Thank you for reading our project about how to build a simple plant stand and I recommend you to check out the rest of the projects. Don’t forget to LIKE and SHARE our projects with your friends, by using the social media widgets. SUBSCRIBE to be the first that gets our latest projects.
