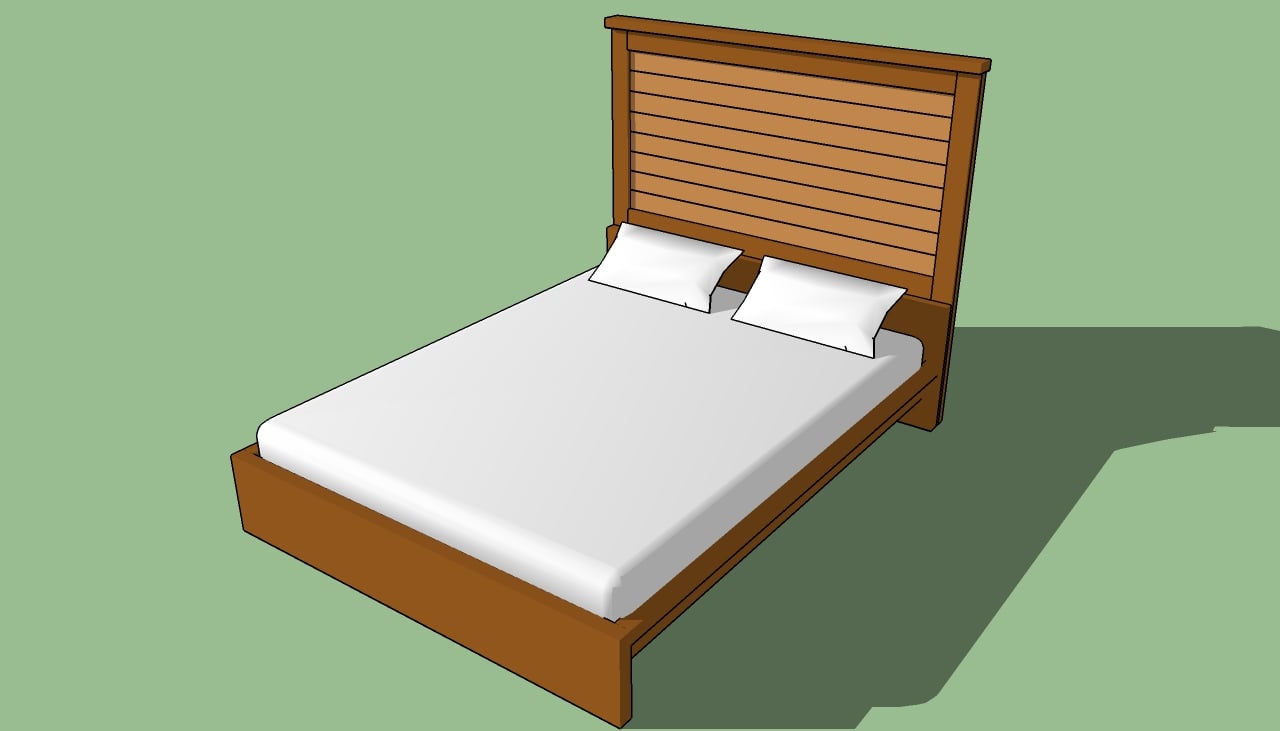
This step by step diy article is about how to build a headboard for a bed. If you look for a simple way to freshen-up the look of your bedroom, building a wooden bed headboard is a perfect weekend project. There are many designs and plans you could choose from, so you should assess your needs and tastes from the very beginning. This woodworking project can be done in just a day, as any person with basic skills could build the components and assemble them together.
Adjust the plans and the size of the headboard to your needs, otherwise it might not match the dimensions of your bed. These plans are designed for a regular queen bed frame, but the woodworking techniques are the same, irrespective of its size. Measure the components several times before making the cuts, to make sure they are accurate. Work with good judgement and great care, if you want to build your own headboard.
Pre-drill holes in the wooden components, to prevent the wood from splitting. Add a good wood glue to the edges of the components, to enhance the bond of the joints. Use a spirit level to make sure the headboard is plumb. In addition, check the corners for squareness, using a carpentry square. Smooth the cut edges and the wooden surface with a sand-block and medium-grit sandpaper. See all my Premium Plans in the Shop.
Made from this plan
In order to make a headboard for a bed, you need the following:
Materials
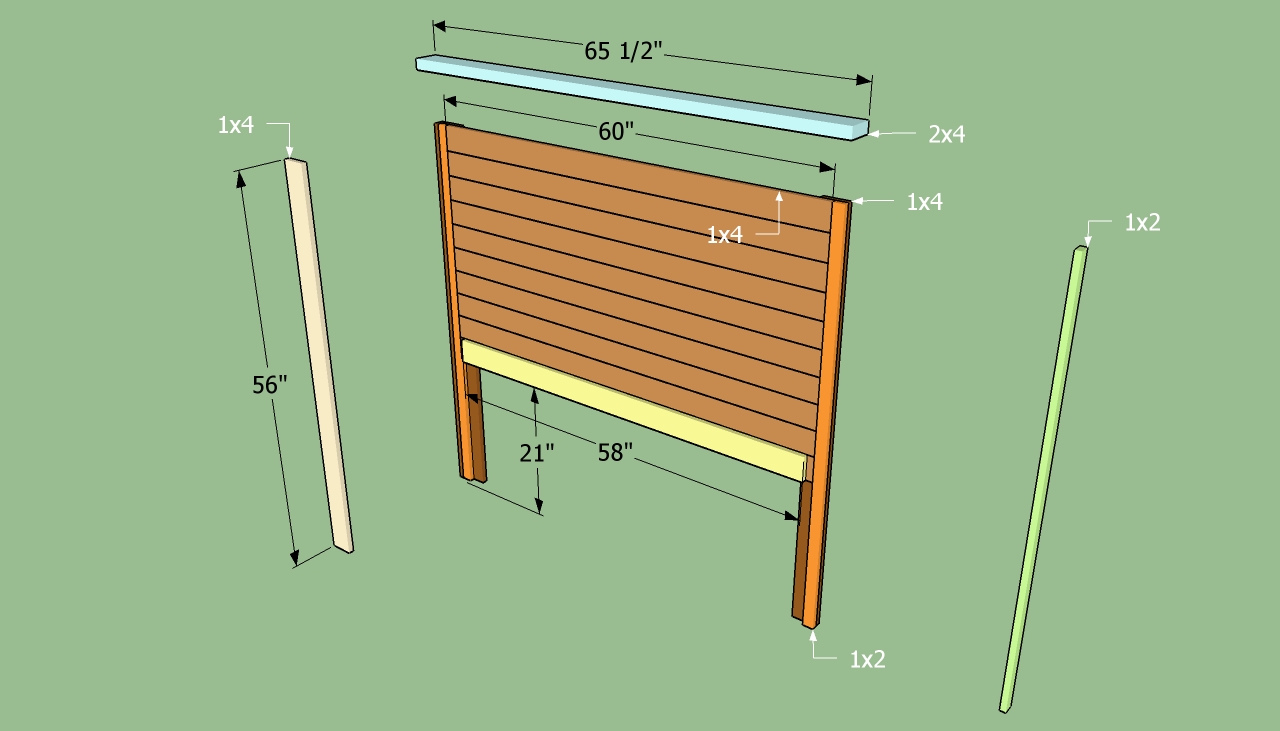
- 2 pieces of 1×4 lumber – 56″, 2 pieces – 58″ LEGS
- 2 pieces of 1×2 lumber – 56″ RAILS
- 9 pieces of 1×4 lumber – 60″ PANEL
- 2 pieces of 1×4 lumber – 58″, 2 pieces of 1×3 lumber – 56″ TRIM
- 1 piece of 2×4 lumber – 65 1/2″, 2 pieces of 1×2 lumber – 56″ TOP TRIM
- 1 1/4” wood screws – SCREWS
- Wood glue
- 8 pieces of 1×4 lumber – 10 ft
- 1 piece of 1×3 lumber – 10 ft
- 2 pieces of 1×2 lumber – 10 ft
- 1 piece of 2×4 lumber – 6 ft
- 2 1/2″ screws
- 1 1/4″ screws
- glue, stain
- wood filler
Tools
- Safety gloves, glasses, Miter saw saw, jigsaw
- Chalk line, tape measure, spirit level, carpentry pencil
- Drill machinery and drill bits, Pocket hole jig
Tips
- Pre-drill holes in the wooden components, before driving in the screws
- Smooth the exterior edges of the components, by using a router with a 1/4” bit
Time
- One weekend
Related
Building a bed headboard
Building a rustic headboard is a nice project, as you have the opportunity to change the look of your bedroom dramatically. Use 1×4 slats, wood nails and glue to make a traditional bed headboard, in just an weekend.
How to make a headboard for a bed
The first step of the project is to build the legs of the headboard. Therefore, secure 1×2 slats to 1×4 lumber, making sure you leave about 3/4” from the edges. In order to obtain a nice appearance, you should insert 1 1/4” nails trough the 1/2s into the legs. Add glue to the edges of the components, as to enhance the bond of the joints.
Continue the project by installing the panel, as in the plans. You could use 1×4 or 1×6 lumber, or you could use both of them alternatively, in order to obtain a random pattern. Don’t leave gaps between the slats and drive in the 1 1/4” nails trough the panel in the legs.
Next, you have to attach the back of the bed headboard. Therefore, cut the 1×4 slats at the right size and secure them into place with 2” finish nails. In addition, add glue to the edges of the components, to make the joints rigid. Make sure the outside edges are flush with the previous layer.
After making the main part of the headboard, you should install the side trims to the frame. Fit the 1×2 trims into place, making sure they are aligned properly and perfectly plumb. Add wood glue to the inner edges of the trims and lock them into place with 1 1/4” screws.
Last but not least, you should take care of the finishing touches. Fill the holes with wood putty and let it dry out for several hours. Afterwards, sand the surface with 120 grit sandpaper, along the wood grain.
Thank you for reading your article about how to build a headboard for a bed and we recommend you to check out the rest of our projects. Don’t forget to share our articles with your friends, by using the social media widgets.


2 comments
Excelente información, gracias por compartirla. BENDICIONES A TODOS.
You’re welcome. Looking forward to seeing your projects.