This step by step woodworking project is about how to build a garden bench with cushions. The idea behind this project was to use materials I already had in the garage. Even the cushions were bought several years ago and this summer I finally had the time and motivation to put them to good use. I improvised with the design, but I put the focus on comfort and built the bench around the cushion dimensions.
I recommend you to invest in the best materials you could afford. Therefore, you should buy weather-resistant lumber, such as pine or cedar. Always take accurate measurements before adjusting the size of the components at the proper size. Drill pilot holes trough the components before inserting the wood screws, to prevent the wood from splitting. See all my Premium Plans in the Shop.
Made from this plan
How to Build a Garden Bench with Cushions
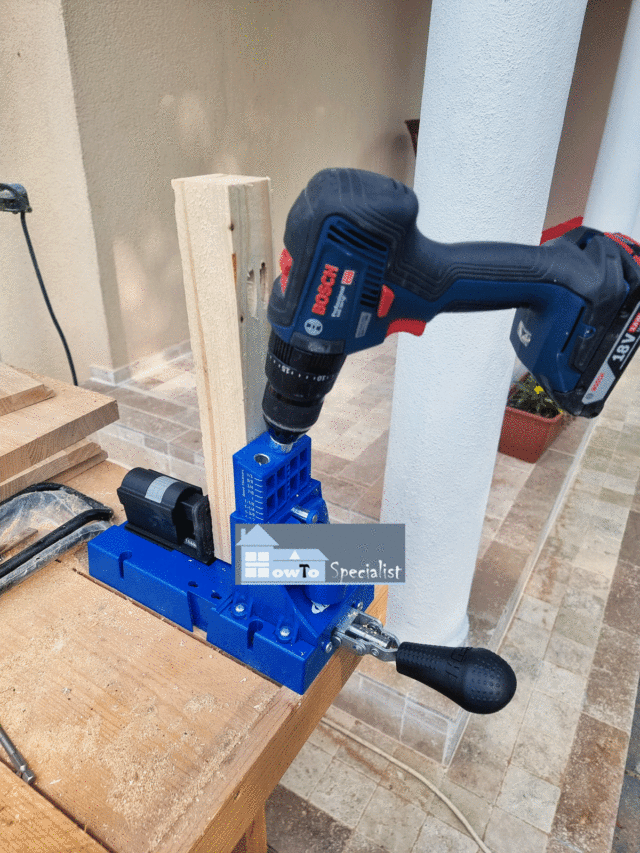
Drilling-pocket-holes
The first step of the project is to cut all components for the seat frame. Drill pocket holes at both ends of the short components. I used a pocket hole jig and a drill to speed up the job. You can use butt joint as well, but I prefer this method because it makes the screw heads invisible to the eye.
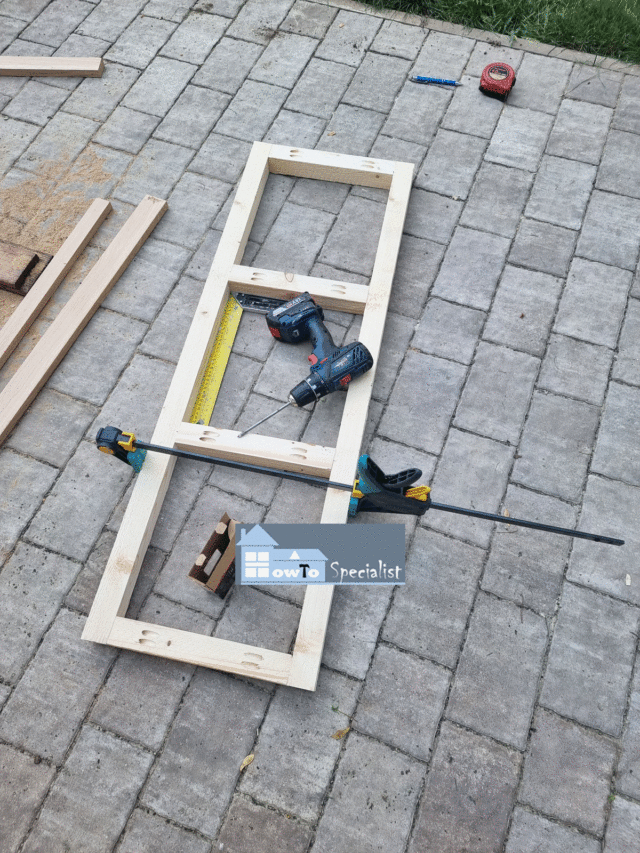
Assembling-the-seat-frame
Next, lay the components on a level surface and align everything with attention. Leave no gaps between the components and make sure the corners are square. Place the short components equally spaced and insert 2 1/2″ screws to lock them together tightly.
Notice the quick clamp used to hold the frame together while inserting the screws.
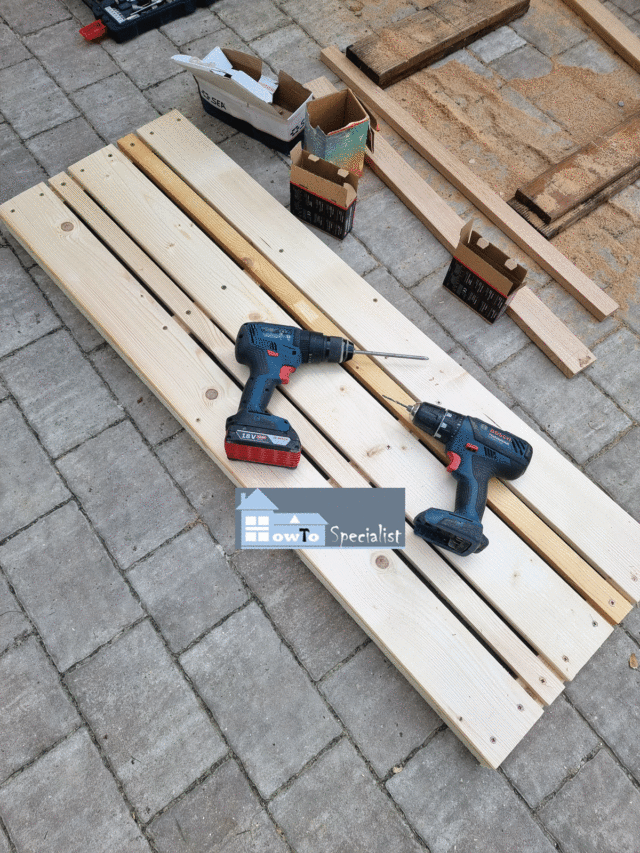
Fitting-the-seat-slats
Continue the project by fitting the boards to the seat frame. I used lumber that I had in the garage, therefore I had to adapt to what I had. I used a spacer to make sure the gaps are even. Drill pilot holes and insert screws to lock them to the frame.
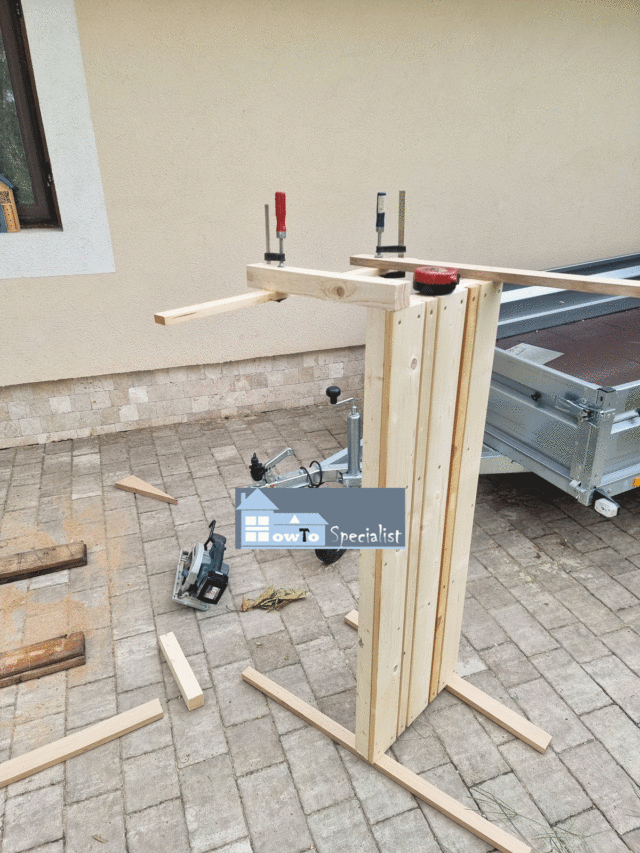
Attaching-the-legs-to-the-garden-bench
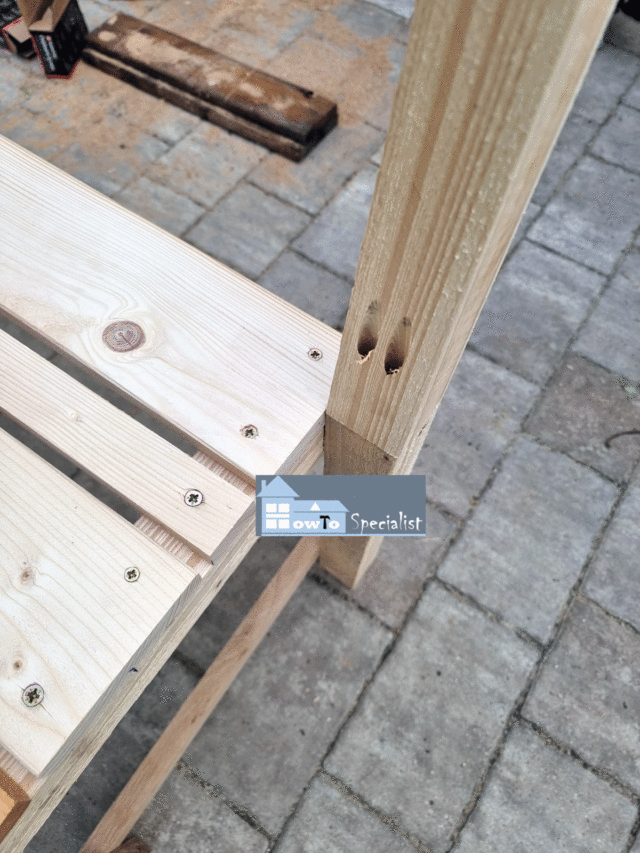
The next step of the project is to attach the legs to the sides of the seat frame. Use a carpentry square to make sure the legs are plumb. In addition, you need to check the bottom of the legs are aligned one to another. Drill pilot holes through the seat frame and insert 2 1/2″ screws into the legs.
Backrest-legs
I used 2×2 lumber for the backrest supports. I made a 10 degree cut to the base of the supports and then drilled pocket holes. I aligned everything with attention and insert 2 1/2″ screws to lock them together tightly.
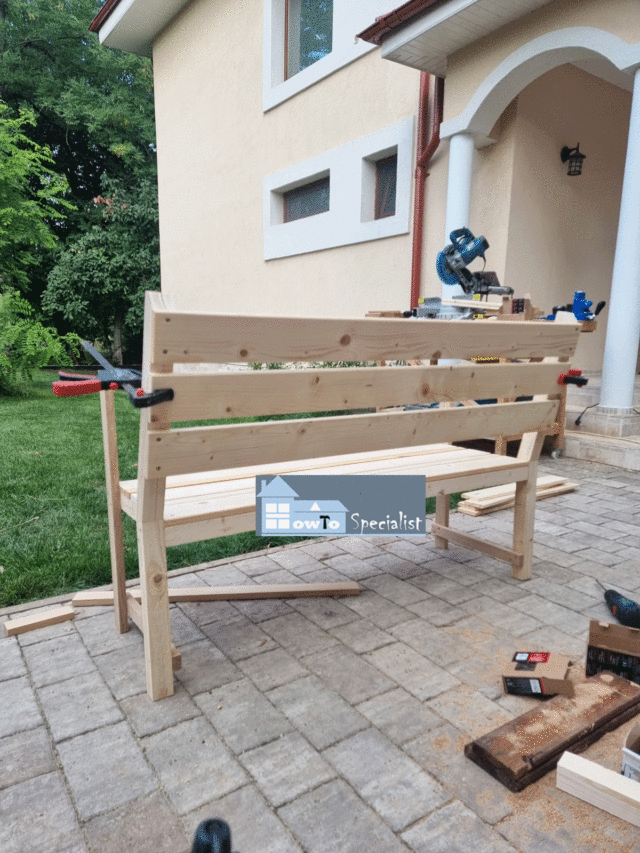
Notice the bottom braces to the side legs of the bench. These will lock the logs together and add strength to the bench frame.
Fitting-the-backrest-boards
I attached the backrest boards to the back of the supports, to make enough room for the cushions. I used a quick clamp and lock the boards to the supports. Drill pilot holes and insert 1 5/8″ screws to lock them to the supports.
Fitting-the-bench-cushions
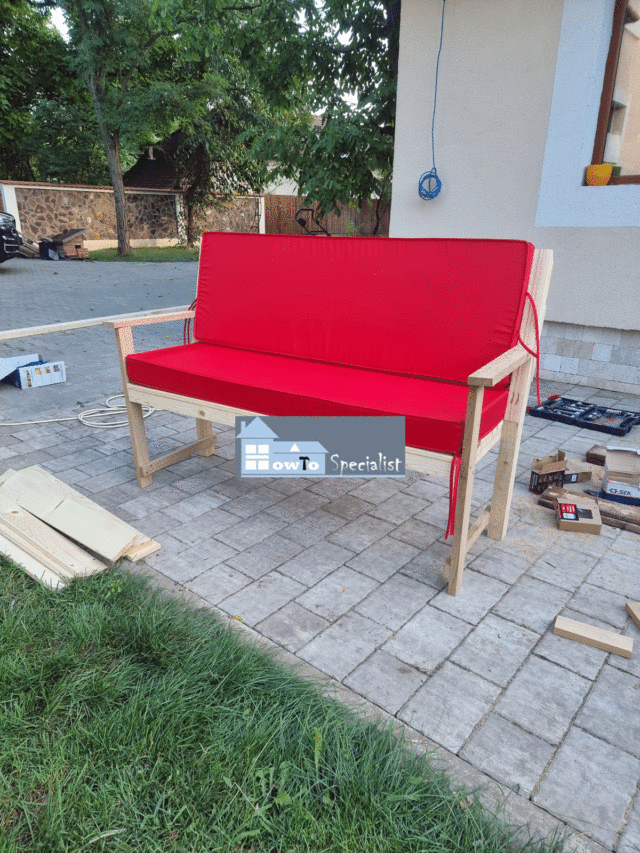
I attached the armrests to the garden bench and then fitted the cushions. Everything was perfect. At this point, you can fill the pocket holes with plugs and wood putty. Smooth the surface with sandpaper and then apply a few coats of paint / stain. See another bench project I built for my garden HERE.
How-to-build-a-garden-bench-with-cushions
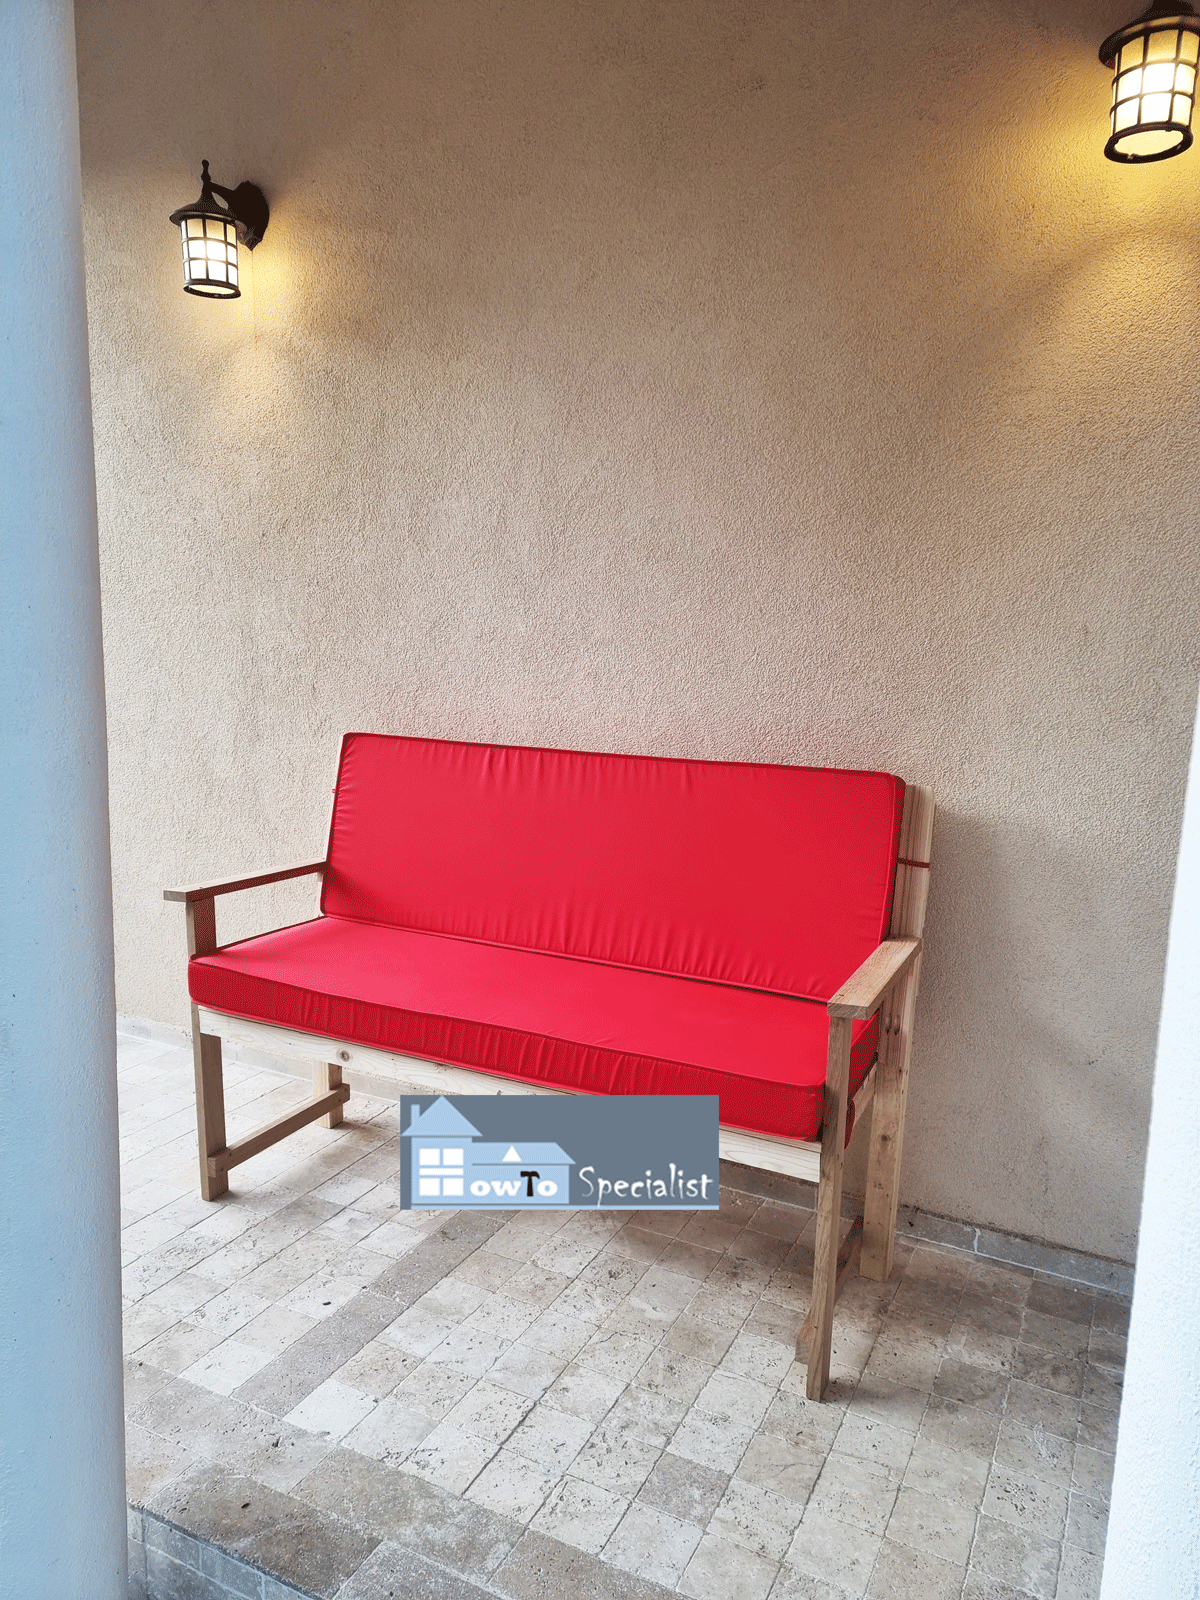
This garden bench with cushions was a success and a quick one afternoon project. I really improvised a lot because I used just materials I had left from previous projects. Therefore, it might not be ideal project in terms of design, but it is comfy and sturdy. If you like my project, don’t forget to SHARE it on Facebook and Pinterest.
Thank you for reading our project about how to build a garden bench with backrest and I recommend you to check out the rest of the projects. Don’t forget to LIKE and SHARE our projects with your friends, by using the social media widgets. SUBSCRIBE to be the first that gets our latest projects.
